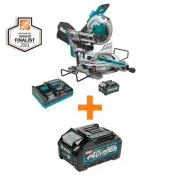
Page 2 - SPECIFICATIONS; Applicable battery cartridge and charger
2 ENGLISH ENGLISH (Original instructions) SPECIFICATIONS Model: GSL03 Blade diameter 255 mm (10″) Hole diameter 15.88 mm (5/8″) Max. kerf thickness of the saw blade 3.2 mm (1/8″) Max. miter angle Right 60°, Left 60° Max. bevel angle Right 48°, Left 48° No load speed (RPM) 3,600 /min Dimensions (L x ...
Page 3 - SAFETY WARNINGS; For your own safety, read; General power tool safety warnings; Save all warnings and instruc-
3 ENGLISH SAFETY WARNINGS For your own safety, read instruction manual before oper- ating tool. Save it for future reference. General power tool safety warnings WARNING: Read all safety warnings, instruc- tions, illustrations and specifications provided with this power tool. Failure to follow all in...
Page 4 - Safety instructions for mitre saws
4 ENGLISH 5. Maintain power tools and accessories. Check for misalignment or binding of moving parts, breakage of parts and any other condition that may affect the power tool’s operation. If dam - aged, have the power tool repaired before use. Many accidents are caused by poorly maintained power too...
Page 6 - SAVE THESE INSTRUCTIONS.; Symbols; Important safety instructions for
6 ENGLISH 10. Check the blade carefully for cracks or dam- age before operation. Replace cracked or dam- aged blade immediately. Gum and wood pitch hardened on blades slows saw and increases potential for kickback. Keep blade clean by first removing it from tool, then cleaning it with gum and pitch ...
Page 7 - Tips for maintaining maximum
7 ENGLISH 10. The contained lithium-ion batteries are subject to the Dangerous Goods Legislation require- ments. For commercial transports e.g. by third parties, forwarding agents, special requirement on pack- aging and labeling must be observed. For preparation of the item being shipped, consult- i...
Page 8 - PARTS DESCRIPTION
8 ENGLISH 24. When cleaning the wireless unit, gently wipe with a dry soft cloth. Do not use benzine, thin- ner, conductive grease or the like. 25. When storing the wireless unit, keep it in the supplied case or a static-free container. 26. Do not insert any devices other than Makita wireless unit i...
Page 9 - INSTALLATION; Installing the grip
9 ENGLISH 1 2 3 4 5 67 8 9 10 12 11 13 14 1 Handle 2 Battery cartridge 3 Dust bag (when replaced with dust extraction hose) 4 Hose (for dust extraction) 5 0° adjusting bolt (for bevel angle) 6 Bevel angle scale 7 Pointer (for bevel angle) 8 45° adjusting bolt (for bevel angle) 9 Latch lever (for bev...
Page 10 - Bench mounting
10 ENGLISH Installing and removing dust extraction hose Attach the hose elbow to the upper port with the lock button facing upwards. Insert the sleeve of the hose into the lower port, pressing and aligning the stopper but- tons on the sleeve with the guide notches on the port. Make sure that the elb...
Page 11 - Installing or removing battery; Tool / battery protection system
11 ENGLISH This tool should be bolted with four bolts to a level and stable surface using the bolt holes provided in the tool's base. This will help prevent tipping and possible injury. 1 ► 1. Bolts WARNING: Ensure that the tool will not move on the supporting surface. Movement of the miter saw on t...
Page 12 - Handle lock; Slide lock
12 ENGLISH Indicating the remaining battery capacity Press the check button on the battery cartridge to indi- cate the remaining battery capacity. The indicator lamps light up for a few seconds. 1 2 ► 1. Indicator lamps 2. Check button Indicator lamps Remaining capacity Lighted Off Blinking 75% to 1...
Page 14 - Maintaining maximum cutting
14 ENGLISH NOTE: The rear screws can easily be loosened and tightened by turning the turn base at an angle. Make sure to raise the handle fully when turning the turn base. 2. Re-tighten them only to the extent that the kerf boards can still be easily moved by hand. 3. Lower the handle fully, then pu...
Page 15 - Stopper arm
15 ENGLISH 2. Push the carriage toward the guide fences fully and lower the handle completely. 1 2 ► 1. Guide fence 2. Adjusting bolt 3. Use the hex wrench to turn the adjusting bolt until the circular saw blade comes slightly below the cross section of the guide fences and the top surface of the tu...
Page 16 - Adjusting the miter angle; Positive stop function
16 ENGLISH CAUTION: Always hold the handle firmly when adjusting. Failure to do so may cause the carriage to jump up and result in injury. Adjusting the miter angle CAUTION: After changing the miter angle, always secure the turn base by returning the lock/ releasing lever to a locked position and ti...
Page 20 - ASSEMBLY; Hex wrench storage
20 ENGLISH Casting a cutting line CAUTION: The lamp is not a rainproof. Do not wash the lamp in water or use it in a rain or a wet area. Such a conduct can cause an electric shock and fume. CAUTION: Do not touch the lens of the lamp as it is very hot while it is lighted or shortly after it is turned...
Page 21 - Removing and installing saw blade; Removing the blade
21 ENGLISH Removing and installing saw blade WARNING: Always be sure that the tool is switched off and the battery cartridge is removed before removing and installing the circular saw blade. Accidental start up of the tool may result in serious personal injury. WARNING: Use only the Makita wrench pr...
Page 22 - Installing the blade; Connecting a vacuum cleaner
22 ENGLISH 4. If the inner flange is removed, install it on the spindle with its recessed side facing the circular saw blade. If the flange is installed incorrectly the flange will rub against the machine. 1 2 3 4 5 6 ► 1. Hex socket bolt (left-handed) 2. Outer flange 3. Circular saw blade 4. Inner ...
Page 23 - Guide fences
23 ENGLISH Dust bag CAUTION: When performing a cutting, always attach the dust bag or connect a vacuum cleaner to prevent dust-related hazards. The use of the dust bag makes cutting operations clean and dust collection easy. To attach the dust bag, remove the dust extraction hose from the tool and c...
Page 24 - Vertical vise
24 ENGLISH Use upper fences to support the material higher than the lower fences. Insert the upper fence into the hole on the lower fence and tighten the clamping screw. 2 1 3 4 2 1 3 4 ► 1. Upper fence 2. Lower fence 3. Clamping screw 4. Adjusting screw NOTICE: The lower fences are fixed to the bas...
Page 25 - Horizontal vise; Holders
25 ENGLISH NOTE: For a quick setting of workpiece, turning the vise knob to 90° counterclockwise allows the vise knob to be moved up and down. To secure the work- piece after setting, turn the vise knob clockwise. Horizontal vise Optional accessory WARNING: Always rotate the vise nut clock- wise unt...
Page 26 - Sub base; Adjusting sub fence; OPERATION
26 ENGLISH Sub base Optional accessory WARNING: Always support a long workpiece so it is level with the top surface of the turn base for an accurate cut and to prevent dangerous loss of tool control. Proper workpiece support will help avoid blade pinch and possible kickback which may result in serio...
Page 27 - Press cutting
27 ENGLISH NOTICE: Before use, be sure to unlock the stopper pin and release the handle from the lowered position. NOTICE: Do not apply excessive pressure on the han- dle when cutting. Too much force may result in overload of the motor and/or decreased cutting efficiency. Press down handle with only...
Page 28 - Cutting crown and cove moldings
28 ENGLISH Miter cutting Refer to the section for adjusting the miter angle. Bevel cutting WARNING: After setting the blade for a bevel cut, ensure that the carriage and saw blade will have free travel throughout the entire range of the intended cut before operating the tool. Interruption of the car...
Page 29 - Measuring; In the case of left bevel cut
29 ENGLISH 2 (a) (b) (a) (b) (b) (a) (b) (a) (a) (b) (c) (d) 1 1. Inside corner 2. Outside corner Measuring Measure the wall width, and adjust the width of the workpiece according to it. Always make sure that width of the workpiece's wall contact edge is the same as wall length. 2 3 1 4 ► 1. Workpie...
Page 30 - In the case of right bevel cut
30 ENGLISH In the case of right bevel cut (a) (b) (c) (d) 1 2 1. Inside corner 2. Outside corner Table (A) – Molding position in the figure Bevel angle Miter angle 52/38° type 45° type 52/38° type 45° type For inside corner (a) Right 33.9° Right 30° Right 31.6° Right 35.3° (b) Left 31.6° Left 35.3° ...
Page 31 - Miter and Bevel Angle Settings
31 ENGLISH Miter and Bevel Angle Settings Wall to Crown Molding Angle: 52°/38° 30.1 29.7 29.4 29.0 28.7 28.3 28.0 27.6 27.2 26.9 26.5 26.1 25.8 25.4 25.0 24.7 24.3 23.9 23.6 23.2 22.8 22.5 22.1 21.7 21.3 21.0 20.6 20.2 19.8 19.5 19.1 18.7 18.3 17.9 17.6 17.2 16.8 16.4 16.0 15.6 26.9 26.5 26.1 25.7 2...
Page 33 - Crown molding stopper
33 ENGLISH Crown molding stopper Optional accessory Crown molding stoppers allow easier cuts of crown molding without tilting the saw blade. Install them on the turn base as shown in the figures. At right 45° miter angle 1 2 3 4 ► 1. Crown molding stopper L 2. Crown molding stop- per R 3. Turn base ...
Page 35 - WIRELESS ACTIVATION; What you can do with the wireless
35 ENGLISH CAUTION: Always secure all moving portions before carrying the tool. If portions of the tool move or slide while being carried, loss of control or balance may occur and result in personal injury. CAUTION: Be sure that the carriage elevation is properly locked at its bottom by the stopper ...
Page 36 - Tool registration for the vacuum
36 ENGLISH When removing the wireless unit, open the lid slowly. The hooks on the back of the lid will lift the wireless unit as you pull up the lid. 1 2 3 ► 1. Wireless unit 2. Hook 3. Lid After removing the wireless unit, keep it in the supplied case or a static-free container. NOTICE: Always use ...
Page 37 - Starting the wireless activation function
37 ENGLISH NOTE: The wireless activation lamps finish blinking in green after 20 seconds elapsed. Press the wireless activation button on the tool while the wireless acti- vation lamp on the cleaner is blinking. If the wireless activation lamp does not blink in green, push the wire- less activation ...
Page 38 - Description of the wireless activation lamp status
38 ENGLISH NOTE: The wireless activation lamp on the tool will stop blinking in blue when there is no operation for 2 hours. In this case, set the stand-by switch on the vacuum cleaner to "AUTO" and push the wireless activation button on the tool again. NOTE: The vacuum cleaner starts/stops ...
Page 40 - Troubleshooting for wireless activation function
40 ENGLISH Troubleshooting for wireless activation function Before asking for repairs, conduct your own inspection first. If you find a problem that is not explained in the manual, do not attempt to dismantle the tool. Instead, ask Makita Authorized Service Centers, always using Makita replace- ment...
Page 41 - MAINTENANCE; Adjusting the cutting angle; ° bevel angle
41 ENGLISH MAINTENANCE WARNING: Always be sure that the tool is switched off and the battery cartridge is removed before attempting to perform inspection or main- tenance. Failure to removing the battery cartridge and switch off the tool may result in accidental start up of the tool which may result...
Page 42 - 5° bevel angle; Cleaning lamp lens
42 ENGLISH Carefully square the side of the circular saw blade with the top surface of the turn base using the triangular rule, try-square, etc. by turning the 0° adjusting bolt clockwise. Then tighten the knob firmly to secure the 0° angle you have set. 1 2 3 ► 1. Triangular rule 2. Saw blade 3. To...
Page 43 - After use; OPTIONAL ACCESSORIES; MAKITA LIMITED WARRANTY
43 ENGLISH The LED light becomes hard to see as the lens for the light gets dirty. Clean the lens at regular intervals. Remove the battery cartridge. Loosen the screw and pull out the lens. Clean the lens gently with a damp soft cloth. 1 2 ► 1. Screw 2. Lens After use After use, wipe off chips and d...
Page 44 - ESPECIFICACIONES; Cartucho de batería y cargador aplicables
44 ESPAÑOL ESPAÑOL (Instrucciones originales) ESPECIFICACIONES Modelo: GSL03 Diámetro del disco 255 mm (10″) Diámetro del orificio 15,88 mm (5/8″) Ancho de corte máx. del disco de la sierra 3,2 mm (1/8″) Ángulo de inglete máximo Derecho 60°, izquierdo 60° Ángulo de bisel máximo Derecho 48°, izquierd...
Page 45 - Advertencias generales de seguridad
45 ESPAÑOL ADVERTENCIAS DE SEGURIDAD Por su propia seguridad lea el manual de instrucciones Antes de utilizar la herramienta. Conserve las instrucciones para referencia en el futuro. Advertencias generales de seguridad para herramientas eléctricas ADVERTENCIA: Lea todas las advertencias de seguridad...
Page 49 - GUARDE ESTAS; Símbolos; Instrucciones importantes de
49 ESPAÑOL 18. Asegúrese de que el disco no esté haciendo contacto con la pieza de trabajo antes de acti- var el interruptor. 19. Antes de utilizar la herramienta en una pieza de trabajo definitiva, déjela funcionar durante un rato. Observe si hay vibración o bamboleo que pueda indicar una instalaci...
Page 50 - Instrucciones importantes
50 ESPAÑOL 12. Utilice las baterías únicamente con los pro- ductos especificados por Makita. Instalar las baterías en productos que no cumplan con los requisitos podría ocasionar un incendio, un calen - tamiento excesivo, una explosión o una fuga de electrolito. 13. Si no se utiliza la herramienta p...
Page 51 - DESCRIPCIÓN DE LAS PIEZAS
51 ESPAÑOL 22. No deje la unidad inalámbrica en un lugar donde haya polvo o suciedad ni en un lugar donde pueda generarse gas corrosivo. 23. Los cambios repentinos de temperatura podrían humedecer la unidad inalámbrica. No utilice la unidad inalámbrica hasta que la con- densación se haya secado por ...
Page 52 - INSTALACIÓN; Instalación de la perilla
52 ESPAÑOL 1 2 3 4 5 67 8 9 10 12 11 13 14 1 Empuñadura 2 Cartucho de batería 3 Bolsa recolectora de polvo (cuando se reem- plaza con la manguera de extracción de polvo) 4 Manguera (para la extracción de polvo) 5 Perno de ajuste de 0° (para el ángulo de bisel) 6 Escala del ángulo de bisel 7 Marcador...
Page 54 - DESCRIPCIÓN DEL; Instalación o extracción del; Sistema de protección para la
54 ESPAÑOL Esta herramienta debe fijarse con cuatro pernos a una superficie nivelada y estable usando los orificios para pernos provistos en la base de la herramienta. Esto ayudará a evitar que la herramienta se vuelque y provo- que lesiones. 1 ► 1. Pernos ADVERTENCIA: Asegúrese de que la herra- mie...
Page 55 - Bloqueo de la empuñadura; Bloqueo de deslizamiento
55 ESPAÑOL Protección contra sobredescarga Cuando la capacidad de la batería se reduce, la herra - mienta se detiene automáticamente. Si la herramienta no funciona con la operación del interruptor, extraiga la batería de la herramienta y cárguela. Indicación de la capacidad restante de la batería Op...
Page 56 - Protector del disco; Limpieza
56 ESPAÑOL Protector del disco ADVERTENCIA: Nunca inhabilite o quite el protector del disco, ni el resorte que lo fija. Un disco expuesto como resultado de inhabilitar el protector puede causar graves lesiones personales durante la operación. ADVERTENCIA: Nunca use la herramienta si el protector del...
Page 59 - Brazo de retención; Ajuste del ángulo de inglete
59 ESPAÑOL Brazo de retención La posición del límite inferior del disco de la sierra circular puede ser ajustada fácilmente con el brazo de retención. Para hacerlo, mueva el brazo de retención en dirección de la flecha, tal como se muestra en la figura. Gire el tornillo de ajuste de manera que el di...
Page 60 - Ajuste del ángulo de bisel
60 ESPAÑOL NOTA: Para liberar la base giratoria de la función de tope de seguridad, presione hacia abajo la palanca de liberación. La base giratoria se puede mover libremente sin mantener presionada la palanca de bloqueo. Gire la perilla para girar la base giratoria al ángulo deseado, y luego apriet...
Page 61 - Inclinación del disco de la sierra
61 ESPAÑOL Inclinación del disco de la sierra circular a la derecha 1. Rote el pomo del soporte de corredera en sentido inverso al de las manecillas del reloj. 2. Sostenga la empuñadura e incline el carro a la izquierda ligeramente. 3. Incline el carro a la derecha mientras oprime el botón de libera...
Page 63 - MONTAJE; Almacenamiento de la llave Allen
63 ESPAÑOL Proyección de una línea de corte PRECAUCIÓN: La lámpara no es a prueba de lluvia. No limpie la lámpara sumergiéndola en agua ni la use bajo la lluvia o en un área mojada. El hacerlo podría causar una descarga eléctrica y producir humo. PRECAUCIÓN: No toque el lente de la lám- para ya que ...
Page 64 - Extracción del disco
64 ESPAÑOL Extracción e instalación del disco de la sierra ADVERTENCIA: Siempre asegúrese de que la herramienta esté apagada y que el cartucho de batería haya sido extraído antes de desinstalar e instalar el disco de la sierra circular. El encendido accidental de la herramienta puede resultar en les...
Page 65 - Instalación del disco; Conexión de una aspiradora
65 ESPAÑOL 4. Si la brida interior es extraída, instálela en el eje con su lado hueco orientado hacia el disco de la sierra circular. Si la brida se coloca incorrectamente, ésta rozará contra la máquina. 1 2 3 4 5 6 ► 1. Perno de cabeza hexagonal (a mano izquierda) 2. Brida exterior 3. Disco de la s...
Page 67 - Prensa vertical
67 ESPAÑOL Utilice las guías superiores para apoyar el material más arriba de las guías inferiores. Inserte la guía superior en el orificio de la guía inferior y apriete el tornillo de fijación. 2 1 3 4 2 1 3 4 ► 1. Guía superior 2. Guía inferior 3. Tornillo de fija - ción 4. Tornillo de ajuste AVIS...
Page 68 - Prensa horizontal; Soportes
68 ESPAÑOL NOTA: Para un ajuste rápido de la pieza de trabajo, gire el seguro de la prensa 90° en sentido inverso al de las manecillas del reloj para poder moverlo hacia arriba y hacia abajo. Una vez ajustada la pieza de trabajo, gire el seguro de la prensa en el sentido de las manecillas del reloj ...
Page 69 - Base inferior; Ajuste de la guía auxiliar; OPERACIÓN
69 ESPAÑOL Base inferior Accesorio opcional ADVERTENCIA: Apoye siempre una pieza de trabajo de gran tamaño de tal forma que esté nive- lada con la superficie de la base giratoria para un corte preciso y para evitar una pérdida peligrosa del control de la herramienta. Un apoyo adecuado de la pieza de...
Page 70 - Corte con prensa
70 ESPAÑOL AVISO: Antes de usar la herramienta, asegúrese de desbloquear la clavija de retención y liberar la empuñadura de la posición hacia abajo. AVISO: No haga excesiva presión sobre la empu- ñadura mientras corta. Demasiada fuerza podría sobrecargar el motor y/o disminuir la eficacia del corte....
Page 71 - Corte de molduras corona y
71 ESPAÑOL 4. Encienda la herramienta sin que el disco de la sierra haga contacto alguno y espere hasta que ésta alcance la velocidad máxima. 5. Presione hacia abajo la empuñadura y empuje el carro hacia la guía lateral y a través de la pieza de trabajo.6. Una vez finalizado el corte, apague la herr...
Page 73 - En caso de un corte en bisel derecho
73 ESPAÑOL En caso de un corte en bisel derecho (a) (b) (c) (d) 1 2 1. Rincón interno 2. Rincón externo Tabla (A) – Posición de la moldura en la figura Ángulo de bisel Ángulo de inglete Tipo de 52/38° Tipo de 45° Tipo de 52/38° Tipo de 45° Para rincón interno (a) Derecha 33,9° Derecha 30° Derecha 31...
Page 74 - Ajustes del ángulo de inglete y de bisel
74 ESPAÑOL Ajustes del ángulo de inglete y de bisel De la pared al ángulo de la moldura corona: 52°/38° 30.1 29.7 29.4 29.0 28.7 28.3 28.0 27.6 27.2 26.9 26.5 26.1 25.8 25.4 25.0 24.7 24.3 23.9 23.6 23.2 22.8 22.5 22.1 21.7 21.3 21.0 20.6 20.2 19.8 19.5 19.1 18.7 18.3 17.9 17.6 17.2 16.8 16.4 16.0 1...
Page 76 - Tope para moldura de corona
76 ESPAÑOL Tope para moldura de corona Accesorio opcional Los topes para moldura de corona permiten cortar más fácilmente una moldura de corona sin tener que inclinar el disco de la sierra. Instálelos en la base giratoria tal como se muestra en las ilustraciones. A un ángulo de inglete de 45° derech...
Page 78 - FUNCIÓN DE ACTIVACIÓN; Lo que puede hacer con la función
78 ESPAÑOL ADVERTENCIA: La clavija de retención para la elevación del carro debe usarse únicamente para fines de transporte y almacenamiento y no para ninguna operación de corte. El uso de la clavija de retención para operaciones de corte puede causar un movimiento inesperado del disco de la sierra ...
Page 79 - Registro de la herramienta para la
79 ESPAÑOL Cuando extraiga la unidad inalámbrica, abra la tapa lenta- mente. Los ganchos en la parte posterior de la tapa levantarán la unidad inalámbrica mientras usted jala hacia arriba la tapa. 1 2 3 ► 1. Unidad inalámbrica 2. Gancho 3. Tapa Una vez extraída la unidad inalámbrica, guárdela en el ...
Page 84 - MANTENIMIENTO
84 ESPAÑOL Estado de la anomalía Causa probable (avería) Remedio La aspiradora no funciona junto con el interruptor de la herramienta. La unidad inalámbrica no está instalada en la herramienta. La unidad inalámbrica está instalada incorrectamente en la herramienta. Instale la unidad inalámbrica corr...
Page 85 - Ángulo de bisel de 0°
85 ESPAÑOL Ajuste del ángulo de corte Esta herramienta ya viene cuidadosamente ajustada y alineada de fábrica, pero una manipulación descuidada podría afectar la alineación. Si su herramienta no está adecuadamente alineada, haga lo siguiente: Ángulo de inglete Baje la empuñadura por completo y bloqu...
Page 86 - Ángulo de bisel de 45°; Limpieza del lente de la lámpara; Luego del uso
86 ESPAÑOL Ángulo de bisel de 45° AVISO: Antes de ajustar el ángulo de bisel de 45°, termine de ajustar el ángulo de bisel de 0°. Afloje el pomo e incline el carro completamente hacia el lado que desee verificar. Compruebe que el marcador indique la posición de 45° en la escala del ángulo de bisel. ...
Page 87 - GARANTÍA LIMITADA DE MAKITA; Ésta Garantía no aplica para México
87 ESPAÑOL ACCESORIOS OPCIONALES ADVERTENCIA: Estos accesorios o adi- tamentos Makita están recomendados para utilizarse con su herramienta Makita que se especifica en este manual. El uso de cualquier otro accesorio o aditamento puede ocasionar lesiones personales graves. ADVERTENCIA: Use los acceso...
Page 88 - Makita Corporation
Some dust created by power sanding, sawing, grinding, drilling, and other construction activities contains chemicals known to the State of California to cause cancer, birth defects or other reproductive harm. Some examples of these chemicals are: • lead from lead-based paints, • crystalline silica f...