Page 2 - SPECIFICATIONS; Applicable battery cartridge and charger; SAFETY WARNINGS; General power tool safety warnings; Save all warnings and instruc-
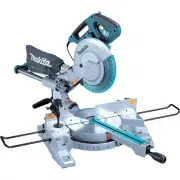
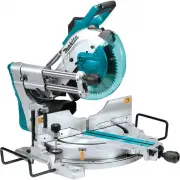
2 ENGLISH ENGLISH (Original instructions) SPECIFICATIONS Model: GSL02 Blade diameter 216 mm (8-1/2″) Hole (arbor) diameter (country specific) 15.88 mm (5/8″) Max. kerf thickness of the saw blade 2.4 mm (3/32″) Max. miter angle Left 60°, Right 60° Max. bevel angle Left 48°, Right 48° No load speed 4,...
Page 4 - Safety instructions for mitre saws
4 ENGLISH 4. Under abusive conditions, liquid may be ejected from the battery; avoid contact. If con- tact accidentally occurs, flush with water. If liquid contacts eyes, additionally seek medical help. Liquid ejected from the battery may cause irritation or burns. 5. Do not use a battery pack or to...
Page 6 - Symbols; Important safety instructions for; SAVE THESE INSTRUCTIONS.
6 ENGLISH 23. Some material contains chemicals which may be toxic. Take caution to prevent dust inhalation and skin contact. Follow material supplier safety data. 24. Do not use a corded power supply with this tool. Additional safety rules for operating lamp 1. Do not look in the light or see the so...
Page 7 - Tips for maintaining maximum
7 ENGLISH Tips for maintaining maximum battery life 1. Charge the battery cartridge before completely discharged. Always stop tool operation and charge the battery cartridge when you notice less tool power. 2. Never recharge a fully charged battery car- tridge. Overcharging shortens the battery serv...
Page 8 - PARTS DESCRIPTION
8 ENGLISH PARTS DESCRIPTION 1 2 3 4 5 6 7 8 9 10 12 11 13 14 15 16 17 18 19 20 21 22 23 24 25 26 27 28 29 1 Hex wrench 2 Adjusting bolt (for maxi - mum cutting capacity) 3 Adjusting screw (for lower limit position) 4 Stopper arm 5 Wireless activation button 6 Wireless activation lamp 7 Vacuum button...
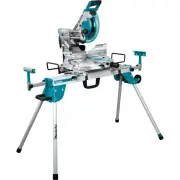
Page 9 - INSTALLATION; Bench mounting
9 ENGLISH 1 2 3 4 5 6 7 8 9 10 11 12 1 Hole for padlock 2 Switch trigger 3 Lock-off button 4 Carry handle 5 Battery cartridge 6 Dust extraction hose 7 Left bevel angle scale 8 Pointer (for left bevel angle) 9 Releasing lever (for 48° bevel angle) 10 45° adjusting bolt (for left bevel angle) 11 Shaft...
Page 10 - Installing the dust extraction hose; FUNCTIONAL; Installing or removing battery
10 ENGLISH 2. Turn the adjusting bolt clockwise or counterclock - wise so that it comes into a contact with the floor sur - face to keep the tool stable. 1 ► 1. Adjusting bolt Installing the dust extraction hose Connect the dust extraction hose to the tool as illustrated. Make sure that the elbow an...
Page 11 - Tool / battery protection system; Overheat protection; Overdischarge protection
11 ENGLISH 2 1 3 ► 1. Red indicator 2. Button 3. Battery cartridge To remove the battery cartridge, slide it from the tool while sliding the button on the front of the cartridge.To install the battery cartridge, align the tongue on the battery cartridge with the groove in the housing and slip it int...
Page 12 - Cleaning
12 ENGLISH Handle lock CAUTION: Always hold the handle when releasing the stopper pin. Otherwise the handle springs up and it may result in personal injury. When the tool is shipped, the handle is locked in the lowered position with the stopper pin. To unlock the handle, pull the stopper pin and rot...
Page 13 - Positioning kerf board
13 ENGLISH 5. Make sure to return the circular saw blade and center cover to their original positions and tighten the hex socket bolt. 1 3 2 4 ► 1. Hex wrench 2. Hex socket bolt 3. Center cover 4. Blade guard WARNING: Do not remove spring holding blade guard. If guard becomes damaged in course of ti...
Page 15 - Adjusting the miter angle; Positive stop function; Adjusting the bevel angle
15 ENGLISH Adjusting the miter angle CAUTION: After changing the miter angle, always secure the turn base by returning the releasing lever in a locked position and tightening the grip firmly. NOTICE: When turning the turn base, be sure to raise the handle fully. 1. Rotate the grip counterclockwise a...
Page 17 - Tilting the circular saw blade beyond; Switch action
17 ENGLISH Tilting the circular saw blade beyond the range 0° - 45° 1. Rotate the grip dial counterclockwise. 2. Hold the handle and tilt the carriage through 45° either to the left or right. 3. Pull the carriage back slightly and turn the releas - ing lever for 48° bevel angle in clockwise directio...
Page 18 - Casting a cutting line; Electronic function; ASSEMBLY; Hex wrench storage
18 ENGLISH Casting a cutting line CAUTION: The lamp is not a rainproof. Do not wash the lamp in water or use it in a rain or a wet area. Such a conduct can cause an electric shock and fume. CAUTION: Do not touch the lens of the lamp as it is very hot while it is lighted or shortly after it is turned...
Page 19 - Removing and installing saw blade; Removing the blade
19 ENGLISH Removing and installing saw blade WARNING: Always be sure that the tool is switched off and the battery cartridge is removed before removing and installing the circular saw blade. Accidental start up of the tool may result in serious personal injury. WARNING: Use only the Makita wrench pr...
Page 20 - Installing the blade; Connecting a vacuum cleaner
20 ENGLISH 4. If the inner flange is removed, install it on the spindle with its recessed side facing the circular saw blade. If the flange is installed incorrectly the flange will rub against the machine. 1 2 3 4 5 6 ► 1. Outer flange 2. Circular saw blade 3. Inner flange 4. Hex socket bolt (left-h...
Page 21 - Securing workpiece; Guide fences
21 ENGLISH Dust bag CAUTION: When performing a cutting, always attach the dust bag or connect a vacuum cleaner to prevent dust-related hazards. The use of the dust bag makes cutting operations clean and dust collection easy. To attach the dust bag, remove the dust extraction hose from the tool and c...
Page 22 - Vertical vise; Horizontal vise
22 ENGLISH Use upper fences to support the material higher than the lower fences. Loosen the clamping screw so that the upper fences slide in and out over the lower fences. Reposition the fences and then tighten the screw. 1 1 2 2 3 3 4 4 ► 1. Upper fence 2. Lower fence 3. Clamping screw 4. Adjustin...
Page 23 - OPERATION; Press cutting
23 ENGLISH NOTE: The maximum width of workpiece which can be secured by the horizontal vise is 68 mm (2-11/16″). Sub base WARNING: Always support a long workpiece so it is level with the top surface of the turn base for an accurate cut and to prevent dangerous loss of tool control. Proper workpiece ...
Page 24 - Miter cutting
24 ENGLISH 4. Gently lower the handle to the fully lowered posi - tion to cut the workpiece. 5. When the cut is completed, switch off the tool and wait until the circular saw blade has come to a com- plete stop before returning the circular saw blade to its fully elevated position. 1 ► 1. Stopper pi...
Page 25 - Compound cutting; Cutting crown and cove moldings
25 ENGLISH NOTICE: When pressing down the handle, apply pressure in parallel with the circular saw blade. If a force is applied perpendicularly to the turn base or if the pressure direction is changed during a cut, the precision of the cut will be impaired. 1. Remove the upper fence on the side that...
Page 26 - In the case of right bevel cut
26 ENGLISH Measuring Measure the wall width, and adjust the width of the workpiece according to it. Always make sure that width of the workpiece's wall contact edge is the same as wall length. 2 3 1 4 ► 1. Workpiece 2. Wall width 3. Width of the work - piece 4. Wall contact edge Always use several p...
Page 28 - Miter and Bevel Angle Settings
28 ENGLISH Miter and Bevel Angle Settings Wall to Crown Molding Angle: 52°/38° 30.1 29.7 29.4 29.0 28.7 28.3 28.0 27.6 27.2 26.9 26.5 26.1 25.8 25.4 25.0 24.7 24.3 23.9 23.6 23.2 22.8 22.5 22.1 21.7 21.3 21.0 20.6 20.2 19.8 19.5 19.1 18.7 18.3 17.9 17.6 17.2 16.8 16.4 16.0 15.6 26.9 26.5 26.1 25.7 2...
Page 30 - Cutting aluminum extrusion; Groove cutting
30 ENGLISH Cutting aluminum extrusion 12 3 4 5 ► 1. Vise 2. Spacer block 3. Guide fence 4. Aluminum extrusion 5. Spacer block When securing aluminum extrusions, use spacer blocks or pieces of scrap as shown in the figure to prevent deformation of the aluminum. Use a cutting lubricant when cutting th...
Page 31 - What you can do with the wireless
31 ENGLISH WARNING: Stopper pin for carriage elevation is for carrying and storage purposes only and not for any cutting operations. The use of the stopper pin for cutting operations may cause unexpected movement of the circular saw blade resulting in kick - back and serious personal injury. CAUTION...
Page 32 - Tool registration for the vacuum
32 ENGLISH When removing the wireless unit, open the lid slowly. The hooks on the back of the lid will lift the wireless unit as you pull up the lid. 1 2 3 ► 1. Wireless unit 2. Hook 3. Lid After removing the wireless unit, keep it in the supplied case or a static-free container. NOTICE: Always use ...
Page 33 - Starting the wireless activation function
33 ENGLISH NOTE: The wireless activation lamps finish blinking in green after 20 seconds elapsed. Press the wireless activation button on the tool while the wireless acti - vation lamp on the cleaner is blinking. If the wireless activation lamp does not blink in green, push the wire - less activatio...
Page 34 - Description of the wireless activation lamp status
34 ENGLISH NOTE: The wireless activation lamp on the tool will stop blinking in blue when there is no operation for 2 hours. In this case, set the stand-by switch on the vacuum cleaner to "AUTO" and push the wireless activation button on the tool again. NOTE: The vacuum cleaner starts/stops ...
Page 36 - Troubleshooting for wireless activation function
36 ENGLISH Troubleshooting for wireless activation function Before asking for repairs, conduct your own inspection first. If you find a problem that is not explained in the manual, do not attempt to dismantle the tool. Instead, ask Makita Authorized Service Centers, always using Makita replace - men...
Page 37 - MAINTENANCE; Adjusting the cutting angle; Bevel angle; ° bevel angle
37 ENGLISH MAINTENANCE WARNING: Always be sure that the tool is switched off and the battery cartridge is removed before attempting to perform inspection or main- tenance. Failure to removing the battery cartridge and switch off the tool may result in accidental start up of the tool which may result...
Page 38 - 5° bevel angle; Cleaning the lamp lens
38 ENGLISH Carefully square the side of the circular saw blade with the top surface of the turn base using the triangular rule, try-square, etc. by turning the 0° adjusting bolt clock - wise. Then tighten the grip dial firmly to secure the 0° angle you have set. 1 2 3 ► 1. Triangular rule 2. Saw bla...
Page 39 - After use; OPTIONAL; MAKITA LIMITED WARRANTY
39 ENGLISH The LED light becomes hard to see as the lens for the light gets dirty. Clean the lens at regular intervals. Remove the battery cartridge. Loosen the screw and pull out the lens. Clean the lens gently with a damp soft cloth. 1 2 ► 1. Screw 2. Lens After use After use, wipe off chips and d...
Page 40 - ESPECIFICACIONES; Cartucho de batería y cargador aplicables; ADVERTENCIAS DE; Advertencias generales de; Conserve todas las advertencias e ins-
40 ESPAÑOL ESPAÑOL (Instrucciones originales) ESPECIFICACIONES Modelo: GSL02 Diámetro del disco 216 mm (8-1/2″) Diámetro del orificio (eje) (específico del país) 15,88 mm (5/8″) Ancho de corte máx. del disco de la sierra 2,4 mm (3/32″) Ángulo de inglete máximo Izquierda 60°, Derecha 60° Ángulo de bi...
Page 42 - Instrucciones de seguridad para
42 ESPAÑOL 4. Guarde la herramienta eléctrica que no use fuera del alcance de los niños y no permita que las personas que no están familiarizadas con ella o con las instrucciones la operen. Las herramientas eléctricas son peligrosas en manos de personas que no saben operarlas. 5. Dé mantenimiento a ...
Page 44 - GUARDE ESTAS
44 ESPAÑOL 23. La sierra puede cortar madera, aluminio o materiales similares siempre que se utilice un disco de la sierra apropiado para el material. No utilice la sierra para cortar otros materiales incluido magnesio, acero y hierro. Instrucciones adicionales 1. Uso pretendido Esta herramienta est...
Page 45 - Símbolos; Instrucciones importantes de
45 ESPAÑOL Símbolos A continuación se muestran los símbolos utilizados para la herramienta. volts o voltios corriente directa o continua velocidad sin carga revoluciones o alternaciones por minuto, frecuencia de rotación diámetro No coloque la mano ni los dedos cerca del disco. No mire fijamente la ...
Page 46 - Instrucciones importantes
46 ESPAÑOL Consejos para alargar al máximo la vida útil de la batería 1. Cargue el cartucho de batería antes de que se descargue completamente. Pare siem- pre la operación y cargue el cartucho de batería cuando note menos potencia en la herramienta. 2. No cargue nunca un cartucho de batería que esté...
Page 47 - DESCRIPCIÓN DE LAS PIEZAS
47 ESPAÑOL DESCRIPCIÓN DE LAS PIEZAS 1 2 3 4 5 6 7 8 9 10 12 11 13 14 15 16 17 18 19 20 21 22 23 24 25 26 27 28 29 1 Llave hexagonal 2 Perno de ajuste (para la máxima capacidad de corte) 3 Tornillo de ajuste (para la posición del límite inferior) 4 Brazo de retención 5 Botón de activación inalámbric...
Page 48 - INSTALACIÓN; Montaje en un banco de trabajo
48 ESPAÑOL 1 2 3 4 5 6 7 8 9 10 11 12 1 Orificio para el candado 2 Gatillo interruptor 3 Botón de desbloqueo 4 Empuñadura portadora 5 Cartucho de batería 6 Manguera de extracción de polvo 7 Escala del ángulo de bisel del lado izquierdo 8 Marcador (para el ángulo de bisel del lado izquierdo) 9 Palanc...
Page 49 - DESCRIPCIÓN DEL; Instalación o extracción del
49 ESPAÑOL 2. Gire el perno de ajuste en el sentido de las mane - cillas del reloj o en sentido inverso de manera que haga contacto con la superficie del suelo y la herramienta se mantenga estable. 1 ► 1. Perno de ajuste Instalación de la manguera de extracción de polvo Conecte la manguera de extrac...
Page 50 - Sistema de protección para la
50 ESPAÑOL 2 1 3 ► 1. Indicador rojo 2. Botón 3. Cartucho de batería Para quitar el cartucho de batería, deslícelo de la herra - mienta mientras desliza el botón sobre la parte delan - tera del cartucho.Para colocar el cartucho de batería, alinee la lengüeta sobre el cartucho de batería con la ranur...
Page 51 - Limpieza
51 ESPAÑOL Bloqueo de la empuñadura PRECAUCIÓN: Siempre sostenga la empuñadura al liberar la clavija de retención. De lo contrario, la empu - ñadura se levanta de golpe y puede provocar una lesión. Cuando la herramienta sale de fábrica, la empuñadura es blo - queada en la posición hacia abajo con la...
Page 52 - Posicionamiento del panel de corte
52 ESPAÑOL 5. Asegúrese de regresar el disco de la sierra circu - lar y la cubierta central a sus posiciones originales, y apriete el perno de cabeza hexagonal. 1 3 2 4 ► 1. Llave hexagonal 2. Perno de cabeza hexagonal 3. Cubierta central 4. Protector del disco ADVERTENCIA: No quite el resorte que s...
Page 54 - Brazo de retención; Ajuste del ángulo de inglete
54 ESPAÑOL Brazo de retención La posición del límite inferior del disco de la sierra circular puede ser ajustada fácilmente con el brazo de retención. Para hacerlo, mueva el brazo de retención en dirección de la flecha, tal como se muestra en la figura. Gire el tornillo de ajuste de manera que el di...
Page 58 - MONTAJE; Almacenamiento de la llave Allen; Extracción del disco
58 ESPAÑOL Función eléctrica Freno eléctrico La herramienta está equipada con un freno eléctrico para el disco. Si de manera consistente la herramienta no cesa de funcionar rápidamente después de soltar el gatillo interruptor, lleve la herramienta a un centro de servicio Makita para que le den mante...
Page 59 - Instalación del disco
59 ESPAÑOL 2. Use la llave hexagonal para aflojar el perno de cabeza hexagonal que sostiene la cubierta central. Luego, levante el protector del disco y la cubierta central. 1 3 2 4 ► 1. Llave hexagonal 2. Perno de cabeza hexagonal 3. Cubierta central 4. Protector del disco 3. Presione el bloqueo de...
Page 61 - Guías laterales; Prensa vertical
61 ESPAÑOL Aseguramiento de la pieza de trabajo ADVERTENCIA: Es extremadamente impor- tante siempre asegurar correctamente la pieza de trabajo con el tipo apropiado de prensa. El no hacerlo podría ocasionar lesiones personales gra - ves y causar daños a la herramienta y/o la pieza de trabajo. ADVERT...
Page 62 - Prensa horizontal
62 ESPAÑOL 1 2 4 3 5 ► 1. Orificios 2. Varilla de la prensa 3. Brazo de la prensa 4. Tornillo de fijación 5. Seguro de la prensa Prensa horizontal Accesorio opcional ADVERTENCIA: Gire siempre el soporte de la tuerca en el sentido de las manecillas del reloj hasta que la pieza de trabajo quede firmem...
Page 63 - OPERACIÓN; Corte con prensa
63 ESPAÑOL Cuando corte, coloque la pieza de trabajo en forma horizontal contra las guías laterales. 1 2 ► 1. Guía lateral 2. Base inferior OPERACIÓN Esta herramienta está diseñada para cortar productos de madera. Con los discos de la sierra apropiados y originales de Makita también se pueden cortar...
Page 65 - Corte compuesto; Corte de molduras corona y; Medición
65 ESPAÑOL 8. Una vez finalizado el corte, apague la herramienta y espere hasta que el disco de la sierra circular se haya detenido por completo antes de regresar el disco de la sierra circular a su posición completamente elevada. Corte compuesto El corte compuesto es un proceso en el que el ángulo ...
Page 66 - En caso de corte en bisel izquierdo; En caso de un corte en bisel derecho
66 ESPAÑOL En caso de corte en bisel izquierdo (a) (b) (c) (d) 1 2 1. Rincón interno 2. Rincón externo Tabla (A) – Posición de la moldura en la figura Ángulo de bisel Ángulo de inglete Tipo de 52/38° Tipo de 45° Tipo de 52/38° Tipo de 45° Para rincón interno (a) Izquierda 33,9° Izquierda 30° Derecha...
Page 67 - Ajustes del ángulo de inglete y de bisel
67 ESPAÑOL Ajustes del ángulo de inglete y de bisel De la pared al ángulo de la moldura corona: 52°/38° 30.1 29.7 29.4 29.0 28.7 28.3 28.0 27.6 27.2 26.9 26.5 26.1 25.8 25.4 25.0 24.7 24.3 23.9 23.6 23.2 22.8 22.5 22.1 21.7 21.3 21.0 20.6 20.2 19.8 19.5 19.1 18.7 18.3 17.9 17.6 17.2 16.8 16.4 16.0 1...
Page 69 - Corte de extrusión de aluminio; Corte de ranuras; Transporte de la herramienta
69 ESPAÑOL Corte de extrusión de aluminio 12 3 4 5 ► 1. Prensa 2. Bloque espaciador 3. Guía lateral 4. Extrusión de aluminio 5. Bloque espaciador Cuando asegure extrusiones de aluminio, utilice blo - ques espaciadores o piezas de desecho tal como se muestra en la figura para evitar la deformación de...
Page 70 - FUNCIÓN DE ACTIVACIÓN; Lo que puede hacer con la función
70 ESPAÑOL ADVERTENCIA: La clavija de retención para la elevación del carro debe usarse únicamente para fines de transporte y almacenamiento y no para ninguna operación de corte. El uso de la clavija de retención para operaciones de corte puede causar un movimiento inesperado del disco de la sierra ...
Page 71 - Registro de la herramienta para la
71 ESPAÑOL 2. Inserte la unidad inalámbrica en la ranura y luego cierre la tapa.Cuando inserte la unidad inalámbrica, alinee las partes salientes con las partes cóncavas en la ranura. 1 2 3 4 ► 1. Unidad inalámbrica 2. Parte saliente 3. Tapa 4. Parte cóncava Cuando extraiga la unidad inalámbrica, ab...
Page 72 - Inicio de la función de activación
72 ESPAÑOL 3. Oprima el botón de activación inalámbrica en la aspiradora durante 3 segundos hasta que la luz indica - dora de activación inalámbrica parpadee en verde. Y luego oprima el botón de activación inalámbrica en la herramienta de la misma manera. 1 1 2 2 ► 1. Botón de activación inalámbrica...
Page 77 - MANTENIMIENTO; Ajuste del ángulo de corte
77 ESPAÑOL Estado de la anomalía Causa probable (avería) Remedio La aspiradora no funciona junto con el interruptor de la herramienta. La unidad inalámbrica no está instalada en la herramienta. La unidad inalámbrica está instalada incorrectamente en la herramienta. Instale la unidad inalámbrica corr...
Page 78 - Ángulo de bisel; Ángulo de bisel de 0°; Ángulo de bisel de 45°
78 ESPAÑOL Ajuste la base giratoria en la posición de 0° usando la función de tope de seguridad. Cuadre el lado del disco de la sierra circular con la cara de la guía lateral usando una regla triangular o escuadra. Mientras los mantiene cuadrados, apriete los tornillos en la escala del ángulo de ing...
Page 79 - Limpieza del lente de la lámpara; Luego del uso; ACCESORIOS
79 ESPAÑOL Si el marcador no indica la posición de 45°, alinéelo con la posición de 45° girando el perno de ajuste de 45°. 1 2 ► 1. Perno de ajuste a 45° a la derecha 2. Perno de ajuste a 45° a la izquierda Limpieza del lente de la lámpara AVISO: No retire el tornillo que fija el lente. Si el lente ...
Page 80 - GARANTÍA LIMITADA DE MAKITA; Ésta Garantía no aplica para México
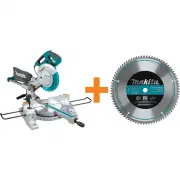
80 ESPAÑOL Si necesita cualquier ayuda para más detalles en relación con estos accesorios, pregunte a su centro de servicio local Makita.• Discos de sierra con puntas de carburo • Prensa vertical • Prensa horizontal • Bolsa recolectora de polvo • Regla triangular • Llave hexagonal • Unidad inalámbri...
Page 84 - Makita Corporation
Some dust created by power sanding, sawing, grinding, drilling, and other construction activities contains chemicals known to the State of California to cause cancer, birth defects or other reproductive harm. Some examples of these chemicals are: • lead from lead-based paints, • crystalline silica f...


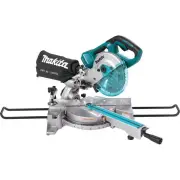
 Makita GSL03Z
User Manual
Makita GSL03Z
User Manual
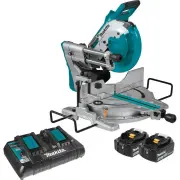
 Makita GSL04M1
User Manual
Makita GSL04M1
User Manual
 Makita LH1040
User Manual
Makita LH1040
User Manual
 Makita LH1040F
User Manual
Makita LH1040F
User Manual
 Makita LS0815F
User Manual
Makita LS0815F
User Manual
 Makita LS1018
User Manual
Makita LS1018
User Manual
 Makita LS1018A-93681
User Manual
Makita LS1018A-93681
User Manual
 Makita LS1019L
User Manual
Makita LS1019L
User Manual
 Makita LS1019LX
User Manual
Makita LS1019LX
User Manual
 Makita LS1040
User Manual
Makita LS1040
User Manual
 Makita LS1219L
User Manual
Makita LS1219L
User Manual
 Makita LS1219LX
User Manual
Makita LS1219LX
User Manual
 Makita LS1221
User Manual
Makita LS1221
User Manual
 Makita MLS100
User Manual
Makita MLS100
User Manual
 Makita XSL02Z
User Manual
Makita XSL02Z
User Manual
 Makita XSL05Z
User Manual
Makita XSL05Z
User Manual
 Makita XSL06PT
User Manual
Makita XSL06PT
User Manual