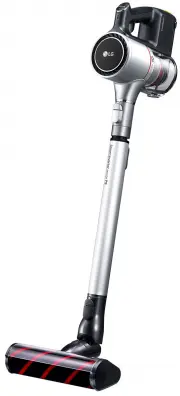
Page 2 - OWNER’S MANUAL; LG CORDLESS; Before using, carefully read the Safety Precautions pages
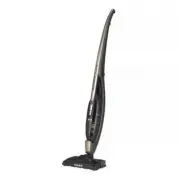
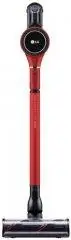
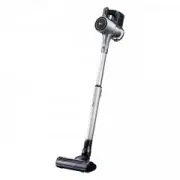
www.lg.com OWNER’S MANUAL LG CORDLESS HANDY-STICK CLEANER VS86***** Before using, carefully read the Safety Precautions pages to allow for safe operation of the product. After reading this manual, keep it in an easily accessible location. MFL67983125
Page 3 - TABLE OF CONTENTS
2 TABLE OF CONTENTS BEFORE USING 3 78 Safety PrecautionsIncluded with ProductParts METHOD OF USE 101112 1314151618 202122 Assembling Handy-Stick CleanerAssembling Charging StandHow to Mount and Detach the Water ReservoirHow to Attach the Wet MopHow to Replenish WaterHow to use the Dry MopUsing the P...
Page 4 - SAFETY PRECAUTIONS; SAVE THESE INSTRUCTIONS; Basic Safety Precautions; WARNING
3 SAFETY PRECAUTIONS This guide contains many important safety messages. Always read and obey all safety messages. Read all instructions before using. SAVE THESE INSTRUCTIONS IMPORTANT SAFETY INSTRUCTIONS WARNING 1. This appliance is not intended for use by persons (including children) with reduced ...
Page 7 - CAUTION
6 SAFETY PRECAUTIONS • Static Electricity may be generated at main body during cleaning. If vacuum cleaner malfunctions due to electrostatic energy, disconnect from the wall outlet and plug in again. • Remove socks, stockings, tissues, and other objects from floor before cleaning to prevent them fro...
Page 8 - INCLUDED WITH PRODUCT
7 INCLUDED WITH PRODUCT Battery* (Spare) Water reservoir *Available on some models. Fixing screw Filter (Spare) Owner’s Manual Wet mop Adapter Dry mop Handy-Stick Cleaner Charging Stand (models vary)
Page 10 - PARTS – CHARGING STATION / DUST BIN; Dust Bin
9 PARTS – CHARGING STATION / DUST BIN Inner filter (non mesh side) Dust bin Dust separator Dust bin cover Charging Stand (models vary) Dust Bin
Page 11 - ASSEMBLING HANDY-STICK CLEANER
10 ASSEMBLING HANDY-STICK CLEANER 1 2 Upper body part Lower body part ➊ Assemble the upper and lower body parts. Attach the upper body part to the lower body part as shown. Keep fingers away from pinch points while assembling. ➋ Fasten the fixing screw. Locate the hole for the fixing screw on the re...
Page 12 - ASSEMBLING CHARGING STAND
11 ASSEMBLING CHARGING STAND Insert the upper part of the charging stand into the base until it clicks. (models vary)
Page 13 - HOW TO MOUNT AND DETACH THE WATER RESERVOIR
12 HOW TO MOUNT AND DETACH THE WATER RESERVOIR ➊ How to mount the water reservoir Place the water reservoir on the floor and insert the nozzle of the cleaner into the groove at the center of the reservoir until you hear a “click” sound. ➋ How to detach the water reservoir Placing one foot on the wat...
Page 14 - HOW TO ATTACH THE WET MOP; Helpful tip
13 HOW TO ATTACH THE WET MOP ① ② ③ ① Please wet the mop prior to use. ② Be sure to squeeze the wet mop sufficiently before use to remove excess moisture. ③ With the Velcro side of the wet mop facing up, attach to the water reservoir. Helpful tip • To maximize cleaning performance, please wet the mop...
Page 15 - HOW TO REPLENISH WATER
14 HOW TO REPLENISH WATER ① ② ③ ① Open the cap on the water reservoir as shown in the illustration. ② As shown in the illustration, fill the water reservoir up to the “Max” line marked on the side. ③ After filling with water, securely close the cap on the water reservoir. WARNING It is recommended t...
Page 16 - HOW TO USE THE DRY MOP
15 HOW TO USE THE DRY MOP Dry mop handle When attaching to the water reservoir prior to use ① With the Velcro side of the dry mop facing up, attach to the water reservoir. ② Please mount the water reservoir on the main body prior to use. (When using the dry mop, please empty the water reservoir.) Wh...
Page 17 - USING THE PRODUCT
16 USING THE PRODUCT Power ON/OFF button Vacuum power button Speed control button (Power or Regular) Battery indicator Groove Make sure the vacuum body has docked correctly. Projection Battery indicator Press the power button to turn on the product. • Press the speed control button to select the mot...
Page 19 - CLEANING INSTRUCTIONS FOR VARIOUS SITUATIONS; Precautions before use
18 CLEANING INSTRUCTIONS FOR VARIOUS SITUATIONS Attach a mop to the stick cleaner to remove dust and wipe at the same time. Attach wet mop Precautions before use • Do not draw liquid such as water into the cleaner. - This may cause the product to malfunction. • Do not leave the cleaner standing on t...
Page 21 - CHARGING THE BATTERY
20 CHARGING THE BATTERY 1 2 Battery indicator Charging indicator ➊ If the voltage gets low during operation, the power is automatically turned off to protect the battery. You must then recharge the battery. Securely dock the hand-held cleaner to the main body of the vacuum cleaner. Then place the va...
Page 22 - HOW TO STORE THE WATER RESERVOIR
21 HOW TO STORE THE WATER RESERVOIR To remove all moisture within the water reservoir effectively, detach the gasket attached to the bottom of the water reservoir and store upside down. Shake the water reservoir to remove any residual moisture. Helpful tip • After you are finished with cleaning, ple...
Page 23 - HOW TO ATTACH/DETACH THE WATER RESERVOIR GASKET
22 HOW TO ATTACH/DETACH THE WATER RESERVOIR GASKET Spout Spout gasket ① ② How to detach the water reservoir gasket Lightly press on the center of the gasket, and then pull the end. How to attach the water reservoir gasket ① Push the spout assembled to the gasket all the way into the hole on the bott...
Page 24 - CLEANING THE DUST BIN
23 CLEANING THE DUST BIN Dust bin release button Inner filter (non mesh side) Clean and dry Fig.1 Dust bin Dust separator Inner filter Filter cover ① ② ③ ④ ⑤ ① To detach the dust bin, push and hold the release button and pull it in the direction shown. ② Remove the filter cover assembly in the direc...
Page 25 - ASSEMBLING THE DUST BIN
24 ASSEMBLING THE DUST BIN ① ② ③ ① Attach the inner filter back onto the filter cover. ② Put the dust separator back into the dust bin. ③ Assemble the filter cover back onto the dust separator in the direction indicated by the arrow. Filter cover Dust separator Inner filter Helpful tip • To assemble...
Page 26 - CLEANING THE NOZZLE
25 CLEANING THE NOZZLE 1 2 3 4 5 6 ➊ Turn off the vacuum cleaner and remove the hand-held vacuum. Press the hook to release the brush cover. Remove the cover and set aside. ➍ Slide the brush back through the belt inside the vacuum nozzle. ➋ Lift the brush and detach it from the drive belt. ➎ Secure ...
Page 27 - REMOVING CLOGS
26 REMOVING CLOGS ① ② ③ ④ If you notice a loss in suction, first check the filters as described on page 23. If the filters are clean, There may be a clog. The arrows show areas where clogs are most likely to occur. To check for clogs : ① Unplug and turn off the vacuum cleaner. ② Check the hand-held ...
Page 28 - TROUBLESHOOTING
27 TROUBLESHOOTING Check the following before calling for service. WARNING Electrical shock and personal injury hazard. Always remove the vacuum cleaner from the charging stand before servicing. Remove the hand-held vacuum and the battery before servicing to avoid electric shock or injury. PROBLEM P...
Page 29 - PRODUCT SPECIFICATION
28 PRODUCT SPECIFICATION 43½ in. 1105 mm 10 5 / 8 in. 270 mm 7 1 / 5 in. 190 mm Model VS86***** Dimension 7 1 / 5 in. x 10 5 / 8 in. x 43 1 / 2 in. (190 mm x 270 mm x 1105 mm) Weight 6.2 lb (2.8 kg) Power Consumption 90 W (6.5 A) Battery DC 18 V Hours of use Power mode : 20 min Regular mode : 30 min...
Page 30 - LG HANDY-STICK CLEANER WARRANTY
29 LG HANDY-STICK CLEANER WARRANTY LG Electronics Inc. will repair or replace your product, at LG’s option, if it proves to be defective in material or workmanship under personal household use, during the warranty period set forth below, effective from the date of original consumer purchase of the p...
Page 31 - MEMO
Page 33 - LG Customer Information Center
Made in Korea www.lg.com For inquiries or comments, visit www.lg.com or call: 1-800-243-0000 USA, Consumer User LG Customer Information Center Register your product Online!