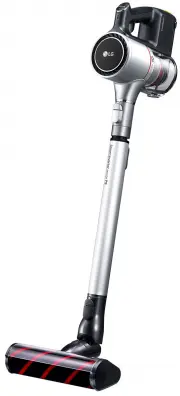
Page 2 - êìäéÇéÑëíÇé èéãúáéÇÄíÖãü
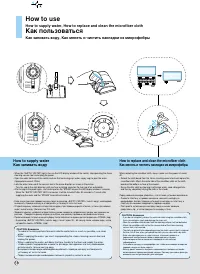
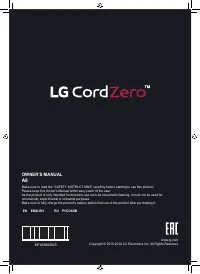
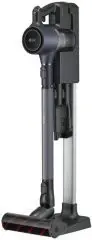
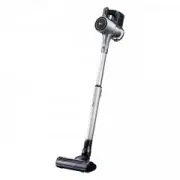
V K8 7 3 0 * * * * OWNER'S MANUAL êìäéÇéÑëíÇé èéãúáéÇÄíÖãü New Type Cyclone Vacuum Cleanerè˚ÎÂÒÓÒ Ò ˆËÍÎÓÌÌ˚Ï ÙËθÚÓÏ ÌÓ‚Ó„Ó ÚËÔ‡ This information contains important instructions for the safe use and maintenance of the vacuum cleaner. Especially, please read all of the information on page 4,5,6 for...
Page 5 - WARNING
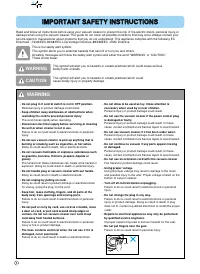
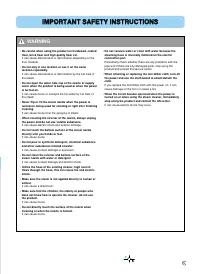
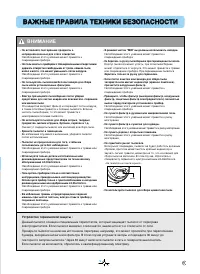
4 IIM MP PO OR RT TA AN NT T S SA AF FE ET TY Y IIN NS ST TR RU UC CT TIIO ON NS S Read and follow all instructions before using your vacuum cleaner to prevent the risk of fire,electric shock, personal injury,ordamage when using the vacuum cleaner.This guide do not cover all possible conditions that...
Page 7 - CAUTION
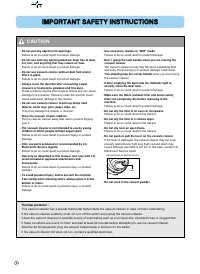
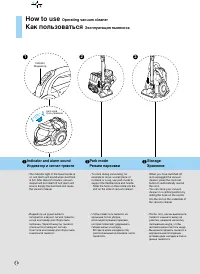
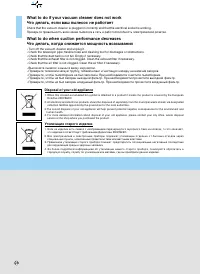
6 IIM MP PO OR RT TA AN NT T S SA AF FE ET TY Y IIN NS ST TR RU UC CT TIIO ON NS S Thermal protector : This vacuum cleaner has a special thermostat that protects the vacuum cleaner in case of motor overheating. If the vacuum cleaner suddenly shuts off, turn off the switch and unplug the vacuum clean...
Page 8 - éëíéêéÜçé
7 Ç ÇÄ ÄÜ Üç çõ õÖ Ö è èê êÄ ÄÇ Çà àã ãÄ Ä í íÖ Öï ïç çà àä äà à Å ÅÖ Öá áé éè èÄ Äë ëç çé éë ëí íà à ÑÎfl Ô‰ÓÚ‚‡˘ÂÌËfl ËÒ͇ ‚ÓÁ„Ó‡ÌËfl, ÔÓ‡ÊÂÌËfl ˝ÎÂÍÚ˘ÂÒÍËÏ ÚÓÍÓÏ, ÔÓÎÛ˜ÂÌËfl Ú‡‚Ï ËÎË Ì‡ÌÂÒÂÌËfl Û˘Â·‡ ÔË ÔÓθÁÓ‚‡ÌËË Ô˚ÎÂÒÓÒÓÏ,ÔÓ˜ÚËÚ ‚Ò ËÌÒÚÛ͈ËË Ë ÒÚÓ„Ó Ëı Òӷ≇ÈÚÂ. чÌÌÓ ÛÍÓ‚Ó‰ÒÚ‚Ó ...
Page 10 - ÇçàåÄçàÖ; ìÒÚÓÈÒÚ‚Ó ÚÂÏË ̃ÂÒÍÓÈ Á‡ ̆ËÚ ̊ :
9 Ç ÇÄ ÄÜ Üç çõ õÖ Ö è èê êÄ ÄÇ Çà àã ãÄ Ä í íÖ Öï ïç çà àä äà à Å ÅÖ Öá áé éè èÄ Äë ëç çé éë ëí íà à ÇçàåÄçàÖ • ç ‚ÒÚ‡‚ÎflÈÚ ÔÓÒÚÓÓÌÌË Ô‰ÏÂÚ˚ ‚ ÌÂÔ‰̇Á̇˜ÂÌÌ˚ ‰Îfl ˝ÚÓ„Ó ÓÚ‚ÂÒÚËfl çÂÒӷβ‰ÂÌË ˝ÚÓ„Ó Û͇Á‡ÌËfl ÏÓÊÂÚ ÔË‚ÂÒÚË ÍÔÓ‚ÂʉÂÌ˲ ÔË·Ó‡. • ç ÔÓθÁÓ‚‡Ú¸Òfl ÔË·ÓÓÏ Ò ·ÎÓÍËÓ‚‡ÌÌ˚ÏË ÓÚ‚...
Page 11 - How to use; Assembling vacuum cleaner; ä‡Í ÔÓÎ ̧ÁÓ‚‡Ú ̧Òfl; ë·Ó͇ Ô ̊ÎÂÒÓÒ‡
1 2 Telescopic pipeíÂÎÂÒÍÓÔ˘ÂÒ͇fl Ú۷͇ Spring latch ê„ÛÎflÚÓ ‰ÎËÌ˚ ÚÂÎÂÒÍÓÔ˘ÂÒÍÓÈ ÚÛ·ÍË Hose Handle ê͇ۘ ¯Î‡Ì„‡ (depending on model) (Ì ‚Ó ‚ÒÂı ÏÓ‰ÂÎflı) (depending on model) (Ì ‚Ó ‚ÒÂı ÏÓ‰ÂÎflı) (depending on model) (Ì ‚Ó ‚ÒÂı ÏÓ‰ÂÎflı) 10 How to use Assembling vacuum cleaner ä‡Í ÔÓθÁÓ‚‡Ú¸Ò...
Page 13 - • BOX •; Upholstery Nozzle; èêÖÑìèêÖÜÑÖçàÖ; How to Use; Using the Accessory Nozzles; àÒÔÓÎ ̧ÁÓ‚‡ÌË ËÁ‰ÂÎËfl; àÒÔÓÎ ̧ÁÓ‚‡ÌË ‰ÓÔÓÎÌËÚÂÎ ̧Ì ̊ı ̇҇‰ÓÍ
12 1 2 3 Dusting brush è˚΂‡fl ˘ÂÚ͇ Upholstery nozzle ç‡Ò‡‰Í‡ ‰Îfl ˜ËÒÚÍË Ó·Ë‚ÍË Crevice tool ôÂ΂‡fl ̇҇‰Í‡ • BOX • • äéêéÅäÄ • Upholstery Nozzle ç‡Ò‡‰Í‡ ‰Îfl ˜ËÒÚÍË Ó·Ë‚ÍË Upholstery Nozzle is for vacuuming upholstery,mattresses, etc. The thread collectors help topick up the threads and fluff. ...
Page 14 - Cleaning carpet and floor nozzle; The 2 position head; Suction Hole for Device Protection
4 5 3 1 2 4 Pedal Cleaning carpet and floor nozzle Floor èÓÎ 5 Carpet äÓ‚Â Suction Hole for Device Protection ÇÒ‡Ò˚‚‡˛˘Â ÓÚ‚ÂÒÚË ‰Îfl Á‡˘ËÚ˚ ÛÒÚÓÈÒÚ‚‡ Extension Pipe for Length Adjustment ì ‰ÎËÌËÚÂθ̇fl Ú۷͇ ‰Îfl „ÛÎËÓ‚ÍË ‰ÎËÌ˚ (depending on model) (Ì ‚Ó ‚ÒÂı ÏÓ‰ÂÎflı) 13 The 2 position head...
Page 15 - Operating vacuum cleaner; ùÍÒÔÎÛ‡Ú‡ˆËfl Ô ̊ÎÂÒÓÒ‡
1 2 3 alarm soundê͇ۘ ÛÔ‡‚ÎÂÌËfl Indicator à̉Ë͇ÚÓ 14 How to use Operating vacuum cleaner ä‡Í ÔÓθÁÓ‚‡Ú¸Òfl ùÍÒÔÎÛ‡Ú‡ˆËfl Ô˚ÎÂÒÓÒ‡ Indicator and alarm soundà̉Ë͇ÚÓ Ë Ò˄̇ΠÚÂ‚Ó„Ë • The indicator light of the hose handle is on and alarm will sound when dust tankis full. After about 2 minutes, va...
Page 16 - How to supply water, ä‡Í Á‡ÎË‚‡Ú ̧ ‚Ó‰Û; Basic using method of the steam cleaner; éÒÌÓ‚ÌÓÈ ÒÔÓÒÓ· ËÒÔÓÎ ̧ÁÓ‚‡ÌËfl Ô‡Ó‚ÓÈ Ì‡Ò‡‰ÍË
MAX MIN STEAM (ON/OFF) OFF Handle êÛÍÓflÚ͇ How to supply water, ä‡Í Á‡ÎË‚‡Ú¸ ‚Ó‰Û How to attach the microfiber clothä‡Í ÛÒÚ‡ÌÓ‚ËÚ¸ ̇Í·‰ÍÛ ËÁ ÏËÍÓÙË·˚ Steam safety switch Ä‚‡ËÈÌ˚È ‚˚Íβ˜‡ÚÂθ Ô‡‡ Hose ò·̄ Extension pipeê„ÛÎflÚÓ ‰ÎËÌ˚ ÚÂÎÂÒÍÓÔ˘ÂÒÍÓÈ ÚÛ·ÍË 3 2 1 4 5 How to use Basic using me...
Page 17 - ëÛı‡fl Û·Ó͇ / è‡Ó‚‡fl óËÒÚ͇ / é‰ÌÓ‚ÂÏÂÌ̇fl ÒÛı‡fl Û·Ó͇ Ë ̃ËÒÚ͇ Ô‡ÓÏ
3 4 5 MAX MIN STEAM (ON/OFF) OFF MAX MIN STEAM (ON/OFF) OFF MAX MIN STEAM (ON/OFF) OFF 16 Vacuum cleaning ëÛı‡fl Û·Ó͇ • Connect the Carpet and floor nozzle or steam cleaning tool to the extensionpipe. • Operate the function control button to "MAX" or "MIN" mode. When thecleaning is ...
Page 18 - When removing old stain/floor stain; ÍÓ‚Ó‚, Û‰‡ÎÂÌË Á‡Òڇ‚ ̄Ëı ÔflÚÂÌ / ÔflÚÂÌ Ì‡ ÔÓÎÛ
6 7 8 MAX MIN STEAM (ON/OFF) OFF 17 When cleaning hardwood/laminated/general floor óËÒÚ͇ ‰Â‚flÌÌÓ„Ó / ·ÏË̇ÚÌÓ„Ó / Ó·˚˜ÌÓ„Ó ÔÓ· • Attach the microfiber cloth on the cloth board and install the steam cleaning vacuum tool. - When cleaning the hardwood/laminated/general floor, if you do not use the...
Page 19 - How to supply water, How to replace and clean the microfiber cloth; ä‡Í Á‡ÎË‚‡Ú ̧ ‚Ó‰Û, ä‡Í ÏÂÌflÚ ̧ Ë ̃ËÒÚËÚ ̧ ̇Í·‰ÍË ËÁ ÏËÍÓÙË· ̊
STEAM SUPPLYWATER Unloc k Loc k STEAM SUPPLYWATER 18 How to supply water ä‡Í Á‡ÎË‚‡Ú¸ ‚Ó‰Û • When the "SUPPLY WATER" light is turn on the LED display window of the nozzle, stop operating the steam cleaning vacuum tool and unplug the power. • Open the water hole cap of the nozzle and use the ...
Page 20 - Emptying dust tank; é ̃ËÒÚ͇ ÍÓÌÚÂÈ̇ ÓÚ Ô ̊ÎË
19 Pull outÇ˚ÌÛÚ¸ Tank handle ͇ۘ Ô˚ÎÂÒ·ÓÌË͇ Tank separation lever ÍÌÓÔ͇ ÒÌflÚËfl Ô˚ÎÂÒ·ÓÌË͇ Tank handle͇ۘ Ô˚ÎÂÒ·ÓÌË͇ Carrier handleê͇ۘ ‰Îfl ÔÂÂÌÓÒÍË Indicator à̉Ë͇ÚÓ How to use Emptying dust tank ä‡Í ÔÓθÁÓ‚‡Ú¸Òfl é˜ËÒÚ͇ ÍÓÌÚÂÈ̇ ÓÚ Ô˚ÎË The dust tank needs emptying when indicator ...
Page 21 - Cleaning dust tank; óËÒÚ͇ Ô ̊ÎÂÒ·ÓÌË͇
20 Inner tank ÇÌÛÚÂÌÌËÈ ÂÁ‚ۇ Dust tankÔ˚ÎÂÒ·ÓÌËÍ Pull outÇ˚ÌÛÚ¸ Tank handle͇ۘ Ô˚ÎÂÒ·ÓÌË͇ Tank separation lever ÍÌÓÔ͇ ÒÌflÚËfl Ô˚ÎÂÒ·ÓÌË͇ Dust tank cap ä˚¯Í‡ Ô˚ÎÂÒ·ÓÌË͇ Assembling the air guide & the inner tankë·Ó͇ ‚ÓÁ‰ÛıÓ‚Ó‰‡ Ë ‚ÌÛÚÂÌÌÂ„Ó ÂÁ‚ۇ‡ • Line up on the inner tank...
Page 22 - Cleaning air filter and motor safety filter; óËÒÚ͇ ‚ÓÁ‰Û ̄ÌÓ„Ó ÙËÎ ̧Ú‡ Ë Á‡ ̆ËÚÌÓ„Ó ÙËÎ ̧Ú‡ ̋ÎÂÍÚÓ‰‚Ë„‡ÚÂÎfl
21 Air filter ÇÓÁ‰Û¯Ì˚È ÙËÎ¸Ú Motor safety filterᇢËÚÌ˚È ÙËÎ¸Ú ˝ÎÂÍÚÓ‰‚Ë„‡ÚÂÎfl How to use Cleaning air filter and motor safety filter ä‡Í ÔÓθÁÓ‚‡Ú¸Òfl óËÒÚ͇ ‚ÓÁ‰Û¯ÌÓ„Ó ÙËθڇ Ë Á‡˘ËÚÌÓ„Ó ÙËθڇ ˝ÎÂÍÚÓ‰‚Ë„‡ÚÂÎfl NOTICE If filters are damaged, do not use them.In this cases, contact LG Electroni...
Page 23 - Cleaning exhaust filter; óËÒÚ͇ ‚ ̊ıÓ‰ÌÓ„Ó ÙËÎ ̧Ú‡
22 a b b • Slide locking clasps a and b in the direction indicated.• Open the exhaust filter cover and take out the exhaust filter from the vacuum cleaner.• Remove the dust by shaking the exhaust filter over the trash can.• After clean the exhaust filter and put it on the vacuum cleaner.• Close the ...
Page 24 - Storage method after use; ï‡ÌÂÌË ÔË·Ó‡ ÔÓÒΠËÒÔÓÎ ̧ÁÓ‚‡ÌËfl
23 Storage board ÔÓ‰ÎÓÊ͇ ‰Îfl ı‡ÌÂÌËfl Ô‡Ó‚ÓÈ Ì‡Ò‡‰ÍË • Turn off the power switch and unplug the power. • After using the microfiber cloth, directly clean the cloth. - Always separate the cloth after cleaning, and wash the cloth. When the cloth is exposed for a long time, it can generate a bad odor...
Page 25 - Use; Features
24 User's guide for sani punch vacuum nozzle (depending on model) àÌÒÚÛ͈Ëfl ÔÓ ˝ÍÒÔÎÛ‡Ú‡ˆËË Ì‡Ò‡‰ÍË Sani Punch (Ì ‚Ó ‚ÒÂı ÏÓ‰ÂÎflı) Use àÒÔÓθÁÓ‚‡ÌË Set the suction power control switch to MAX POWER before vacuuming.Depending on the type of bedding, handling may be awkward or it may cause a lot of...
Page 26 - ç‡Ò‡‰Í‡ Ô‰̇Á̇ ̃Â̇ ‰Îfl ̃ËÒÚÍË ÔÓÒÚÂÎË, Ó‰ÂflÎ Ë Ó·Ë‚ÍË Ï·ÂÎË ÓÚ ÍΠ̆ÂÈ Ë Ô ̊ÎË.; When using on the bed
25 This Sani Punch nozzle is for effective cleaning of beds and blankets to remove mites and dust. ç‡Ò‡‰Í‡ Ô‰̇Á̇˜Â̇ ‰Îfl ˜ËÒÚÍË ÔÓÒÚÂÎË, Ó‰ÂflÎ Ë Ó·Ë‚ÍË Ï·ÂÎË ÓÚ Í΢ÂÈ Ë Ô˚ÎË. Effective cleaning ùÙÙÂÍÚ˂̇fl ˜ËÒÚ͇ Bed & blanket äÓ‚‡ÚË Ë Ó‰Âfl· Bulky & heavy blanket íÓÎÒÚ˚Â Ë ÚflÊÂÎ˚ Ӊ...
Page 27 - User's guide for sani punch vacuum nozzle; Cleaning Vacuum Nozzle for Bedding (depending on model); àÌÒÚÛ͈Ëfl ÔÓ ̋ÍÒÔÎÛ‡Ú‡ˆËË Ì‡Ò‡‰ÍË Sani Punch; óËÒÚ͇ ̇҇‰ÍË ‰Îfl ÔÓÒÚÂÎ ̧Ì ̊ı ÔË̇‰ÎÂÊÌÓÒÚÂÈ (Ì ‚Ó ‚ÒÂı ÏÓ‰ÂÎflı)
26 User's guide for sani punch vacuum nozzle Cleaning Vacuum Nozzle for Bedding (depending on model) àÌÒÚÛ͈Ëfl ÔÓ ˝ÍÒÔÎÛ‡Ú‡ˆËË Ì‡Ò‡‰ÍË Sani Punch óËÒÚ͇ ̇҇‰ÍË ‰Îfl ÔÓÒÚÂθÌ˚ı ÔË̇‰ÎÂÊÌÓÒÚÂÈ (Ì ‚Ó ‚ÒÂı ÏÓ‰ÂÎflı) For simple cleaning of the vacuum nozzle, detach the Sani Punch nozzle from the telesc...
Page 29 - Disposal of your old appliance; ìÚËÎËÁ‡ˆËfl ÒÚ‡Ó„Ó ËÁ‰ÂÎËfl
28 What to do if your vacuum cleaner does not workóÚÓ ‰Â·ڸ, ÂÒÎË ‚‡¯ Ô˚ÎÂÒÓÒ Ì ‡·ÓÚ‡ÂÚ What to do when suction performance decreasesóÚÓ ‰Â·ڸ, ÍÓ„‰‡ ÒÌËʇÂÚÒfl ÏÓ˘ÌÓÒÚ¸ ‚Ò‡Ò˚‚‡ÌËfl Check that the vacuum cleaner is plugged in correctly and that the electrical socket is working.èӂ¸Ú ԇ‚ËθÌÓÒ...
Page 33 - Made in KOREA