Page 2 - CONTENTS
2 CONTENTS Unpacking the Vacuum Cleaner Assembly Parts Wand & Hose AssemblyAttaching the HoseAccessory Storage Cord Storage 4 ASSEMBLY 5 OPERATION Storing the Vacuum Cleaner Dust Tank Components Emptying the Dust Tank Cleaning the Dust Tank Cleaning the Foam Pre FilterCleaning the HEPA FilterPet...
Page 3 - LG VA C U U M C L E A N E R WA R R A N T Y
3 ENGLISH LG VA C U U M C L E A N E R WA R R A N T Y LG Electronics Inc. will repair or replace your product, at LG’s option, if it proves to be defective in material or workmanship under Personal household use, during the warranty period set forth below, effective from the date of original consumer...
Page 4 - I M P O RTA N T S A F E T Y I N F O R M AT I O N S; READ ALL INSTRUCTIONS BEFORE USE; IMPORTANT SAFETY IINSTRUCTIIONS; SAVE THESE INSTRUCTIONS; WARNING; CAUTION
4 I M P O RTA N T S A F E T Y I N F O R M AT I O N S • Disconnect electrical supply before servicing or cleaning the unit or when cleaner is not in use. Failure to do so could result in electrical shock or personal injury. • Do not use vacuum cleaner to pick up anything that is burning or smoking su...
Page 6 - PA RT S A N D F E AT U R E S
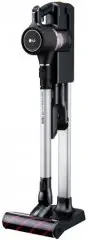
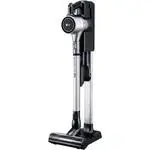
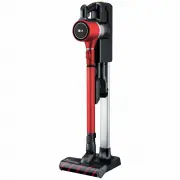
6 PA RT S A N D F E AT U R E S It is important to know your vacuum cleaner’s parts and features to assure its proper and safe use. Review these before using your vacuum cleaner. Common Replacement Parts To order these parts call 1-800-243-0000 (U.S.A) 1-888-542-2623 (Canada) Accessory Tools Crevice ...
Page 7 - Unpacking the Vacuum Cleaner; A S S E M B LY
7 ENGLISH Unpacking the Vacuum Cleaner Carefully unpack the vacuum cleaner and make sure that you have all parts before discarding of any packaging. Remove any tape, cardboard inserts and protective film before assembly. Items that are packed in the box: 1. Vacuum Cleaner Body 2. Crevice Tool (alrea...
Page 8 - Wand & Hose assembly
8 A S S E M B LY Wand & Hose assembly 1. Remove Cover by sliding up. 2. Insert the 2 “AAA” batteries. 3. Insert the Pet hair turbine tool into the bottom of the wand. 4. Insert the other side of the wand into the Dusting brush. 5. Insert the Dusting brush into the handle. Attaching the Hose 1. A...
Page 9 - Accessory Storage; Cord Storage
9 ENGLISH A S S E M B LY Accessory Storage Your vacuum cleaner features convenient on-board storage for the accessories. • Put the wand & hose assembly on the back of body and then push the wand & hose assembly to the body. • Put the sharp end of the crevice tool into the boss and then push ...
Page 10 - O P E R AT I O N; Control Operation
10 O P E R AT I O N Control Operation 1. Carpet / Floor: To toggle between the agitato eing on or off. NOTE: If the vacuum is in the upright position the agitator will not run even if the vacuum power is on. 2. HIGH MED LOW: To select the proper suction of the vacuum such as High, Medium or Low. 3. ...
Page 11 - Adjusting the Pile Height
11 ENGLISH O P E R AT I O N Adjusting the Pile Height To adjust the pile height: When it is necessary to raise and lower the front of the vacuum for various carpet pile heights, press the right foot pedal to adjust the pile height. Each press will raise the agitator one notch. Suggested pile height ...
Page 12 - Accessory Use Chart; Accessory
12 O P E R AT I O N Accessory Use Chart CLEANING AREA * Always make sure attachments are clean before using on fabrics. Accessory Between Cushions Upholstered Surfaces* Furniture and Hard Surfaces* Drapes* (lower power level) Stairs Cushions Carpeted Floors/ Rugs Walls Mattress/ Bedding Pet Hair Tur...
Page 13 - Using the Wand or Wand Handle
13 ENGLISH O P E R AT I O N Using the Wand or Wand Handle If using any accessory on the end of the handle the entire wand must be removed from the body base. Release the wand and handle: 1. Make sure the vacuum cleaner is locked in the upright position and on a flat, stable surface. 2. Press the wan...
Page 14 - Installing Attachments; Using the Extended Crevice tool; Using the Pet Hair Turbine Tool
14 O P E R AT I O N Installing Attachments Using the crevice tool: Slide the crevice tool over the end of the wand or fit it into the handle. Using the Extended Crevice tool To use the extended crevice tool place the extension onto the crevice tool by sliding onto the crevice tool until it has locke...
Page 15 - Using the Mattress Tool
15 ENGLISH O P E R AT I O N Using the Mattress Tool The mattress tool can be used on your mattress or bedding to help in the removing of dirt and dust mites. This tool vibrates on the mattress to separate the dust and dirt from intended cleaning area. Stairways and Landings Use the Dusting brush or ...
Page 16 - C A R E & C L E A N I N G; Storing the Vacuum Cleaner
16 C A R E & C L E A N I N G Always follow all safety precautions when cleaning and servicing the vacuum cleaner. Storing the Vacuum Cleaner When not in use, wrap the cord around the cord hanger as shown. Store the crevice tool in their proper places on the back of the vacuum cleaner. Dust Tank ...
Page 17 - Emptying the Dust Tank
17 ENGLISH C A R E & C L E A N I N G Emptying the Dust Tank For maximum performance, always empty the dust tank when the dirt level reaches the MAX line. TO REMOVE DUST TANK, press the dust tank release, tilt the dust tank back, then lift it out of the vacuum cleaner. TO EMPTY DUST TANK, press t...
Page 18 - Cleaning the Foam Pre Filter; Cleaning the HEPA Filter
18 C A R E & C L E A N I N G Cleaning the Foam Pre Filter For optimal performance, check the filters every 3 months and clean when necessary. Don’t close the dust tank lid without the Foam pre filter. To Clean the Foam pre filter: 1. Remove the dust tank from the vacuum cleaner. 2. Lift up on th...
Page 19 - Pet Hair Turbine Tool
19 ENGLISH Pet Hair Turbine Tool To clean the pet hair turbine tool 1. Remove the four screws on the bottom of the pet hair turbine tool. 2. Lift off the cover. 3. Remove any debris. To reassemble: 4. Carefully press cover onto tabs until they snap into place. 5. Insert and tighten screws removed in...
Page 20 - Removing Clogs
20 C A R E & C L E A N I N G 5. Fit the agitator through the belt, making sure the belt is aligned with the pulley section of the agitator. 6. Lower the agitator into place, making sure the oval shaped tabs fit into the indents on the head. 7. Reinstall the agitator brush cover as described abov...
Page 21 - Cleaning the Accessory Holder
21 ENGLISH 4. Check the hose where it connects to back of the body by pressing the release button on the top end of the hose. And then check two cases, the wand installed and uninstalled. 5. Turn the vacuum cleaner over, Check the agitator inlet. 6. To check more thoroughly, remove the screw on the ...
Page 22 - Mattress Tool Maintenance
22 Mattress Tool Maintenance Note: Do not submerse the entire mattress tool under water, this could damage the tool. ❶ Turn the dial, on the end of the container, counterclockwise one half turn to allow the dirt from the container to be sucked up into the vacuum during use. ❷ To remove the dirt cont...
Page 23 - T RO U B L E S H O OT I N G
23 ENGLISH T RO U B L E S H O OT I N G Review this chart to find do-it-yourself solutions for minor performance problems. Any service or repair needed, other than as described in this User’s Guide, should be performed through your local LGE service center. Electrical shock and personal injury hazard...
Page 24 - M E M O
Page 25 - MANUAL DEL PROPIETARIO; ASPIRADORA; Por favor, lea atentamente este manual antes de operar
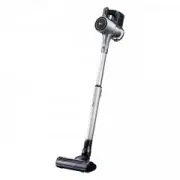
MANUAL DEL PROPIETARIO ASPIRADORA Luv400T Por favor, lea atentamente este manual antes de operar su aparato y guárdelo para futuras referencias. P/NO : MFL62862403 www.lge.com ESP AÑOL
Page 26 - ÍNDICE
2 ÍNDICE Desempaque de la aspiradora Piezas para el montaje Montaje del tubo y la mangueraSujeción de la mangueraAlmacenamiento de los accesorios Almacenamiento del cordón eléctrico 4 MONTAJE 5 OPERACIÓN Almacenamiento de la aspiradora Componentes del tanque para polvoVaciado del tanque para polvoLi...
Page 27 - G A R A N T Í A PA R A L A A S P I R A D O R A LG
3 G A R A N T Í A PA R A L A A S P I R A D O R A LG LG Electronics Inc. reparará o reemplazará su producto, a opción de LG, si se demuestra que los materiales o la mano de obra están defectuosos sometidos a uso doméstico sin fines comerciales durante el período de garantía indicado más adelante, a p...
Page 28 - I N F O R M A C I Ó N I M P O RTA N T E D E S E G U R I DA D; LEA TODAS LAS INSTRUCCIONES ANTES DE PONER EN SERVICIO; INSTRUCCIONES IMPORTANTES DE SEGURIDAD; ADVERTENCIA; PRECAUCIÓN; GUARDE ESTAS INSTRUCCIONES
4 I N F O R M A C I Ó N I M P O RTA N T E D E S E G U R I DA D • Desconecte el suministro eléctrico antes de dar mantenimiento o limpiar el aparato o cuando la aspiradora no esté en uso. El incumplimiento de esta indicación podría provocar descarga eléctrica o lesiones personales. • No utilice la as...
Page 30 - P I E Z A S Y C A R A C T E R Í S T I C A S
6 P I E Z A S Y C A R A C T E R Í S T I C A S Es importante que usted conozca las piezas y las características de su aspiradora a fin de garantizar el uso correcto y seguro. Sugerimos que se familiarice con ellas antes de usar su aspiradora. Piezas de repuesto comunes Para pedir estas piezas puede l...
Page 31 - M O N TA J E; Desempaque de la aspiradora
7 ESP AÑOL 10. Boquilla para suelo desnudo 11. Herramienta para colchones M O N TA J E Desempaque de la aspiradora Desempaque con mucho cuidado la aspiradora y asegúrese de que tiene todas las piezas antes de descartar cualquier empaque. Retire cualquier cinta adhesiva, las inserciones de cartón y l...
Page 32 - Montaje del tubo y la manguera
8 M O N TA J E Montaje del tubo y la manguera 1. Retire la tapa deslizándola hacia arriba. 2. Inserte las 2 pilas “AAA”. 3. Inserte la boquilla turbo para pelo de mascota dentro de la parte inferior del tubo. 4. Inserte el otro extremo del tubo dentro del cepillo para el polvo. 5. Inserte el cepillo...
Page 33 - Almacenamiento de los accesorios; Almacenamiento del cordón eléctrico
9 ESP AÑOL M O N TA J E Almacenamiento de los accesorios Su aspiradora cuenta con almacenamiento incorporado para la boquilla plana. • Coloque el conjunto de tubo y manguera en la parte de atrás del cuerpo de la aspiradora y luego empuje el conjunto de tubo y manguera hacia el cuerpo. • Coloque la p...
Page 34 - O P E R A C I Ó N; Operación de los controles
10 O P E R A C I Ó N Operación de los controles 1. Alfombra/Piso: Para alternar entre cepillo rotativo encendido o apagado. NOTA: Si la aspiradora está en posición vertical el cepillo rotativo no funcionará aunque la potencia de la aspiradora esté encendida. 2. ALTO MEDIANO BAJO: Para seleccionar la...
Page 35 - Ajuste de altura de la alfombra
11 ESP AÑOL O P E R A C I Ó N Ajuste de altura de la alfombra Para ajustar la altura de lanilla: Cuando sea necesario subir o bajar la parte delantera de la aspiradora para los distintos espesores de las alfombras, oprima el pedal derecho para ajustar la altura de lanilla. Cada vez que presione el c...
Page 36 - Cuadro sobre el uso de los accesorios
12 O P E R A C I Ó N Cuadro sobre el uso de los accesorios * Siempre asegúrese de que los accesorios estén limpios antes de usar en las telas. Accesorios Boquilla turbo para pelo de mascota Este cepillo accionado por turbina de aire es fabuloso para las escaleras o espacios interiores, así como para...
Page 37 - Uso del tubo o de la manija del tubo
13 ESP AÑOL O P E R A C I Ó N Uso del tubo o de la manija del tubo Al emplear cualquier accesorio en el extremo de la manija se debe retirar todo el tubo de la base del cuerpo. Desenganche del tubo y la manija: 1. Asegúrese de que la aspiradora esté bloqueada en la posición vertical y sobre una supe...
Page 38 - Instalación de los accesorios
14 O P E R A C I Ó N Instalación de los accesorios Uso de la boquilla plana: Deslice la boquilla plana sobre el extremo del tubo o acóplela dentro de la manija. Uso de la herramienta de boquilla de ranura extendida Para usar la herramienta de boquilla de ranura extendida, coloque la extensión sobre ...
Page 39 - Stairways and Landings; Protección de sobrecarga térmica
15 ESP AÑOL O P E R A C I Ó N Uso de la herramienta para colchones Se puede usar la herramienta para colchones en su colchón o cama para ayudar a eliminar la suciedad y los ácaros del polvo. Esta herramienta vibra sobre el colchón para separar el polvo y la suciedad en la zona de limpieza prevista. ...
Page 40 - C U I DA D O Y L I M P I E Z A; Almacenamiento de la aspiradora
16 C U I DA D O Y L I M P I E Z A Siempre atienda todas las precauciones de seguridad al limpiar y dar mantenimiento a la aspiradora. Almacenamiento de la aspiradora Cuando no esté en uso, enrolle el cordón eléctrico alrededor de los ganchos según se muestra. Almacene la boquilla plana en su lugar r...
Page 41 - Vaciado del tanque para polvo
17 ESP AÑOL C U I DA D O Y L I M P I E Z A Vaciado del tanque para polvo Para obtener el mejor rendimiento, siempre vacíe el tanque para polvo cuando el nivel de suciedad alcance la línea MAX. PARA RETIRAR EL TANQUE PARA POLVO, oprima el desenganche del tanque para polvo, incline hacia atrás el tanq...
Page 42 - Limpieza del prefiltro de espuma
18 C U I DA D O Y L I M P I E Z A Limpieza del prefiltro de espuma Para un rendimiento óptimo, inspeccione los filtros cada tres meses y límpielos si fuera necesario. No cierre la tapa del tanque para polvo sin el prefiltro de espuma. Para limpiar el prefiltro de espuma: 1. Retire el tanque para pol...
Page 43 - Boquilla turbo para pelo de mascota
19 ESP AÑOL C U I DA D O Y L I M P I E Z A Boquilla turbo para pelo de mascota Para limpiar la boquilla turbo para pelo de mascota 1. Retire los cuatro tornillos en la parte inferior de la boquilla turbo para pelo de mascota. 2. Levante la tapa.3. Elimine todos los escombros. Para reensamblar: 4. Pr...
Page 44 - Eliminación de obstrucciones
20 ➀ ➁ C U I DA D O Y L I M P I E Z A 5. Ajuste el cepillo rotativo a través de la correa, asegurándose de que la correa esté alineada con la sección de la polea motriz del cepillo rotativo. 6. Baje el cepillo rotativo a su lugar, asegurándose de que las lengüetas de forma ovalada encajen dentro de ...
Page 45 - Limpieza del accesorio contenedor
21 ESP AÑOL C U I DA D O Y L I M P I E Z A 4. Inspeccione la manguera donde se conecta a la parte de atrás del cuerpo de la aspiradora presionando el botón de desenganche en el extremo superior de la manguera. dégagement situé dans le haut du tuyau. Y luego marque las dos casillas, con la varita ins...
Page 47 - S O L U C I Ó N D E P RO B L E M A S
23 ESP AÑOL S O L U C I Ó N D E P RO B L E M A S Consulte este cuadro para encontrar soluciones que puede realizar usted mismo cuando surjan problemas leves de rendimiento. Todo servicio, o reparación necesaria, que sea distinto a los problemas descritos en esta Guía del Usuario, deberá ser realizad...
Page 49 - MANUEL D’UTILISATION; ASPIRATEUR; et rangez-le soigneusement à titre de référence ultérieure.
MANUEL D’UTILISATION ASPIRATEUR LuV300 Avant de mettre votre appareil en fonctionnement, lisez ce manuel attentivement et rangez-le soigneusement à titre de référence ultérieure. P/NO : MFL62862401 www.lge.com FRANÇAIS
Page 50 - TABLE DES MATIÈRES
2 TABLE DES MATIÈRES Déballage de l’aspirateurPièces à assemblerPour assembler le tube et le tuyauPour installer le tuyauRangement des accessoiresRangement du cordon 4 ASSEMBLAGE 5 FONCTIONNEMENT Rangement de l’aspirateurÉléments du réservoir à poussièreVidage du réservoir à poussièreNettoyage du ré...
Page 51 - G A R A N T I E D E L' A S P I R AT E U R LG
3 FRANÇAIS G A R A N T I E D E L' A S P I R AT E U R LG LGE Electronics Inc. réparera ou remplacera, à son choix, votre produit s'il présente un défaut de matériau ou de fabrication, dans des conditions d’usage domestique, pendant la période de garantie spécifiée ci-dessous, laquelle est en vigueur ...
Page 52 - R E N S E I G N E M E N T S I M P O RTA N T S S U R L A S É C U R I T É; VEUILLEZ LIRE TOUTES LES CONSIGNES; CONSIGNES DE SÉCURITÉ IMPORTANTES; MISE EN GARDE; CONSERVEZ CES INSTRUCTIONS
4 R E N S E I G N E M E N T S I M P O RTA N T S S U R L A S É C U R I T É • Débranchez le cordon d’alimentation avant de réparer ou de nettoyer l’appareil ou lorsque vous n’utilisez pas l’aspirateur. Le non-respect de cette consigne pourrait causer un choc électrique ou des blessures. • N'utilisez p...
Page 54 - P I È C E S E T C A R A C T É R I S T I Q U E S
6 P I È C E S E T C A R A C T É R I S T I Q U E S Pièces de rechange courantes Pour commander ces pièces, téléphonez au 1 800 243-0000.(U.S.A) 1 888 542 2623 (Canada) Filtre HEPA ADQ72913001 Préfiltre en mousse Cadre du filtre MDQ61918301 (ADV72987201) Filtre en mousse MDJ61980601Courroie de la bros...
Page 55 - A S S E M B L AG E; Déballage de l'aspirateur
7 FRANÇAIS 10. Suceur parquet 11. Suceur spécial matelas A S S E M B L AG E Déballage de l'aspirateur Déballez soigneusement l'aspirateur et vérifiez si vous avez toutes les pièces avant de jeter l'emballage. Enlevez le ruban, les cartons de protection et les pellicules protectrices avant d'assemble...
Page 57 - Rangement des accessoires; Rangement du cordon
9 FRANÇAIS A S S E M B L AG E Rangement des accessoires Votre aspirateur comporte un logement pratique pour ranger le suceur plat. • Placez l’ensemble tube-tuyau à l’arrière du boîtier puis poussez-le vers le boîtier. • Placez l’extrémité saillante du suceur plat dans le bossage, puis poussez le suc...
Page 58 - F O N C T I O N N E M E N T; Fonctionnement des commandes
10 F O N C T I O N N E M E N T Fonctionnement des commandes 1. Tapis/Plancher : Pour mettre la brosse de battage en marche et l’arrêter. NOTA: Si l’aspirateur est en position verticale, la brosse de battage ne fonctionnera pas même si l’aspirateur est en marche. 2. HIGH MED LOW : Pour choisir l'inte...
Page 60 - Tableau d’utilisation des accessoires
12 F O N C T I O N N E M E N T Tableau d’utilisation des accessoires ZONE À NETTOYER * Vérifiez toujours si les accessoires sont propres avant de les utiliser sur du tissu. Accessoire Entre les coussins Surfaces rembourrées* Mobilier et surfaces dures* Rideaux* (niveau de puissance le plus bas) Esca...
Page 62 - Installation des accessoires; Conseils et astuces; Utilisation du suceur parquet
14 F O N C T I O N N E M E N T Installation des accessoires Utilisation du suceur plat : Faites glisser le suceur plat sur l'extrémité du tube ou insérez-le dans la poignée. Utilisation de l'accessoire extension suceur fente Pour utiliser l'accessoire extension suceur fente, placez l'extension sur l...
Page 63 - E N T R E T I E N E T N E T TOYAG E
15 FRANÇAIS E N T R E T I E N E T N E T TOYAG E Utilisation du suceur spécial matelas Le suceur spécial matelas s'utilise sur vos matelas et votre literie pour vous permettre de retirer toute saleté et les acariens de la poussière. Cet accessoire vibre sur le matelas pour détacher la poussière de la...
Page 65 - Vidage du réservoir à poussière
17 FRANÇAIS E N T R E T I E N E T N E T TOYAG E Vidage du réservoir à poussière Pour obtenir le meilleur rendement, videz toujours le réservoir à poussière lorsque le niveau de poussière atteint la ligne « MAX ». POUR ENLEVER LE RÉSERVOIR À POUSSIÈRE, appuyez sur le bouton de dégagement du réservoir...
Page 66 - Nettoyage du préfiltre en mousse
18 E N T R E T I E N E T N E T TOYAG E Nettoyage du préfiltre en mousse Pour obtenir un rendement optimal, inspectez les filtres aux trois mois et nettoyez-les au besoin. Ne fermez pas le couvercle du réservoir à poussière sans y avoir installé le préfiltre en mousse.Pour nettoyer le préfiltre en mo...
Page 67 - Entretien de la brosse de battage
19 FRANÇAIS E N T R E T I E N E T N E T TOYAG E Accessoire à turbine à air pour poils d’animaux Pour nettoyer l’accessoire à turbine à air pour poils d’animaux 1. Enlevez les quatre vis situées au bas de l’accessoire à turbine à air pour poils d’animaux. 2. Soulevez le couvercle. 3. Retirez les débr...
Page 71 - D É PA N N AG E
23 FRANÇAIS D É PA N N AG E Consultez le tableau pour trouver des solutions aux problèmes de rendement mineurs. Toute autre réparation ou tout autre entretien que ceux décrits dans le présent manuel d'utilisation doivent être effectués par le centre de service LG de votre localité. Risques de chocs ...


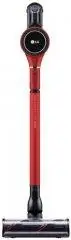
 LG A931KWM
User Manual
LG A931KWM
User Manual
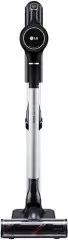
 LG A9ESSENTIAL
User Manual
LG A9ESSENTIAL
User Manual
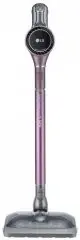
 LG A9K-AQUA
User Manual
LG A9K-AQUA
User Manual
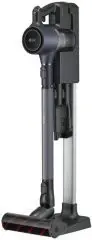
 LG A9K-EVOLVE
User Manual
LG A9K-EVOLVE
User Manual
 LG A9MASTER2X
User Manual
LG A9MASTER2X
User Manual
 LG A9MULTI2X CordZero
User Manual
LG A9MULTI2X CordZero
User Manual
 LG A9N-CORE
User Manual
LG A9N-CORE
User Manual
 LG A9NEOMAX
User Manual
LG A9NEOMAX
User Manual
 LG A9N-MULTI
User Manual
LG A9N-MULTI
User Manual
 LG A9PETNBED2X
User Manual
LG A9PETNBED2X
User Manual
 LG CordZero A9ESSENTIAL
User Manual
LG CordZero A9ESSENTIAL
User Manual
 LG CordZero A9-LITE
User Manual
LG CordZero A9-LITE
User Manual
 LG CordZero A9MASTER2X
User Manual
LG CordZero A9MASTER2X
User Manual
 LG CordZero A9MULTICARE
User Manual
LG CordZero A9MULTICARE
User Manual
 LG CordZero A9N-Core
User Manual
LG CordZero A9N-Core
User Manual
 LG FVD3700
User Manual
LG FVD3700
User Manual
 LG Kompressor Plus VK8828HQ
User Manual
LG Kompressor Plus VK8828HQ
User Manual
 LG Kompressor VC83209UHAV
User Manual
LG Kompressor VC83209UHAV
User Manual
 LG KV-PRO
User Manual
LG KV-PRO
User Manual
 LG MVK71187HU
User Manual
LG MVK71187HU
User Manual