Jet JT1-112 - Manuals
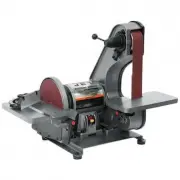
User Manual Jet JT1-112


Summary
2 1.0 Warranty and Service JET warrants every product it sells against manufacturers’ defects. If one of our tools needs service or repair, please contact Technical Service by calling 1-800-274-6846, 8AM to 5PM CST, Monday through Friday. Warranty Period The general warranty lasts for the time perio...
3 2.0 Table of Contents Section Page 1.0 Warranty and Service ................................................................................................................................... 2 2.0 Table of Contents .....................................................................................
4 3.0 Safety Warnings General Cautions - Misuse of this machine can cause serious injury. - For safety, the machine must be set up, used and serviced properly. - Read, understand and follow the instructions in the operator’s and parts manual which was shipped with your machine. When setting up the m...
Jet Grinding Machines Manuals
-
 Jet 414551
User Manual
Jet 414551
User Manual
-
 Jet 414600
User Manual
Jet 414600
User Manual
-
 Jet 414610
User Manual
Jet 414610
User Manual
-
 Jet 577003
User Manual
Jet 577003
User Manual
-
 Jet 577004
User Manual
Jet 577004
User Manual
-
 Jet 577101
User Manual
Jet 577101
User Manual
-
 Jet 577102
User Manual
Jet 577102
User Manual
-
 Jet 577103
User Manual
Jet 577103
User Manual
-
 Jet 577126
User Manual
Jet 577126
User Manual
-
 Jet 577128
User Manual
Jet 577128
User Manual
-
 Jet 577248
User Manual
Jet 577248
User Manual
-
 Jet 577400
User Manual
Jet 577400
User Manual
-
 Jet 577405
User Manual
Jet 577405
User Manual
-
 Jet 577408
User Manual
Jet 577408
User Manual
-
 Jet 577436
User Manual
Jet 577436
User Manual
-
 Jet 577634
User Manual
Jet 577634
User Manual
-
 Jet 578008
User Manual
Jet 578008
User Manual
-
 Jet 578010
User Manual
Jet 578010
User Manual
-
 Jet 578218
User Manual
Jet 578218
User Manual
-
 Jet 578248
User Manual
Jet 578248
User Manual