Honeywell RTH2300B - Manuals
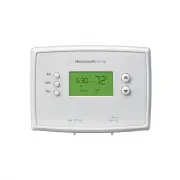
User Manual Honeywell RTH2300B


Summary
2 NOTICE: To avoid possible compressor damage, do not run air conditioner if the outside temperature drops below 50°F (10°C). AT TENTION: MERCURY RECYCLING NOTICE This product does not contain mercury. However, this product may replace a product that contains mercury. Mercury and products containing...
3 Installation Installation ....................................................... 3Advanced Installation ................................ 8 About your new thermostat Controls and Home screen quick reference ........................................... 10Preset energy-saving schedules ....... 11 Pro...
4 Do not remove wallplate yet 3 Label Wires with Tags Label the wires using the supplied wire labels as you disconnect them. Wire Labels M32731 TO REMOVE WALLPLATE PULL HERE Wallplate C C MCR33823 Terminal designation If you have an older thermostat with a sealed mercury tube, turn to page 2 for pro...
Honeywell Thermostats Manuals
-
 Honeywell CT31A
User Manual
Honeywell CT31A
User Manual
-
Honeywell CT31A
Installation Manual
-
 Honeywell CT31A1003/E1
Manual
Honeywell CT31A1003/E1
Manual
-
 Honeywell CT33A
User Manual
Honeywell CT33A
User Manual
-
 Honeywell CT410B
User Manual
Honeywell CT410B
User Manual
-
Honeywell CT410B
Installation Manual
-
 Honeywell CT50K1002
User Manual
Honeywell CT50K1002
User Manual
-
 Honeywell CT50K1028
User Manual
Honeywell CT50K1028
User Manual
-
 Honeywell CT53K
User Manual
Honeywell CT53K
User Manual
-
 Honeywell CT87K
User Manual
Honeywell CT87K
User Manual
-
Honeywell CT87K
Manual
-
 Honeywell CT87K1004/E1
User Manual
Honeywell CT87K1004/E1
User Manual
-
 Honeywell CT87N
User Manual
Honeywell CT87N
User Manual
-
Honeywell CT87N
Installation Manual
-
Honeywell CT87N
Manual
-
 Honeywell RCHTSENSOR-2PK/E
Installation Manual
Honeywell RCHTSENSOR-2PK/E
Installation Manual
-
 Honeywell RLV4305A
User Manual
Honeywell RLV4305A
User Manual
-
 Honeywell RTH111B
User Manual
Honeywell RTH111B
User Manual
-
Honeywell RTH111B
Installation Manual
-
Honeywell RTH111B
Manual