Honeywell RTH111B - Manuals
Honeywell RTH111B Thermostat – User Manual, Installation Manual, Manual in PDF format online.
Manuals:
User Manual Honeywell RTH111B


Summary
About your new thermostat Thermostat features ................................... 1Quick reference to controls ....................... 3Quick reference to display ........................ 4 Operation Select system setting ................................ 5Select fan setting ............................
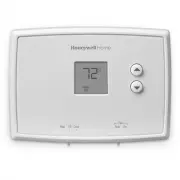
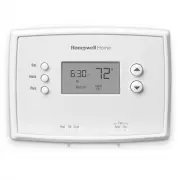
RTH111 1 69-2731ES—02 About your new thermostat About your new thermostat Your new Honeywell thermostat has been designed to give you many years of reliable service and easy-to-use, push-button climate control. Features • Displays ambient (measured) temperature at all times• One-touch access to setp...
Operating Manual 69-2731ES—02 2 About your new thermostat This thermostat is ready to go! Simply perform the three steps below and the thermostat is in operation: 1. Select system setting: Preset to Off ................................ To change, see page 5 2. Select fan setting: Preset to Auto .......
Installation Manual Honeywell RTH111B


Summary
69-2732ES—02 ii Identify System Type This thermostat is compatible with the following systems: Gas, oil or electric furnace Central air conditioner Hot water system with or without pump Millivolt system Central heating and cooling system Heat pump without auxiliary/backup heat Do you need assistance...
1 69-2732ES—02 1 Turn Off Power to Heating/ Cooling System OFF or 69-2732ES_A.indd 1 4/19/2012 8:33:40 AM
69-2732ES—02 2 50 60 70 80 F OFF AUTO EM. HEAT EM. HEAT AUX. HEAT CHECK FILTER MONTHLY 50 60 70 80 M33762 Is there a sealed tube containing mercury? If so, see back cover for proper disposal instructions. Old thermostat Cover Remove old thermostat but leave wallplate with wires attached. Remove Old ...
Manual Honeywell RTH111B


Summary
HONEYWELL RTH111B INSTALLATION MANUAL PDF Ebook Library online library related with Honeywell Rth111b H/c Digital Manual Thermostat.... honeywell-rth111b-h-c-digital-manual-thermostat.pdf filetype: PDF Download - Read Online... HONEYWELL RTH111B VERTICAL DIGITAL NON-PROGRAMMABLE THERMOSTATMANUAL Rea...
HONEYWELL RTH111B INSTALLATION MANUAL PDF Ebook Library HONEYWELL TH811OU1003 INSTALLATION MANUAL Read Online and Download PDF Ebook Honeywell Th811ou1003 Installation Manual. DownloadHoneywell Th811ou1003 Installation Manual PDF file for free, Get many PDF Ebooks from our onlinelibrary related with...
HONEYWELL RTH111B INSTALLATION MANUAL PDF Ebook Library HONEYWELL LYNX PLUS INSTALLATION MANUAL Read Online and Download PDF Ebook Honeywell Lynx Plus Installation Manual. DownloadHoneywell Lynx Plus Installation Manual PDF file for free, Get many PDF Ebooks from our onlinelibrary related with Honey...
Honeywell Thermostats Manuals
-
 Honeywell CT31A
User Manual
Honeywell CT31A
User Manual
-
Honeywell CT31A
Installation Manual
-
 Honeywell CT31A1003/E1
Manual
Honeywell CT31A1003/E1
Manual
-
 Honeywell CT33A
User Manual
Honeywell CT33A
User Manual
-
 Honeywell CT410B
User Manual
Honeywell CT410B
User Manual
-
Honeywell CT410B
Installation Manual
-
 Honeywell CT50K1002
User Manual
Honeywell CT50K1002
User Manual
-
 Honeywell CT50K1028
User Manual
Honeywell CT50K1028
User Manual
-
 Honeywell CT53K
User Manual
Honeywell CT53K
User Manual
-
 Honeywell CT87K
User Manual
Honeywell CT87K
User Manual
-
Honeywell CT87K
Manual
-
 Honeywell CT87K1004/E1
User Manual
Honeywell CT87K1004/E1
User Manual
-
 Honeywell CT87N
User Manual
Honeywell CT87N
User Manual
-
Honeywell CT87N
Installation Manual
-
Honeywell CT87N
Manual
-
 Honeywell RCHTSENSOR-2PK/E
Installation Manual
Honeywell RCHTSENSOR-2PK/E
Installation Manual
-
 Honeywell RLV4305A
User Manual
Honeywell RLV4305A
User Manual
-
 Honeywell RTH221B
User Manual
Honeywell RTH221B
User Manual
-
 Honeywell RTH2300B
User Manual
Honeywell RTH2300B
User Manual
-
 Honeywell RTH2410B
User Manual
Honeywell RTH2410B
User Manual