Honeywell CT87N - Manuals
Honeywell CT87N Thermostat – User Manual, Installation Manual, Manual in PDF format online.
Manuals:
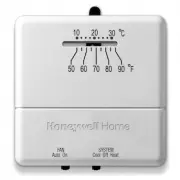
User Manual Honeywell CT87N


Summary
CT87N/CT87K • Owner's Manual 69-1959EFS—04 2 Wrap supplied labels securely around each wire. Do not let wires fall into wall opening! IGNORE WIRE COLORS: Use only letter designations to identify wire types. For CT87N : If your old thermostat has 7 or more wires (not counting terminals C or C1 ), you...
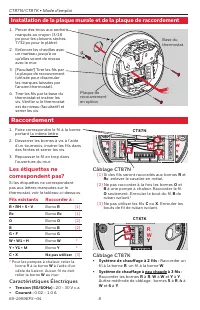
English: Page 1 • Français : Page 6 • Español: Página 11 3 69-1959EFS—04 Wiring CT87N [1] If wires will be connected to both R and Rc terminals, remove the metal jumper. [2] Do not connect both O and B if you have a heat pump. Connect only the O wire. Wrap B wire with electrical tape and do not use....
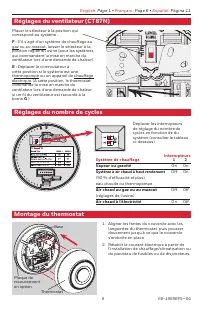
CT87N/CT87K • Owner's Manual 69-1959EFS—04 4 1. Align the slots on the base with tabs on the thermostat, then push gently until the thermostat snaps into place. 2. Restore electrical power at the heating/ cooling system, or at the fuse/circuit- breaker panel. Move the switch to the proper setting fo...
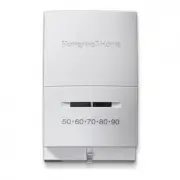
Installation Manual Honeywell CT87N


Summary
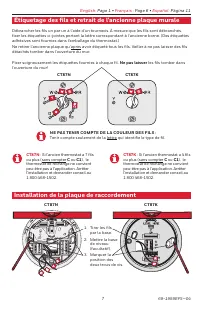
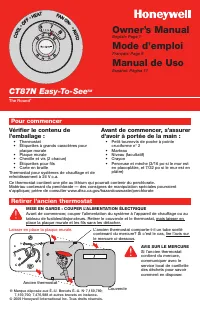
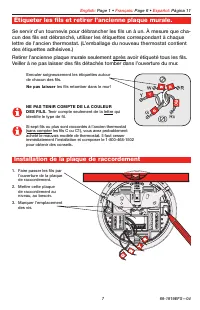
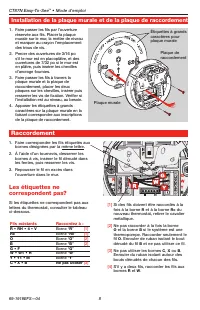
CT87N Easy-To-See TM • Owner's Manual 69-1919EFS—04 2 1. Pull wires through base.2. Level base if desired.3. Mark positions of both screw holes. Label wires and remove old wallplate Use a screwdriver to disconnect wires one by one. As you disconnect each wire, wrap it with the label matching the let...
English: Page 1 • Français: Page 6 • Español: Página 11 3 69-1919EFS—04 1. Match each labeled wire with same letter on terminal. 2. Use a screwdriver to loosen screw terminals, insert bare wire into slots, then tighten screws. 3. Push any excess wire back into the wall opening. Labels don't match? I...
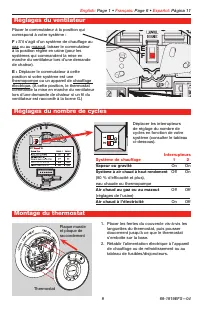
CT87N Easy-To-See TM • Owner's Manual 69-1919EFS—04 4 1. Align the slots on the base with tabs on the thermostat, then push gently until the thermostat snaps into place. 2. Restore electrical power at the heating/cooling system, or at the fuse/circuit-breaker panel. Move the switch to the proper set...
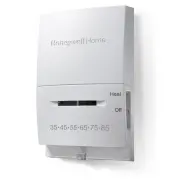
Manual Honeywell CT87N


Summary
CT87N Easy-To-See TM • Owner's Manual 69-1919EFS—04 2 1. Pull wires through base.2. Level base if desired.3. Mark positions of both screw holes. Label wires and remove old wallplate Use a screwdriver to disconnect wires one by one. As you disconnect each wire, wrap it with the label matching the let...
English: Page 1 • Français: Page 6 • Español: Página 11 3 69-1919EFS—04 1. Match each labeled wire with same letter on terminal. 2. Use a screwdriver to loosen screw terminals, insert bare wire into slots, then tighten screws. 3. Push any excess wire back into the wall opening. Labels don't match? I...
CT87N Easy-To-See TM • Owner's Manual 69-1919EFS—04 4 1. Align the slots on the base with tabs on the thermostat, then push gently until the thermostat snaps into place. 2. Restore electrical power at the heating/cooling system, or at the fuse/circuit-breaker panel. Move the switch to the proper set...
Honeywell Thermostats Manuals
-
 Honeywell CT31A
User Manual
Honeywell CT31A
User Manual
-
Honeywell CT31A
Installation Manual
-
 Honeywell CT31A1003/E1
Manual
Honeywell CT31A1003/E1
Manual
-
 Honeywell CT33A
User Manual
Honeywell CT33A
User Manual
-
 Honeywell CT410B
User Manual
Honeywell CT410B
User Manual
-
Honeywell CT410B
Installation Manual
-
 Honeywell CT50K1002
User Manual
Honeywell CT50K1002
User Manual
-
 Honeywell CT50K1028
User Manual
Honeywell CT50K1028
User Manual
-
 Honeywell CT53K
User Manual
Honeywell CT53K
User Manual
-
 Honeywell CT87K
User Manual
Honeywell CT87K
User Manual
-
Honeywell CT87K
Manual
-
 Honeywell CT87K1004/E1
User Manual
Honeywell CT87K1004/E1
User Manual
-
 Honeywell RCHTSENSOR-2PK/E
Installation Manual
Honeywell RCHTSENSOR-2PK/E
Installation Manual
-
 Honeywell RLV4305A
User Manual
Honeywell RLV4305A
User Manual
-
 Honeywell RTH111B
User Manual
Honeywell RTH111B
User Manual
-
Honeywell RTH111B
Installation Manual
-
Honeywell RTH111B
Manual
-
 Honeywell RTH221B
User Manual
Honeywell RTH221B
User Manual
-
 Honeywell RTH2300B
User Manual
Honeywell RTH2300B
User Manual
-
 Honeywell RTH2410B
User Manual
Honeywell RTH2410B
User Manual