Falmec F8DD90B1-IN1300 - Manuals

User Manual Falmec F8DD90B1-IN1300


Summary
CONGRATULATIONS Congratulations and thank you for choosing a Falmec rangehood. To avoid the risks that are always present when you use an electrical appliance it is important that the rangehood is installed correctly and that you read the safety in- structions carefully to avoid misuse and ha- zards...
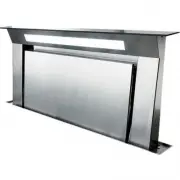
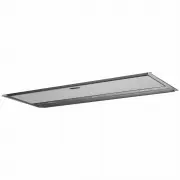
IT ALIANO 3 Down draft 90 - 120 Down draft 90 - 120 349 246 97 92 191 540mm quota minima con curva 90° Falmec 321 361 471 540mm using 90° bend Falmec 781 715 max 400 738 474 241 92 1,5 84 109 IT - Motore remoto. UK - Remote motor. DE - Getrennt montierter Motor. FR - Moteur monté séparément. ES - Mo...
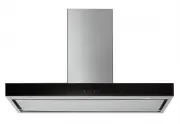
4 IT - Installazione con motore posterioreUK - Installation with back motorDE - Installation mit rückseitigem MotorFR - Installation avec moteur à l'arrièreES - Instalación con motor parte traseraRU - Установка с задним двигателем PL - Instalacja z silnikiem tylnym 396 510 510 737 879 Rear view side...
Falmec Range Hoods Manuals
-
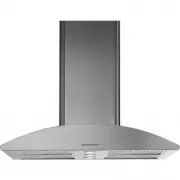
 Falmec Astra 90 ix (600)
User Manual
Falmec Astra 90 ix (600)
User Manual
-
 Falmec Atlas 90 ix (800) ECP
User Manual
Falmec Atlas 90 ix (800) ECP
User Manual
-
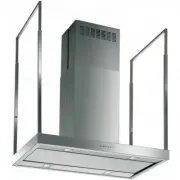
 Falmec Blade isola 90 ix (800)
User Manual
Falmec Blade isola 90 ix (800)
User Manual
-
 Falmec BUILT-IN 50
User Manual
Falmec BUILT-IN 50
User Manual
-
 Falmec BUILT-IN 50 MAX INOX
User Manual
Falmec BUILT-IN 50 MAX INOX
User Manual
-
 Falmec BUILT-IN 70
User Manual
Falmec BUILT-IN 70
User Manual
-
 Falmec BUILT-IN BURANO 70 BK
User Manual
Falmec BUILT-IN BURANO 70 BK
User Manual
-
 Falmec CIRCLE. TECH
User Manual
Falmec CIRCLE. TECH
User Manual
-
 Falmec COVER 85
User Manual
Falmec COVER 85
User Manual
-
 Falmec DAMA IS.60
User Manual
Falmec DAMA IS.60
User Manual
-
 Falmec Design+ Alba 120
User Manual
Falmec Design+ Alba 120
User Manual
-
 Falmec Down Draft 90
User Manual
Falmec Down Draft 90
User Manual
-
 Falmec E.ION GRUPPO INCASSO 50 (450)
User Manual
Falmec E.ION GRUPPO INCASSO 50 (450)
User Manual
-
 Falmec Elite isola 90 ix (800) ECP
User Manual
Falmec Elite isola 90 ix (800) ECP
User Manual
-
 Falmec ELLE ISOLA 175
User Manual
Falmec ELLE ISOLA 175
User Manual
-
 Falmec Europa Isola 120 ix (800) ECP
User Manual
Falmec Europa Isola 120 ix (800) ECP
User Manual
-
 Falmec Exploit Top 90
User Manual
Falmec Exploit Top 90
User Manual
-
 Falmec F3MV12W1
User Manual
Falmec F3MV12W1
User Manual
-
 Falmec F3MV60W1
User Manual
Falmec F3MV60W1
User Manual
-
 Falmec F5RM90B1-IR765
User Manual
Falmec F5RM90B1-IR765
User Manual