Electrolux ERI842DSD - Manuals
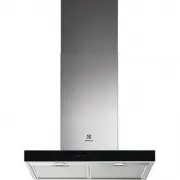
User Manual Electrolux ERI842DSD


Summary
2 electrolux.com.au CONTENTS Important instructions ______________________________ 3 Before using your appliance _____________________ 3 Information on disposal for users ________________ 3 Important safety instructions ____________________ 3 Installation ___________________________________ 5 Descri...
3 BEFORE USING YOUR APPLIANCE Before you use the appliance, we recommend that you read through the relevant sections of this manual, which provides the description of your appliance and its functions.To avoid the risks that are always present when you use an appliance, it is important that the appli...
5 INSTALLATION WARNING This appliance should only be connected by a registered installer. • Always follow the installation instructions in the installation manual provided. • Check the appliance for transport damage. Do not connect a damaged appliance. • Faulty parts may only be replaced by original...
Electrolux Range Hoods Manuals
-
 Electrolux EFC226R
User Manual
Electrolux EFC226R
User Manual
-
 Electrolux EFC226V
User Manual
Electrolux EFC226V
User Manual
-
 Electrolux EFC60151X
User Manual
Electrolux EFC60151X
User Manual
-
 Electrolux EFP9500XA
User Manual
Electrolux EFP9500XA
User Manual
-
 Electrolux EFV516K
User Manual
Electrolux EFV516K
User Manual
-
 Electrolux EFV516W
User Manual
Electrolux EFV516W
User Manual
-
 Electrolux ERC925DSD
User Manual
Electrolux ERC925DSD
User Manual
-
 Electrolux ERC930SA
User Manual
Electrolux ERC930SA
User Manual
-
 Electrolux ERI512SA
User Manual
Electrolux ERI512SA
User Manual
-
 Electrolux LFG525K
User Manual
Electrolux LFG525K
User Manual
-
 Electrolux LFG716X
User Manual
Electrolux LFG716X
User Manual
-
 Electrolux LFP536X
User Manual
Electrolux LFP536X
User Manual
-
 Electrolux LFT416X
User Manual
Electrolux LFT416X
User Manual
-
 Electrolux LFT419X
User Manual
Electrolux LFT419X
User Manual
-
 Electrolux LFT766X
User Manual
Electrolux LFT766X
User Manual
-
 Electrolux LFV616W
User Manual
Electrolux LFV616W
User Manual