DeLonghi ESAM6900M - Manuals
User Manual DeLonghi ESAM6900M


Summary
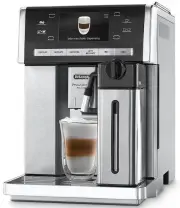
8 IntRoDUCtIon Thank you for choosing the ESAM6900 automatic coffee, cappuccino and hot chocolate machine. We hope you enjoy using your new appliance. Take a few minutes to read these instructions. This will avoid all risks and damage to the appliance. symbols used in these instructions Important wa...
10 PReLIMInARY CHeCKs Checking the appliance After removing the packaging, make sure the product is complete and undamaged and that all accessories are present. Do not use the appliance if it is visibly damaged. Contact De’Longhi Customer Services. Installing the appliance Important! When you instal...
11 When heating is complete, the message changes to “Rinsing”. The appliance is ready for use when an espresso coffee cup appears on the display. tURnInG tHe APPLIAnCe oFF Whenever the coffee machine is turned off after being used to make coffee, it performs an automatic rinse cycle. Danger of burns...
DeLonghi Coffee Machines Manuals
-
 DeLonghi CAM51025MB
User Manual
DeLonghi CAM51025MB
User Manual
-
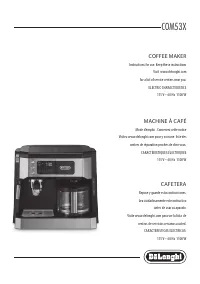 DeLonghi COM530M
User Manual
DeLonghi COM530M
User Manual
-
 DeLonghi EABI6600
User Manual
DeLonghi EABI6600
User Manual
-
DeLonghi EABI6600
Manual
-
 DeLonghi EC230
User Manual
DeLonghi EC230
User Manual
-
 DeLonghi EC260BK
User Manual
DeLonghi EC260BK
User Manual
-
 DeLonghi EC680BK
User Manual
DeLonghi EC680BK
User Manual
-
 DeLonghi EC680R
User Manual
DeLonghi EC680R
User Manual
-
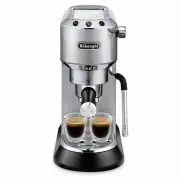
 DeLonghi EC685BK
User Manual
DeLonghi EC685BK
User Manual
-
 DeLonghi EC685M
User Manual
DeLonghi EC685M
User Manual
-
 DeLonghi EC685R
User Manual
DeLonghi EC685R
User Manual
-
 DeLonghi EC685W
User Manual
DeLonghi EC685W
User Manual
-
 DeLonghi EC785AZ
User Manual
DeLonghi EC785AZ
User Manual
-
 DeLonghi EC860M
User Manual
DeLonghi EC860M
User Manual
-
 DeLonghi EC885M
User Manual
DeLonghi EC885M
User Manual
-
 DeLonghi EC885MPK
User Manual
DeLonghi EC885MPK
User Manual
-
 DeLonghi EC9155GR
User Manual
DeLonghi EC9155GR
User Manual
-
 DeLonghi EC9155GRPKK
User Manual
DeLonghi EC9155GRPKK
User Manual
-
 DeLonghi EC9155MB
User Manual
DeLonghi EC9155MB
User Manual
-
 DeLonghi EC9155MBPK
User Manual
DeLonghi EC9155MBPK
User Manual