DeLonghi EC785AZ - User Manual
DeLonghi EC785AZ Coffee Machine – User Manual, read for free online in PDF format. We hope this helps you resolve any issues you may have. If you have further questions, please contact us through the contact form.


Table of Contents:
- Page 2 – without adding coffee
- Page 5 – Cleaning the drip tray; and 2 cup filters; Cleaning the coffee outlet
- Page 6 – EXPLANATION OF LIGHTS; Lights
15
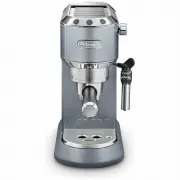
1. DESCRIPTION
(page 3)
The terminology below will be used repeatedly on the following
pages.
1.1 Description of the appliance
A1. Water tank lid
A2. Tank extraction handle
A3. Water tank
A4. Cup warmer
A5. Coffee outlet
A6. ON/OFF switch
A7. Cup tray
A8. Drip tray full indicator
A9. Drip tray
A10. Mugs or glasses tray
A11. Steam dial
A12. Hot water/steam spout
A13. Hot water/steam connection nozzle
A14. Cappuccino maker selection ring
A15. Hot water/steam connection tube
1.2 Description control panel
B1. One cup button
B2. ON light on button (white)
B3. Two cups button
B4. ON light on button (white)
B5. Steam button
B6. ON light on button (white)
B7. Descale light (orange)
1.3 Description of the accessories
C1. Filter holder
C2. 1 cup filter (
symbol under filter)
C3. 2 cup filter (
symbol under filter)
C4. Pod filter (
symbol under filter)
C5. Tamper
C6. Water softener filter (*not included, can be purchased
from authorised Customer Services)
C7. Milk jug
2. FILLING THE WATER TANK
Please note:
Before first use,
wash all the accessories and water tank with
warm water.
1. Extract the tank by pulling it upwards (fig. 1).
2. Open the lid and fill the tank with fresh clean water, taking
care not to exceed the MAX level (fig. 2). Put the tank back
in the appliance, pressing lightly to open the valves located
on the bottom of the tank.
3. More simply, the tank can also be filled without removing
it, pouring the water directly from a jug.
Important:
Never operate the appliance without water in the tank or with-
out the tank.
Please note:
It is normal for there to be water in the space under the tank.
This should therefore be dried regularly with a clean sponge.
3. FIRST USE
At first use, rince the internal circuit as follows:
1. Turn the appliance on by pressing the ON/OFF switch (fig.
3). The appliance performs a self-diagnosis cycle, indicated
by sequential flashing of the three buttons.
2. The and
lights flash to indicate the appliance
is heating up. When the lights stop flashing and remain on
steadily, the appliance is ready for operating the rinse.
3. Attach the filter holder to the appliance (fig. 9).
4. Place a container with a minimum capacity of 500 ml
under the coffee outlet (A5) (fig. 4) and press the
button. Repeat this operation 5 times.
5. Empty the container and put it under the hot water/steam
spout (A12) (fig. 4).
6. Turn the hot water/steam dial to the
position (fig.
5) and deliver to empty the water tank (A3); then turn the
knob to the
O
position.
4. PROGRAMMING THE SETTINGS MENU
To access the menu, make sure the appliance is ready for use,
then press and hold the
button for 10 seconds until the
three buttons flash in sequence:
The appliance is now in programming mode.
Set the coffee maker as you wish, then exit the settings menu by
waiting for 15 seconds.
Please note:
If no selections are made for 15 seconds, the appliance automat-
ically exits programming and is ready for use again.
4.1 Setting coffee temperature
To modify the temperature of the water used to make the coffee,
proceed as follows:
1. Access the settings menu;
2. Press the
button to enter the coffee temperature
selection mode. The lights corresponding to the current
selection come on:
"Loading the manual" means you need to wait until the file loads and becomes available for online reading. Some manuals are very large, and the time they take to appear depends on your internet speed.
Summary
16 low medium high 3. The lights start flashing in sequence;4. Press the button corresponding to the required temperature: low medium high 5. The button flashes to indicate that the selection has been saved. The appliance exits the menu and is ready for use. 4.2 Setting water hardness The light (B7)...
19 - drip tray (A9) - the coffee filters (C2, C3 and C4);- the coffee outlet (A5);- water tank (A3);- the cappuccino maker (A15) as described in section "”8. Cleaning the cappuccino maker after use”; Important! • Do not use solvents, abrasive detergents or alcohol to clean the coffee machine. • ...
20 13. EXPLANATION OF LIGHTS Lights Operation Explanation of lights The ON/OFF button is turned on The appliance performs a self-diagnosis cycle, indicated by sequential flashing of the lights When the appliance is turned on Flashing lights: the appliance is heating up to make coffeeLights on steadi...