Page 2 - CAFETERA ELECTRICA MODELO ESAM4400/ MACCHINA DA CAFFÈ ESAM4400; Visita
IMPORTANT INSTRUCTIONS SAVE THESE INSTRUCTIONS MODE D’EMPLOI IMPORTANT CONSERVEZ LES PRESENTES INSTRUCTIONS INSTRUCIONES IMPORTANTES REPASE Y GUARDE ESTAS INSTRUCCIONES LEA CUIDADOSAMENTE ESTE INSTRUCTIVO ANTES DE USAR SU APARATO ISTRUZIONI IMPORTANTI CONSERVARE LE ISTRUZIONI COFFEE MAKER TYPE ESAM4...
Page 7 - INDEX
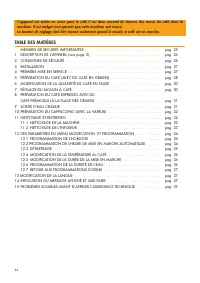
INDEX IMPORTANT SAFEGUARDS . . . . . . . . . . . . . . . . . . . . . . . . . . . . . . . . . . . . . . . . . . page. 7 1 DESCRIPTION (see page 3) . . . . . . . . . . . . . . . . . . . . . . . . . . . . . . . . . . . . . . . . . page. 8 2 SAFETY WARNINGS . . . . . . . . . . . . . . . . . . . . . . . ...
Page 8 - in water or other liquid.; SAVE THESE INSTRUCTIONS; THIS PRODUCT IS FOR HOUSEHOLD USE ONLY
7 SHORT CORD INSTRUCTIONS - A short power cord is provided to reduce risks resulting from becoming entangled in or tripping overa longer cord. - Longer, detachable power supply cords or extension cords are available and may be used if care isexercised in their use. - If an extension cord is used, th...
Page 9 - SAFETY WARNINGS
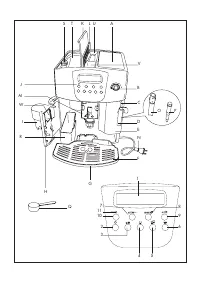
8 1 DESCRIPTION (SEE PAGE 3) A. Cup warmer tray B. Steam knob C. Steam spout D. Cappuccino frother E. Water tank (removable) F. Cup tray G. Drip tray (removable) H. Service door I. Coffee spout (adjustable in height) J. Control panel K. Bean container lid L. Central lid for ground coffee M. Infuser ...
Page 10 - PRESS OK TO select ENGLISH; push as far as it will go.; TURN the STEAM KNOB
9 3 INSTALLATION • After removing the packaging, make sure the product is complete and undamaged. If in doubt, do not use the appliance and contact a qualified professional. • Packing elements (plastic bags, polystyrene etc) must not be left within reach of children as they may represent a hazard. •...
Page 11 - READY strong TASTE; lar taste. To choose the required taste, press the
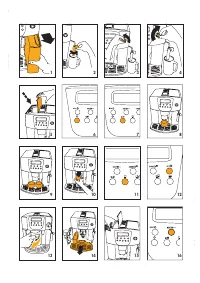
10 Move the cappuccino frother outwards (fig. 2) and place a cup underneath it.Turn the steam knob counterclockwise as far as it will go (fig. 3).After a few seconds, a little water runs out of the cappuccino frother. When the cup contains about 1 ozof water, turn the steam knob clockwise (fig. 4) a...
Page 12 - FILL TANK; IMPORTANT: When removing the drip tray, the grounds container
11 NOTE 1: If the coffee is delivered a drop at a time or not at all, turn the grinding coarseness regulator (fig. 15) one click clockwise (see section 7). Turn one click at a time until the coffee is delivered adequately. The grinding coarseness regulator must only be turned when the coffee mill is...
Page 13 - While the appliance is delivering coffee,; never remove the water tank.; If it is removed, the; If the appliance malfunctions,; do not contact the service center right away.; CHANGING THE QUANTITY OF COFFEE IN THE CUP
12 NOTE 8: While the appliance is delivering coffee, never remove the water tank. If it is removed, the appliance will not be able to make the coffee.To reset the appliance, turn the steam knob counterclockwise as far as it will go and run off water from thecappuccino frother for a few seconds. When...
Page 14 - PREPARING ESPRESSO/COFFEE USING GROUND COFFEE (INSTEAD OF BEANS); • Press the; PRODUCING HOT WATER; READY HOT WATER; • To deactivate the hot water function, press the
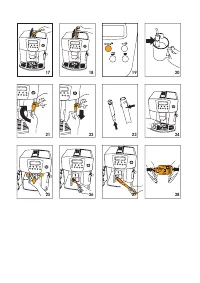
13 8 PREPARING ESPRESSO/COFFEE USING GROUND COFFEE (INSTEAD OF BEANS) • Press the button (fig. 16) to select the ground coffee function. This disables the coffee mill function. The appliance displays READY PRE-GROUND • Lift the central lid, place one level measure of ground coffee in the funnel (see...
Page 15 - STEAM; 1 CLEANING AND MAINTENANCE
14 10 PREPARING CAPPUCCINOS (USING STEAM) • Move the cappuccino frother outwards (fig. 2).• Place an empty container under the cappuccino frother. Turn the steam knob a half turn counterclockwi- se as far as it will go (fig. 3). The appliance displays: STEAM Allow the steam mixed with water to run o...
Page 17 - CORRECTLY; 2 CHANGING AND SETTING THE MENU PARAMETERS; Setting the clock
16 Check that the two red buttons have snapped out, otherwise the door cannot be closed. CORRECT INCORRECT The two red buttons have snapped out CORRECTLY The two red buttons have notsnapped out NOTE 1: If the infuser is not inserted correctly until it clicks into place and the two red buttons have n...
Page 19 - NOTE; OFF AFTER 1 HOUR; Setting water hardness; WATER HARDNESS 4
18 Hot water will run off from the cappuccino frother into the container below and the appliance displays: RINSING • When the water tank is empty, the appliance displays the message: RINSING COMPLETED TURN KNOB • Turn the steam knob clockwise as far as it will go (fig. 4) and refill the water tank w...
Page 20 - 4 TROUBLESHOOTING; Resetting factor y default settings; RESET TO DEFAULT YES; 3 CHANGING THE LANGUAGE
19 MESSAGE MEANING WHAT TO DO FILL TANK • The water tank is empty or is positionedincorrectly. • The tank is dirty or encrusted with limescale. • Fill the water tank as described in sec-tion 5, note 6 and insert it fully. • Rinse or descale the tank. GROUND TOO FINE ADJUST grinder AND • The applianc...
Page 21 - MESSAGE
20 ADD PRE-GROUND COFFEE • With the ground coffee function selec-ted, ground coffee has not been pouredinto the funnel. • Add the ground coffee as described insection 8. FILL BEANs CONTAINER • The coffee beans have run out. • If the coffee grinder is very noisy, thismeans a small stone in the coffee...
Page 22 - The coffee is not hot
21 15 PROBLEMS THAT CAN BE RESOLVED BEFORE CALLING THE SERVICE CENTER If the appliance is not working, the causes of the malfunction can be identified and resolved by referring tosection 14. If, on the other hand, no message is displayed, run the following checks before calling the servi-ce center. ...
Page 24 - LIMITED WARRANTY; What does the warranty cover?; If repairs become necessary, see contact information below:; How does state law apply?
23 This warranty applies to all products with De’Longhi or Kenwood brand names. LIMITED WARRANTY What does the warranty cover? We warrant each appliance to be free from defects in material and workmanship. Our obligation underthis warranty is limited to repair at our factory or authorized service ce...
Page 25 - TABLE DES MATIÈRES; PRÉPARATION DU CAFÉ EXPRESSO AVEC DU
TABLE DES MATIÈRES MESURES DE SECURITÉ IMPORTANTES . . . . . . . . . . . . . . . . . . . . . . . . . . . . . . . . . pag. 25 1 DESCRIPTION DE L’APPAREIL (voir page 3) . . . . . . . . . . . . . . . . . . . . . . . . . . . . . . . pag. 26 2 CONSIGNES DE SÉCURITÉ . . . . . . . . . . . . . . . . . . . ....
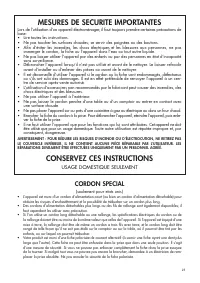
Page 26 - CORDON SPECIAL; faut cependant les utiliser avec précaution.; MESURES DE SECURITE IMPORTANTES; Lire toutes les instructions.; CONSERVEZ CES INSTRUCTIONS; USAGE DOMESTIQUE SEULEMENT
25 CORDON SPECIAL (soulement pour etats unis) • L’appareil est muni d’un cordon d’alimentation court (ou bien un cordon d’alimentation détachable) pour réduire les risques d’enchevêtrement et la possibilité de trébucher sur un cordon plus long. • Des cordons d’alimentation détachables plus longs ou ...
Page 27 - CONSIGNES DE SÉCURITÉ
26 DESCRIPTION DE L’APPAREIL (VOIR PAGE 3) A. Appui chauffe-tasses B. Manette vapeur C. Tube vapeur D. Buse à cappuccino E. Réservoir d’eau (amovible) F. Plateau appui tasses G . Égouttoir (amovible) H. Volet de service I. Sortie café (réglable en hauteur) J. Commandes K. Couvercle du réservoir de g...
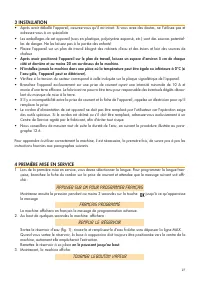
Page 28 - INSTALLATION; les de danger. Ne les laissez pas à la portée des enfants!; côté et derrière et au moins 20 cm au-dessus de la machine.; PREMIÈRE MISE EN SERVICE; APPUYER SUR OK POUR PROGRAMMER FRANÇAIS; Au bout de quelques secondes la machine affichera :; REMPLIR LE RÉSERVOIR; en le poussant jusqu’au bout; TOURNER LE BOUTON VAPEUR
27 3 INSTALLATION • Après avoir déballé l'appareil, assurez-vous qu'il est intact. Si vous avez des doutes, ne l’utilisez pas et adressez-vous à un spécialiste. • Les emballages de cet appareil (sacs en plastique, polystyrène expansé, etc.) sont des sources potentiel- les de danger. Ne les laissez p...
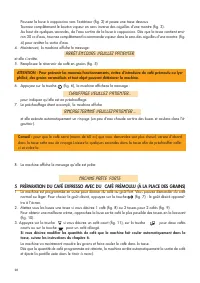
Page 30 - vous pouvez interrompre la sortie; quand l’écran affiche le message :; REMPLIR LE RÉSERVOIR; quand vous sortez l’égouttoir,
29 4. Au bout de quelques secondes, la machine affichera à nouveau le message indiquant qu’elle est prête et vous pourrez faire un autre café. 5. Pour arrêter la machine, appuyez sur la touche . Avant de s’arrêter, la machine exécute automatiquement un rinçage : un peu d’eau chaude sortira des buses...
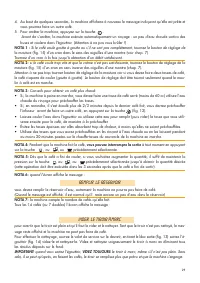
Page 31 - NOTA 8: Vous ne devez jamais extraire le réser voir d’eau; pendant que le café coule car la machine ne; Quand une anomalie se présente,; ne courez pas appeler le service assistance.; MODIFICATION DE LA QUANTITÉ DE CAFÉ EN TASSE; cafè court, si vous appuyez sur la touche ; RÉGLAGE DU MOULIN À CAFÉ
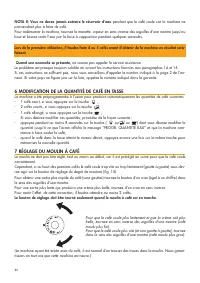
NOTA 8: Vous ne devez jamais extraire le réser voir d’eau pendant que le café coule car la machine ne parviendrait plus à faire de café. Pour redémarrer la machine, tournez la manette vapeur en sens inverse des aiguilles d’une montre jusqu’aubout et laissez sortir l’eau par la buse à cappuccino pend...
Page 32 - PRÉPARATION DU CAFÉ EXPRESSO AVEC DU CAFÉ PRÉMOULU (À LA PLACE DES; fonctionnement du moulin à café). La machine affiche le message; machine PRÊTE PRÉMOULU; SORTIE D’EAU CHAUDE; machine PRÊTE EAU CHAUDE
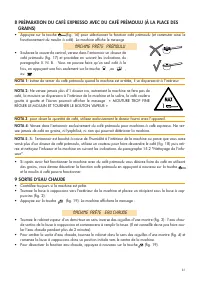
31 8 PRÉPARATION DU CAFÉ EXPRESSO AVEC DU CAFÉ PRÉMOULU (À LA PLACE DES GRAINS) • Appuyez sur la touche (fig. 16) pour sélectionner la fonction café prémoulu (et commuter ainsi le fonctionnement du moulin à café). La machine affiche le message machine PRÊTE PRÉMOULU • Soulevez le couvercle central, ...
Page 33 - 0 PRÉPARATION DU CAPPUCCINO (AVEC LA VAPEUR); VAPEUR; 1 NETTOYAGE ET ENTRETIEN
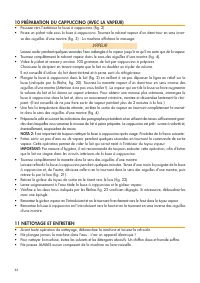
10 PRÉPARATION DU CAPPUCCINO (AVEC LA VAPEUR) • Poussez vers l’extérieur la buse à cappuccino (fig. 2)• Posez un pichet vide sous la buse à cappuccino. Tournez le robinet vapeur d’un demi-tour en sens inver- se des aiguilles d’une montre (fig. 3) : La machine affichera le message: VAPEUR Laissez cou...
Page 35 - CORRECTEMENT; 2 MODIFICATION ET PROGRAMMATION DES PARAMÈTRES DU MENU; Programmation de l’horloge
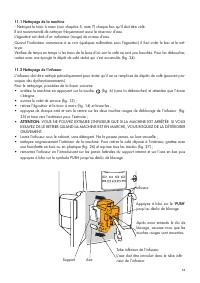
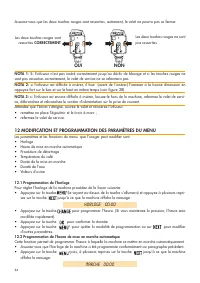
34 Assurez-vous que les deux touches rouges sont ressorties, autrement, le volet ne pourra pas se fermer. OUI NON Les deux touches rouges sont ressorties CORRECTEMENT Les deux touches rouges ne sontpas ressorties NOTA 1: Si l'infuseur n’est pas inséré correctement jusqu’au déclic de blocage et si le...
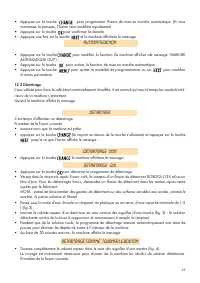
Page 36 - jusqu’à ce que l’écran affiche le message :; DÉTARTRAGE NON; • Appuyez sur la touche; DÉTARTRAGE OUI; • Au bout de 30 minutes environ, la machine affiche le message :; DÉTARTRAGE TERMINÉ TOURNER LE BOUTON
35 • Appuyez sur la touche pour programmer l’heure de mise en marche automatique. (Si vous maintenez la pression, l’heure sera modifiée rapidement). • Appuyez sur la touche pour confirmer la donnée.• Appuyez une fois sur la touche et la machine affichera le message : AUTOMATIQUE NON • Appuyez sur la...
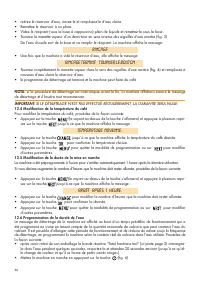
Page 37 - nouveau d’eau claire le réservoir d’eau.; NOTA; de détartrage et il faudra tout recommencer.; Modification de la température du café; Modification de la durée de la mise en marche; ses sur la touche jusqu’à ce que la machine affiche le message :; ARRÊT APRÈS 1 HEURE.; Programmation de la dureté de l’eau
36 • retirez le réservoir d’eau, rincez-le et remplissez-le d’eau claire.• Remettez le réservoir à sa place.• Videz le récipient (sous la buse à cappuccino) plein de liquide et remettez-le sous la buse.• Tournez la manette vapeur d’un demi-tour en sens inverse des aiguilles d’une montre (fig. 3) De ...
Page 38 - ne affiche le message :; Retour aux programmations d’usine; 3 MODIFICATION DE LA LANGUE; message de programmation advenue en français.; 4 SIGNIFICATION DU MESSAGE AFFICHÉ ET QUE FAIRE
37 • Appuyez sur la touche puis, à plusieurs reprises sur la touche jusqu’à ce que la machi- ne affiche le message : DURETÉ EAU 4 • Appuyez sur le nombre de fois correspondant au nombre de carrés rouges qui se sont formés sur la bande réactive (exemple : si 3 carrés rouges se sont formés sur la band...
Page 39 - APPUYER NEXT + CHANGE
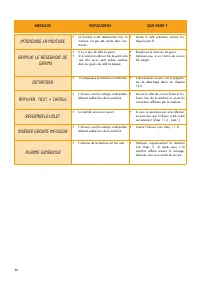
38 INTRODUIRE LA MOUTURE • La fonction a été sélectionnée mais lamouture n’a pas été versée dans l’en-tonnoir. • Versez le café prémoulu comme l’in-dique le par. 8. REMPLIR LE RÉSERVOIR DE GRAINS • Il n’y a plus de café en grains. • Si le moulin à café est très bruyant celaveut dire qu’un petit cail...
Page 40 - 5 PROBLÈMES SOLUBLES AVANT D’APPELER L’ASSISTANCE TECHNIQUE; PROBLÈM; Le café n’est pas chaud
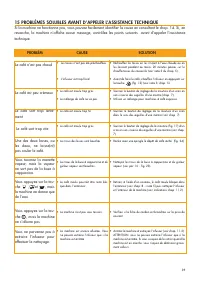
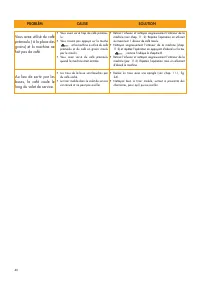
39 15 PROBLÈMES SOLUBLES AVANT D’APPELER L’ASSISTANCE TECHNIQUE Si la machine ne fonctionne pas, vous pouvez facilement identifier la cause en consultant le chap. 14. Si, enrevanche, la machine n’affiche aucun message, contrôlez les points suivants avant d’appeler l’assistancetechnique. PROBLÈM CAUS...
Page 42 - Garantie limitée
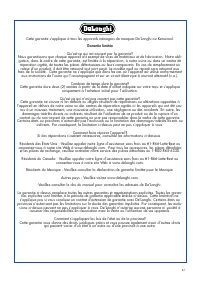
41 Cette garantie s’applique à tous les appareils ménagers de marques De’Longhi ou Kenwood. Garantie limitée Qu’est-ce qui est couvert par la garantie? Nous garantissons que chaque appareil est exempt de vices de matériaux et de fabrication. Notre obli- gation, dans le cadre de cette garantie, est l...
Page 43 - ÍNDICE; PREPARACIÓN DEL CAFÉ EXPRÉS CON EL CAFÉ PREMOLIDO
ÍNDICE ADVERTENCIAS DE SEGURIDAD . . . . . . . . . . . . . . . . . . . . . . . . . . . . . . . . . . . . . . pag. 43 1 DESCRIPCIÓN DEL APARATO (véase la pág. 3) . . . . . . . . . . . . . . . . . . . . . . . . . . . . pag. 44 2 ADVERTENCIAS DE SEGURIDAD . . . . . . . . . . . . . . . . . . . . . . . ....
Page 44 - INSTRUCCIONES PARA EL CABLE CORTO; A D V E R T E N C I A S D E S E G U R I D A D; ra se enfríe antes de agregar o quitar partes, y antes de limpiarla.; CONSERVE ESTAS INSTRUCCIONES; ESTO APARATO ESTÁ FABRICADO SÓLO PARA USO DOMESTICO
43 INSTRUCCIONES PARA EL CABLE CORTO (sólo para Estados Unidos) - Se suministra un cable de alimentación corto para reducir los riesgos consecuentes de un engancheo tropezadura con un cable largo. - Se encuentran disponibles cables de alimentación separables más largos o cables de prolongación,los c...
Page 45 - ADVERTENCIAS DE SEGURIDAD
44 1 DESCRIPCIÓN DEL APARATO (VÉASE LA PÁG. 3) A. Superficie calientatazas B. Mando de vapor C. Tubo de vapor D. Emulsionador E. Depósito de agua (extraíble) F. Bandeja apoyatazas G. Bandeja recogegotas (extraíble) H. Portezuela de servicio I. Dispositivo de erogación de café (regulable enaltura) J....
Page 46 - INSTALACIÓN; ce el aparato y póngase en contacto con personal cualificado.; PRIMERA PUESTA EN MARCHA; PULSAR OK PARA INSTALAR ESPAÑOL; empujándolo hasta el tope.; GIRAR VAPOR
45 3 INSTALACIÓN • Tras haber desembalado la cafetera, asegúrese de la integridad del aparato. Si tuviera dudas, no utili- ce el aparato y póngase en contacto con personal cualificado. • Los elementos que componen el embalaje (bolsas de plástico, espuma de poliestireno, etc.) no deben dejarse al alc...
Page 47 - PREPARACIÓN DEL CAFÉ (UTILIZANDO LOS GRANOS DE CAFÉ)
46 Desplace el emulsionador hacia afuera (fig.2) y coloque una taza debajo.Gire el mando de vapor en el sentido contrario de las agujas del reloj hasta el tope (fig.3).Transcurridos algunos segundos, saldrá agua por el emulsionador. Cuando la taza se haya llenado conalrededor 30cc de agua, gire el m...
Page 48 - cuanto se enciende la cafetera; LLENAR DEPÓSITO; IMPORTANTE: cuando se extrae la bandeja recogegotas es
47 NOTA 1: si el café gotea o no sale , gire el regulador de molienda (fig. 15) una posición en el sentido de las agujas del reloj (véase el cap. 7).Proceda moviéndolo de una posición a la vez hasta obtener una erogación satisfactoria. NOTA 2: si el café sale muy rápidamente y la crema no le satisfa...
Page 49 - mientras la cafetera está haciendo café,; no quite nunca el depósito de agua; no contacte de inmediato al servicio de asistencia técnica.; MODIFICAR LA CANTIDAD DE CAFÉ EN LA TAZA; cafè corto, si se presiona el botón; REGULACIÓN DEL MOLINILLO DE CAFÉ
48 NOTA 8: mientras la cafetera está haciendo café, no quite nunca el depósito de agua . Efectivamente, si se extrajera, la cafetera después no podría hacer el café.Para volver a poner en marcha la cafetera, use el mando de vapor girándolo en el sentido contrario de lasagujas del reloj hasta el tope...
Page 50 - namiento del molinillo de café). En la cafetera aparece el mensaje; LISTA PARA EL USO PREMOLIDO; • Levante la tapa del centro, eche en el embudo un medidor de café; EROGACIÓN DE AGUA CALIENTE; LISTA PARA EL USO AGUA CALIENTE
49 8 PREPARACIÓN DEL CAFÉ EXPRESO CON EL CAFÉ PREMOLIDO (EN LUGAR DE LOSGRANOS) • Presione el botón (fig. 16) para seleccionar la función café premolido (así se inhabilita el funcio- namiento del molinillo de café). En la cafetera aparece el mensaje LISTA PARA EL USO PREMOLIDO • Levante la tapa del ...
Page 51 - 0 PREPARACIÓN DEL CAPUCHINO (UTILIZANDO VAPOR); vapor; se deposite en los circuitos internos del emulsionador.
50 10 PREPARACIÓN DEL CAPUCHINO (UTILIZANDO VAPOR) • Desplace hacia afuera el emulsionador (fig. 2).• Sitúe un recipiente vacío bajo el emulsionador. Gire el mando de vapor media vuelta en el sentido con- trario de las agujas del reloj hasta el tope (fig. 3). La cafetera muestra el mensaje: vapor De...
Page 52 - PUSH; 1 LIMPIEZA Y MANTENIMIENTO; LIMPIEZA DE LA CAFETERA
51 Soporte Perno Grupo de infusión Empuje hasta el tope con fuer-za sobre PUSH hasta oír el clic de enganche. Después de oír el clic deenganche, controle que losbotones rojos hayan salidohacia afuera. Tubo inferior del grupo de infusión.El perno debe entrar en el tubo inferior delgrupo de infusión. ...
Page 53 - Los dos botones rojos han; CORRECTAMENTE; 2 MODIFICAR Y CONFIGURAR LOS PARÁMETROS DEL MENÚ; Programación del reloj; hasta que aparezca el mensaje:; Programación de la hora de encendido automático
52 Controle que los botones rojos hayan salido hacia afuera, porque en caso contrario la portezuela no se cie-rra. CORRECTO INCORRECTO Los dos botones rojos han salido CORRECTAMENTE hacia afuera. Los dos botones rojos no hansalido hacia afuera. NOTA 1: si el grupo de infusión no se coloca correctame...
Page 54 - AUTOENCENDIDO NO; DESCALCIFICACIÓN; • Presione el botón y la cafetera mostrará el mensaje:; DESCALCIFICACIÓN SÍ; eliminar las incrustaciones de cal dentro de la cafetera.; DESCALC. COMPLETA GIRAR MANDO
53 • Presione el botón para programar la hora de encendido automático (Si mantiene presionado el botón , la hora cambia rápidamente). • Presione el botón para validar el dato;• Presione una vez el botón y aparecerá el mensaje: AUTOENCENDIDO NO Presione el botón para modificar la función (la cafetera...
Page 55 - depósito de agua con agua limpia.; TEMPERATURA MEDIA; Modificar la duración del encendido; OFF DESPUÉS DE 1 H; PROGRAMACIÓN DE LA DUREZA DEL AGUA; DUREZA AGUA 4
54 ENJUAGUE • Cuando la cafetera haya vaciado el depósito de agua, aparecerá el mensaje: ENJUAGUE COMPLETO GIRAR MANDO • Gire el mando de vapor en el sentido de las agujas del reloj hasta el tope (fig. 4) y llene de nuevo el depósito de agua con agua limpia. • El programa de descalcificación ha conc...
Page 56 - 4 SIGNIFICADO DEL MENSAJE VISUALIZADO Y QUÉ HACER; Retorno a las configuraciones de fábrica; 3 MODIFICAR LA LENGUA
55 MENSAJE SIGNIFICADO QUÉ HACER LLENAR DEPÓSITO • El depósito de agua está vacío o malcolocado. • El depósito está sucio o incrustado concal. • Llene el depósito con agua siguiendolas indicaciones del cap. 5 nota 6 yencájelo del todo. • Enjuague o descalcifique el depósito. MOLIENDA MUY FINA REGULA...
Page 57 - MENSAJE
56 ECHAR CAFÉ PREMOLIDO • Con la función seleccionada, no se hapodido verter el café molido en elembudo. • Eche el café premolido tal como descri-to en el pár. 8. LLENAR CAFÉ EN GRANOS • Los granos de café se han acabado. • Si el molinillo de café hace muchoruido, significa que una pequeña pie-dra c...
Page 58 - El café no está caliente.
57 15 PROBLEMAS QUE PUEDEN RESOLVERSE ANTES DE LLAMAR A LA ASISTENCIA TÉCNICA Si la cafetera no funciona, se puede localizar fácilmente la causa y resolverla consultando el cap. 14. Perosi en la cafetera no aparece ningún mensaje, efectúe los siguientes controles antes de contactar a la asis-tencia ...
Page 61 - FECHA DE COMPRA
60 Esta garantía cubre todos los productos con las marcas De'Longhi o Kenwood. GARANTIA (para Mexico solamente) CAFETERA ELECTRICA MODELO ESAM4400 Garantizamos todo producto DE´LONGHI por defectos de fabricación, material y mano de obra. Nuestra obli-gación dentro de ésta garantía es proporcionar gr...
Page 62 - INDICE; PREPARAZIONE DEL CAFFÈ ESPRESSO CON
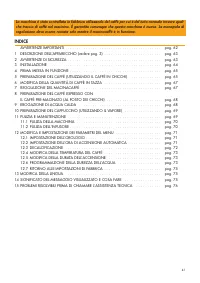
INDICE AVVERTENZE IMPORTANTI . . . . . . . . . . . . . . . . . . . . . . . . . . . . . . . . . . . . . . . . . . pag. 62 1 DESCRIZIONE DELL’APPARECCHIO (vedere pag. 3) . . . . . . . . . . . . . . . . . . . . . . . . . pag. 63 2 AVVERTENZE DI SICUREZZA . . . . . . . . . . . . . . . . . . . . . . . . ...
Page 63 - CAVO DI ALIMENTAZIONE CORTO; del cavo ed evitare di inciampare su cavi troppo lunghi.; AV V E R T E N Z E I M P O R TA N T I; bollitore in acqua o in altro liquido.; CONSERVARE QUESTE ISTRUZIONI; QUESTO APPARECCHIO È DESTINATO SOLO ALL’USO DOMESTICO
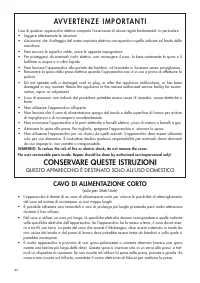
62 CAVO DI ALIMENTAZIONE CORTO (solo per Stati Uniti) • L’apparecchio è dotato di un cavo di alimetazione corto per ridurre le possibilità di attorcigliamento del cavo ed evitare di inciampare su cavi troppo lunghi. • È possibile utilizzare cavi removibili o cavi di prolunga più lunghi prestando per...
Page 64 - AVVERTENZE DI SICUREZZA
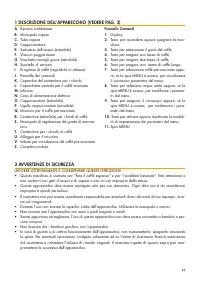
63 1 DESCRIZIONE DELL’APPARECCHIO (VEDERE PAG. 3) A. Ripiano scaldatazze B. Manopola vapore C. Tubo vapore D. Cappuccinatore E. Serbatoio dell'acqua (estraibile) F. Vassoio poggia tazze G. Vaschetta raccogli gocce (estraibile) H. Sportello di servizio I. Erogatore di caffè (regolabile in altezza) J....
Page 65 - INSTALLAZIONE; portata dei bambini in quanto potenziali fonti di pericolo.; PRIMA MESSA IN FUNZIONE; premere OK per installare italiano; spingendolo a fondo.; ruotare manopola vapore
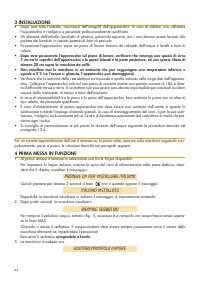
64 3 INSTALLAZIONE • Dopo aver tolto l’imballo, assicurarsi dell’integrità dell’apparecchio. In caso di dubbio, non utilizzare l’apparecchio e rivolgersi a personale professionalmente qualificato. • Gli elementi dell’imballo (sacchetti di plastica, polistirolo espanso, ecc.) non devono essere lascia...
Page 66 - PREPARAZIONE DEL CAFFÈ (UTILIZZANDO IL CAFFÈ IN CHICCHI); richiedere un altro caffè.
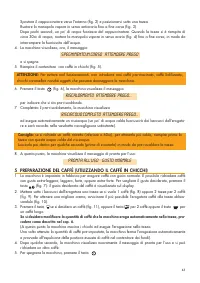
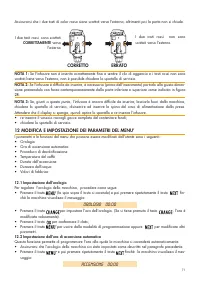
65 Spostare il cappuccinatore verso l’esterno (fig. 2) e posizionarvi sotto una tazza. Ruotare la manopola vapore in senso antiorario fino a fine corsa (fig. 3). Dopo pochi secondi, un po’ di acqua fuoriesce dal cappuccinatore. Quando la tazza si è riempita dicirca 30cc di acqua, ruotare la manopola...
Page 67 - riempire serbatoio; OBBLIGATORIO
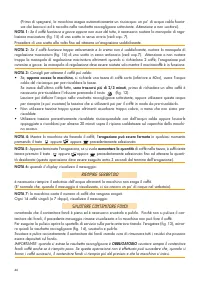
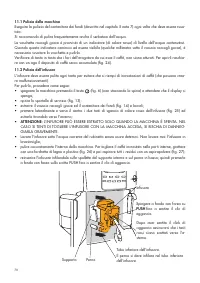
66 (Prima di spegnersi, la macchina esegue automaticamente un risciacquo: un po’ di acqua calda fuorie-sce dai beccucci ed è raccolta nella vaschetta raccogligocce sottostante. Attenzione a non scottarsi) . NOTA 1: Se il caffè fuoriesce a gocce oppure non esce del tutto , è necessario ruotare la man...
Page 68 - mentre la macchina sta erogando caffè,; non si deve mai estrarre il serbatoio dell’acqua.; Infatti se; Quando si presenta un’anomalia; , non bisogna rivolgersi subito al servizio di assistenza tecnica.; MODIFICA DELLA QUANTITÀ DI CAFFÈ IN TAZZA; memorizzare la nuova quantità.; REGOLAZIONE DEL MACINACAFFÈ
67 NOTA 8: mentre la macchina sta erogando caffè, non si deve mai estrarre il serbatoio dell’acqua. Infatti se questo venisse estratto, la macchina poi non riesce più a fare il caffè. Per riavviare la macchina è necessario ruotare la manopola vapore in senso antiorario fino a fine corsa efar defluir...
Page 69 - PRONTA alL’USO PRE-MACINATO; EROGAZIONE DI ACQUA CALDA; pronta All’uso acqua calda
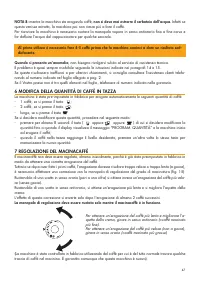
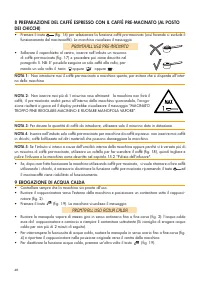
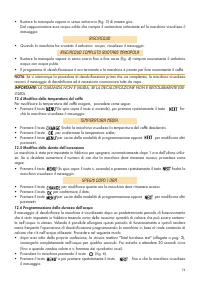
68 8 PREPARAZIONE DEL CAFFÈ ESPRESSO CON IL CAFFÈ PRE-MACINATO (AL POSTODEI CHICCHI) • Premere il tasto (fig. 16) per selezionare la funzione caffè pre-macinato (così facendo si esclude il funzionamento del macinacaffè). La macchina visualizza il messaggio PRONTA alL’USO PRE-MACINATO • Sollevare il ...
Page 70 - 0 PREPARAZIONE DEL CAPPUCCINO (UTILIZZANDO IL VAPORE); vapore; che il latte ristagni nei circuiti interni del cappuccinatore.; 1 PULIZIA E MANUTENZIONE
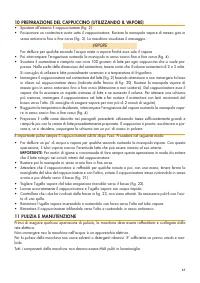
69 10 PREPARAZIONE DEL CAPPUCCINO (UTILIZZANDO IL VAPORE) • Spostare all’esterno il cappuccinatore (fig. 2).• Posizionare un contenitore vuoto sotto il cappuccinatore. Ruotare la manopola vapore di mezzo giro in senso antiorario fino a fine corsa (fig. 3). La macchina visualizza il messaggio : vapor...
Page 71 - Supporto; fino a sentire il clic di
70 11.1 Pulizia della macchina Eseguire la pulizia del contenitore dei fondi (descritta nel capitolo 5 nota 7) ogni volta che deve essere svuo-tato. Si raccomanda di pulire frequentemente anche il serbatoio dell'acqua. La vaschetta raccogli gocce è provvista di un indicatore (di colore rosso) di liv...
Page 72 - I due tasti rossi sono scattati; CORRETTAMENTE; verso; 2 MODIFICA E IMPOSTAZIONE DEI PARAMETRI DEL MENU’; Impostazione dell’orologio; ché la macchina visualizza il messaggio:; Impostazione dell’ora di accensione automatica
71 Assicurarsi che i due tasti di color rosso siano scattati verso l'esterno, altrimenti poi la porta non si chiude. CORRETTO ERRATO I due tasti rossi sono scattati CORRETTAMENTE verso l’esterno I due tasti rossi non sonoscattati verso l’esterno NOTA 1: Se l'infusore non è inserito correttamente fin...
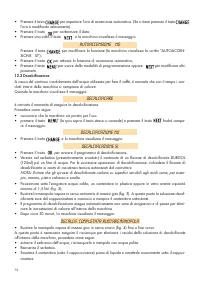
Page 73 - AUTOACCENSIONE NO; Decalcificazione; DECALCIFICARE; • Premere il tasto e la macchina visualizza il messaggio:; DECALCIFICAZIONE SI; nare le incrostazioni di calcare all'interno della macchina.; DECALCif. COMPLETAta RUOTARE MANOPOLA
72 • Premere il tasto per impostare l’ora di accensione automatica. (Se si tiene premuto il tasto , l’ora è modificata velocemente). • Premere il tasto per confermare il dato;• Premere una volta il tasto e la macchina visualizza il messaggio: AUTOACCENSIONE NO Premere il tasto per modificare la funz...
Page 74 - acqua con acqua pulita.; Modifica della durata dell’accensione; macchina visualizza il messaggio:; SPEGNI DOPO 1 ORA.; Programmazione della durezza dell’acqua
73 • Ruotare la manopola vapore in senso antiorario (fig. 3) di mezzo giro. Dal cappuccinatore esce acqua calda che riempie il contenitore sottostante ed la macchina visualizza ilmessaggio: risciacquo • Quando la macchina ha svuotato il serbatoio acqua, visualizza il messaggio: RISCIACQUO COMPLETo R...
Page 75 - 4 SIGNIFICATO DEL MESSAGGIO VISUALIZZATO E COSA FARE; Ritorno alle impostazioni di fabbrica; • Premere il tasto e la macchina visualizza il messaggio “; 3 MODIFICA DELLA LINGUA
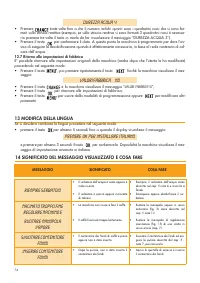
74 MESSAGGIO SIGNIFICATO COSA FARE RIEMPIRE SERBATOIO • Il serbatoio dell'acqua è vuoto oppure èmale inserito. • Il serbatoio è sporco oppure incrostatodi calcare. • Riempire il serbatoio dell'acqua comedescritto nel cap. 5 nota 6 e inserirlo afondo. • Sciacquare oppure decalcificare il ser-batoio. ...
Page 76 - MESSAGGIO
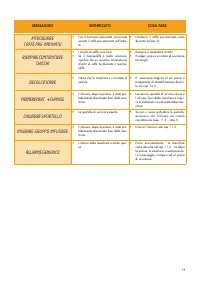
75 INTRODURRE CAFFÈ pre-MACINATO • Con la funzione selezionata, non è stataversato il caffè pre-macinato nell'imbu-to • Introdurre il caffè pre-macinato comedescritto nel par. 8. RIEMPIRE CONTENITORE CHICCHI • I chicchi di caffè sono finiti. • Se il macinacaffè è molto rumoroso,significa che un sass...
Page 77 - 5 PROBLEMI RISOLVIBILI PRIMA DI CHIAMARE L'ASSISTENZA TECNICA; PROBLEMA; Il caffè non è caldo
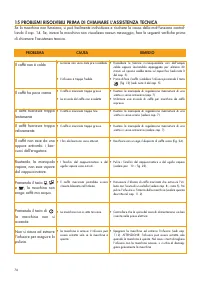
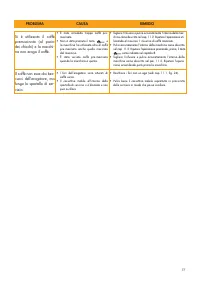
76 15 PROBLEMI RISOLVIBILI PRIMA DI CHIAMARE L'ASSISTENZA TECNICA Se la macchina non funziona, si può facilmente individuare e risolvere la causa della mal-funzione control-lando il cap. 14. Se, invece la macchina non visualizza nessun messaggio, fare le seguenti verifiche primadi chiamare l'assiste...
Page 79 - ne vigente nei vari stati.
78 Questa garanzia e’applicabile a tutti i piccoli elettrodomestici a marchio Kenwood o De’Longhi. Garanzia limitata Copertura della garanzia De’Longhi garantisce che ciascun prodotto è esente da difetti di materiale e di fabbricazione. La pre- sente garanzia è limitata alla riparazione delle parti ...


 DeLonghi EN640 B
User Manual
DeLonghi EN640 B
User Manual
 DeLonghi EN640 W
User Manual
DeLonghi EN640 W
User Manual
 DeLonghi ENV95
User Manual
DeLonghi ENV95
User Manual
 DeLonghi HF3030IBK
User Manual
DeLonghi HF3030IBK
User Manual
 DeLonghi CH301
User Manual
DeLonghi CH301
User Manual
 DeLonghi FDM73
Manual
DeLonghi FDM73
Manual
 DeLonghi EXAM440 55 B
Manual
DeLonghi EXAM440 55 B
Manual
 DeLonghi EXAM440 55 G
User Manual
DeLonghi EXAM440 55 G
User Manual
 DeLonghi KF101AI
User Manual
DeLonghi KF101AI
User Manual
 DeLonghi KM336
Manual
DeLonghi KM336
Manual
 DeLonghi 0105051106
User Manual
DeLonghi 0105051106
User Manual
 DeLonghi 0114581002
User Manual
DeLonghi 0114581002
User Manual
 DeLonghi 0114 711000
Manual
DeLonghi 0114 711000
Manual
 DeLonghi CJ3000
Manual
DeLonghi CJ3000
Manual
 DeLonghi CJ301AI
User Manual
DeLonghi CJ301AI
User Manual
 DeLonghi CJ302AI
User Manual
DeLonghi CJ302AI
User Manual
 DeLonghi 0125394034
User Manual
DeLonghi 0125394034
User Manual
 DeLonghi 0132106140
User Manual
DeLonghi 0132106140
User Manual
 DeLonghi 0132192158
User Manual
DeLonghi 0132192158
User Manual