DeLonghi ECAM35055B - Manuals
User Manual DeLonghi ECAM35055B


Summary
7 1. FUNDAMENTAL SAFETY WARNINGS • The appliance is not intended for use by persons (including children) with reduced physical, sensory or mental capabilities, or lack of experience and knowledge, unless they have been given supervision or instruction concerning use of the appliance by a person resp...
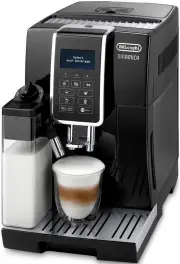
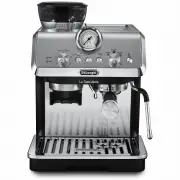
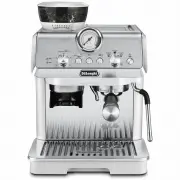
9 4. DESCRIPTION4.1 Description of the appliance (page 3 - A) A1. Beans container lid A2. Pre-ground coffee funnel lid A3. Beans container A4. Pre-ground coffee funnel A5. Grinding adjustment dial A6. Cup shelf A7. button: to turn the appliance on and off (standby) A8. Hot water and steam connection...
10 • Arrange the cord (C7) in such a way that it cannot be dam- aged by sharp edges or contact with hot surfaces (e.g. elec- tric hot plates). 5.3 Connecting the appliance Important! Check that the mains power supply voltage corresponds to that indicated on the rating plate on the bottom of the appl...
DeLonghi Coffee Machines Manuals
-
 DeLonghi CAM51025MB
User Manual
DeLonghi CAM51025MB
User Manual
-
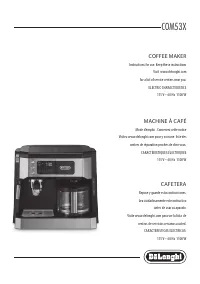 DeLonghi COM530M
User Manual
DeLonghi COM530M
User Manual
-
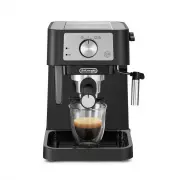
 DeLonghi EC230
User Manual
DeLonghi EC230
User Manual
-
 DeLonghi EC260BK
User Manual
DeLonghi EC260BK
User Manual
-
 DeLonghi EC680BK
User Manual
DeLonghi EC680BK
User Manual
-
 DeLonghi EC680R
User Manual
DeLonghi EC680R
User Manual
-
 DeLonghi EC685BK
User Manual
DeLonghi EC685BK
User Manual
-
 DeLonghi EC685M
User Manual
DeLonghi EC685M
User Manual
-
 DeLonghi EC685R
User Manual
DeLonghi EC685R
User Manual
-
 DeLonghi EC685W
User Manual
DeLonghi EC685W
User Manual
-
 DeLonghi EC860M
User Manual
DeLonghi EC860M
User Manual
-
 DeLonghi EC885M
User Manual
DeLonghi EC885M
User Manual
-
 DeLonghi EC9155GR
User Manual
DeLonghi EC9155GR
User Manual
-
 DeLonghi EC9155GRPKK
User Manual
DeLonghi EC9155GRPKK
User Manual
-
 DeLonghi EC9155MB
User Manual
DeLonghi EC9155MB
User Manual
-
 DeLonghi EC9155MBPK
User Manual
DeLonghi EC9155MBPK
User Manual
-
 DeLonghi EC9155W
User Manual
DeLonghi EC9155W
User Manual
-
 DeLonghi EC9155WPKK
User Manual
DeLonghi EC9155WPKK
User Manual
-
 DeLonghi EC9255M
User Manual
DeLonghi EC9255M
User Manual
-
 DeLonghi EC9335BM
User Manual
DeLonghi EC9335BM
User Manual