Contents Setting Up ............................................................................................................................................................ 3 Main Functions .............................................................................................................
Page 7 - Appendix
Paper Is Fed Incorrectly ..................................................................................................................................... 489 A Message or a Number Starting with "#" (an Error Code) Is Displayed ...............................................................
Page 11 - Main Functions; LINKS
Main Functions 2KUU-001 This manual covers all the functions of the model series you purchased. Before getting started, check which functions are available on the model you purchased. : With function : Without function Function MF269dw MF267dw MF264dw MF269dw VP Copy Print Fax Scan 2-sided printing ...
Page 12 - Preparations Required Before Use
Preparations Required Before Use 2KUU-002 Set up the machine following steps 1 to 5 in order. For more information about a particular step, click on the link to go to the corresponding section. In addition, to use the machine safely, also check Preventing Unauthorized Access(P. 7) . Step 1 Setting U...
Page 13 - Setting from the Remote UI
Setting from the Remote UI ● When the network environment settings are complete, you can efficiently set the machine from a computerusing Remote UI. Starting Remote UI(P. 335) Setting Up 6
Page 14 - Preventing Unauthorized Access; Assigning a Private IP Address; Ranges for Private IP addresses
Preventing Unauthorized Access 2KUU-003 This section describes the security measures on how to prevent unauthorized access from the external network. This is a must-read for all users and administrators before using this machine, other printers, and multifunction machines connected to the network. I...
Page 15 - Setting PIN to Each Function
access from the external networks. If you want to assign a global IP address to and use a printer/multifunction machine, contact your network administrator. Using Firewall to Restrict Transmission A firewall is a system that prevents unauthorized access from the external networks and protects agains...
Page 16 - Setting Up Using the Setup Guide; Touch Panel Model
Setting Up Using the Setup Guide 2KUU-004 When the machine is turned on ( Turning ON the Machine(P. 107) ) for the first time, the Setup Guide starts up to assist you to configure the initial settings of the machine by following the on-screen guidance. In the Setup Guide, the setting screens are dis...
Page 18 - Setting the Date/Time; Setting the Time Zone; Select the time zone.; Setting the Current Date and Time
Setting the Date/Time 2KUU-005 Set the date and time for the machine. The date and time are used as the reference for the functions specifying the time, therefore, they need to be set accurately. Setting the Time Zone(P. 11) Setting the Current Date and Time(P. 11) Setting the Daylight Saving Time(P...
Page 19 - Enter the date and time.; Setting the Daylight Saving Time
Touch Panel Model Select <Menu> in the Home screen. 5 Lines LCD Model Press . 2 Select <Timer Settings> <Date/Time Settings> <Current Date/Time Settings>. 3 Enter the date and time. Touch Panel Model Tap < > or < > to move the cursor, and enter the date and time u...
Page 21 - Setting Up the Network Environment; Before You Start
Setting Up the Network Environment 2KUU-006 When connecting the machine to a wired or wireless local area network (LAN), you need to set an IP address unique to the selected network. Select "wired" or "wireless" depending on your communication environment and networking devices. For ...
Page 23 - Selecting Wired LAN or Wireless LAN
Selecting Wired LAN or Wireless LAN 2KUU-007 After you decide on wired or wireless LAN to connect the machine to the computer, select wired LAN or wireless LAN using the operation panel. Note that if you change the setting from <Wired LAN> to <Wireless LAN> or vice versa, you will need t...
Page 24 - Connecting to a Wired LAN; Wait for several minutes.
Connecting to a Wired LAN 2KUU-008 Connect the machine to a computer via a router. Use a LAN cable to connect the machine to the router. 1 Connect a LAN cable. ● Connect the machine to a router by using a LAN cable. ● Push the connector in until it clicks into place. 2 Wait for several minutes. ➠ Th...
Page 25 - Connecting to a Wireless LAN; Risk of information leak; Setting Up Connection Using WPS; Push Button Mode
Connecting to a Wireless LAN 2KUU-009 Wireless routers (or access points) connect the machine to a computer via radio waves. If your wireless router is equipped with Wi-Fi Protected Setup (WPS), configuring your network is automatic and easy. If your networking devices do not support automatic confi...
Page 26 - PIN Code Mode; Manually Setting Up Connection; Selecting a Wireless Router
◼ PIN Code Mode Some WPS routers do not support the push button mode. If WPS PIN code mode is mentioned on the package or in the instruction manuals of your networking device, set up the connection by entering the PIN code. Setting Up Connection Using WPS PIN Code Mode(P. 22) ● If the wireless route...
Page 27 - Setting Up Connection Using WPS Push Button Mode; Press and hold the WPS button on the wireless router.
Setting Up Connection Using WPS Push Button Mode 2KUU-00A If your wireless router supports WPS push button mode, you can easily set up a connection with a WPS button. ● How to operate the wireless router may vary on each device. See the instruction manuals for yournetworking device for help. 1 Displ...
Page 28 - Reducing power consumption
If an error message is displayed during setup ● Select <Close> and return to step 5. 8 Wait until message <Connected.> is displayed. ➠ Wait several minutes until the IP address and other items are set automatically. Signal strength ● When more than one wireless router is available for co...
Page 29 - Setting Up Connection Using WPS PIN Code Mode; From a Computer
Setting Up Connection Using WPS PIN Code Mode 2KUU-00C If your wireless router supports WPS PIN code mode, generate a PIN code with the machine and register the code to the networking device. ● How to operate the wireless router may vary on each device. See the instruction manuals for yournetworking...
Page 30 - Register the generated PIN code to the wireless router.; From the Operation Panel
➠ The PIN code is generated and shown on the display. From a Computer 8 Register the generated PIN code to the wireless router. ● Register the PIN code on the setup screen displayed in step 1. ● The PIN code must be registered within 10 minutes after selecting <Yes> in step 7. If an error mess...
Page 31 - Setting Up Connection by Selecting a Wireless Router; Security settings
Setting Up Connection by Selecting a Wireless Router 2KUU-00E You can search the wireless routers (or access points) available for connection and select one from the display of the machine. For the network key, enter a WEP key or PSK. Before selecting a wireless router, check and write down the requ...
Page 32 - Select a wireless LAN router.; Enter the network key that you have written down.
7 Select a wireless LAN router. ● Select the router whose SSID matches the one that you have written down. If your wireless router is not found ● Check whether the machine is properly installed and ready to connect to the network. Installation/Settings Problems(P. 467) 8 Enter the network key that y...
Page 33 - If the IP address of the machine has changed
If the IP address of the machine has changed ● In a DHCP environment, the IP address of the machine may be changed automatically. If this happens, theconnection is maintained as long as the machine and the computer belong to the same subnet. LINKS Connecting to a Wireless LAN(P. 18) Setting Up 26
Page 34 - Setting Up Connection by Specifying Detailed Settings; Enter the SSID that you have written down.
Setting Up Connection by Specifying Detailed Settings 2KUU-00F If you want to specify the security settings in detail or cannot establish the wireless connection using the other procedures, manually enter all the required information for the wireless LAN connection. Before specifying detailed settin...
Page 35 - Using WEP
Using WEP 1 Select <WEP>. 2 Select an authentication method. <Open System>Sets open system authentication, which is also called "open authentication." <Shared Key>Uses the WEP key as a password. When <Open System> is selected ● When connecting to a wireless LAN, the m...
Page 37 - Checking the SSID and Network Key
Checking the SSID and Network Key 2KUU-00H When manually setting up a wireless connection, you need to specify the SSID and network key of your wireless router. The SSID and network key may be indicated on these networking devices. Check your devices and write down the necessary information before s...
Page 38 - Setting IP Addresses
Setting IP Addresses 2KUU-00J Connecting the machine to a network requires a unique network IP address. Two versions of IP addresses are available: IPv4 and IPv6. Configure these settings depending on the network environment. To use IPv6 addresses, you need to properly configure the IPv4 address set...
Page 39 - Setting IPv4 Address; Configure IP address settings.
Setting IPv4 Address 2KUU-00K The machine's IPv4 address can be either assigned automatically by a dynamic IP addressing protocol, such as DHCP, or entered manually. When connecting themachine to a wired LAN, make sure that the connectors of the LAN cable are firmlyinserted into the ports ( Connecti...
Page 40 - Automatically assigning an IP address; Manually entering an IP address; Checking whether the settings are correct; Testing the Network Connection
Automatically assigning an IP address 1 Select <Auto Acquire>. 2 Select the protocol. ● Select <Select Protocol> <DHCP>. If you do not want to use DHCP/BOOTP/RARP to assign an IP address ● Select <Off>. If you select <DHCP> when these services are unavailable, the machi...
Page 42 - Setting IPv6 Addresses; Select the [Use IPv6] check box and configure the required settings.
Setting IPv6 Addresses 2KUU-00L The IPv6 addresses of the machine can be configured via the Remote UI. Before setting IPv6 addresses, check the IPv4 address settings ( Viewing IPv4Settings(P. 38) ). You need to set the correct IPv4 settings to use IPv6 addresses.Note that the scan function that uses...
Page 45 - Viewing Network Settings; Viewing IPv4 Settings; Viewing the MAC Address for Wired LAN
Viewing Network Settings 2KUU-00R Viewing IPv4 Settings(P. 38) Viewing IPv6 Settings(P. 38) Viewing Direct Connection Information(P. 38) Viewing the MAC Address for Wired LAN(P. 38) Viewing the MAC Address and Information for Wireless LAN(P. 39) ● The IP address is not correctly configured if it is ...
Page 46 - Lines LCD Model; Viewing the MAC Address and Information for Wireless LAN; Select the setting to view.
5 Lines LCD Model Press . 2 Select <Network Settings>. ● If the screen for entering a PIN appears, enter the correct PIN. Setting the System Manager PIN(P. 293) 3 Select <Ethernet Driver Settings>. ➠ MAC address is displayed. Viewing the MAC Address and Information for Wireless LAN 1 Dis...
Configuring Printing Protocols and WSD Functions 2KUU-00U Configure the protocols that are used for printing documents from a networked computer. ● For more information about the basic operations to be performed when setting the machine from theRemote UI, see Setting Up Menu Options from Remote UI(P...
Page 52 - Configuring Printer Ports; Adding a port
Configuring Printer Ports 2KUU-00W Printing errors can occur when the IP address of the machine has been changed, or when a printer has been added via the Windows printer folder. These errors are typically caused by incorrect printer port settings. For example, an incorrect port number or port type ...
Page 54 - Changing the port type or number
● When the next screen is displayed, follow the instructions on the screen. * When you select the [Device Type], select [Canon Network Printing Device with P9100] under [Standard]. 5 Click [Finish]. 6 Click [Close]. Changing the port type or number If the printing protocol (LPD or RAW) has been chan...
Page 56 - Setting Up Print Server; Install additional drivers as necessary.
Setting Up Print Server 2KUU-00X With a print server, you can reduce the load on the computer that you print from. The print server also makes it possible to install the drivers on each computer over the network, which saves you the trouble of installing the drivers on each computer by using the pro...
Page 57 - Installing the Drivers on a Computer via the Print Server; Follow the on-screen instructions to install the drivers.
● Select additional drivers from the following, according to the operating system of the print server. Print server Select the check box for 32-bit operating systems [x64] 64-bit operating systems [x86] under [Processor] ● If you do not know whether your Windows operating system is a 32-bit or 64-bi...
Configuring Ethernet Settings 2KUU-010 Ethernet is a standard for communicating data in a local area network (LAN). You can set the communication mode and the Ethernet type. In general, the machine can beused without changing the defaults ( <Ethernet Driver Settings>(P. 372) ), butyou can chan...
Page 62 - Changing the Maximum Transmission Unit
Changing the Maximum Transmission Unit 2KUU-011 In most Ethernet networks, the maximum size of a packet that can be sent is 1500 bytes. A packet refers to a chunk of data into which the original data is divided before being sent. The maximum transmission unit (MTU) may vary on each network. Change t...
Page 63 - Setting a Wait Time for Connecting to a Network
Setting a Wait Time for Connecting to a Network 2KUU-012 When a network is designed to enjoy redundant connectivity with multiple switching hubs or bridges, it must have a mechanism to prevent packets from looping. One effective solution is to define the role of each switch port. However, communicat...
Page 64 - Configuring DNS; Configure DNS settings.
Configuring DNS 2KUU-013 DNS (Domain Name System) provides a service for name resolution that associates a host (or domain) name with an IP address. Configure the DNS, mDNS, or DHCP option settings as necessary. Note that the procedures for configuring DNS are different for IPv4 and IPv6. ● For more...
Page 65 - Configuring IPv6 DNS
[Primary DNS Server Address] Enter the IP address of a DNS server. [Secondary DNS Server Address] Enter the IP address of a secondary DNS server, if any. [Host Name] Enter alphanumeric characters for the host name of the machine that is to be registered to the DNS server. [Domain Name] Enter alphanu...
Page 66 - Selecting settings from the operation panel
[DNS Settings] [Primary DNS Server Address] Enter the IP address of a DNS server. Addresses that start with "ff" (or multicast address) cannot be entered. [Secondary DNS Server Address] Enter the IP address of a secondary DNS server, if any. Addresses that start with "ff" (or multica...
Page 68 - Configuring SMB; NetBIOS Name
Configuring SMB 2KUU-014 Server Message Block (SMB) is a protocol for sharing resources, such as files and printers, with more than one device in a network. The machine uses SMB to storescanned documents into a shared folder. Depending on your network, you may haveto set the NetBIOS name and workgro...
Page 70 - Monitoring and Controlling the Machine with SNMP
Monitoring and Controlling the Machine with SNMP 2KUU-015 Simple Network Management Protocol (SNMP) is a protocol for monitoring and controlling communication devices in a network by using Management Information Base (MIB). The machine supports SNMPv1 and security-enhanced SNMPv3. You can check the ...
5 Specify SNMPv1 settings. ● If you do not need to change SNMPv1 settings, proceed to the next step. [Use SNMPv1] Select the check box to enable SNMPv1. You can specify the rest of SNMPv1 settings only when this check box is selected. [Use Community Name 1]/[Use Community Name 2] Select the check bo...
Page 72 - Specify Printer Management Information Acquisition Settings.
[Use SNMPv3] Select the check box to enable SNMPv3. You can specify the rest of SNMPv3 settings only when this check box is selected. [Enable User] Select the check box to enable [User Settings 1]/[User Settings 2]/[User Settings 3]. To disable user settings, clear the corresponding check box. [User...
Page 73 - Disabling SNMPv1
● With SNMP, the printer management information, such as printing protocols and printer ports, can bemonitored and obtained regularly from a computer on the network. [Acquire Printer Management Information from Host] Select the check box to enable monitoring of the printer management information of ...
Page 74 - Configuring SNTP; Select the [Use SNTP] check box and specify the required settings.
Configuring SNTP 2KUU-016 Simple Network Time Protocol (SNTP) enables you to adjust the system clock by using the time server on the network. If SNTP is used, the time server is checked at the specified intervals; therefore, the correct time can always be maintained. The time is adjusted based on Co...
Page 75 - Testing communication with the NTP/SNTP server
Testing communication with the NTP/SNTP server ● You can view communication status with the registered server by clicking [Settings/Registration] [NetworkSettings] [TCP/IP Settings] [Check NTP Server] in [SNTP Settings]. If a proper connection has beenestablished, the result is displayed as shown be...
Page 76 - Installing Drivers; Proceed with the installation.
Installing Drivers 2KUU-017 Install the various drivers and associated software on your computer. 1 Make the necessary preparation before proceeding with the installation. ● If the machine is supplied with a CD-ROM/DVD-ROM, insert the CD-ROM/DVD-ROM into the drive on thecomputer. ● You can download ...
Page 77 - Configuring Initial Settings for Fax Functions
Configuring Initial Settings for Fax Functions 2KUU-018 Follow steps 1 to 4 described below to configure the fax settings. First, determine which receive mode best suits your intended use, and then follow the on-screen instructions to configure the settings. For more information about a particular s...
Page 78 - Deciding Which Fax Receive Mode to Use; Continue to Registering the Fax Number and Unit Name(P. 72)
Deciding Which Fax Receive Mode to Use 2KUU-019 Before configuring the fax settings, determine which receive mode best suits your intended use. Intended use Receive mode Use fax only/Never use telephone <Auto>This setting is for when you want to use the machine exclusively for receiving faxes,...
Page 79 - Registering the Fax Number and Unit Name
Registering the Fax Number and Unit Name 2KUU-01A Register the fax number and unit name of your machine. This information is printed at the top of each page sent from the machine. 1 Select <Menu> in the Home screen. Home Screen(P. 111) 2 Select <Fax Settings> <Fax Setup Guide>. 3 S...
Page 80 - Selecting the Receive Mode; Select the receive mode.
Selecting the Receive Mode 2KUU-01C Select the receive mode that suits your intended use beforehand ( Deciding Which Fax Receive Mode to Use(P. 71) ). 1 Select <Next>. 2 Select the receive mode. ● Select <Yes> or <No> to select the receive mode for the operations you intend to carr...
Page 81 - Connecting the Telephone Line; Connect the telephone line to the machine.
Connecting the Telephone Line 2KUU-01E Connect the telephone line to the machine. 1 Select <Next>. ● One of the screens shown here is displayed after the receive mode has been set. Selecting the ReceiveMode(P. 73) 2 Connect the telephone line to the machine. ● Connect the included telephone ca...
Page 83 - Saving to a Computer
Configuring Scan Settings 2KUU-01F To send scanned originals directly by e-mail or save them to shared folders, you need to configure the network. The Send Function Setting Tool, an application that is included with the machine, will assist you with the required setup. Set the necessary configuratio...
Page 84 - Preparing to Use the Machine as a Scanner; Click
Preparing to Use the Machine as a Scanner 2KUU-01H To use this machine as a scanner, you must complete preparations in advance, including installation of software to a computer. For more information, see the manuals for the relevant drivers on the online manual website. In Windows, when connecting t...
Page 85 - Procedure for Setting to Send E-Mail
Procedure for Setting to Send E-Mail 2KUU-01J Before configuring the machine for scanning to e-mail, check the setup flow shown below. Make sure that the machine and the computer are correctly connected. Connecting to a Wireless LAN(P. 18) Connecting to a Wired LAN(P. 17) Make sure that you have the...
Page 86 - Configuring Basic E-Mail Settings; Start the Send Function Setting Tool.
Configuring Basic E-Mail Settings 2KUU-01K This section describes how to configure the e-mail settings by using the Send Function Setting Tool. With the Send Function Setting Tool, you can also register e-mail addresses to the Address Book. ● The Send Function Setting Tool helps you configure the ba...
Page 87 - Specify the required settings.
If the machine is not displayed in [Device List] ● Click [Search Again]. If the problem persists, click [Search by IP Address], enter the IP address of themachine, and then click [OK]. 6 Confirm the settings and click [OK]. 2 Click [Start]. ● If the login screen is displayed, enter the appropriate P...
Page 89 - Configuring E-Mail Communication Settings
Configuring E-Mail Communication Settings 2KUU-01L Use the Remote UI to configure the detailed send settings, such as the settings for POP authentication and encryption of communication before you send e-mail. Contact your provider or network administrator for the required settings. ● For more infor...
Page 90 - Configuring Pop Authentication before Sending; Configuring SMTP authentication
Configuring Pop Authentication before Sending POP before SMTP authentication prevents unauthorized users from using e-mail by performing user authentication on the POP3 server. [Use POP Authentication Before Sending] To use the POP3 server for authentication before you send e-mail, select the check ...
Page 93 - Setting a Shared Folder as a Save Location
Setting a Shared Folder as a Save Location 2KUU-01S The feature of scanning to shared folders is also called "Scan to SMB" because the feature uses Server Message Block (SMB), a Windows-specific technology. SMB is a protocol for sharing resources, such as files and printers, with more than o...
Page 96 - Basic Operations
Basic Operations Basic Operations ............................................................................................................................................... 91 Parts and Their Functions ................................................................................................
Page 98 - Parts and Their Functions
Basic Operations 2KUU-01U This chapter describes basic operations, such as how to use the operation panel or how to load the paper, that are frequently performed to use the functions of the machine. ◼ Parts and Their Functions This section describes the exterior and interior parts of the machine and...
Page 100 - Registering Destinations
◼ Registering Destinations This section describes how to register destinations for sending faxes or scanned documents. Registering Destinations(P. 161) Basic Operations 93
Page 102 - Front Side
Front Side 2KUU-01X Feeder Automatically feeds originals into the machine for scanning. When two or more sheets of original are loaded in the feeder, originals can be scanned continuously. Feeder(P. 99) Operation panel The operation panel consists of keys such as Stop key, a display, and status indi...
Page 104 - Back Side
Back Side 2KUU-01Y Back cover Open the back cover when clearing paper jams. Clearing Paper Jams(P. 510) Rating label The label shows the serial number, which is needed when making inquiries about the machine. When a Problem Cannot Be Solved(P. 518) USB port Connect a USB cable when connecting the ma...
Page 105 - Interior; Operation panel
Interior 2KUU-020 Operation panel Lift this panel to replace the toner cartridge, etc., or clear paper jams. Replacing the Toner Cartridge(P. 443) Replacing the Drum Cartridge(P. 447) Paper Jams inside the Machine(P. 514) Toner cover Open this cover to replace the toner cartridge, etc., or clear pap...
Page 106 - Feeder; Slide guides; Feeder cover; Original scanning area
Feeder 2KUU-021 Slide guides Adjust these guides to match the width of original. Feeder cover Open when clearing paper jams. Paper Jams in the Feeder(P. 511) Original supply tray Automatically feeds originals into the machine for scanning. When two or more sheets of original are loaded in the feeder...
Page 107 - Paper guides
Multi-Purpose Tray 2KUU-022 Multi-Purpose Tray Lower the multi-purpose tray when loading paper. Paper guides Adjust the paper guides to exactly the width of the loaded paper to ensure that paper is fed straight into the machine. LINKS Loading Paper in the Multi-Purpose Tray(P. 138) Basic Operations ...
Page 108 - Drawer
Drawer 2KUU-023 Paper guides Adjust the paper guides to exactly the size of the loaded paper to ensure that paper is fed straight into the machine. LINKS Loading Paper in the Drawer(P. 134) Basic Operations 101
Operation Panel 2KUU-024 Operation Panel of Touch Panel Model(P. 102) Operation Panel of 5 Lines LCD Model(P. 104) Operation Panel of Touch Panel Model [Home] key Press to display the Home screen, which provides access to the setting menu and functions such as copy and scan. Home Screen(P. 111) Cust...
Page 111 - Operation Panel of 5 Lines LCD Model
[*] key Press to switch the type of text that is entered. Operation Panel of 5 Lines LCD Model [Menu] key Press to start specifying many of the settings for the machine, such as <Timer Settings> or <Preferences>. Setting Menu List(P. 361) [COPY/SCAN] key Press to switch the mode to copy ...
Page 114 - Turning ON the Machine; Press the power switch.
Turning ON the Machine 2KUU-025 This section describes how to turn ON the machine. 1 Make sure that the power plug is firmly inserted into a power outlet. 2 Press the power switch. ➠ The Start screen appears. Operation Panel(P. 102) ● A blank sheet of paper may be output when you turn ON the power f...
Page 115 - Turning OFF the Machine
Turning OFF the Machine 2KUU-026 This section describes how to turn OFF the machine. 1 Press the power switch. ● Make sure that the power indicator has gone out. ● It may take some time for the machine to completely shut down. Do not unplug the power cord until thedisplay turns off. ● To restart the...
Page 116 - Using the Operation Panel
Using the Operation Panel 2KUU-027 You can use the display and keys of the operation panel to configure machine settings or operate functions. This section describes basic usage of the display and keys. Basic Screens(P. 110) Basic Operation(P. 118) Entering Text(P. 123) ● If you want to invert the l...
Page 117 - Basic Screens; For the Touch Panel Model
Basic Screens 2KUU-028 The Home screen or settings screen appears on the display, allowing you to initiate functions such as copy and scan. You can also use the display to check information such as error messages and the machine's operation status. The screen is also a touch panel, so you can perfor...
Page 118 - Home Screen
Home Screen 2KUU-029 Home Screen (Touch Panel Model)(P. 111) Main Screen (5 Lines LCD Model)(P. 113) Home Screen (Touch Panel Model) The Home screen is displayed when the power is turned ON or by pressing on the operation panel. Use this screen to specify settings for and register functions. <Men...
Page 120 - Copy Main Screen / Scan Main Screen; Selecting Paper Tray
<Coded Dial> If you register destinations beforehand as coded dial numbers, they can be quickly displayed by simply entering a three-digit number. Registering Destinations in the Address Book(P. 163) Main Screen (5 Lines LCD Model) The main screen shows the screens for copying, scanning, and o...
Page 123 - Status and logs of copied, printed, and sent/received documents
Status and logs of copied, printed, and sent/received documents Displays the current status of the selected item. You can check <TX Job>,<RX Job>, and <Fax Forwarding Errors> statuses only on a touch panel model. The <Copy/Print Job> screen is shown below as an example. <N...
Page 124 - Message Display; When an Error Occurs
Message Display 2KUU-02C Messages are displayed on the screen in situations such as when paper runs out or when the expiration of the toner cartridge lifetime is reached. Countermeasures for Each Message(P. 491) When <You have notifications.> or <Tap the [i] icon.> is displayed (Touch Pa...
Page 125 - Basic Operation; Basic Operation of Touch Panel Model; Avoid the following actions.
Basic Operation 2KUU-02E Basic Operation of Touch Panel Model(P. 118) Basic Operation of 5 Lines LCD Model(P. 120) Basic Operation of Touch Panel Model The display is a touch panel, allowing you to operate directly on the screen. Avoid the following actions. ● The display may malfunction or be damag...
Page 126 - Selecting Items; If an item is mistakenly touched; Scrolling the Screen
◼ Selecting Items Tap an item name or button to make a selection. If an item is mistakenly touched ● Slide your finger away then release it from the screen to cancel the selection. To return to the previous screen ● Press to return to the previous screen. ◼ Scrolling the Screen The scroll bar appear...
Page 127 - Changing Value and Setting; Changing value; To move the cursor; Basic Operation of 5 Lines LCD Model
◼ Changing Value and Setting Changing value Tap < > or < > to enter values. If an icon such as below is displayed at the upper left of the screen, you can enter values directly using the numeric keys. To move the cursor ● When < > or < > is displayed, tap to move the cursor. ...
Page 129 - Changing Setting Values; Moving the Cursor; Using; Using the Numeric Keys
Changing Setting Values Use / to adjust the slider scale. Moving the Cursor Use / to enter text and values. Entering Text(P. 123) Using Press to apply a setting. Using the Numeric Keys Use the numeric keys to enter text and values. Entering Text(P. 123) ● You can change a variety of display-related ...
Page 130 - Entering Text; Entering Text on the Touch Panel Model; Switching the Type of Character; Types of Character That Can Be Entered
Entering Text 2KUU-02F Entering Text on the Touch Panel Model(P. 123) Entering Text on the 5 Lines LCD Model(P. 125) Entering Text on the Touch Panel Model Use the display and numeric keys to enter text and values. Switching the Type of Character Tap <A/a/12> to switch the type of character th...
Page 131 - Example of Entering Text and Numbers
DEF def 3 GHI ghi 4 JKL jkl 5 MNO mno 6 PQRS pqrs 7 TUV tuv 8 WXYZ wxyz 9 (Not available) 0 (space) - . * # ! " , ; : ^ ` _ = / | ' ? $ @ % & + \ ~ ( ) [ ] { } < > (Not available) ● When the type of text that is entered is <A> or <a>, press or tap <#> to display enter...
Page 132 - Deleting Text; Entering Text on the 5 Lines LCD Model
10 Press . 11 Tap <Apply>. Deleting Text One character is deleted each time is pressed. Press and hold to delete all of the entered text. Moving the Cursor (Entering a Space) Tap < > or < > to move the cursor. To enter a space, move the cursor to the end of the text, and tap < &...
Page 135 - Placing Originals; Use originals that are completely dry
Placing Originals 2KUU-02H Place originals on the platen glass or in the feeder. Use the platen glass when scanning thick or bound documents such as books. You can load two or more sheets of originals in the feeder so that they can be scanned continuously. For information on loadable sizes, etc., se...
Page 136 - Placing Originals on the Platen Glass; Place the original face down on the platen glass.; Placing Originals in the Feeder; Open the original supply tray.
Placing Originals on the Platen Glass 1 Open the feeder. 2 Place the original face down on the platen glass. ● Align the corner of the original with the top-left corner of the platen glass. ● To scan transparent originals (for example, tracing paper or transparencies), cover them with plain whitepap...
Page 138 - Align the slide guides against the edges of the original.
5 Align the slide guides against the edges of the original. ● Slide the slide guides inward until they are aligned securely against the edges of the original. ➠ The machine is ready to scan the original. Align the slide guides securely against the edges of the original ● Slide guides that are too lo...
Page 139 - Loading Paper; Precautions for Paper; Do not use the following types of paper:
Loading Paper 2KUU-02J You can load the paper into the drawer. See Available Paper(P. 538) for available paper sizes and types. About Paper Precautions for Paper(P. 132) Storing the Paper Printed with the Machine(P. 133) How to Load Paper Loading Paper in the Drawer(P. 134) Loading Paper in the Mult...
Page 140 - Storing the Paper Printed with the Machine; How to Store the Printed Paper
Paper handling and storage ● It is recommended that you use paper as soon as possible after unwrapping. Paper remaining unusedshould be covered with the original wrapping paper and stored on a flat surface. ● Keep the paper wrapped in its original package to protect the paper from moisture or drynes...
Page 141 - Loading Paper in the Drawer; When loading A5 size paper; Open the front cover.
Loading Paper in the Drawer 2KUU-02K Load the paper that you usually use in the drawer. When you want to print on paper that is not loaded in the drawer, load the paper in the multi-purpose tray. Loading Paper in the Multi-Purpose Tray(P. 138) When loading A5 size paper ● When setting the paper size...
Page 142 - Align the paper guides against the edges of the paper.
3 Load the paper and slide it all the way in, until it touches the back side. ● Load the paper in portrait orientation (with the short edge toward the machine) and the print side face up.Paper cannot be loaded in landscape orientation. ● Before loading it, fan the paper stack well, and tap it on a f...
Page 143 - Close the front cover.
Align the paper guides securely against the paper Paper guides that are too loose or too tight may cause misfeeds or paper jams. 5 Close the front cover. ● When performing printing, open the paper stopper in advance so that the output paper does not fall out ofthe output tray. » Continue to Specifyi...
Page 145 - Loading Paper in the Multi-Purpose Tray; Load only one sheet of paper at a time
Loading Paper in the Multi-Purpose Tray 2KUU-02L When you want to print on paper that is not loaded in the drawer, load the paper in the multi-purpose tray. Load the paper that you usually use in the drawer. Loading Paper in the Drawer(P. 134) Load only one sheet of paper at a time ● Only one sheet ...
Page 146 - Spread the paper guides apart.
3 Spread the paper guides apart. ● Slide the paper guides outward. 4 Insert the paper slowly into the multi-purpose tray until it reaches the back of thetray. ● Load the paper with the print side face up. ● When loading envelopes or paper with a logo, see Loading Envelopes(P. 141) or Loading Preprin...
Page 148 - Loading Envelopes; Before Loading Envelopes; Close the flap of each envelope.
Loading Envelopes 2KUU-02R Make sure to flatten any curls on envelopes before loading them. Also pay attention to the orientation of envelopes and which side is face up. Before Loading Envelopes(P. 141) Loading Envelopes in the Drawer(P. 142) Loading Envelopes in the Multi-Purpose Tray(P. 142) ● Thi...
Page 149 - Align the edges of the envelopes on a flat surface.; Loading Envelopes in the Drawer
4 Align the edges of the envelopes on a flat surface. Loading Envelopes in the Drawer Load the envelopes Monarch, No. 10 (COM10), DL, or C5 in portrait orientation (with the short edge toward the machine), with the non-glued side (front side) face up. You cannot print on the reverse side of envelope...
Page 150 - Loading Preprinted Paper; Making Printouts on Paper with Logos; Printing on Paper with Logos in Portrait Orientation; Making 2-Sided Printouts on Paper with Logos
Loading Preprinted Paper 2KUU-02S When you use paper that has been preprinted with a logo, pay attention to the orientation of the paper when loading. Load the paper properly so that printing is performed on the correct side of the paper with a logo. Making Printouts on Paper with Logos(P. 143) Maki...
Page 152 - Specifying Paper Size and Type
Specifying Paper Size and Type 2KUU-02U Set the paper size and paper type when printing from an application with which you cannot set the paper size and paper type. Make sure to change the paper settings when you load the paper that is different from the previously loaded paper. Specifying Paper Siz...
Page 153 - Specifying Paper Size and Type in the Drawer; Select the paper size.
Specifying Paper Size and Type in the Drawer 2KUU-02W 1 Display the <Paper Settings> screen. Home Screen(P. 111) Touch Panel Model Select <Paper Set.> in the Home screen. 5 Lines LCD Model Press (Paper Setting). 2 Select <Drawer 1>. 3 Select the paper size. ● If the loaded paper si...
Page 155 - Registering a Custom Paper Size; Select the paper type.
Registering a Custom Paper Size 2KUU-02Y You can register one frequently used custom paper size. 1 Display the <Paper Settings> screen. Home Screen(P. 111) Touch Panel Model Select <Paper Set.> in the Home screen. 5 Lines LCD Model Press (Paper Setting). 2 Select <MP Tray> or <D...
Page 157 - Limiting the Paper Sizes Displayed; Clear the check boxes for paper sizes you do not want displayed.
Limiting the Paper Sizes Displayed 2KUU-030 You can ensure that only frequently used paper sizes are shown in the screen for selecting the paper size setting. 1 Display the <Paper Settings> screen. Home Screen(P. 111) Touch Panel Model Select <Paper Set.> in the Home screen. 5 Lines LCD ...
Page 158 - Customizing the Display; Customizing the Home Screen
Customizing the Display 2KUU-031 In order to make the Home screen easier to use, you can customize it. Customizing the Home Screen You can rearrange buttons that are displayed in the Home screen. Customizing the Home Screen(P. 152) Basic Operations 151
Page 159 - Changing the Arrangement of Buttons; Select the button to move.; Repeat steps 3 and 4 to move all buttons you want to move.; Inserting a Blank
Customizing the Home Screen 2KUU-032 You can change the item display order to make it easier to access the Home screen, and customize the Home screen. ◼ Changing the Arrangement of Buttons 1 Select <Home Set.> in the Home screen. Home Screen(P. 111) ● If a screen appears prompting you to enter...
Page 161 - Changing the Default Settings for Functions; Copy; FAX; Shared Folder
Changing the Default Settings for Functions 2KUU-0AE The default settings are the settings that are displayed whenever you turn ON the machine, or when you press . If you change these default settings to match the operations that you perform frequently, you can eliminate the need to specify the same...
Page 162 - Setting Sounds
Setting Sounds 2KUU-034 The machine produces sounds in a variety of situations, such as when fax sending is complete or when a paper jam or error occurs. You can set the volume of each of these sounds individually. 1 Select <Menu> in the Home screen. Home Screen(P. 111) 2 Select <Preference...
Page 163 - End sound only for error
● To mute the sound, move the cursor all the way to the left. End sound only for error Select <When Error>, select <On>, and select <Apply>. Basic Operations 156
Page 164 - Entering Quiet Mode; When in quiet mode
Entering Quiet Mode 2KUU-033 The quiet mode function reduces the operation sound of the machine. For example, when using the machine at night, press on the operation panel. With only this operation, you can easily minimize operation sound. You can also specify a time for the machine to automatically...
Page 165 - Exiting Quiet Mode
<Start Time> Specify a time for entering quiet mode. To set, select <On> then specify the time. <End Time> Specify a time for exiting quiet mode. To set, select <On> then specify the time. Exiting Quiet Mode Press to exit quiet mode. Basic Operations 158
Page 166 - Entering Sleep Mode; When in sleep mode
Entering Sleep Mode 2KUU-035 The sleep mode function reduces the amount of power consumed by the machine by disabling power flow to the operation panel. If no operations will be performed on the machine for a while, such as during a lunch break, you can save power simply by pressing on the operation...
Page 167 - Exiting Sleep Mode
<Menu> ( ) <Timer Settings> <Auto Sleep Time> Set the amount of time that elapses before the machine automatically enters sleep mode <Apply> ( ) Exiting Sleep Mode You can press or any other key on the operation panel to exit the sleep mode. ● On the touch panel model, you ca...
Page 168 - Group Dial
Registering Destinations 2KUU-036 You can register frequently used fax/scan destinations in the Address Book and easily select them when needed ( Registering Destinations in the AddressBook(P. 163) ). Destinations can be searched alphabetically, from lists in the AddressBook, or by entering three-di...
Page 170 - Select Select the type of address to register.
Registering Destinations in the Address Book 2KUU-037 This section describes how to register destinations from the operation panel. You can also use the Remote UI to register destinations. Registering Destinations from Remote UI(P. 347) 1 Select <Addr. Book> in the Home screen. Home Screen(P. ...
Page 172 - Registering Destinations for One-Touch Dial; Select the number to register.; Making detailed settings (only when registered for fax)
Registering Destinations for One-Touch Dial 2KUU-0A7 You can conveniently register frequently used destinations for One-Touch Dial. Destinations can be quickly displayed by selecting One-Touch buttons in the Home Screen. You can edit or delete destinations that you have registered. You can register ...
Page 174 - Registering Multiple Destinations as a Group
Registering Multiple Destinations as a Group 2KUU-038 You can select multiple destinations that have already been registered and register them together as a group. This section describes how to register a group from the operation panel. You can also use the Remote UI to register a group. Registering...
Page 175 - Select the destination.
9 Select the destination. 10 Repeat steps 7 to 9 until you have registered all of the destinations that you want toregister, and then select <Apply>. To view information about the destination ● Select the target destination. To remove a destination from the group ● Select the destination that ...
Page 178 - Using Basic Operations; Enhancing Quality Enhancing and Adjusting Copy Quality(P. 180)
Copying 2KUU-03A This chapter describes basic copy operations and various other useful functions, such as 2-sided copying and ID card copy. ◼ Using Basic Operations Basic Copy Operations(P. 173) Canceling Copies(P. 177) Checking the Copying Status and Log(P. 179) ◼ Enhancing Quality Enhancing and Ad...
Page 180 - Enter the number of copies using the numeric keys.; Specify the copy settings as necessary.; Adjusting Density
Basic Copy Operations 2KUU-03E This section describes the basic operation procedure used to copy an original. 1 Place the original(s). Placing Originals(P. 128) 2 Display the <Copy> screen. Home Screen(P. 111) Touch Panel Model Select <Copy> in the Home screen. 5 Lines LCD Model Press (C...
Page 181 - Manual Density; Types of 2-sided copying
Manual Density Adjust the density manually. <Auto Density> An optimal density for the original is automatically set. <Original Type> is automatically set to <Text>. Selecting the Type of Original for Copying(P. 181) 2-Sided Copying You can copy two pages of an original on both side...
Page 182 - Enlarging or Reducing; Preset copy ratio
Enlarging or Reducing You can enlarge or reduce copies by using a preset copy ratio such as <129% STMT- >LTR>, or by setting a custom copy ratio in increments of 1 %. ● If you make a setting for <N on 1> after setting the copy ratio, the setting of reduction ratio in <N on1> tak...
Page 183 - When placing originals on the platen glass in step 1
When placing originals on the platen glass in step 1 If you have set 2-sided copying, N on 1 copying, or collating, a screen prompting you to load the next original is displayed. 1 Select the document size. ● Only displayed when 2-sided copying is set. 2 Place the next original on the platen glass, ...
Page 184 - Canceling Copies; Select on the Screen That is Displayed While Copying; If the Screen Displays a List of Documents When; Check the copy job status before canceling
Canceling Copies 2KUU-03F If you want to cancel copying immediately after pressing , select <Cancel> on the screen or press on the operation panel. You can also cancel copying after checking the copy status. ◼ Select <Cancel> on the Screen That is Displayed While Copying ◼ Press to Cance...
Page 186 - Checking the Copying Status and Log
Checking the Copying Status and Log 2KUU-03H You can check the current copy statuses and the logs for copied documents. ● When <Display Job Log> is set to <Off>, you cannot check the copy job log. <Display Job Log>(P. 425) Useful in the Following Cases ● When some long time has alr...
Page 187 - Enhancing and Adjusting Copy Quality
Enhancing and Adjusting Copy Quality 2KUU-03J You can improve the copy quality by specifying more detailed settings, such as adjusting the brightness, erasing unnecessary shadows, etc. Selecting the Type of Original for Copying(P. 181) Adjusting Sharpness for Copying (Sharpness)(P. 182) Copying 180
Page 188 - Selecting the Type of Original for Copying
Selecting the Type of Original for Copying 2KUU-03K You can select the optical image quality for the copy depending on the original type, such as text-only documents, documents with charts and graphs, or magazinephotos. Touch Panel Model <Copy> <Original Type> Select the original type 5 ...
Page 189 - Adjusting Sharpness for Copying (Sharpness)
Adjusting Sharpness for Copying (Sharpness) 2KUU-03L You can adjust sharpness of the copied image. Increase the sharpness to sharpen blurred text and lines, or decrease the sharpness to improve the appearance ofmagazine photos. Touch Panel Model <Copy> <Sharpness> Adjust the sharpness &l...
Page 191 - Useful Copy Functions
Useful Copy Functions 2KUU-03R You can copy multiple sheets onto one page, or copy by grouping sheets into complete sets in sequential page order. Also, there is a function to copy both sides of a card, etc. onto one page. Copying Multiple Documents onto One Sheet (N on 1)(P. 185) Using <Paper Sa...
Page 192 - Copying Multiple Documents onto One Sheet (N on 1); Number of pages to be combined
Copying Multiple Documents onto One Sheet (N on 1) 2KUU-03S You can copy two or four documents onto a single sheet at a reduced size. This decreases the number of pages, enabling you to save paper. ● Using <N on 1> reduces the copy ratio automatically (the copy ratio is displayed on the screen...
Page 195 - Collating Copies by Page
Collating Copies by Page 2KUU-03U When preparing multiple copies of multi-page originals, set <Collate> to <On> to collate copies in sequential page order. This function is useful when preparing handouts formeetings or presentations. Touch Panel Model <Copy> <Collate> <On&...
Page 196 - Making ID Card Copies
Making ID Card Copies 2KUU-03W You can use <ID Card Cpy>/<ID Card Copy> to copy the front and back sides of a card onto the same side of a page. This function is useful when copying a driver's license or ID card. ● <ID Card Cpy>/<ID Card Copy> is not available when using <...
Page 197 - Making Passport Copy
Making Passport Copy 2KUU-03X Copy passports for several individuals laid out on a single sheet of paper. This is convenient such as when copying passports as a receptionist duty. ● Using Passport Copy reduces the copy ratio automatically (the copy ratio is displayed on the screen). If thecopying pr...
Page 199 - Faxing
Faxing Faxing ................................................................................................................................................................... 193 Basic Operations for Sending Faxes ......................................................................................
Page 202 - Basic Operations for Sending Faxes; Specifying from Address Book
Basic Operations for Sending Faxes 2KUU-041 This section describes the basic operation procedure used to fax an original. ● You need to complete some procedures before using fax functions. Configuring Initial Settings for FaxFunctions(P. 70) 1 Place the original(s). Placing Originals(P. 128) 2 Selec...
Page 203 - Select a destination.; Specifying from Coded Dial Numbers
3 Select a destination. ● If a destination is selected from <Addr. Book> in the Home screen, the Fax Basic Features screen can bedisplayed while the selected destination remains being specified. Specifying from Coded Dial Numbers Three-digit numbers (coded dial numbers) are assigned to address...
Page 204 - Specifying from One-Touch; Entering Destinations Directly; Enter the fax number.
● If a coded dial number is selected from <Coded Dial> in the Home screen, the Fax Basic Features screen canbe displayed while the selected destination remains being specified. Specifying from One-Touch Specify a destination by selecting from a list registered to the one-touch buttons. ● You n...
Page 205 - To delete destinations; Specify the scanning settings as necessary.; Adjusting Image Quality
If a confirmation screen appears ● When <Confirm Entered Fax Number> is set to <On>, the input screen reappears so that you canconfirm the destination ( Confirming the Entered Fax Number(P. 329) ). Enter the destinationagain. Sending a fax abroad ● Enter the international access code, th...
Page 207 - Scanning 2-Sided Originals
Scanning 2-Sided Originals The machine can automatically scan the front and back sides of originals in the feeder. ● The machine cannot scan both sides of originals automatically when the originals are placed on the platenglass or when the machine is set to Manual Sending. <2-Sided Original> S...
Page 209 - Canceling Sending Faxes; Select on the screen during fax transmission; If the screen displays a list of documents when; Check the transmission status before canceling
Canceling Sending Faxes 2KUU-042 If you want to cancel sending faxes immediately after pressing , select <Cancel> on the display or press on the operation panel. You can also cancel sending faxes after checking the fax status. ◼ Select <Cancel> on the screen during fax transmission ◼ Pre...
Page 210 - Receiving Faxes; Methods for Receiving Faxes
Receiving Faxes 2KUU-043 This section describes the methods for receiving faxes and how to set up the machine to receive faxes. You need to complete some procedures for using fax functions before specifying the receiving settings. Configuring Initial Settings for Fax Functions(P. 70) ● The machine c...
Page 211 - Setting Up the Machine to Receive Faxes; Select the receiving method.
● You can set the machine to automatically receive faxes when an incoming call rings within aspecified timeframe. <Switch to Auto RX>(P. 396) <Answering Machine> When the call is a faxAfter an incoming call rings, the machine receives the fax automatically. When the call is a telephone c...
Page 212 - Using a Telephone to Receive Faxes (Remote Reception); When an incoming call rings, pick up the telephone handset.
When selecting <Fax/Tel (Auto Switch)> Specify the following three settings as necessary. When the setting is complete, select <Apply>. <Ring Start Time> Enables you to specify the duration during which the machine determines whether an incoming call is a fax or a telephone call. &...
Page 214 - Useful Functions When Sending
Useful Functions When Sending 2KUU-044 This section describes how to forward a fax again to a previously specified destination, how to send a fax after a phone call, and how to save a copy of a fax document. Recalling Previously Used Settings for Sending (Recall Settings)(P. 208) Sending a Fax after...
Page 217 - Sending a Fax after a Phone Call (Manual Sending)
Sending a Fax after a Phone Call (Manual Sending) 2KUU-046 You can send faxes manually at the end of a phone conversation. When you hear a beep over the phone, it means the recipient is trying to receive your faxes. Press to send your faxes. ● You need to connect your telephone to the machine before...
Page 219 - Various Receiving Methods
Various Receiving Methods 2KUU-047 You can store received faxes in the machine's memory without printing them. You can reduce fax paper waste by checking the detailed information of fax documents and only printing necessary documents. Saving Received Documents into the Machine (Memory Reception)(P. ...
Page 221 - Checking/Forwarding/Deleting Documents in Memory
<Menu> <Fax Settings> <RX Function Settings> <Memory Lock Settings> <Off> Checking/Forwarding/Deleting Documents in Memory You can check an outline of each document stored in memory, including sender fax numbers and number of pages sent. You can also select and forward ...
Page 222 - Forwarding the Received Documents Automatically; Printing Documents to be Forwarded; Storing Documents that Failed to be Forwarded in Memory
Forwarding the Received Documents Automatically 2KUU-049 The machine can forward all the received documents to specified destinations. Even if you are out of the office, you can receive fax information anytime, anywhere. Specifying Settings for Documents to be Forwarded Automatically(P. 215) Printin...
Page 224 - To check the communication logs for sent and received documents
Checking Status and Log for Sent and ReceivedDocuments 2KUU-04A The statuses and communication logs for sent and received fax documents can be checked separately for sending and receiving. ● When <Display Job Log> is set to <Off>, you cannot check the communication logs. <Display JobL...
Page 226 - Sending Faxes from Your Computer (PC Fax)
Sending Faxes from Your Computer (PC Fax) 2KUU-04C You can send fax documents created on your computer application directly from your computer. This feature eliminates the need to print documents for faxing and saves paper. You need to specify the basic fax settings ( Configuring Initial Settings fo...
Page 227 - Sending PC Faxes; Open a document in an application and display the print dialog box.
Sending PC Faxes 2KUU-04E ● When <Allow Fax Driver TX> is set to <Off> on the machine, you cannot send faxes from computers. Restricting Fax Sending from a Computer(P. 329) 1 Open a document in an application and display the print dialog box. ● How to display the print dialog box differs...
Page 229 - Printing
Printing Printing ................................................................................................................................................................ 223 Printing from a Computer ...............................................................................................
Page 230 - Printing from Mobile Devices
Printing 2KUU-04F You can print documents on your computer by using the printer driver. ◼ Printing from a Computer You can print a document made on your computer by using the printer driver. Printing from a Computer(P. 224) Printing from Mobile Devices ● Linking mobile devices such as smartphones or...
Page 231 - About the Printer Driver Help; Basic Printing Operations; Paper settings on the machine
Printing from a Computer 2KUU-04H You can print a document made with an application on your computer by using the printer driver. There are useful settings on the printer driver, such as enlarging/reducing and 2-sided printing, that enable you to print your documents in various ways. Before you can ...
Page 233 - Canceling from the Remote UI
Canceling Prints 2KUU-04J You can cancel printing from your computer or on the operation panel of the machine. From a Computer(P. 226) From the Operation Panel(P. 227) From a Computer You can cancel printing from the printer icon displayed on the system tray on the desktop. 1 Double-click the printe...
Page 234 - Check the Print Job Status Before Canceling
From the Operation Panel Cancel printing using or . ◼ Press to Cancel If the Screen Displays a List of Documents When is Pressed Select the document you want to cancel, and select <Yes>. ◼ Check the Print Job Status Before Canceling <Copy/Print Job> <Job Status> Select the document...
Page 235 - Checking the Printing Status and Log; To check the print logs
Checking the Printing Status and Log 2KUU-04K You can check the current print statuses and the logs for printed documents. ● When <Display Job Log> is set to <Off>, you cannot check the print logs. <Display Job Log>(P. 425) Useful in the Following Cases ● When your documents are no...
Page 237 - Scanning
Scanning Scanning .............................................................................................................................................................. 231 Basic Operations for Scanning Originals ..................................................................................
Page 238 - Enhancing Quality
Scanning 2KUU-04L You can scan original documents by using the operation panel of the machine or an application on a computer. Whichever way you use, the scanned originals are converted into electronic file formats such as PDFs. Use the scan function to convert large-volume paper documents into file...
Page 239 - Scanning from a Computer
Useful Scanning Functions(P. 255) ◼ Scanning from a Computer You can scan originals placed on the machine from a computer. The scanned originals are saved to the computer. You can scan using MF Scan Utility (included with the machine), or with other applications such as an image-processing or word-p...
Page 240 - Operating Jobs
Basic Operations for Scanning Originals 2KUU-04S This section describes the basic procedures for scanning originals. ◼ Scanning Scanning and Saving to a Computer(P. 234) Scanning Using the Shortcut Key(P. 236) Sending Data by E-Mail/Saving Data to a Shared Folder(P. 239) ◼ Operating Jobs Canceling S...
Page 241 - Scanning and Saving to a Computer; Select the destination computer.
Scanning and Saving to a Computer 2KUU-04U The sequence of "scanning an original and saving it to a computer" can only be done when scanning from the machine. Scan while specifying what computer originals will be saved to; whether to scan originals in color or black and white; whether to sav...
Page 242 - About the save destination folder
When placing originals in the feeder in step 1 When scanning is complete, the save destination folder is displayed on the computer. When placing originals on the platen glass in step 1 When scanning is complete, follow the procedure below (when the file format is PDF). 1 If there are additional page...
Page 243 - Scanning Using the Shortcut Key; Registering Your Settings in the Shortcut Key; Select the shortcut key to which you want to register settings.
Scanning Using the Shortcut Key 2KUU-04W After placing an original on the machine, use the short cut key and scanning starts. The type of scan (color or black and white), the save destination for the original, and other settings can be registered to the menu items, and originals can be scanned using...
Page 244 - Select the scan type.; Checking the Registered Settings; Using the Shortcut Key; Select the shortcut key.
● If you selected <USB Connection> in step 5, proceed to step 7. 7 Select the scan type. ● The scan types and settings that are displayed can be confirmed and changed by using MF Scan Utility. Formore information, click [Instructions] on MF Scan Utility. ● If you are a macOS user, see the manu...
Page 246 - Sending Data by E-Mail/Saving Data to a Shared Folder; Specify the destination.
Sending Data by E-Mail/Saving Data to a Shared Folder 2KUU-04X This section describes the procedures for scanning originals and sending the scanned data directly from the machine by attaching it to an e-mail or saving it to a shared folder. ● Before you can send the data directly by e-mail, you need...
Page 250 - Specifying the Scanning Size of the Original; Specifying the Color Mode
Specifying the Scanning Size of the OriginalSpecifying the Color ModeSelecting a File FormatSpecifying Orientation of Your OriginalScanning 2-Sided Originals Specifying the Scanning Size of the Original You can specify the scanning size of your original. <Scan Size> Select the original size Sp...
Page 251 - Specifying Orientation of Your Original
● If you select JPEG in <File Format> and try to scan an original from the platen glass, you can only scanone page. To scan a multiple-page original all at once, use the feeder. Each page of the original issaved as a separate file. If you select TIFF or PDF, you can scan multiple-page original...
Page 252 - If an E-Mail Send Error Occurs
<Calendar Type> Select for originals whose images on the front and back sides face in opposite directions. ● For information about other scan settings, see Scanning Clearly(P. 251) or Adjusting Balancebetween File Size and Image Quality(P. 256) . ● For e-mail, you can specify the subject, mess...
Page 254 - Canceling Sending Documents
Canceling Sending Documents 2KUU-04Y If you want to cancel sending documents immediately after pressing , select <Cancel> on the display or press . You can also cancel sending documents after checking the sending status. ◼ Select <Cancel> to cancel ◼ Press to cancel If the screen display...
Page 256 - Checking Status and Log for Scanned Originals; To check the logs for sent documents
Checking Status and Log for Scanned Originals 2KUU-050 You can check the status and log for scanned originals sent directly from the machine. ● When <Display Job Log> is set to <Off>, you cannot check the logs for sent documents. <Display JobLog>(P. 425) 1 Press . 2 Select <TX J...
Page 258 - Scanning Clearly
Scanning Clearly 2KUU-051 When creating files for brochures that contain many pictures or reports written in pencil, you can adjust density and brightness to achieve clearer image quality. Adjusting Image Quality(P. 252) Adjusting Density(P. 253) Adjusting Sharpness When Scanning (Sharpness)(P. 254)...
Page 261 - Adjusting Sharpness When Scanning (Sharpness)
Adjusting Sharpness When Scanning (Sharpness) 2KUU-054 You can adjust the sharpness of the image. Increase the sharpness to sharpen blurred text and lines, or decrease the sharpness to improve the appearance ofmagazine photos. <Scan> Specify destinations in <E-Mail> or <File> <S...
Page 262 - Useful Scanning Functions
Useful Scanning Functions 2KUU-055 The machine is equipped with useful functions such as those that can create secure PDF files to prevent them from being tampered with, and that can send data again to previously specified destinations. Adjusting Balance between File Size and Image Quality(P. 256) R...
Page 263 - Adjusting Balance between File Size and Image Quality
Adjusting Balance between File Size and Image Quality 2KUU-056 You can specify the file compression ratio when converting scanned originals into the JPEG format. <Small: Memory Priority> makes the compression ratio higher thannormal to create smaller files with lower image quality. On the othe...
Page 266 - Specifying E-Mail Settings; To specify subject/message
Specifying E-Mail Settings 2KUU-058 When attaching a scanned originals to an e-mail, you can specify the subject, message, reply-to address, and priority for the e-mail before sending it. 1 Place the original(s). Placing Originals(P. 128) 2 Select <Scan> in the Home screen. Home Screen(P. 111)...
Page 267 - To specify priority; When placing originals in the feeder in step 1
1 Select <Reply To>. 2 Select <Specify from Address Book>. 3 Select a reply-to address. To specify priority 1 Select <Priority>. 2 Select a priority level. 6 Press . ➠ Scanning of the original starts. ● If you want to cancel, select <Cancel> <Yes>. Canceling Sending Doc...
Page 268 - Using Your Computer to Scan (Remote Scan); Scanning Using MF Scan Utility
Using Your Computer to Scan (Remote Scan) 2KUU-059 To scan from a computer, you can use MF Scan Utility or an application such as an image processing or word processing application. If you use ScanGear MF supplied with the machine, you can configure advanced scan settings ( Using ScanGear MF(P. 264)...
Page 269 - Scanning Documents from an Application; From the application, select the start scan command.
Scanning Documents from an Application 2KUU-05A You can scan originals from applications such as image-processing or word- processing software. The scanned image is directly loaded in the application,allowing you to edit or process the image immediately. The following procedurevaries depending on th...
Page 271 - Using ScanGear MF; Starting from MF Scan Utility
Using ScanGear MF 2KUU-05C ScanGear MF is a scanner driver included with the machine. You can use ScanGear MF to configure advanced scan settings when you scan. The way ofstarting ScanGear MF differs depending of the way of scanning from the computer. Starting from MF Scan Utility When scanning from...
Page 272 - Linking with Mobile Devices
Linking with Mobile Devices Linking with Mobile Devices .................................................................................................................... 266 Connecting with Mobile Devices ...............................................................................................
Page 274 - Connecting via a Wireless LAN Router
Connecting with Mobile Devices 2KUU-05F There are two methods used to connect a mobile device with the machine: connecting via a wireless LAN router, and communicating wirelessly and directly with the machine. Select a connection method in accordance with the communication environment and the device...
Page 275 - Connecting via a Wireless LAN Router (LAN Connection)
Connecting via a Wireless LAN Router (LAN Connection) 2KUU-05H If a wireless LAN router is connected to the network connected to the machine, you can establish a communication with a mobile device via the wireless LAN router in the same way for a computer. For information about how to connect a mobi...
Page 276 - Preparing for Direct Connection (Access Point Mode); Specifying the value for time until auto termination
Connecting Directly (Access Point Mode) 2KUU-05J Even in an environment without a wireless LAN router, using "Access Point Mode," which can directly connect a mobile device to the machine wirelessly, enables you to connect the mobile device on hand to the machine without difficult settings. ...
Page 279 - Utilizing the Machine through Applications; Using Canon PRINT Business; Printing with Google Cloud Print
Utilizing the Machine through Applications 2KUU-05K Perform printing and other operations from the mobile device connected to the machine using applications. Various applications including those exclusive to Canon are supported. Use properly in accordance with your device, the application, and the s...
Page 280 - Using AirPrint; Configuring AirPrint Settings
Using AirPrint 2KUU-0A9 This section describes the settings required to use AirPrint and the procedures to be performed using Apple devices. AirPrint Settings Configuring AirPrint Settings(P. 273) Displaying the Screen for AirPrint(P. 276) Functions of the AirPrint Printing with AirPrint(P. 278) Sca...
Page 282 - Changing the Setting of Functions Available with AirPrint; Changing Print and Fax Settings; Changing the Scan Setting
◼ Changing the Setting of Functions Available with AirPrint If you want to disable functions that you are not going to use with AirPrint or encrypt communications, configure the necessary setting using the operation panel or Remote UI. Changing Print and Fax Settings To perform printing or fax sendi...
Page 283 - Displaying the Screen for AirPrint; Log in to the Remote UI.; AirPrint-Dedicated Page
<Menu> ( ) <Network Settings> <TCP/IP Settings> <Network Link Scan Settings> Set <Use TLS> to <Off> or <On> Displaying the Screen for AirPrint You can display the screen for AirPrint, on which you can not only access the AirPrint Settings but also view infor...
Page 284 - Trademarks
[AirPrint Settings] Enables you to check the values entered in the AirPrint settings, such as the name and location of the machine. You can click [Edit] to change the settings. [Other Settings] [Print Security Settings]Configure the print security settings using TLS or authentication. [Scan Security...
Page 285 - Printing with AirPrint; System Requirements; Network Environment; Printing from an iPad, iPhone, or iPod touch; From the application on your Apple device, tap
Printing with AirPrint 2KUU-05R You can print from an iPad, iPhone, iPod touch, or Mac without using a printer driver. Printing from an iPad, iPhone, or iPod touch(P. 278) Printing from a Mac(P. 279) System Requirements One of the following Apple devices is required to print with AirPrint. ● iPad (a...
Page 286 - Specify the print settings as necessary.; Printing from a Mac; Make sure that the machine is turned ON and connected to the Mac.
3 Tap [Print]. 4 Select this machine from [Printer]. ● The printers connected to the network are displayed here. Select this machine in this step. ● The screen for selecting this machine in [Printer] is not displayed on applications that do not supportAirPrint. You cannot print by using those applic...
Page 288 - Scanning with AirPrint; Scanning from a Mac
Scanning with AirPrint 2KUU-05S You can use AirPrint to transfer the data scanned by the machine directly to a Mac. System Requirements To scan with AirPrint, you need a Mac with OS X 10.9 or later installed. To scan using TLS, you need a Mac with OS X 10.11 or later installed. Network Environment O...
Page 289 - Configure the scan settings as necessary.
5 Click [Open Scanner]. ➠ The [Scanner] screen is displayed. 6 Configure the scan settings as necessary. 7 Click [Scan]. ➠ The original is scanned, and the image is displayed. Linking with Mobile Devices 282
Page 290 - Faxing with AirPrint; Faxing from a Mac
Faxing with AirPrint 2KUU-05U You can send faxes from a Mac in almost the same way as when you print from a Mac. System Requirements To send faxes with AirPrint, you need a Mac with OS X 10.9 or later installed. Network Environment One of the following environments is required. ● An environment wher...
Page 292 - If AirPrint Cannot Be Used
If AirPrint Cannot Be Used 2KUU-05W If AirPrint cannot be used, try taking the following solutions. ● Make sure that the machine is turned ON. If the machine is turned ON, first turn it OFF, then wait for at least 10seconds and then turn it back ON to check if the problem is solved. ● Make sure that...
Page 293 - Using Google Cloud Print; Checking the Settings of the Machine; Registering the Machine with Google Cloud Print
Using Google Cloud Print 2KUU-05X Google Cloud Print is a service that enables a user with a Google account to print from a smartphone, tablet, or computer connected to the Internet using applications compatible with Google Cloud Print. Unlike conventional printing from a computer, it does not requi...
Page 294 - Follow the instructions on the screen to register the machine.
1 Start the Remote UI and log in as an administrator. Starting Remote UI(P. 335) 2 Click [Settings/Registration] on the Portal page. Remote UI Screen(P. 336) 3 Select [Network Settings] [Google Cloud Print Settings]. 4 Click [Edit] for [Basic Settings]. 5 Select the [Use Google Cloud Print] check bo...
Page 295 - Managing the Machine by the Remote Control; Supported Web Browsers; iOS; Starting the Remote UI from Mobile Devices; Start the Web browser of the mobile device.
Managing the Machine by the Remote Control 2KUU-05Y You can use the Remote UI from a smart phone or tablet Web browser. You can confirm the machine status or perform various settings from a mobile device. Supported Web Browsers Web browsers supporting the Remote UI for mobile devices are the followi...
Page 296 - Managing the Machine
Managing the Machine Managing the Machine ............................................................................................................................... 290 Setting Access Privileges .......................................................................................................
Page 297 - Configuring the Basic Management System
Managing the Machine 2KUU-060 To reduce the various risks associated with the use of this machine, such as leaks of personal information or unauthorized use by third parties, constant and effective security measures are required. An administrator should manage important settings, such as access priv...
Page 298 - Managing the System Configuration and Settings
◼ Managing the System Configuration and Settings Updating the Firmware(P. 355) Initializing Settings(P. 358) Managing the Machine 291
Page 299 - Setting Access Privileges; System Manager PIN
Setting Access Privileges 2KUU-061 Protect the machine from unauthorized access by only allowing users with access privileges to use the machine. When privileges are set, the user must enter a PIN to change settings or access the Remote UI. Access privileges are divided into two types: System Manage...
Page 300 - Setting the System Manager PIN; Specify the System Manager PIN.; Setting the System Manager Name
Setting the System Manager PIN 2KUU-062 Set a System Manager PIN that is intended exclusively for Administrators. You can access <Network Settings>, <System Management Settings>, etc. only when the PIN has been entered correctly. It is recommended that only Administrators know the PIN. 1...
Page 302 - Setting a Remote UI PIN; Select the [Use Remote UI Access PIN] check box and set the PIN.
Setting a Remote UI PIN 2KUU-063 You can set a PIN for access to the Remote UI. All users use a common PIN. ● For more information about the basic operations to be performed when setting the machine from theRemote UI, see Setting Up Menu Options from Remote UI(P. 344) . 1 Start the Remote UI and log...
Page 303 - If are initialized
If <System Management Settings> are initialized ● The Remote UI Access PIN is also initialized. After an initialization, reset the PIN. <InitializeMenu>(P. 428) LINKS Setting Access Privileges(P. 292) Setting the System Manager PIN(P. 293) Managing the Machine 296
Page 304 - Configuring the Network Security Settings; Firewall Settings
Configuring the Network Security Settings 2KUU-064 Authorized users may incur unanticipated losses from attacks by malicious third parties, such as sniffing, spoofing, and tampering of data as it flows over a network. To protect your important and valuable information from these attacks, the machine...
Page 306 - Restricting Communication by Using Firewalls
Restricting Communication by Using Firewalls 2KUU-065 Without proper security, unauthorized third parties can access computers and other communication devices that are connected to a network. To prevent this unauthorized access, specify the settings for packet filter, a feature that restricts commun...
Page 307 - Specifying IP Addresses for Firewall Settings; Specify the settings for packet filtering.
Specifying IP Addresses for Firewall Settings 2KUU-066 You can either limit communication to only devices with specified IP addresses, or block devices with specified IP addresses but permit other communications. You can specify a single IP address or a range of IP addresses. ● For more information ...
Page 309 - Using the operation panel
<IPv6 Address Filter>(P. 422) Entry form for IP addresses Description Example Entering a single address IPv4:Delimit numbers with periods. 192.168.0.10 IPv6:Delimit alphanumeric characters withcolons. fe80::10 Specifying a range of addresses Insert a hyphen between theaddresses. 192.168.0.10-1...
Page 310 - Specifying MAC Addresses for Firewall Settings
Specifying MAC Addresses for Firewall Settings 2KUU-067 You can limit communication to only devices with specified MAC addresses. This function is unavailable when the machine is connected to a wireless LAN. ● For more information about the basic operations to be performed when setting the machine f...
Page 312 - Changing Port Numbers; Selecting the protocol of which you want to change the port number.
Changing Port Numbers 2KUU-068 Ports serve as endpoints for communicating with other devices. Typically, conventional port numbers are used for major protocols, but devices that use these port numbers are vulnerable to attacks because these port numbers are well-known. To enhance security, your Netw...
Page 313 - Setting a Proxy; Select the [Use Proxy] check box and specify the required settings.
Setting a Proxy 2KUU-069 A proxy (or HTTP proxy server) refers to a computer or software that carries out HTTP communication for other devices, especially when communicating with resources outside the network, such as when browsing Web sites. The client devices connect to the outside network through...
Page 315 - Configuring the Key and Certificate for TLS; Enable TLS for the Remote UI.
Configuring the Key and Certificate for TLS 2KUU-06A You can encrypt communication between the machine and a Web browser on the computer by using Transport Layer Security (TLS). TLS is a mechanism for encrypting data sent or received over the network. TLS must be enabled when the Remote UI is used f...
Page 317 - Specify settings for the key and certificate.
Generating the Key and Certificate for NetworkCommunication 2KUU-06C A key and certificate can be generated with the machine when it is required for encrypted communication via Transport Layer Security (TLS). You can use TLS when accessing the machine via the Remote UI. Self-signed certificates are ...
Page 320 - Generating a Key and Certificate Signing Request (CSR); Generating a Key and CSR; Specify settings for the key and CSR.
Generating a Key and Certificate Signing Request (CSR) 2KUU-06E Because certificates generated on the machine do not have a CA signature, a communication error may result depending on devices it communicates with. To have the certificate authority issue the certificate with the CA signature, you nee...
Page 322 - Registering a Certificate to a Key
➠ The CSR file is stored on the computer. 9 Attach the stored file and submit the application to the certification authority. Registering a Certificate to a Key The key with the CSR generated cannot be used until the certificate issued from the certificate authority based on the CSR is registered in...
Page 324 - Register the key and certificate or CA certificate.; Registering a CA certificate
Deleting the key and certificate file or CA certificate file ● Click [Delete] on the right of the file you want to delete click [OK]. 6 Click [Browse], specify the file to install, and click [Start Installation]. ➠ The key and certificate file or the CA certificate file is installed on the machine f...
Configuring IEEE 802.1X Authentication Settings 2KUU-06H The machine can connect to an 802.1X network as a client device. A typical 802.1X network consists of a RADIUS server (authentication server), LAN switch (authenticator), and client devices with authentication software (supplicants). If a devi...
Page 326 - Setting TLS
2 Click [Settings/Registration] on the Portal page. Remote UI Screen(P. 336) 3 Select [Network Settings] [IEEE 802.1X Settings]. 4 Click [Edit]. 5 Select the [Use IEEE 802.1X] check box, and enter the login name in the [Login Name]text box. [Use IEEE 802.1X] Select the check box to enable IEEE 802.1...
Page 329 - Restricting the Machine's Functions; Restricting Access to Address Book and Sending Functions
Restricting the Machine's Functions 2KUU-06J Some of the functions of the machine may rarely be used or provide opportunities for misuse. For security purposes, the machine can be set to limit its capabilities by partially or completely disabling these functions. Restricting Access to Address Book a...
Page 332 - Restricting Use of the Address Book
Restricting Use of the Address Book 2KUU-06L The Address Book can be set to require users to enter a PIN in order to add new entries to the Address Book or edit existing entries. Setting a PIN to the AddressBook can reduce the risk of documents being sent to unintended recipients becausechanges to t...
Page 334 - Limiting Available Destinations; Restricting New Destinations that Can Be Specified; Disabling Use of Previously Used Destinations
Limiting Available Destinations 2KUU-0AA By limiting destinations that can be specified to those registered in the Address Book, you can reduce the possibility of specifying unintended destinations andprevent users from leaking information. You can configure the setting to display theconfirmation sc...
Page 336 - Restricting the Fax Sending Functions; Confirming the Entered Fax Number; Restricting Fax Sending from a Computer; Restricting Sequential Broadcasts
Restricting the Fax Sending Functions 2KUU-0AC You can set various restrictions for sending faxes, which can prevent information leakage to third parties or sending documents to unintended destinations. Confirming the Entered Fax Number(P. 329) Restricting Fax Sending from a Computer(P. 329) Restric...
Page 338 - Restricting USB Functions; Restricting the USB Connection with a Computer
Restricting USB Functions 2KUU-06Y USB is a convenient way of connecting peripheral devices and storing or relocating data, but USB can also be a source of information leakage if it is not properly managed. This section describes how to restrict connection via the USB port of the machine. Restrictin...
Page 339 - Disabling HTTP Communication
Disabling HTTP Communication 2KUU-070 HTTP is used for communications over the network, such as when you access the machine via the Remote UI. If you are using a USB connection or are otherwise not using HTTP, you can disable HTTP to block malicious third-party intrusions via the unused HTTP port. ●...
Page 340 - Disabling Remote UI
Disabling Remote UI 2KUU-071 The Remote UI is useful because the machine settings can be specified by using a Web browser on a computer. To use the Remote UI, the machine must be connected to a computer over the network. If the machine is connected to a computer via USB, or if you do not need to use...
Page 341 - Managing the Machine from a Computer (Remote UI)
Managing the Machine from a Computer (Remote UI) 2KUU-072 Using a Web browser to operate the machine remotely, you can check the documents waiting to be printed or the status of the machine. You can also make various settings. You can do this without leaving your desk, making system management easie...
Page 342 - Starting Remote UI; Start the Web browser.
Starting Remote UI 2KUU-073 To operate remotely, you need to input the IP address of the machine into a Web browser and start the Remote UI. Check the IP address set to the machine in advance ( Viewing Network Settings(P. 38) ). If you have any questions, ask your Network Administrator. 1 Start the ...
Page 343 - When a System Manager PIN is set; Remote UI Screen
When a System Manager PIN is set Enter the appropriate PIN in [System Manager PIN] to log in to System Manager Mode. Setting the System Manager PIN(P. 293) 4 Click [Log In]. ➠ The Portal page (main page) will be displayed. Remote UI Screen(P. 336) Remote UI Screen When you log in to the Remote UI, t...
Page 344 - Refresh Icon
[Support Link] Displays the support link specified in [Device Information] under [System Management]. Refresh Icon Refreshes the currently displayed page. [Log Out] Logs off from the Remote UI. The Login page will be displayed. [Mail to System Manager] Displays a window for creating an e-mail to the...
Page 345 - Checking the Status and Logs; Checking Current Status of Print Documents
Checking the Status and Logs 2KUU-074 Checking Current Status of Print Documents(P. 338) Checking the Status of Received Faxes(P. 339) Checking History of Documents(P. 339) Checking Error Information(P. 339) Checking Consumables(P. 340) Checking Maximum Print Speed(P. 340) Checking System Manager In...
Page 349 - Checking History of Cartridge; Checking Eco Information
Checking History of Cartridge You can check the usage logs of the toner cartridge or the drum cartridge. The display can be changed to either the toner cartridge or the drum cartridge. Log in to the Remote UI ( Starting Remote UI(P. 335) ) [Status Monitor/Cancel] [CartridgeLog] Checking Eco Informat...
Page 351 - Setting Up Menu Options from Remote UI; Click the link to display the desired page as necessary.
Setting Up Menu Options from Remote UI 2KUU-075 You can change the various machine settings by using the Remote UI. Most of the settings can be set also on the machine, but some settings can only be set using the Remote UI. This section describes the basic flow of changing the settings of the machin...
Page 353 - Restart the machine as necessary.
8 Restart the machine as necessary. ● Turn OFF the machine, wait for at least 10 seconds, and turn it back ON. ● For information about whether you need to restart the machine, view the message on the edit screen. Managing the Machine 346
Page 354 - Registering Destinations from Remote UI
Registering Destinations from Remote UI 2KUU-076 You can use the computer to register destinations in the Address Book of the machine and edit information of registered destinations. Specify the shared folder destination here. You can change the settings only when you have logged in to System Manage...
Page 355 - To register the e-mail destination
6 Specify the destination. To register the fax destination [Name]Enter the name of the destination.[Fax Number]Enter the fax number of the destination.[ECM TX]Select the check box to make the following possible: if an error occurs in an image that is being sent, the error is checked and corrected to...
Page 356 - To register the shared folder destination
[Name]Enter the name of the destination.[E-Mail Address]Enter the e-mail address of the destination. To register the shared folder destination [Name]Enter the name for the destination.[Host Name]Enter the computer name or IP address. You can include a path to the shared folder with the computer name...
Page 358 - Saving/Loading Address Book from Remote UI; Do not operate the machine during the import or export process; Exporting Address Book Data; Do not operate until the process is complete.
Saving/Loading Address Book from Remote UI 2KUU-077 Address Book data in the machine can be saved on your computer (export). Data that is saved on your computer can also be registered in the machine (import). You can easily copy the destinations in the Address Book tomultiple machines. * To use thes...
Page 359 - Loading Address Book Data
Loading Address Book Data The Address Book data currently registered is overwritten when you load the Address Book data. 1 Start the Remote UI and log in to System Manager Mode. Starting RemoteUI(P. 335) 2 Click [Settings/Registration] on the Portal page. Remote UI Screen(P. 336) 3 Click [Import/Exp...
Page 362 - Updating the Firmware; Checking the firmware version; Updating via the Internet
Updating the Firmware 2KUU-078 For the firmware, select the method of update depending on the installation condition of the machine. There are two methods of update: the one is to access the latest firmware version on the Internet from the machine and perform the update if the version currently inst...
Page 363 - Updating from a Computer; To Put the Machine into a Firmware Update Waiting State; Checking the Firmware Version
4 Select <Via Internet>. ➠ A check for existence of the latest firmware is performed. ● If the <This is the latest firmware version.> message is displayed, there is no need to update the firmware. 5 Check the message and select <Yes>. 6 When a license screen appears, press <Acce...
Initializing Settings 2KUU-079 You can restore the following settings: Initializing Eco Report Counter(P. 358) Initializing Menu(P. 358) Initializing Key and Certificate(P. 358) Initializing Address Book(P. 359) Initializing All Data/Settings(P. 359) Initializing Eco Report Counter You can restore t...
Page 366 - Initializing Address Book; Initializing All Data/Settings
● After initializing, functions that require a key and certificate such as TLS encrypted communication are notavailable. To use these functions, configure the settings for the key and certificate and activate the functionsagain. Log in to the Remote UI with Administrator privileges ( Starting Remote...
Page 367 - Setting Menu List
Setting Menu List Setting Menu List ........................................................................................................................................... 361 <Direct Connection> .................................................................................................
Page 372 -
<Time Until Direct Connection Termination> Specify the time to automatically disconnect after Direct Connection is established. 0 (Do not terminate session automatically)1 to 10 to 60 (min.) <Menu> ( ) <Network Settings> <Direct Connection Settings> <Time Until Direct Conn...
Page 385 -
<Millimeter/Inch Entry Switch> *2 Select the unit of measurement. <Millimeter><Inch> <Menu> ( ) <Preferences> <Display Settings> <Millimeter/Inch Entry Switch> Select <Millimeter> or <Inch> <Gram/Pound Switch> *2 Select the unit of measurem...
Page 389 - UTC
<Time Format> Select the 12- or 24-hour clock display setting. <12 Hour (AM/PM)><24 Hour> <Menu> ( ) <Timer Settings> <Date/Time Settings> <Time Format> Select the display setting <Current Date/Time Settings> Set the current date and time. Setting the ...
Page 392 - Paper Sources
<Common Settings> 2KUU-07K All the settings related to the paper feed method are listed with descriptions. Default settings are marked with a dagger ( ). <Switch Paper Feed Method> Specify this setting when you print a document on paper with logos. In general use, to print on paper with ...
Page 412 - Priority of settings;
<Printer Settings> 2KUU-07U All the settings related to the printer are listed with descriptions. Default settings are marked with a dagger ( ). <Action When Paper Size Mismatch> (P. 405) <Image Quality Settings for Mobile Print>(P. 405) <Copies>(P. 406) <2-Sided Printing&...
Maintenance 2KUU-07Y This chapter describes upkeep of the machine, including how to clean the machine and adjustment of print quality. ◼ Basic Cleaning Regular Cleaning(P. 432) ◼ Replacing Consumables Replacing the Toner Cartridge(P. 443) Replacing the Drum Cartridge(P. 447) Checking the Remaining A...
Page 438 - Adjusting and Managing the Machine
◼ Adjusting and Managing the Machine Relocating the Machine(P. 452) Viewing the Counter Value(P. 454) Printing Reports and Lists(P. 455) Maintenance 431
Page 439 - Regular Cleaning; Where to Clean
Regular Cleaning 2KUU-080 Regularly clean the machine to prevent deterioration in printing quality and to ensure that you use it safely and easily. Where to Clean Exterior of the machine and ventilation slots Cleaning the Exterior(P. 433) Feeder Cleaning the Feeder(P. 435) Interior of the machine an...
Page 440 - Cleaning the Exterior; Clean the exterior of the machine and the ventilation slots.
Cleaning the Exterior 2KUU-081 Regularly wipe the exterior of the machine, especially around the ventilation slots, to keep the machine in good condition. 1 Turn OFF the machine, and unplug the power cord from the AC power outlet. ● Turning the printer OFF erases any queued print data. Data such as ...
Page 441 - Cleaning the Platen Glass; Clean the platen glass and the underside of the feeder.
Cleaning the Platen Glass 2KUU-082 Regularly wipe off the dust from the platen glass and the underside of the feeder to prevent smudges to be printed on originals or printouts. 1 Turn OFF the machine, and unplug the power cord from the AC power outlet. ● Turning the printer OFF erases any queued pri...
Page 442 - Cleaning the Feeder; Feeder scan area cleaning notification
Cleaning the Feeder 2KUU-083 Graphite powder or dust on the rollers inside the feeder or on the original scanning area may cause smudges to appear on printouts. If this occurs or if a paper jam occurs frequently, clean the feeder. Feeder scan area cleaning notification ● To display a message for soi...
Page 444 - If the problem persists
● When wiping the transparent plastic part ( ), take care not to bend the plastic. If the problem persists Remove the transparent plastic part ( ) and wipe it. 1 Hold the tabs ( ) at both ends of the transparent plastic part, and remove the plastic part by gently lifting the rearward end first. ● Th...
Page 445 - Wait for the cleaned area to dry completely.
4 Wait for the plastic part to dry completely. 5 Place the transparent plastic part back into position. ● Make sure of the proper orientation, then hold the tabs and place the plastic part back into positionby gently lowering the frontward end first. 8 Wait for the cleaned area to dry completely. 9 ...
Page 446 - Cleaning the Fixing Assembly
Cleaning the Fixing Assembly 2KUU-084 Dirt may adhere to the fixing assembly inside the machine and cause black streaks to appear on printouts. To clean the fixing assembly, perform the following procedure. Note that you cannot clean the fixing assembly when the machine has documents waiting to be p...
Page 447 - Cleaning the Machine Interior; Turn off the machine and unplug it from the power outlet.; Open the toner cover.
Cleaning the Machine Interior 2KUU-085 Clean the interior of the machine regularly so that toner/paper dust does not collect. 1 Turn off the machine and unplug it from the power outlet. ● Turning the printer OFF erases any queued print data. Data such as documents received and held in memory,documen...
Page 450 - Replacing the Toner Cartridge; When a Message Appear
Replacing the Toner Cartridge 2KUU-086 The machine displays a message when the amount remaining in the toner cartridge is low. Note that the print quality may suffer if you continue printing without resolving this issue. You can check the amount remaining in the toner cartridge on the display ( Chec...
Page 451 - Procedure for Replacing the Toner Cartridge; Lift the operation panel.
<Status Monitor> <Error Information/Notification> <Toner Cartridge End of Lifetime> to display the procedure for replacing the toner cartridge. To replace a consumable ● Press and hold . Select <Consumables Status Report>, print the consumables status report to find out the c...
Page 452 - Remove the new toner cartridge from the protective package.
● Do not shake or tilt the toner cartridge. Also, make sure to avoid applying shocks to the toner cartridge,such as by hitting it against something. Doing so may cause the toner left in the toner cartridge to leak.Remove the toner cartridge gently at the same angle as the slot. 4 Remove the new tone...
Page 454 - Replacing the Drum Cartridge
Replacing the Drum Cartridge 2KUU-087 The machine displays a message when the amount remaining in the drum cartridge is low. Note that the print quality may suffer if you continue printing without resolving this issue. You can check the amount remaining in the drum cartridge on the display ( Checkin...
Page 455 - Procedure for Replacing the Drum Cartridge
<Status Monitor> <Error Information/Notification> <Drum Cartridge End of Lifetime> to display the procedure for replacing the drum cartridge. To replace a consumable ● Press and hold . Select <Consumables Status Report>, print the consumables status report to find out the car...
Page 456 - Remove the drum cartridge.; Remove the new drum cartridge from the protective bag.
Do not shake or tilt the toner cartridge. Also, make sure to avoid applying shocks to the toner cartridge, such as by hitting it against something. Doing so may cause the toner left in the toner cartridge to leak. Remove the toner cartridge gently at the same angle as the slot. 4 Remove the drum car...
Page 458 - Checking the Remaining Amount of Consumables; Amount Remaining in Toner Cartridge; Amount Remaining in Drum Cartridge
Checking the Remaining Amount of Consumables 2KUU-088 Use the procedure below to check the amount remaining in the toner cartridge, etc. It is particularly important to check whether you need to have a new toner cartridge or a new drum cartridge ready before starting a large print job. <Device In...
Page 459 - Relocating the Machine; Turn OFF the machine and computer.
Relocating the Machine 2KUU-089 The machine is heavy. Make sure to follow the procedure below when moving the machine to avoid injury. 1 Turn OFF the machine and computer. ● Turning the printer OFF erases any queued print data. Data such as documents received and held in memory,documents waiting to ...
Page 460 - Carefully place the machine at the new installation site.
● Hold the lift handles, and lift up the machine. 6 Carefully place the machine at the new installation site. ● For information about how to install the machine after relocating it, see "Getting Started." Manuals andTheir Contents(P. 549) Maintenance 453
Page 461 - Viewing the Counter Value
Viewing the Counter Value 2KUU-08A You can check total for the number of pages used for printouts. The number of printouts includes printouts of the list as well as printouts of data from computers. <Device Information> <Check Counter> Check the number of pages printed Maintenance 454
Page 462 - Printing Reports and Lists; Setting Reports on the Communication Results; Communication Management Report (Touch Panel Model)
Printing Reports and Lists 2KUU-08C You can print reports and lists to check information such as machine settings. Setting Reports on the Communication Results(P. 455) Printing Lists of Settings(P. 457) Printing Reports and Lists on the Usage Status of the Machine(P. 457) Setting Reports on the Comm...
Page 463 - Communication result
<Menu> <Output Rprt.> <Print List> <Communication Management Report> Check thatthe size and type of paper displayed on the screen is loaded in the machine, and select<OK> <Yes> Fax TX Result Report (Touch Panel Model) You can check the fax logs of sent documents b...
Page 464 - Printing Lists of Settings; User Data List; Printing Reports and Lists on the Usage Status of the Machine; Eco Report
<Menu> <Output Rprt.> <Report Settings> <RX Result Report> Select <On> or <Only WhenError Occurs> Printing Lists of Settings You can print information and settings registered in the machine as a list. Address Book List (Touch Panel Model) You can check the list of...
Page 465 - Consumables Status Report; PCL Font List; Cartridge Log Report
<Menu> <Output Rprt.> <Print List> <Eco Report> Check that the size and type of paperdisplayed on the screen is loaded in the machine, and select <OK> <Yes> 5 Lines LCD Model <Output Report> <Eco Report> Check that the size and type of paper displayed ...
Consumables 2KUU-08E The following is a guide to the estimated replacement time for the consumables used in this machine. Purchase consumables at your local authorized Canon dealer. Observe safety and health precautions when storing and handling consumables. For optimum print quality, using Canon ge...
Page 468 - Be careful of counterfeit toner cartridges; Drum Cartridge; Supplied Drum Cartridge; Replacement Drum Cartridges
Approx. 0.4 Kg * The average yield is based on "ISO/IEC 19752" (the global standard related to "Method for the determination of toner cartridge yield for monochromatic electrophotographic printers and multi-function devices that contain printer components" issued by ISO [Internationa...
Page 469 - Be careful of counterfeit drum cartridges
Be careful of counterfeit drum cartridges ● Please be aware that there are counterfeit Canon drum cartridges in the marketplace. Use ofcounterfeit drum cartridge may result in poor print quality or machine performance. Canon is notresponsible for any malfunction, accident or damage caused by the use...
Page 470 - Troubleshooting
Troubleshooting Troubleshooting ............................................................................................................................................. 464 Common Problems .............................................................................................................
Page 473 - Check the Following; Is the machine turned ON? Is the power cord connected?; If a problem persists even after checking
Common Problems 2KUU-08H If you encounter problems when using the machine, check the items in this section before contacting us. If the problems persist, contact your local authorized Canon dealer or the Canon help line. Check the Following Is the machine turned ON? Is the power cord connected? ● If...
Page 474 - Installation/Settings Problems; Problems with the Wireless/Wired LAN Connection; The wireless LAN and wired LAN cannot be connected at the same time.
Installation/Settings Problems 2KUU-08J See Common Problems(P. 466) also. Problems with the Wireless/Wired LAN Connection(P. 467) Problem with the USB Connection(P. 470) Problem with the Print Server(P. 470) Problems with the Wireless/Wired LAN Connection The wireless LAN and wired LAN cannot be con...
Page 475 - When the Machine Cannot Connect to the Wireless LAN
You are unsure of the set IP address. Viewing Network Settings(P. 38) The connection method cannot be switched between a wired LAN and a wirelessLAN. ● Did you select a wired LAN or a wireless LAN on the operation panel on the machine as well? This selection isrequired to have the machine switch to ...
Page 476 - When you need to manually set up the connection
If the problem persists even after checking the above: ● Turn off the devices, and then turn them on again. ● Wait for a while, and try again to connect to the network. Check whether the machine is turned ON. ● If the machine is turned ON, turn it OFF, and then turn it back ON. Check the installatio...
Page 477 - You cannot find the print server to connect to.; You cannot connect to a shared printer.
● When only IEEE 802.11n is used for the wireless communication, WEP is selected or the WPA/WPA2encryption method is set to TKIP. Problem with the USB Connection Cannot communicate. ● Change the USB cable. If you are using a long USB cable, replace it with a short one. ● If you are using a USB hub, ...
Page 478 - Copying/Printing Problems; When You
Copying/Printing Problems 2KUU-08K See Common Problems(P. 466) also. Printing/copy results are not satisfactory. Paper creases or curls. When You Cannot Print Properly(P. 476) You cannot print. ● Can you print a Windows test page? If you can print a Windows test page, there is no problem with themac...
Page 479 - Printing seems to be slow.
● Can you print from other computers on the network? If you also cannot print from other computers,contact your local authorized Canon dealer or the Canon help line. Wired LAN connection ● Have you selected the correct port? If there is no port to use, create a port. Checking the Printer Port(P. 561...
Page 481 - Faxing/Telephone Problems; Sending Problems; A fax cannot be sent.; A fax cannot be sent with a destination in the history specified.; A fax cannot be sent on an optical fiber line.
Faxing/Telephone Problems 2KUU-08L See Common Problems(P. 466) also. Sending Problems(P. 474) Receiving Problems(P. 475) Sending Problems A fax cannot be sent. ● Is an external phone line busy? Wait until the line becomes free. ● Has an error occurred? Print and check a Communication Management Repo...
Page 482 - Receiving Problems; When
Receiving Problems The results of received fax are not satisfactory. Paper creases or curls. When You Cannot Print Properly(P. 476) Telephone and fax cannot be switched automatically. ● Check that the receive mode is set to <Fax/Tel (Auto Switch)>, <Answering Machine>, or <DRPD: Selec...
Page 483 - When You Cannot Print Properly
When You Cannot Print Properly 2KUU-08R If printing results are not satisfactory, or paper creases or curls, try the following solutions. If the problems persist, contact your local authorized Canon dealer or the Canon help line. ◼ Problems with Image Quality Printing Results Are Not Satisfactory(P....
Page 484 - Problems with Printout Paper Paper Creases or Curls(P. 487)
Spots Appear(P. 485) Reverse Side of Paper is Smudged(P. 486) Printed Barcode Cannot Be Read(P. 486) ◼ Problems with Printout Paper Paper Creases or Curls(P. 487) Paper Creases(P. 487) Paper Curls(P. 487) ◼ Problems with Paper Feed Paper Is Fed Incorrectly(P. 489) Printouts Are Skewed(P. 489) Paper ...
Page 485 - Printing Results Are Not Satisfactory; Smudge Marks Appear on the Edge of Printouts; Smudges Appear on Printouts; Are you using appropriate paper?
Printing Results Are Not Satisfactory 2KUU-08S Dirt inside the machine may affect printing results. Perform care and cleaning to the machine first. Regular Cleaning(P. 432) Smudge Marks Appear on the Edge of Printouts Are you using appropriate paper? ● Check the supported paper types and replace wit...
Page 486 - Afterimages Appear in Blank Areas; Is the amount remaining in the toner cartridge running low?; Toner Smudges and Splatters Appear
<Special Processing>(P. 416) Afterimages Appear in Blank Areas Are you using appropriate paper? ● Check usable paper, and replace with appropriate paper. Available Paper(P. 538) Loading Paper(P. 132) Is the amount remaining in the toner cartridge running low? ● Check how much the amount remain...
Page 487 - Printouts Are Faded
● Setting <Special Printing Mode U> to <On> may solve the problem. <Special Processing>(P. 416) Are you using paper containing much paper dust or other dust particles? ● Smudges may appear in a printout when the paper has a lot of paper dust or other dust particles. Setting<Spec...
Page 489 - A Portion of the Page Is Not Printed; Do you print data without margins?; Streaks Appear/Printing is Uneven; Is the platen glass dirty?; Have you cleaned the fixing unit?
A Portion of the Page Is Not Printed Do you print data without margins? ● This symptom occurs if a margin is set to none in the printer driver. A margin of 1/4" (5 mm) or lessaround the edge of paper or 3/8" (10 mm) or less around the edge of envelopes is not printable with themachine. Make ...
Page 490 - Printouts Are Entirely or Partially Grayish
Are you using rough-surface paper? ● Printed images may be faint when they are printed on rough-surface paper. Setting <Special PrintingMode Q> to <On> may solve the problem. <Special Processing>(P. 416) ● Setting this to <On> may affect the image quality. Are you using the m...
Page 491 - Are you using a specific type of paper?; White Spots Appear
Is <Correct Density> in <Copy Settings> set too dark? ● Adjust the setting so that density is lighter. <Correct Density>(P. 388) Does the original have background color, is it stained, or are you copying an original such as a newspaper that is printed on thin paper so that text or ...
Page 492 - Are you using paper that has absorbed moisture?; Spots Appear
Are you using paper that has absorbed moisture? ● Replace with appropriate paper. Loading Paper(P. 132) Are you using appropriate paper? ● Check usable paper, and replace with appropriate paper. Available Paper(P. 538) Loading Paper(P. 132) Is the amount remaining in the toner cartridge running low?...
Page 493 - Reverse Side of Paper is Smudged; Do smudges appear on 2-sided printed paper?; Printed Barcode Cannot Be Read; Are you trying to read a small barcode or one with thick lines?
Reverse Side of Paper is Smudged Have you loaded paper that is smaller than the size of the print data? ● Check to make sure that the paper size matches the size of the print data. Have you cleaned the fixing unit? ● Clean the fixing unit. Cleaning the Fixing Assembly(P. 439) Do smudges appear on 2-...
Page 494 - Paper Creases or Curls; Paper Creases; Is paper loaded correctly?; Paper Curls
Paper Creases or Curls 2KUU-08U Paper Creases Is paper loaded correctly? ● If paper is not loaded below the load limit line or is loaded obliquely, it may crease. Loading Paper(P. 132) Are you using paper that has absorbed moisture? ● Replace with appropriate paper. Loading Paper(P. 132) Are you usi...
Page 496 - Paper Is Fed Incorrectly; Printouts Are Skewed; Do the paper guides align with the edges of the paper?; Paper Is Not Fed/Two or More Sheets Are Fed Together
Paper Is Fed Incorrectly 2KUU-08W Printouts Are Skewed Do the paper guides align with the edges of the paper? ● If the paper guides are too loose or too tight, the printouts are skewed. Loading Paper(P. 132) Are you printing on curled envelopes? ● Uncurl the envelopes, and print again. Loading Envel...
Page 498 - Countermeasures for Each Message
Countermeasures for Each Message 2KUU-08Y If you cannot send a fax or the memory is full, or you encounter operation problems, a message appears on the display. Find out more information about messages in the following list. A counterfeit or non-Canon drum cartridge may be in use. The amountremainin...
Page 499 - Cannot connect using Direct Connection.; Cannot export. An error has been detected during file creation.
● Reinstall the toner cartridge. If this message does not disappear after reinstalling several times, the tonercartridge might be possibly broken. Contact the store where you purchased the toner cartridge, or consultthe Canon Customer Help Center. Replacing the Toner Cartridge(P. 443) You might not ...
Page 500 - Cannot find the access point.; Cannot import. A file error has been detected.; Cannot print RX data.
Cannot find the access point. When automatic setting with WPS was attempted, a wireless router could not be detected within a specific period of time. ● Connect again paying attention to the time limit. Setting Up Connection Using WPS Push Button Mode(P. 20) Setting Up Connection Using WPS PIN Code ...
Page 501 - Cannot send because more than one destination is specified.; Cannot specify a group.
Cannot send because more than one destination is specified. Sending a fax to multiple destinations is disabled. ● To specify multiple destinations, you need to set <Restrict Sequential Broadcast> to <Off> or <ConfirmSequential Broadcast>. For more information, contact your Administ...
Page 502 - Check the authentication settings.
● Re-install the drum cartridge. If re-installing the drum cartridge fails to clear the error message, the drumcartridge may be faulty. Contact the store where you purchased the drum cartridge or consult the CanonCustomer Help Center. Procedure for Replacing the Drum Cartridge(P. 448) Cartridge comm...
Page 503 - Could not connect. Check the PSK settings.
Could not connect. (for Easy Connection via PC connection) An error has occurred while starting Easy Connection via PC (cableless setup mode). ● Press to return to the previous screen, and then try <Easy Connection via PC> again. ● If the same message still appears after retrying <Easy Conn...
Page 504 - Could not detect any connections from wireless devices.; Could not perform cleaning.; Could not set the current date and time.
Could not detect any connections from wireless devices. It was not possible to detect any mobile device within the predetermined length of time. ● Connect again paying attention to the time limit. Connecting Directly (Access Point Mode)(P. 269) Could not perform cleaning. Paper jammed during cleanin...
Page 505 - Direct Connection terminated.; Insert the drum cartridge.
Could not update the device time because its battery has run out. Cannotuse Google Cloud Print if the time settings are incorrect. The machine's battery has run out and the correct time settings could not be kept. ● Set the correct time again. Setting the Current Date and Time(P. 11) Direct Connecti...
Page 506 - Insert the toner cartridge.
● Properly set the drum cartridge. Replacing the Drum Cartridge(P. 447) Insert the toner cartridge. The toner cartridge is not set or properly set. ● Properly set the toner cartridge. Replacing the Toner Cartridge(P. 443) Maximum number of wireless devices connected using Direct Connectionhas been r...
Page 507 - No reply from the destination.; Set the correct authentication information.
No reply from the destination. A network cable may be disconnected, or there may be a problem in a switch. ● Check the status of the network cables and switches. No response from the host./No response from host. The machine is not connected to a network correctly. ● Check the machine and network set...
Page 508 - Size/Settings Mismatch; Specifying and registering new destinations is restricted.
Size/Settings Mismatch The paper size setting on the operation panel does not match the loaded paper size. ● Match the paper size setting specified in <Paper Settings> and the size of the paper that is actually loaded. To use the loaded paper Change the setting of <Paper Settings> to mat...
Page 509 - The WEP key is not set correctly. Check the WEP settings.
Saving Received Documents into the Machine (Memory Reception)(P. 213) ● If sending an original with many pages, divide it into multiple sections. ● If sending a fax, reduce the resolution to scan the original. Basic Operations for Sending Faxes(P. 195) ● If scanning, change the file format to reduce...
Page 511 - Countermeasures for Each Error Code
Countermeasures for Each Error Code 2KUU-090 If printing is not successful or you cannot send or receive a fax or scanned document, or another error occurs, that error appears on a report or a message on the <Status Monitor> screen as a three-digit number (error code). Check the following to f...
Page 517 - Clearing Paper Jams; When removing the jammed paper, do not turn OFF the machine; Do not forcibly remove the jammed paper from the machine
Clearing Paper Jams 2KUU-091 If a paper jams, <Paper jammed.> is displayed on the screen. Press <Next> ( ) to display simple solutions. If it is difficult to understand the procedures on the display, see the following sections to clear jams. Feeder Paper Jams in the Feeder(P. 511) Inside...
Page 518 - Paper Jams in the Feeder; Remove the jammed original from the feeder cover.
Paper Jams in the Feeder 2KUU-092 If there are originals placed in the feeder, remove them first. Then, follow the procedure below. Do not forcibly remove jammed paper from the machine. If the jammed paper cannot be removed easily, proceed to the next step. Paper Jams in the Feeder (MF269dw / MF269d...
Page 519 - Remove the jammed original from the inner cover inside the feeder.; Return the lever back in place, and close the feeder cover.
2 Remove the jammed original from the inner cover inside the feeder. 1 Hold the green knob, and open the inner cover. 2 Gently pull out the original. 3 Close the inner cover. 3 Return the lever back in place, and close the feeder cover. 4 Place the original again. Paper Jams in the Feeder (MF267dw /...
Page 521 - Paper Jams inside the Machine
Paper Jams inside the Machine 2KUU-093 Remove the jammed paper according to the procedure below. Do not forcibly remove jammed paper from the machine. If the jammed paper cannot be removed easily, proceed to the next step. 1 Lift the operation panel. ● The operation panel cannot be opened if the fee...
Page 522 - Gently pull out the paper.
Do not shake or tilt the toner cartridge. Also, make sure to avoid applying shocks to the toner cartridge,such as by hitting it against something. Doing so may cause the toner left in the toner cartridge to leak.Remove the toner cartridge gently at the same angle as the slot. 2 Remove the drum cartr...
Page 523 - Check whether paper is jammed inside the machine.; Check whether paper is jammed in the back cover.
2 Gently pull out the paper. 3 Close the paper exit guide. 6 Check whether paper is jammed inside the machine. 1 Gently pull out the paper. ● Hold both edges of the paper, pull the leading edge of the paper down, and then pull it out. 7 Check whether paper is jammed in the back cover. 1 Open the bac...
Page 524 - Insert the cartridges.; Close the toner cover, and lower the operation panel.
3 Close the back cover. 8 Insert the cartridges. 1 Insert the drum cartridge. 2 Insert the toner cartridge. 9 Close the toner cover, and lower the operation panel. ➠ The paper jam message disappears, and the machine is ready to print. Troubleshooting 517
Page 525 - When a Problem Cannot Be Solved; Do not disassemble or repair the machine yourself; When Contacting Canon
When a Problem Cannot Be Solved 2KUU-094 If you cannot solve a problem by referring to the information in this chapter, contact your local authorized Canon dealer or the Canon help line. Do not disassemble or repair the machine yourself ● If you disassemble or repair the machine yourself, it may not...
Page 526 - Checking the serial number from the operation panel
Checking the serial number from the operation panel ● Press <Device Information> <Serial Number>. Troubleshooting 519
Page 528 - Machine Specifications
Appendix 2KUU-095 This chapter contains technical specifications of this machine, instructions on how to use the User's Guide, disclaimers, copyright information, and other important information for customers. ◼ Machine Specifications See the following section(s) when you want to check the specifica...
Page 529 - Third Party Software
Third Party Software 2KUU-096 For information related to third-party software, click the following icon(s). Appendix 522
Page 530 - Feature Highlights
Feature Highlights 2KUU-097 This section describes tips for leveraging the features of the machine by category. You can make use of the features according to your intended purposes and operating environment. Going Green and Saving Money(P. 524) Improving Efficiency(P. 526) Going Digital(P. 528) So M...
Page 531 - Going Green and Saving Money
Going Green and Saving Money 2KUU-098 There are lots of ways to cut back on paper, toner, power, and expenses. 2-Sided Printing Print Multiple Pages on a Single Sheet You can use 2-sided printing for copies, print jobs sent fromyour computer, and even incoming faxes. Because you'llonly be using half...
Page 533 - Improving Efficiency
Improving Efficiency 2KUU-099 Here are some simple operations that can make complicated tasks more efficient. Address Book Shortcut Keys for Copying and Scanning Entering fax and e-mail addresses in the Address Booksaves you the inconvenience of entering them number-by-number, letter-by-letter every...
Page 535 - Going Digital
Going Digital 2KUU-09A Digitalizing a document enables editing using a computer as well as reducing cost and time by using e-mail. Scan and E-Mail Scan and Share E-mail scanned originals without even turning onyour computer. Just convert your scanned originalinto an e-mail attachment right from the ...
Page 537 - So Much More
So Much More 2KUU-09C There are a variety of features for whatever you need to do - at home, in the office, or even on the road. Using a smartphone/tablet Easy Printing with Google Cloud Print At times such as when you want to quickly print out aproposal you completed on a tablet while travelling to...
Page 539 - Specifications
Specifications 2KUU-09E Specifications are subject to change without notice for product improvement or future release. ◼ Machine Specifications Main Unit(P. 533) Feeder(P. 536) Available Paper(P. 538) ◼ Functional Specifications Fax Function(P. 541) Scan Function(P. 542) Printer Functions(P. 543) Ma...
Page 540 - Main Unit
Main Unit 2KUU-09F ● For information on paper sizes and types for each paper source, see " Available Paper(P. 538) ." Name Canon imageCLASS MF269dw / MF267dw / MF264dw / MF269dw VP Type Desktop Color Supported Black and White Resolution for Reading 600 dpi x 600 dpi Resolution for Writing 60...
Page 545 - Available Paper; Supported Paper Sizes
Available Paper 2KUU-09J The paper types that can be used with this machine are shown in the following table. ◼ Supported Paper Sizes : Available : Unavailable Paper Sizes Drawer Multi-Purpose Tray Automatic 2-Sided Printing *1 A4 *2 B5 A5 *3 A6 *4 Legal Letter *2 Statement Executive Oficio Oficio (...
Page 546 - Supported Paper Types
Paper Sizes Drawer Multi-Purpose Tray Automatic 2-Sided Printing *1 F4A Envelope No. 10 (COM10) Envelope Monarch Envelope C5 Envelope DL Custom *5 *5 *1 Automatic 2-sided printing is available without replacing paper. *2 Allows you to print received fax documents. *3 If feeding in landscape orientat...
Page 548 - Fax Function
Fax Function 2KUU-09K Telephone Line Used *1 Public Switched Telephone Network (PSTN) Scan Line Density Normal G3: 8 pels *2 /mm x 3.85 line/mm Fine G3: 8 pels *2 /mm x 7.7 line/mm Superfine G3: 8 pels *2 /mm x 15.4 line/mm Transmission Speed *3 Super G3: 33.6 kbps G3: 14.4 kbps Compression Method M...
Page 549 - Scan Function
Scan Function 2KUU-09L Type Color Scanner Original Scanning Size (Max) Scanning on Platen Glass Same as "Acceptable Originals" in "Main Unit" Main Unit(P. 533) Scanning from Feeder Same as "Size of Originals" in "Feeder" Feeder(P. 536) Resolution (Max) 600 dpi x 600 d...
Printer Functions 2KUU-09R ◼ UFR II-LT Printer Function Type Internal Print Size Available Paper(P. 538) Print Speed Same as "Copy Speed" in "Main Unit" Main Unit(P. 533) Resolution Data Processing 1200 dpi x 1200 dpi, 600 dpi x 600 dpi Page Description Language (PDL) UFR II-LT Proto...
Page 552 - Management Functions; Registration of Keys and Certificates
Management Functions 2KUU-09S ◼ Firewall Settings ● Up to 4 IP addresses (or ranges of IP addresses) can be specified for both IPv4 and IPv6. ● Up to 10 MAC addresses can be specified. ◼ Registration of Keys and Certificates ● If you install a key or CA certificate from a computer, make sure that th...
Page 553 - System Environment
System Environment 2KUU-09U System Environment for WSD Scan ● Windows Vista ● Windows 7 ● Windows 8.1 ● Windows 10 System Requirements for the Remote UI *1 Windows ● Windows Vista / 7 / 8.1 / 10: Internet Explorer 11 or later ● Windows 10: Edge macOS ● Mac OS X 10.6 and later ● Safari 3.2.1 and late...
Page 555 - Common Specifications
Network Environment 2KUU-09W ◼ Common Specifications Protocol Supported TCP/IP ● Frame type: Ethernet II ● Print applications: LPD, Raw, IPP, IPPS, WSD, Mopria, Google Cloud Print, AirPrint, Windows10Mobile Print ◼ Wired LAN Specifications Interface 10BASE-T, 100BASE-TX (RJ-45) ◼ Wireless LAN Specif...
Page 556 - Manuals and Their Contents
Manuals and Their Contents 2KUU-09X The manuals listed below are included with the machine. Refer to them as necessary. Getting Started Read this manual first. It describes basic setup procedures, from removing thepacking materials to setting up the machine. User's Guide (This Manual) This manual de...
Page 557 - Screen Layout of User's Guide; Search the contents
Using User's Guide 2KUU-09Y The User's Guide is a manual that can be viewed on your computer or mobile device and it describes all of the functions of the machine. You can search from your intended use or enter a keyword to quickly find the page you are looking for. The section describes the screen ...
Page 558 - Top Page
Screen Layout of User's Guide 2KUU-0A0 The User's Guide is divided into different screens, and the content of each screen varies. Top Page Appears when User's Guide is started. / Click to also display all of the sections under the chapters. Click to return to the previous display. / Click to toggle ...
Page 559 - Topic Page
Topic Page Contains information about how to configure and use the machine. Navigation See what chapter topic you are currently viewing. Click to jump to the corresponding page. To return to the previous page, click "Back" on your Web browser. ● When you click the icon, the current page may ...
Page 560 - Search
/ Click to display the hidden detailed descriptions. Click to close the detailed descriptions. Click to return to the page top. Search Click to display the search window. Contains a text box to perform a search by keyword and find the page you are looking for. [Enter keyword(s) here] Enter a keyword...
Page 563 - Basic Windows Operations; Displaying the Printer Folder
Basic Windows Operations 2KUU-0A3 Displaying the Printer Folder(P. 556) Enabling [Network discovery](P. 556) Displaying Shared Printers in the Print Server(P. 557) Displaying the [Software Programs/Manuals Setup] Screen(P. 558) Printing a Test Page in Windows(P. 558) Checking the Bit Architecture(P....
Page 564 - Displaying Shared Printers in the Print Server; Open Windows Explorer.
Right-click the lower-left corner of the screen select [Control Panel] [View network status and tasks] [Change advanced sharing settings] select [Turn on network discovery] under [Network discovery]. Windows 8.1/Server 2012 R2 Right-click [Start] select [Control Panel] [View network status and tasks...
Page 565 - Printing a Test Page in Windows
◼ Displaying the [Software Programs/Manuals Setup] Screen If your computer does not display the [Software Programs/Manuals Setup] screen after inserting the provided CD- ROM/DVD-ROM, follow the procedure below. The CD-ROM/DVD-ROM drive name is indicated as "D:" in this manual. The CD-ROM/DVD...
Page 566 - Checking the Bit Architecture
4 Click [Print Test Page] in [General] tab. ➠ The test page is printed. ◼ Checking the Bit Architecture If you are not sure whether your computer is running 32-bit or 64-bit Windows follow the procedure below. 1 Display [Control Panel]. Windows Vista/7/Server 2008 [Start] select [Control Panel]. Win...
Page 567 - Check the bit architecture.; Checking the Computer Name
Windows Vista/7/8/Server 2008 R2/Server 2012 Click [System and Maintenance] or [System and Security] [System]. Windows 10/Server 2016 Click [ ] [Settings] [System] select [About]. Windows Server 2008 Double-click [System]. 3 Check the bit architecture. For 32-bit versions [32-bit Operating System] i...
Page 568 - Check the computer name.; Checking the Printer Port
Windows Server 2008 Double-click [System]. 3 Check the computer name. ◼ Checking the Printer Port 1 Open the printer folder. Displaying the Printer Folder(P. 556) 2 Right-click the printer driver icon for this machine, and click [Printer properties] or[Properties]. Appendix 561
Page 569 - Checking Bidirectional Communication
3 In the [Ports] tab, check that the port is selected correctly. If you are using a network connection and have changed the machine's IP address ● If [Description] for the selected port is [Canon MFNP Port], and the machine and the computer are on thesame subnet, then the connection will be maintain...
Page 570 - Checking the SSID to Which Your Computer is Connected; When Printing or Sending from the Windows Store App
◼ Checking the SSID to Which Your Computer is Connected If your computer is connected to a wireless LAN network, click , , , or in the system tray to display the SSID of the connected wireless LAN router. ◼ When Printing or Sending from the Windows Store App Windows 8/Windows Server 2012 Display the...
Page 571 - Menu Route Map
Menu Route Map 2KUU-0A4 For the settings on the machine's display, see Menu Route Map (PDF manual). Touch Panel Model 5 Lines LCD Model Appendix 564
Page 572 - Notice; ENERGY STAR; Disclaimers
Notice 2KUU-0AJ ◼ ENERGY STAR ® (for USA and Canada only) The ENERGY STAR Program is an international program that promotes energy saving through the use of computers and other office equipment.The program backs the development and dissemination of products with functions thateffectively reduce ener...


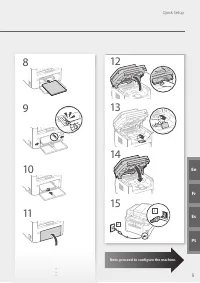


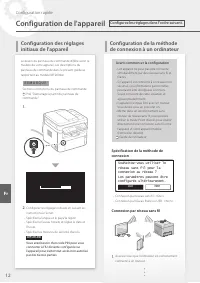
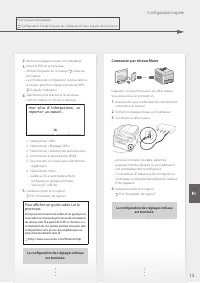
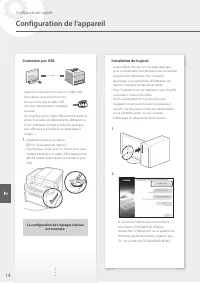
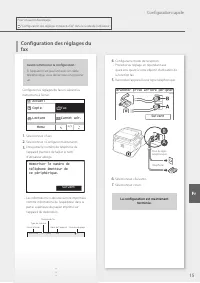


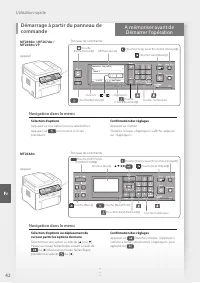
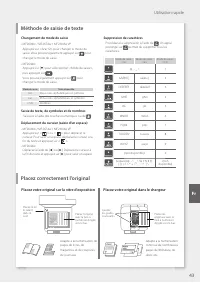
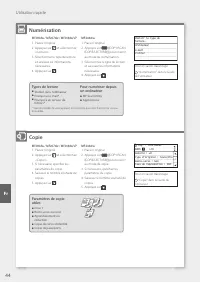
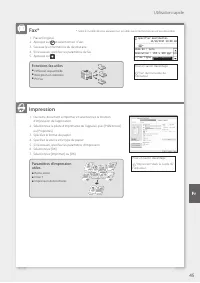
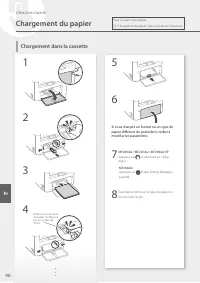

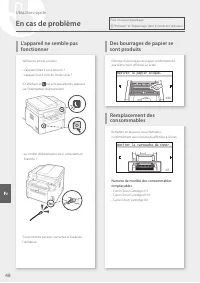


 Canon 6130280
User Manual
Canon 6130280
User Manual
 Canon imageCLASS MF284dw
User Manual
Canon imageCLASS MF284dw
User Manual
 Canon imageCLASS LBP172dw
User Manual
Canon imageCLASS LBP172dw
User Manual
 Canon 248
User Manual
Canon 248
User Manual
 Canon 323
User Manual
Canon 323
User Manual
 Canon 250
User Manual
Canon 250
User Manual
 Canon 251
User Manual
Canon 251
User Manual
 Canon 6710C002
User Manual
Canon 6710C002
User Manual
 Canon K10605
User Manual
Canon K10605
User Manual
 Canon K10613
User Manual
Canon K10613
User Manual
 Canon K10608
User Manual
Canon K10608
User Manual
 Canon K10609
User Manual
Canon K10609
User Manual
 Canon imageRUNNER C3326i
User Manual
Canon imageRUNNER C3326i
User Manual
 Canon imageCLASS MF465dw
User Manual
Canon imageCLASS MF465dw
User Manual
 Canon K10617
User Manual
Canon K10617
User Manual