Canon 601 - Manuals
Canon 601 – User Manual, Troubleshooting Guide, Installation Manual in PDF format online.
User Manual Canon 601
Summary
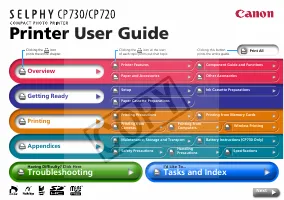
Next Back Return to Cover Page Getting Ready Printing Appendices Overview Troubleshooting Tasks and Index 2 Introduction Before using your printer for the first time, read through the “Safety Precautions” (p. 40) and “Handling Precautions” (p. 42). This mark denotes issues that may affect the printe...
3 Getting Ready Printing Appendices Troubleshooting Tasks and Index Next Back Return to Cover Page Printer Features You can enjoy printing with your SELPHY printer in a variety of ways. Print from Memory Cards You can print from memory cards placed in the printer slot from a camera or mobile telepho...
4 Getting Ready Printing Appendices Overview Troubleshooting Tasks and Index Next Back Return to Cover Page Perfect for Albums Prints a standard size photo print. You can also have the date imprint and borders appear on the print. Postcard Size Paper Print postcards bearing your original photographs...
5 Getting Ready Printing Appendices Overview Troubleshooting Tasks and Index Next Back Return to Cover Page Component Guide and Functions This section indicates the component names and functions. SELPHY CP730 LCD Monitor PRINT/STOP Button Power Button Control Buttons IrDA Sensor Retractable USB Cabl...
6 Getting Ready Printing Appendices Overview Troubleshooting Tasks and Index Next Back Return to Cover Page Paper and Accessories Select the correct size for the purpose. Some items are not sold in some regions. Paper Cassette*: Supplied Postcard Size Standard Paper + Ink*: Color Ink/Paper Set KP-36...
7 Getting Ready Printing Appendices Overview Troubleshooting Tasks and Index Next Back Return to Cover Page Other Accessories This section identifies the separately sold accessories that expand the capabilities of the SELPHY printers. Battery Pack (CP730 Only) If you install the battery pack sold se...
8 Printing Appendices Overview Troubleshooting Tasks and Index Next Back Return to Cover Page Setup Set up your SELPHY printer in the following manner for safe use. • Do not set the printer upon unstable surfaces. • Keep the printer at least 1 meter (3 ft.) from dev...
9 Getting Ready Printing Appendices Overview Troubleshooting Tasks and Index Next Back Return to Cover Page Ink Cassette Preparations Install ink cassettes using the following procedures. 1 Confirm the ink cassette size. Confirm a match between the sizes of the ink cassette and the photo paper. 2 Co...
10 Getting Ready Printing Appendices Overview Troubleshooting Tasks and Index Next Back Return to Cover Page Paper Cassette Preparations The following procedures instruct you how to set paper in the cassette and install it in the printer. 1 Confirm that you have the correct size of paper cassette. P...
11 Getting Ready Printing Appendices Overview Troubleshooting Tasks and Index Next Back Return to Cover Page • Use paper specified for use by Canon with this printer. Do not use standard copy paper or postcards. • Placing 19 or more sheets in the paper...
12 Getting Ready Appendices Overview Troubleshooting Tasks and Index Next Back Return to Cover Page Printing Precautions This section explains the precautions that should be observed when printing. These precautions are applicable to all of the printing methods, including “Printing from Memory Cards...
13 Getting Ready Printing Appendices Overview Troubleshooting Tasks and Index Next Back Return to Cover Page Printing from Memory Cards These procedures are for printing images from memory cards taken from cameras or mobile telephones. • SELPHY printers support image data conforming to ...
14 Getting Ready Printing Appendices Overview Troubleshooting Tasks and Index Next Back Return to Cover Page The following types of information appear on the LCD monitor. CP730 CP720 Although there are some differences in the information displayed by the CP730 and CP720 m...
15 Getting Ready Printing Appendices Overview Troubleshooting Tasks and Index Next Back Return to Cover Page Select a mode to set the print operation. (Single) Prints one copy of the displayed image. (Select) Prints the specified number of copies of the selected images. (All) Prints one copy of all ...
17 Getting Ready Printing Appendices Overview Troubleshooting Tasks and Index Next Back Return to Cover Page Printing One Copy of All Images on the Card 1 Switch the mode to (All) using the MODE button. 2 Configure the print layout, date imprint and My Colors settings as desired. These settings appl...
18 Getting Ready Printing Appendices Overview Troubleshooting Tasks and Index Next Back Return to Cover Page Select a print layout. (Borderless) Prints without borders. (Bordered) Prints with a white border. (2 Images) Prints two images on a single sheet. (4 Images) Prints four images on a single sh...
19 Getting Ready Printing Appendices Overview Troubleshooting Tasks and Index Next Back Return to Cover Page You can select whether or not to include the date imprint and its format. (No Imprint) Does not include the date imprint. (Year/Month/Day) Prints the date in the Year/Month/Day format. (Month...
20 Getting Ready Printing Appendices Overview Troubleshooting Tasks and Index Next Back Return to Cover Page This feature applies color effects to images. (Off) No effects applied. (B/W) Prints the image in black and white. (Sepia) Prints the image in a sepia tone (a faded brown tint). (Vivid) Print...
22 Getting Ready Printing Appendices Overview Troubleshooting Tasks and Index Next Back Return to Cover Page Printing from Cameras These procedures are for printing images from a camera connected to the printer. On cameras that support printing via this method, icons such as (PictBridge) or (Direct ...
23 Getting Ready Printing Appendices Overview Troubleshooting Tasks and Index Next Back Return to Cover Page This section provides a simple explanation of the procedures using a Canon-brand camera as an example. For a more detailed explanation, see your camera's manual (Camera User Guide in the case...
24 Getting Ready Printing Appendices Overview Troubleshooting Tasks and Index Next Back Return to Cover Page If you are using a Canon-brand camera, you can configure the following settings and print. (Some features may not be supported by some models.) See your Camera User Guide or the Direct Print ...
25 Getting Ready Printing Appendices Overview Troubleshooting Tasks and Index Next Back Return to Cover Page Printing from Computers This section explains how to connect the printer to a computer to print. You computer must meet the minimum requirements listed below to enable printing from the compu...
26 Getting Ready Printing Appendices Overview Troubleshooting Tasks and Index Next Back Return to Cover Page Please note the following points. • Before you connect the printer to a computer, check whether there are any memory cards in the printer or if a cam...
27 Getting Ready Printing Appendices Overview Troubleshooting Tasks and Index Next Back Return to Cover Page Do not connect the printer to the computer until after you have installed the printer driver. Windows 1 Place the supplied Compact Photo Printer Solution Disk in...
29 Getting Ready Printing Appendices Overview Troubleshooting Tasks and Index Next Back Return to Cover Page Windows 1 Place the supplied CD-ROM into the computer's CD-ROM drive. If the CD-ROM is already in the computer and the window below does not show, then take the CD-ROM out once and put it bac...
30 Getting Ready Printing Appendices Overview Troubleshooting Tasks and Index Next Back Return to Cover Page Windows ZoomBrowser EX Easy-PhotoPrint You can download detailed guides to ZoomBrowser EX (Windows) and ImageBrowser (Macintosh) from the following website. http...
31 Getting Ready Printing Appendices Overview Troubleshooting Tasks and Index Next Back Return to Cover Page Wireless Printing These procedures are for printing images over a wireless connection (IrDA, Bluetooth or wireless LAN). • You cannot print via a wireless connection if a me...
32 Getting Ready Printing Appendices Overview Troubleshooting Tasks and Index Next Back Return to Cover Page 3 Aim the mobile telephone’s infrared port at the printer’s IrDA sensor and initiate the data transfer from the telephone. See the user guide for your mobile telephone for instructions for co...
34 Getting Ready Printing Appendices Overview Troubleshooting Tasks and Index Next Back Return to Cover Page This section explains how to print images via a wireless LAN (local area network) from a PowerShot SD430 Digital ELPH Wireless/Digital IXUS WIRELESS camera and a Wireless Print Adapter (WA-1N...
35 Troubleshooting Tasks and Index Next Back Return to Cover Page Getting Ready Printing Overview Maintenance, Storage and Transport This section explains how maintain, store and transport the printer. Internal Care If fine stripes appear on printed images, there is a possibility that dirt or dust h...
36 Getting Ready Printing Appendices Overview Troubleshooting Tasks and Index Next Back Return to Cover Page Main Unit • Detach the power cord of the compact power adapter from the power outlet. • Remove the paper and ink cassettes from the printer for storage. Store the paper cassettes with the lid...
37 Getting Ready Printing Appendices Overview Troubleshooting Tasks and Index Next Back Return to Cover Page Battery Instructions (CP730 Only) You can print on trips and in places that lack power outlets if you attach the separately sold battery pack to the CP730 model. • Battery Pack NB-CP1L ...
38 Getting Ready Printing Appendices Overview Troubleshooting Tasks and Index Next Back Return to Cover Page Use the following procedures to charge the battery. 1 Attach the battery to the printer. 2 Connect the power cord to the compact power adapter and plug it in a power outlet. Connect the compa...
39 Getting Ready Printing Appendices Overview Troubleshooting Tasks and Index Next Back Return to Cover Page To protect the battery and prevent a decline in performance, do not charge it continuously for more than 24 hours. • This is a lithium ion battery pack...
40 Getting Ready Printing Appendices Overview Troubleshooting Tasks and Index Next Back Return to Cover Page Safety Precautions Use this equipment correctly according to the following precautions to avoid the risk of injury, fire, electrical shock, malfunctions and other hazards. Please also be sure...
41 Getting Ready Printing Appendices Overview Troubleshooting Tasks and Index Next Back Return to Cover Page CAUTIONS WARNINGS • Do not stick any part of your hand into the printer interior. • Do not use or store the equipment in the following types of places. Humid or dusty areas, places ...
42 Getting Ready Printing Appendices Overview Troubleshooting Tasks and Index Next Back Return to Cover Page Handling Precautions This section explains the precautions that you should take in handling the equipment. • Do not apply excessive force to the paper cassette. Force or impact on the cassett...
43 Getting Ready Printing Appendices Overview Troubleshooting Tasks and Index Next Back Return to Cover Page Specifications All data is measured according to standard Canon testing procedures. We reserve the right to change specifications without notice. * When connected to a Canon compact digital c...
44 Getting Ready Printing Appendices Overview Troubleshooting Tasks and Index Next Back Return to Cover Page * Test conditions: Normal temperature (23°C/73°F), Canon images, continuous print.The above data may vary according to the printing environment and the image to be printed. If the ambient tem...
45 Getting Ready Printing Appendices Overview Tasks and Index Next Back Return to Cover Page Troubleshooting This section has solutions for when the printer does not operate as expected or an error symbol is displayed. If the solutions below do not remedy your problem, contact the retail outlet or a...
46 Appendices Troubleshooting Tasks and Index Next Back Return to Cover Page Getting Ready Printing Overview Î Printing from Memory Cards • Is the memory card inserted all the way into the slot with the label facing upward? • Do the images conform to the Design rule for Camera File system (Exif comp...
47 Appendices Troubleshooting Tasks and Index Next Back Return to Cover Page Getting Ready Printing Overview Q Printer Power Button is Red but No Error Message Has Appeared on the Camera’s LCD Monitor. Î A malfunction occurred during printing.Remove the paper from the main unit and take up the slack...
48 Appendices Troubleshooting Tasks and Index Next Back Return to Cover Page Getting Ready Printing Overview When the printer encounters some kind of problem, a symbol appears in the LCD monitor to indicate the error type. Take the action recommended for the error symbol. Error messages will also di...
51 Getting Ready Printing Appendices Overview Troubleshooting Tasks and Index Back Return to Cover Page • Macintosh and Mac OS are trademarks of Apple Computer Inc., registered in the United States and other countries. • Microsoft ® and Windows ® are either registered trademarks or trademarks of Mic...
Troubleshooting Guide Canon 601
Summary
1 Card Photo Printer CP-300/CP-200 Printer Driver User Guide Windows
2 Contents Safety Precautions .................................................................................... 4 Read This First .......................................................................................... 5 About the Manuals ...........................................................
4 Safety Precautions The precautions noted within this guide are intended to instruct you in the safe and correct use of the products and to prevent injuries or damage to yourself, other persons and property. Please read and ensure that you understand them before proceeding to other sections of the ...
5 Read This First About the Manuals This user guide describes how to connect the printer to a computer and print images. CP-300/CP-200 User Guide Provides printer handling notes, safety precautions, printer preparation, names of parts and other information necessary for operating the printer. Please...
6 Printing Flow Diagram Follow the steps outlined below to prepare the printer and install the necessary software to enable printing. Prepare the printer. Insert paper cassette and ink cassette. See the CP-300/CP-200 User Guide. Install the necessary software. ➀ Install ZoomBrowser EX into your comp...
7 About the Connection Cable The printer can be connected to a computer using a standard USB cable. Printing. Print on standard paper or full size labels. To print an 8-label sheet: See Printing Duplicate Images on an 8-Label Sheet ( ➡ p.44), Printing Different Images on an 8-Label Sheet ( ➡ p.46) i...
8 Installing the Software from the CP Printer Solution Disk Canon CP Printer Solution Disk contains software required for printing from your computer. Installing 1 Close any programs that are running. 2 Place the Canon CP Printer Solution Disk in the CD-ROM drive. The installer panel automatically a...
10 This section describes how to uninstall the software, using ZoomBrowser EX as an example. 1 Click the [Start] button and select [Programs] ([All Programs] for Windows XP), [Canon Utilities], [ZoomBrowser EX], and [ZoomBrowser EX Uninstall]. Uninstallation begins and ZoomBrowser EX is removed. Uni...
11 Installing the Printer Driver Installing This section describes how to install the printer driver on your computer. Installation starts automatically the first time you connect the printer to your computer’s USB port. Important Do not attempt to install the printer driver using the following proc...
17 Windows Me 1 Close any programs that are running. 2 Place the Canon CP Printer Solution Disk in the CD-ROM drive. When the installer panel appears, click [Exit] to close it. 3 Turn the printer on. ( ➡ p.32) 4 Connect the printer to your computer, using the USB cable. ( ➡ p.33) After a moment, the...
22 6 Select “Search for a suitable driver for my device (recommended)” and then click the [Next] button. 7 Select “Specify a location” and then click the [Next] button. Do not select “CD-ROM drives”.
25 Windows XP 1 Close any programs that are running. 2 Place the Canon CP Printer Solution Disk in the CD-ROM drive. When the installer panel appears, click [Exit] to close it. 3 Turn the printer on. ( ➡ p.32) 4 Connect the printer to your computer, using the USB cable. ( ➡ p.33) After a moment, the...
29 Example 2: 7 When the confirmation message appears, click the [OK] button. 8 Click the [OK] button to close the System Properties dialog. 9 Close the Control Panel window. 10 Disconnect the USB cable from your computer. 11 Restart your computer. 12 Follow the procedure described in Installing ( ➡...
31 5 When the installer panel appears, click [Exit]. 6 Start Windows Explorer, and then double-click the [\CP_DRV\ENGLISH\UNINST] folder on the CD-ROM drive to open the folder. 7 Double-click [CNYCPUN.EXE] icon to start the uninstaller. The uninstaller starts. 8 From the list of printers available f...
32 Turning On the Printer Refer to the above figure during the following procedure (the numbers in the figure correspond to the steps in the procedure). 1 Place the printer on a flat surface. When printing, the paper temporarily projects out from the rear, so allow a clear space of at least 10 cm (4...
33 Connecting the Printer to Your Computer ■ Notes about connection • Using the USB cable, be sure to connect the printer directly to your computer. If you connect it via a USB hub, the printer may not function properly. • Do not use the printer together with other USB devices (except a USB mouse or...
35 Printing This section describes how to use PhotoRecord to print images displayed in ZoomBrowser EX. ZoomBrowser EX and PhotoRecord are applications included on the Canon CP Printer Solution Disk. These applications make it easy to print. • Screen shots from Windows XP are used for illustration, b...
37 2 Click [Layout Print]. 3 Click [1 Select Images] and click an image you want to print. When you select [Index Print], use the following procedure to print. 1. Click [1 Select Images] and click an image you want to print. 2. Click [2 Select Captions for Printing] and select captions. 3. Click [3 ...
39 Selecting a Print Mode This section describes how to select a print mode in PhotoRecord, and then print on standard sheet or full-size label sheet. For information on how to print on an 8-label sheet, see Printing Duplicate Images on an 8-Label Sheet ( ➡ p.44) or Printing Different Images on an 8...
40 3 Select the paper size, and then click the [Finish] button. Close the PhotoRecord Print Modes window. The print mode settings are now reflected in the album page window.To open the PhotoRecord Print Modes window again, click (PRINT MODES) in the PhotoRecord layout window. Setting the Printer Dri...
43 6 Adjust other settings, and then click the [Print] button. Printing starts. If you stop printing while printing is in progress, paper is ejected to the paper handling slot and an error message may be displayed. This is not a malfunction, but a mechanism for protecting the print head.If you inter...
49 Printing with Image Quality Correction PhotoRecord has a function that supports Exif 2.2 (referred to as Exif Print), allowing you to automatically optimize print quality and print clearer, better-looking images. 1 Click the image you want to print, and select [Clip/Correct Photo].
51 Other Printing Functions By selecting [Artwork/Layout album] in the PhotoRecord Print Modes window, you can add text or decorative embellishments to an image when printing it. Also, you can combine the different functions and create your own original name card. Adding text Adding decorative embel...
52 Appendices About the Print Area and Pixels Print Area The shaded area ( ) in the following diagrams indicates the maximum printable area.Note that because the print area is larger than the actual paper size, a border is trimmed from the image when it is printed.(shown in millimeters) L size sheet...
54 Number of Pixels * Number of pixels of print area for borderless printing. This also includes the border that is trimmed from around an image during printing. Paper Type Total number of pixels (dots) * Effective number of pixels (dots) Postcard size sheet 1232 × 1823 approx. 1180 × 1748 L size sh...
55 Troubleshooting This section describes how to troubleshoot problems. Correction : Make sure the indicator light on the printer is green. ( ➡ p.32) Correction : Check the USB cable to make sure it is connected correctly. ( ➡ p.33) Correction : Try the following procedure. <Windows 98/Me/2000>...
56 Correction : Check the USB cable to make sure it is connected correctly. ( ➡ p.33) Correction : Be sure to use the USB cable to connect the printer directly to your computer. If you connect via a USB hub, the printer may not function properly. <Windows 98/Me/2000> 1. Click the [Start] butto...
57 Error Messages If an error occurs while printing is in progress, an error message appears on the screen of your computer.This section contains a list of error messages as well as the information on how to troubleshoot them. ■ Errors where printing can resume If any of the following messages appea...
60 ■ Errors where printing is canceled If any of the following messages appear, printing is canceled. After using the recommended solution to clear the error, you need to start the print job over again. Correction : After closing the dialog, turn the printer off and then back on again. Paper is auto...
61 Correction : Make sure the indicator light on the printer is green. ( ➡ p.32) Correction : Check to make sure the USB cable is connected correctly. ( ➡ p.33) Correction : Turn the printer’s power off and back on again. Start the print job over. Correction : Remove paper from the paper cassette, a...
1 Card Photo Printer CP-300/CP-200 Printer Driver User Guide Macintosh
11 6 Select [Easy Install], and then click the [Install] button. 7 Click the [Continue] button to automatically close any applications other than the installer. 8 Follow the messages on the screen to proceed. 9 When installation is completed, click the [Restart] button. Before the printer driver wil...
12 ■ With Mac OS X Continuing from the above procedure, do the following: 1) Turn the printer’s power on. ( ➡ p.16) 2) After your computer restarts, connect the printer to computer with the USB cable. For information on how to connect the printer, see Connecting the Printer to Your Computer ( ➡ p.17...
13 To uninstall the printer driver, use the installer. Important Be sure to follow the procedures described in this section to uninstall the printer. 1 Close any programs that are running. 2 Place the Canon CP Printer Solution Disk in the CD-ROM drive. 3 With Mac OS 9.0 - 9.2, double-click the [Cano...
20 With Mac OS 9.0 - 9.2 Selecting a Printer with the Chooser 1 Open the (Apple) menu and select [Chooser]. 2 Click the [CP Printer Driver] icon. If the printer is connected, it appears in the [Destination] list. 3 Click the printer in the [Destination] list, then close the Chooser dialog by clickin...
21 Selecting an Image for Printing 1 Select an image you want to print from the browser area. Click the (PRINT) button to display a menu. From the menu, select [Layout printing]. The Print window and Layout Options window appear. Browser area When the CP-200 or CP-300 is selected, you cannot select ...
22 Selecting a Layout Type This section describes how to select a layout type, and then print on standard sheets or full-size label sheets. For information on how to print on 8-label sheets, see Printing Duplicate Images on an 8-Label Sheet ( ➡ p.28) or see Printing Different Images on an 8-Label Sh...
24 Setting the Printer Driver for Printing This section describes printing with modified printer driver settings. 1 Click the (PRINT) button. 2 Select [Color]. 3 To adjust image quality, select [Custom]. Custom Click the [Adjust] button to adjust image quality freely. The default is [Non adjustment]...
27 You can save [Color] and [Background Printing] settings as [Profiles]. ■ To register a profile 1 Make [Color] and [Background Printing] settings. 2 Select [Add Profile]. 3 In the Add Profile window, type in a name and a comment for the profile, and then click the [OK] button. Registering Profiles
30 7 Click the (PRINT) button to start printing. Printing Different Images on an 8-Label Sheet You can also print a combination of different images on an 8-label sheet. 1 In the Layout Options window, select “Photo printer multiple printing”, and then click the [Next] button. 2 Click the [Page setup...
34 Printing with Image Quality Correction ImageBrowser has a function that supports Exif 2.2 (referred to as Exif Print) , allowing you to automatically optimize print quality and print clearer, better-looking images. 1 Click the image you want to print, and select [Preferences] from the ImageBrowse...
49 Printing Part of an Image (Trimming) You can select and then print a portion of an image (trimming).This is useful when you only want to print part of an image, or if the part you are most interested in is not at the center of the image. 1 Click the image you want to print in the Print window ( ➡...
57 Error Messages If an error occurs while printing is in progress, an error message appears on the screen of your computer.This section contains a list of error messages as well as the information on how to troubleshoot them. ■ Errors where printing can resume If any of the following messages appea...
59 Correction : Replace the paper with the correct size. Correction : Insert the correct paper cassette. Correction : Insert the correct ink cassette. Correction : Insert the correct ink cassette and paper. Correction : Use a new or fully charged battery pack, or use the printer with the AC adapter ...
61 Correction : Turn printer off and back on, then try printing again. Correction : Remove paper from the paper cassette, and then make sure to load the correct amount of paper in the paper cassette. In other cases, such as when you specify output for a file or other errors related to your system oc...
Installation Manual Canon 601
Summary
The precautions noted within this guide are intended to instruct you in the safe and correct use of the products and to prevent injuries or damage to yourself, other persons and property. Please read and ensure that you understand them before proceeding to other sections of the guide. Trademark Ackn...
i Canon Software License Agreement IMPORTANT - READ THIS AGREEMENT BEFORE USING THE SOFTWARE ON THE CD-ROM IN THIS BOX. BY USING THE SOFTWARE, YOU AGREE TO BE BOUND BY THE TERMS OF THIS AGREEMENT.This is a license agreement (the “Agreement”) between you and Canon Inc. (“Canon”).IF YOU DO NOT AGREE T...
ii NEITHER CANON, NOR ANY OF CANON’S SUBSIDIARIES, DISTRIBUTORS OR DEALERS SHALL HAVE ANY OBLIGATION TO INDEMNIFY YOU AGAINST ANY CLAIM OR SUIT BROUGHT BY A THIRD PARTY ALLEGING THAT THE SOFTWARE OR THE USE THEREOF INFRINGES ANY INTELLECTUAL PROPERTY OF SUCH THIRD PARTY.SOME STATES, PROVINCES OR LEG...
iii Table of contents Read This First 1 It’s so Simple! Make Prints Right at Home Like a Pro ...................... 2Unbounded Possibilities with Entertaining Software ..................... 4About the CD-ROMs in Your Package .............................................. 6System Requirements ..........
Windows/Macintosh 1 Read This First This chapter explains what you can accomplish using the camera with the software contained on the Canon Digital Camera Solution Disk. It also lists the computer system configurations required to use the software. About this Guide • The explanations in this guide a...
It’s so Simple! Make Prints Right at Home Like a Pro 2 It’s so Simple! Make Prints Right at Home Like a Pro See your Camera Use r Guide for shooting instructions. Just install the software once at the beginning. Shoot the images Install the software on the computer
Unbounded Possibilities with Entertaining Software 4 Unbounded Possibilities with Entertaining Software Print a Variety of Layouts Print with the diverse layouts available in PhotoRecord (Windows) and ImageBrowser (Macintosh). Stitch a Panorama Together Create a panoramic image from a series of imag...
Windows/Macintosh 5 Send an Image as an E-mail Attachment Attach an image to an e-mail message by starting your mail software from within ZoomBrowser EX (Windows) or ImageBrowser (Macintosh). Operate the Camera Shutter from the Computer Release the camera’s shutter from the computer with RemoteCaptu...
About the CD-ROMs in Your Package 6 About the CD-ROMs in Your Package About the Supplied Software In addition to the Canon Digital Camera Solution Disk, your camera may be accompanied by other CD-ROMs containing image editing software. Your choice of camera model will determine which disks are inclu...
Windows/Macintosh 7 System Requirements Please install the software on a computer meeting the following minimum requirements. Windows OS Windows 98 (First or Second Edition) Windows Millenium Edition (Windows Me) Windows 2000 Windows XP (Home Edition, Professional) Computer Model The above OS should...
System Requirements 8 Macintosh OS Mac OS 9.0 - 9.2, Mac OS X (Version 10.1/ 10.2) Computer Model The above OS should be pre-installed on computers with built- in USB ports. CPU PowerPC RAM Mac OS 9.0 - 9.2: 20 MB or more of application memory Mac OS X (Version 10.1/ 10.2): 128 MB or more Interface ...
Windows - Preparations - 9 Using the Software on the Windows Platform - Preparations - This chapter explains the basic procedures for installing the software and connecting the camera to a computer. Read this material before you connect the camera to the computer.
Installing the Software and USB Driver 10 Installing the Software and USB Driver Start by installing the software from the Canon Digital Camera Solution Disk. Items to Prepare • Your computer • Canon Digital Camera Solution Disk supplied with the camera Installation Procedures 1 Confirm that the cam...
Windows - Preparations - 11 4 Click [Software Installation]. 5 Click [Next]. 6 Read the software license agreement and click [Yes] if you consent to all the conditions. How to Display the Installer Panel Use the following procedures to display the installer panel if it does not appear automatically....
Starting ZoomBrowser EX 18 Starting ZoomBrowser EX Begin by starting up ZoomBrowser EX. The startup procedures vary according to whether you are connecting the camera to the computer or using a memory card reader. Camera to Computer Connection 1 Attach the supplied USB cable to the computer’s USB po...
Windows - The Basics - 19 2 Select [Canon ZoomBrowser EX] and click [OK]. ZoomBrowser EX will start and open its Camera Window. The camera images will display as thumbnails (tiny versions) in the Camera Window. A dialog allowing you to select the camera model will display if a camera and a memory ca...
Starting ZoomBrowser EX 20 Next, download images to the computer (p. 22). Memory Card Connection 1 Insert the memory card into the reader. Use a separately sold card adapter (PCMCIA adapter) if required. See the manual for the memory card for its connection and handling instructions. 2 Start ZoomBro...
Downloading Images to the Computer 22 Downloading Images to the Computer 1 Click on images in the Camera Window that you wish to download. The background color of the selected images will change to orange. 2 Click [Download Image]. A Download Settings dialog allowing you to select the image destinat...
Downloading Images to the Computer 24 Other Methods of Downloading Images to the Computer * Windows XP Your camera uses a standard image transfer protocol called the Picture Transfer Protocol (PTP). With the PTP and Windows XP, all you need do is connect the camera to the computer with a USB cable t...
Windows - The Basics - 25 Printing Images 1 Click [Print] in the Main Window. 2 Click [Layout Print] in the next menu. 3 Click on the image(s) you wish to print and click the [Next] button at the window's bottom right. Movies cannot be printed. The background color of the selected images will change...
The ZoomBrowser EX Windows 30 The ZoomBrowser EX Windows ZoomBrowser EX has two windows: the Camera Window and the Main Window. This topic explains the features of these two windows. Camera Window This window can be used to view images in the camera (or memory card) and download them to the computer...
Replaying Movies 32 Replaying Movies When you double-click an image with a movie icon in the ZoomBrowser EX’s Browser Area, QuickTime Player will start and replay the movie. 1 Double-click an image with a movie icon. QuickTime Player will start. 2 Click the play button in QuickTime Player. The movie...
Windows - Advanced T echniques - 33 Converting RAW Images - File Viewer Utility Images can be recorded in the RAW format (RAW images) with certain camera models. RAW images are extremely high-quality images that are not degraded by compression algorithms when recorded. However, they are not supporte...
Converting RAW Images - File Viewer Utility 34 File Viewer Utility Features Image Adjustment Features The following items will display when you select a RAW image and a camera model name in the Model-Specific Processing Mode list box. Save ButtonConverts and saves the image. Preferences ButtonUse th...
Windows - Advanced T echniques - 35 Merging Panoramic Images - PhotoStitch You can create a wide panoramic image by merging several images, such as those shot in the camera's Stitch Assist mode. Use the PhotoStitch program to merge the images. Starting PhotoStitch Start PhotoStitch from ZoomBrowser ...
Merging Panoramic Images - PhotoStitch 36 Images Shot in Stitch Assist Mode It is easy to merge images shot with the camera's Stitch Assist mode since PhotoStitch automatically arranges them in the correct order and orientation. Stitch Assist mode images appear in the Camera Window as shown below. •...
Windows - Advanced T echniques - 37 Operating the Shutter Remotely - RemoteCapture You can use a computer to control the shutter of a connected camera to record still images. This is particularly useful for checking images on the larger computer display as you record them. Start the RemoteCapture pr...
Operating the Shutter Remotely - RemoteCapture 38 RemoteCapture Features RemoteCapture has two windows: the Shooting-RemoteCapture window and the Save-RemoteCapture window. Use these windows to record and save images, respectively. Shooting-RemoteCapture Window RemoteCapture locks the exposure and f...
Windows - Advanced T echniques - 39 Save-RemoteCapture Window The following limitations apply when the Viewfinder image is displayed with a DIGITAL ELPH/DIGITAL IXUS series camera.• The Viewfinder will automatically turn off after you shoot or after 1 minute passes after it is turned on. Click [View...
Operating the Shutter Remotely - RemoteCapture 40 Shooting with RemoteCapture 1 Click the arrow to the left of [Detail Settings]. The full-view Shooting-RemoteCapture window will display. 2 Click [Viewfinder On] and view the image in the Shooting- RemoteCapture window. Change the settings if require...
Windows - Advanced T echniques - 41 Interval Timer Shooting Interval timer shooting is a method of shooting that records a specified number of frames at set intervals. 1 In the Shooting-RemoteCapture window, click the [Interval Timer Shooting] tab. This will display the Interval Timer Shooting windo...
Operating the Shutter Remotely - RemoteCapture 42 Other Features Changing the File Destination and Method of Saving 1 In the Save-RemoteCapture window, click the [File] menu and select [Preferences]. This will display the Preferences dialog. 2 Select the way images are saved and the folder to which ...
Windows - Advanced T echniques - 43 Printing an Index of the Thumbnail Images You can print an index of all the thumbnails displayed in the Thumbnail View area of the Save-RemoteCapture window by clicking the [File] menu and selecting [Print Index]. This provides a convenient register and means of c...
Enjoy Customizing Your Camera with the My Camera Settings 44 Enjoy Customizing Your Camera with the My Camera Settings The start-up image, start-up sound, shutter sound, operation sound, and self- timer sound are called the My Camera Settings. You can add your favorite images and sounds from your co...
Windows - Advanced T echniques - 45 The My Camera Window Features Saving the My Camera Settings to the Camera You can save the My Camera Settings displayed in the My Camera window to the camera. ZoomBrowser EX already contains several pre-recorded My Camera Settings items. You can check these items ...
Enjoy Customizing Your Camera with the My Camera Settings 46 1 Confirm that the [Setup as a theme] tab is selected in the My Camera window. To save the settings individually, select the [Set individually] tab and select the setting type in the [Data Type] list box. 2 Select the settings file you wis...
Windows - Advanced T echniques - 47 1 Confirm that the [Setup as a theme] tab is selected in the My Camera window. To save the settings individually, select the [Set individually] tab and select the setting type in the [Data Type] list box. 2 Select the settings file(s) from the Camera list that you...
Enjoy Customizing Your Camera with the My Camera Settings 48 2 Select the file you created and click [Open]. The selected file will appear in the Computer list. This concludes the process for adding new data. You can save the newly created data to the camera using the procedures described in the Sav...
Installing the Software 52 Installing the Software Start by installing the software from the Canon Digital Camera Solution Disk. Items to Prepare • Your computer • Canon Digital Camera Solution Disk supplied with the camera Installation Procedures 1 Close any programs that are running. 2 Place the C...
Macintosh - The Basics - 55 Using the Software on the Macintosh Platform - The Basics - This chapter explains the procedures for using ImageBrowser to download the camera's images to the computer and print them. Read this chapter after completing the preparations in the Using the Software on the Mac...
Starting ImageBrowser 56 Starting ImageBrowser Begin by starting up ImageBrowser. The startup procedures vary according to whether you are connecting the camera to the computer or using a memory card reader. Camera to Computer Connection Mac OS X 1 Attach the supplied USB cable to the computer’s USB...
Starting ImageBrowser 58 Mac OS 9 1 Attach the supplied USB cable to the computer’s USB port and the camera’s Digital Terminal. Prepare the camera for communication with the computer. How to Set ImageBrowser to Start Automatically with Mac OS X You can have ImageBrowser start automatically when you ...
Starting ImageBrowser 60 What to Do the Next Time ImageBrowser is Started A dialog with the previously selected automated settings will display the next time you start ImageBrowser. To use these settings unchanged, click the [Start] button. To do nothing, click [Cancel]. To change the settings, clic...
Macintosh - The Basics - 63 Downloading Images to the Computer Creating a Folder to Receive Downloaded Images Create a new folder for downloaded images with the following procedures. 1 Click the window labeled [Browser Window] and bring it to the foreground. 2 Select the [Users] folder and the subfo...
Downloading Images to the Computer 64 5 Select the newly created folder . Downloading Images Download images to the new folder. 1 Click the Camera Window to bring it to the forefront. 2 Click the images to download. A blue frame appears around selected images. You can select multiple images by holdi...
Printing Images 66 Printing Images Printing 1 Select the image(s) you wish to print. A blue frame appears around selected images. 2 Click the [Print] button and select [Layout printing] from the displayed menu. This displays the Layout Options dialog and the Print window. 3 Confirm that [Custom layo...
Printing Images 68 Print Window Features When the [Custom layout printing] option is selected in the Layout Options window, you can freely change the size and position of the images for printing. This chapter explained the ImageBrowser basics. Once you have mastered them, read the following chapter ...
Macintosh - Advanced T echniques - 71 Converting RAW Images - File Viewer Utility Images can be recorded in the RAW format (RAW images) with certain camera models. RAW images are extremely high-quality images that are not degraded by compression algorithms when recorded. However, they are not suppor...
Operating the Shutter Remotely - RemoteCapture 80 Other Preferences Changing the File Destination and Method of Saving 1 Click the [RemoteCapture] menu (Mac OS X) or the [File] menu (Mac OS 9) and select [Preferences] in the Save-RemoteCapture or Shooting-RemoteCapture window. This will display the ...
Macintosh - Advanced T echniques - 83 3 Select [Start-up Image, Start-up Sound, Operation Sound, Selftimer Sound and Shutter Sound] and click [OK]. This will display the My Camera window. The My Camera Window ImageBrowser already contains several pre-recorded My Camera Settings items. You can check ...
Enjoy Customizing Your Camera with the My Camera Settings 86 1 Open the My Camera window and click the [Add] button. This will display the file opening dialog. 2 Select the file you created and click [Open]. The selected file will appear in the Computer list. This concludes the process for adding ne...
Macintosh - Advanced T echniques - 87 Downloading Images with the USB Mounter The USB Mounter can only be used with the PowerShot G3, PowerShot S45 and PowerShot S230 DIGITAL ELPH/DIGITAL IXUS v 3 camera models on a computer running Mac OS 9. The USB Mounter is a driver program that allows images on...
Windows/Macintosh 91 Information about Your Camera The software package and the procedures for connecting to a computer and preparing for data transfers vary between camera models. Certain software functions may also not be supported by some camera models. Read this section to confirm the capabiliti...
Information Common to All Models 92 Information Common to All Models See the respective page for your camera model for information specific to that model (pp. 94 - 101). Programs and Compatible Operating Systems The CD-ROM labeled “Canon Digital Camera Solution Disk” is provided with all models. It ...
Windows/Macintosh 93 Connecting the Camera to a Computer • Your camera and computer • USB cable supplied with the camera See the page (pp. 94 - 101) for your specific model for information about connecting the camera to the computer. Ensure that you have installed the software from the supplied Cano...
PowerShot S50 94 PowerShot S50 How to Connect the Camera to a Computer and Prepare to Transfer Data 1 Attach the supplied USB cable to the computer’s USB port and the camera’s Digital terminal as shown below. The camera and computer will automatically be ready to transfer data when a connection is e...
Windows/Macintosh 95 PowerShot S400 DIGITAL ELPH/DIGITAL IXUS 400 How to Connect the Camera to a Computer and Prepare to Transfer Data 1 Attach the supplied USB cable to the computer’s USB port and the camera’s Digital terminal as shown below. 2 Set the mode switch to the replay mode and turn the ca...
PowerShot A300 98 PowerShot A300 How to Connect the Camera to a Computer and Prepare to Transfer Data 1 Attach the supplied USB cable to the computer’s USB port and the camera’s Digital terminal as shown below. 2 Press the (On) button. This will prepare the camera to exchange data with the computer....
Windows/Macintosh 99 PowerShot G3 How to Connect the Camera to a Computer and Prepare to Transfer Data 1 Confirm that the camera’s [Communication] setting is set to [Normal]. 2 Attach the supplied USB cable to the computer’s USB port and the camera’s Digital terminal as shown below. The camera and c...
Windows/Macintosh 103 Appendices This chapter introduces the CD-ROMs included in your package and the procedures for installing the programs. It also explains how to uninstall the programs. Read the Troubleshooting section in this chapter if you experience a problem using the programs.
About the CD-ROMs in Your Package 104 About the CD-ROMs in Your Package CD-ROMs containing image editing programs are included in your camera package along with the Canon Digital Camera Solution Disk. This topic explains the program features and installation procedures for each CD-ROM. ArcSoft Camer...
Windows/Macintosh 105 Installing ArcSoft Camera Suite 2.0 Windows 1 Place the ArcSoft Camera Suite CD-ROM in the drive. Follow the onscreen messages to install PhotoStudio and VideoImpression. If the message does not appear automatically, click the Windows [Start] menu, select [My Computer], and dou...
About the CD-ROMs in Your Package 106 ArcSoft Camera Suite 1.2 CD-ROM This CD-ROM contains the following programs. The free hard disk space required to install ArcSoft Camera Suite 1.2 is 475 MB or more on a Windows system and 375 MB or more on a Macintosh system. What Can Be Accomplished with ArcSo...
About the CD-ROMs in Your Package 108 Adobe Photoshop 5.0 LE CD-ROM This CD-ROM contains the following programs Approximately 40 MB or free hard disk space is required to install Adobe Photoshop 5.0 LE. What Can Be Accomplished with Adobe Photoshop 5.0 LE Special Effects and Image Editing for Variou...
Windows/Macintosh 109 Macintosh 1 Close any programs that are running. 2 Place the Adobe Photoshop 5.0 LE CD-ROM in the computer’s CD- ROM drive. 3 Double-click the CD-ROM icon, followed by the [English] and [Adobe Photoshop 5.0 LE] folders and the [Install Photoshop LE] icon . The installation will...
Uninstalling the Software 110 Uninstalling the Software The procedures for uninstalling the software are only required when you wish to delete the programs from your computer or when reinstallation is required to fix corrupted files. Uninstalling the Software (Windows) Software Installed from the Ca...
Windows/Macintosh 111 Uninstalling the Other Supplied Programs • ArcSoft PhotoStudio, PhotoImpression and VideoImpression Uninstall these programs by clicking the Windows [Start] menu and selecting [Programs] or [All Programs], followed by [ArcSoft Camera Suite] and [Uninstall]. • Adobe Photoshop 5....
Troubleshooting 116 Troubleshooting Please read this section if you encounter a problem using the software. Start by Checking This Investigate the following points first if you encounter a problem. Does your computer meet the following requirements? Computer systems that fail to meet the following r...
Windows/Macintosh 117 Problems Try the suggested solutions to the common problems listed below. USB Driver installation not proceeding well (Windows) Uninstall the driver (p. 111) before reinstalling it with the procedures in Installing the Software and USB Driver (p. 10). Add New Hardware Wizard or...
Troubleshooting 118 Camera not detected, Events dialog won’t display or images will not download to the computer (when camera is connected to the computer via a USB cable) Cause 1: There is a problem with one of the items in the Start by Checking This section (p. 116). Solution: Resolve the problem....
Troubleshooting 120 Windows XP and Windows 2000 <Check to see if the camera is being recognized as an “other” device and delete the driver if it is.> 1. Windows XP: Click the [Start] menu, followed by [Control Panel], [Performance and Maintenance] and [System]. Windows 2000: Click the [Start] ...
Windows/Macintosh 121 < Delete the setup information files> 7. Windows XP: Click the [Start] menu and open [My Computer], followed by [C:] Drive, the [Windows] folder and the [Inf] folder. Windows 2000: Double-click the [My Computer] icon on the desktop, followed by the [C:] drive, [Winnt] fol...
Windows/Macintosh 123 Windows Me/Windows 98 <Check to see if the camera is being recognized as an “other” device and delete the driver if it is.> 1. Click the [Start] menu and select [Settings], followed by [Control Panel]. Double-click the [System] icon. This will display the System Propertie...
Windows/Macintosh 125 <Reinstall the driver> 11.Reinstall the driver with the procedures in Installing the Software and USB Driver (p. 10). Zooming Images in ZoomBrowser EX is Slow or Not Working Some graphics cards or settings may cause the display of zoomed images in ZoomBrowser EX to slow d...
Troubleshooting 126 If You Were Using ZoomBrowser EX Version 2 or 3 Take the following steps if you were using ZoomBrowser EX version 2 or 3 with Windows. If Titles and Comments Were Attached to Your Images. Take the following steps to display in version 4 the titles and comments you input in versio...
127 Index A Adobe Acrobat Reader 109 Adobe Photoshop 5.0 LE 108 ArcSoft Camera Suite 1.2 106 ArcSoft Camera Suite 2.0 104 B Browser Area 31, 65 C Camera Window Windows 19, 22, 30 Macintosh 57, 64 Canon Digital Camera Solution Disk 92 Windows 10 Macintosh 52 CD-ROM 6, 104 Computer 7, 8, 93 Connecting...
Canon Customer Support For Canon Customer Support contacts, please see the Canon Limited Warranty supplied with your camera. Adobe Customer Support Adobe Systems Inc. technical support information is available in the PDF file format on the supplied CD-ROM. PDF File Location and Opening Instructions ...
Canon Manuals
-
Canon 6130280
User Manual
-
Canon imageCLASS MF284dw
User Manual
-
Canon imageCLASS MF289dw
User Manual
-
Canon imageCLASS LBP172dw
User Manual
-
Canon 248
User Manual
-
Canon 323
User Manual
-
Canon 323
Installation Manual
-
Canon 323
Manual
-
Canon 250
User Manual
-
Canon 251
User Manual
-
Canon 251
Manual
-
Canon 251
Troubleshooting Guide
-
Canon 6710C002
User Manual
-
Canon K10605
User Manual
-
Canon K10613
User Manual
-
Canon K10608
User Manual
-
Canon K10609
User Manual
-
Canon imageRUNNER C3326i
User Manual
-
Canon imageCLASS MF465dw
User Manual
-
Canon K10617
User Manual