Asko OP8611A - Manuals
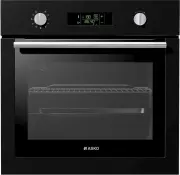
User Manual Asko OP8611A


Summary
422686 We sincerely thank you for your purchase. We believe you will soon fi nd ample evidence that you can really rely on our products. To make the use of the appliance easier, we attach these comprehensive instruction manual. The instructions should aid you in getting familiar with your new applia...
422686 • The appliance may only be connected to the power mains by a service technician or other quali fi ed expert. • Unprofessional tampering and repairs may result in serious physical injury and damage to the appliance. The repairs may only be carried out by the service personnel or an authorized...
422686 capacity, or persons with inadequate experience or knowledge, do not use the appliance unless attended by a quali fi ed person. The same recommendation applies when the appliance is used by persons of less-than-legal age. The symbol on the product or on its packaging indicates that this produ...
Asko Ovens Manuals
-
 Asko OCM8464B
User Manual
Asko OCM8464B
User Manual
-
 Asko OCM8487A
User Manual
Asko OCM8487A
User Manual
-
 Asko OCM8487B
User Manual
Asko OCM8487B
User Manual
-
 Asko OCM8487S
User Manual
Asko OCM8487S
User Manual
-
 Asko OCS8464B
User Manual
Asko OCS8464B
User Manual
-
 Asko OCS8464S
User Manual
Asko OCS8464S
User Manual
-
 Asko OCS8487A1
User Manual
Asko OCS8487A1
User Manual
-
 Asko OCS8487B
User Manual
Asko OCS8487B
User Manual
-
 Asko OCS8664A
User Manual
Asko OCS8664A
User Manual
-
 Asko OCS8664B
User Manual
Asko OCS8664B
User Manual
-
 Asko OCS8664S
User Manual
Asko OCS8664S
User Manual
-
 Asko OCS8687S
User Manual
Asko OCS8687S
User Manual
-
 Asko OP8611SS
User Manual
Asko OP8611SS
User Manual
-
 Asko OP8621A
User Manual
Asko OP8621A
User Manual
-
Asko OP8621SS
User Manual
-
Asko OP8631A
User Manual
-
 Asko OP8631SS
User Manual
Asko OP8631SS
User Manual
-
 Asko OP8637A
User Manual
Asko OP8637A
User Manual
-
 Asko OP8637A1
User Manual
Asko OP8637A1
User Manual
-
 Asko OP8637S
User Manual
Asko OP8637S
User Manual