Page 2 - Instructions for use; Pictograms used; Important information
EN Instructions for use EN 3 - EN 29 Pictograms used Important information Tip
Page 3 - CONTENTS
EN 3 CONTENTS Your oven Introduction 4Description of the appliance 5 Guide rails/Telescopic guide rails 5 Accessories 6 Door 6Cooling fan 6 Control panel 7 Control panel general use 8 First use Before first use 10 Use Microwaves 12Guidelines for cookware 13 Please note! 14 Explanation of the knobs a...
Page 4 - YOUR OVEN; Introduction; The installation instructions are included separate.
EN 4 YOUR OVEN Introduction Congratulations on choosing this oven. This product is designed with simple operation and optimum comfort in mind. This manual shows how you can best use this oven. In addition to information about operating the appliance, you will also find background information that ma...
Page 5 - on the telescopic guide rails, back into the oven cavity.
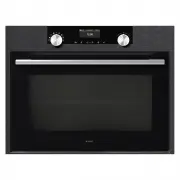
EN 5 Description of the appliance 1. Control panel 2. Oven levels3. Oven door 4. Door handle Guide rails/Telescopic guide rails • The oven has four or five guide rails (Level 1 to 4/5), depending on the model. Level 1 is mainly used in combination with bottom heat. The two upper levels are mainly us...
Page 6 - Accessories; never place an accessory on the bottom of the oven!; Enamelled baking tray; Door; The oven continues operating when the door is closed.; Cooling fan
EN 6 Accessories Your appliance is accompanied by a range of accessories, depending on the model. Only use original accessories; they are specially suited to your appliance. Be sure that all the accessories that are being used are able to withstand the temperature settings of the chosen oven functio...
Page 7 - Control panel; Combi microwave functions
EN 7 Control panel 12 13 14 15 16 17 1 10 11 6 7 8 9 5 4 3 2 1. Function knob (in ‘Off’ position) 2. Defrost3. Automatic programs 4. Fast preheat 5. Oven functions6. Microwave functions 7. Combi microwave functions 8. Warming9. Cleaning 10. Display11. Selection knob12. On/off key and stop key (cance...
Page 8 - Control panel general use; Set a function and settings; Touch and hold the on/off key to switch on the appliance.
EN 8 Control panel general use Activated area (grey background) Set a function and settings 1. Touch and hold the on/off key to switch on the appliance. 2. Turn the function knob to set a main oven function. The main oven functions are visible around the oven function knob and in the display.The fun...
Page 9 - Temperature; Delayed start
EN 9 YOUR OVEN Egg timer Clock Cooking time Finishing time Temperature 14:30 Feedback bar Active area (grey background) Main function icon • The display will show the icon and name of the activated function for about 1.5 seconds. • The feedback bar shows what setting you are changing. Delayed start ...
Page 10 - FIRST USE; Before first use; Make sure that there is good ventilation during initial use.; Setting the language; Language; Confirm the setting by touching the confirm key.; English; Language; Français; Year
EN 10 FIRST USE Before first use • Clean the appliance interior and accessories with hot water and washing-up liquid. Do not use aggressive cleaning agents, abrasive sponges and similar. • The appliance will emit a particular odor when it is used for the first time; this is normal. Make sure that th...
Page 11 - is now ready for use.
EN 11 FIRST USE All the start-up settings are now set and the display will show the stand-by screen. The appliance is now ready for use. The language, time and date can be adjusted in the settings menu (see ‘Settings menu’ chapter). The settings menu can be opened from the start display via the ‘Plu...
Page 12 - Microwaves; Cooking principle; USE
EN 12 Microwaves Microwaves are high-frequency electromagnetic waves. The energy makes it possible to cook or warm up a dish without affecting the form or colour. Cooking principle • The microwaves the microwave generates are spread evenly by a distribution system. This cooks the dish evenly. • The ...
Page 13 - Guidelines for cookware; Cookware
EN 13 Guidelines for cookware Cookware that you use for the microwave function should not block the microwaves. Metals such as stainless steel, aluminium and copper reflect microwaves. For that reason, do not use metal cookware. Cookware which is designated as microwave-safe can be used safely. For ...
Page 14 - Explanation of the knobs and the keys
EN 14 Please note! Warning! • Heating liquids in the microwave can result in delayed boiling. This means that the liquid may start to boil furiously after it is removed from the microwave, with the risk of scalding. You can offset the delayed boiling effect by placing a plastic or glass spoon in the...
Page 15 - Switch the lighting on/off; Touch this key to switch the cavity lighting on or off.
EN 15 To cancel or go back in the menu Touch this key to cancel an operation or to go back one-step in the menu. Lighting key Switch the lighting on/off Touch this key to switch the cavity lighting on or off. Navigation keys Navigate to the right Touch the right navigation key to confirm the setting...
Page 16 - Description of the mains functions; Main functions (to select with the function knob)
EN 16 Description of the mains functions Consult the tables to select the preferred function. Also consult the instructions for preparation on the dish packaging. Some main functions have sub functions. In ‘Microwave function’: do not use metal cookware or utensils and do not preheat the oven. Be su...
Page 17 - Description of the sub functions; Oven functions (to select with the selection knob)
EN 17 Function Description Combi microwave • Use one of the functions for (fast) cooking of meals. • Sub functions are available (consult Combi microwave functions table). Warming • Use one of the functions to warm dishes.• Sub functions are available (consult warming functions table). Cleaning • Gr...
Page 19 - he upper h
EN 19 Top heat • Heating only by means of the upper heating element. • This mode can be used when you wish to bake/ roast the top part of your dish. • Place the baking tray or oven rack in the middle of the oven. • Suggested temperature: 150 °C 2 Bottom heat • Heating only by means of the lower heat...
Page 21 - Plate warming; • This function is used for warming tableware, so; Keep warm; • This function is used to keep already cooked; Plus menu; The egg timer can be used independently of the oven function.
EN 21 Warming functions (to select with the selection knob) Function Description Plate warming • This function is used for warming tableware, so that the served food stays hotter for longer. Keep warm • This function is used to keep already cooked dishes warm. Plus menu Touch the Plus key to choose ...
Page 22 - Using the appliance cooking functions; At the end of the cooking you can:; The previous process is activated again.; OPERATION
EN 22 Using the appliance cooking functions Consult ‘Control panel general use’ to get information about the general operation of the appliance. 1. Touch the ‘On/off key to switch on the appliance. 2. Turn the function knob to select a main function. ▷ Consult ‘Description of the functions’ to selec...
Page 23 - Changing settings during the progress; return to the progress screen.
EN 23 Changing settings during the progress • During progress, touching the navigation keys will show the active area. The selected setting can now be changed. After confirmation with the confirm key the progress screen will be shown with the changed settings. • After 5 seconds without actions the p...
Page 24 - SETTINGS; Settings menu; General
EN 24 SETTINGS Settings menu The settings menu is only available by touching the plus key when the appliance is in stand-by mode. Egg timer (setting an alarm time) General • Language of the display• Time ▷ Set time ▷ Hour format ▷ Clock size • Date ▷ Date yy-mm-dd ▷ Date format • Sound ▷ Volume (low...
Page 25 - Cleaning the appliance; Using Steam clean; dirt and grease if the oven is hot.; MAINTENANCE
EN 25 Cleaning the appliance Clean the oven regularly to prevent fat and food particles from accumulating, especially on the surfaces of the interior and the exterior, the door and the seal. • Activate the child lock (to prevent that the appliance is switched on accidentally). • Clean the exterior s...
Page 26 - socket or by switching off the circuit breaker in the fuse box.
EN 26 Removing and cleaning the guide rails Use conventional cleaning products to clean the guide rails. 1. Remove the screw using a screwdriver. 2. Remove the guide rails from the holes in the back wall. Save the guide rail spacers carefully. Return the spacers after cleaning. This prevents sparks ...
Page 27 - • This is normal. Wipe the oven clean after use.; MALFUNCTIONS
EN 27 General If you have problems with your oven, consult the error overview below. Should the problems persist, please contact the Customer Services Department. The food stays raw • Check whether the timer has been set and you have touched the confirm key.• Is the door closed properly?• Check whet...
Page 28 - The circuit breaker switches off regularly.; • Consult a service technician.; Storing and repairing the oven
EN 28 MALFUNCTIONS Clicking sounds can be heard when the oven is working, particularly in the defrost setting. • This is normal. The circuit breaker switches off regularly. • Consult a service technician. The display gives an error code, ERROR XX ... (XX indicates the number of the error). • There i...
Page 29 - ENVIRONMENTAL ASPECTS; Disposal of the appliance and packaging; Declaration of Conformity
EN 29 ENVIRONMENTAL ASPECTS Disposal of the appliance and packaging This product is made from sustainable materials. However, the appliance must be disposed of responsibly at the end of its useful life. The government can provide you with information about this. The appliance packaging can be recycl...