Page 2 - Table of Contents
Table of Contents BIOS Update ��������������������������������������������������������������������������������3UEFI BIOS Setup ���������������������������������������������������������������������������7A�I FAN Control ����������������������������������������������������������������������������8VIVI...
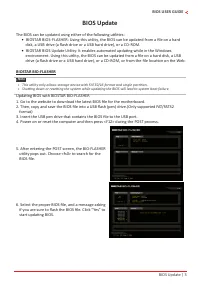
Page 3 - BIOS USER GUIDE; BIOS Update; The BIOS can be updated using either of the following utilities:; Updating BIOS with BIOSTAR BIO-FLASHER
BIOS Update | 3 BIOS USER GUIDE BIOS Update The BIOS can be updated using either of the following utilities: • • BIOSTAR BIOS-FLASHER: Using this utility, the BIOS can be updated from a file on a hard disk, a USB drive (a flash drive or a USB hard drive), or a CD-ROM. • • BIOSTAR BIOS Update Utility...
Page 4 - BIOS Update Utility (through the Internet)
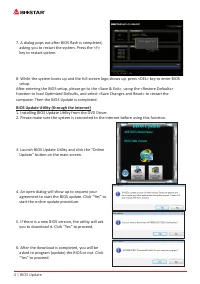
4 | BIOS Update 7. A dialog pops out after BIOS flash is completed, asking you to restart the system. Press the <Y> key to restart system. 8. While the system boots up and the full screen logo shows up, press <DEL> key to enter BIOS setup. After entering the BIOS setup, please go to the ...
Page 6 - Backup BIOS; Click the Backup BIOS button on the main screen for
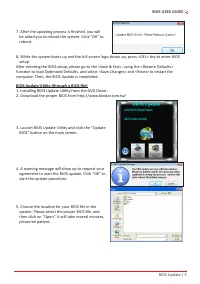
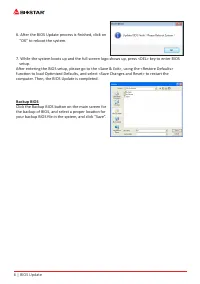
6 | BIOS Update 6. After the BIOS Update process is finished, click on “OK” to reboot the system. 7. While the system boots up and the full screen logo shows up, press <DEL> key to enter BIOS setup. After entering the BIOS setup, please go to the <Save & Exit>, using the <Restore ...
Page 7 - UEFI BIOS Setup; these settings to NVRAM.
UEFI BIOS Setup | 7 BIOS USER GUIDE UEFI BIOS Setup Introduction The purpose of this manual is to describe the settings in the AMI UEFI BIOS Setup program on this motherboard. The Setup program allows users to modify the basic system configuration and save these settings to NVRAM. UEFI BIOS determin...
Page 8 - A�I FAN Control; value of CPU FAN, SYSTEM FAN and MOS FAN.
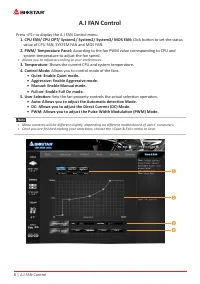
8 | A.I FAN Control A�I FAN Control Press <F5> to display the A.I FAN Control menu. 1� CPU FAN/ CPU OPT/ System1/ System2/ System3/ MOS FAN: Click button to set the status value of CPU FAN, SYSTEM FAN and MOS FAN. 2� PWM/ Temperature Panel: According to the fan PWM value corresponding to CPU a...
Page 9 - VIVID LED Control | 9; VIVID LED Control
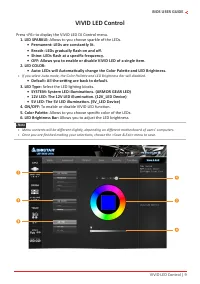
VIVID LED Control | 9 BIOS USER GUIDE VIVID LED Control Press <F6> to display the VIVID LED DJ Control menu. 1. LED SPARKLE: Allows to you choose sparkle of the LEDs. • • Permanent: LEDs are constantly lit� • • Breath: LEDs gradually flash on and off. • • Shine: LEDs flash at a specific freque...
Page 10 - � Main Menu; an overview of the basic system information.
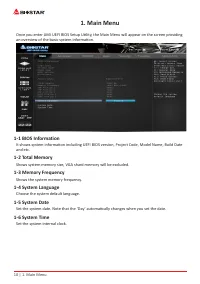
10 | 1. Main Menu 1� Main Menu Once you enter AMI UEFI BIOS Setup Utility, the Main Menu will appear on the screen providing an overview of the basic system information. 1-1 BIOS Information It shows system information including UEFI BIOS version, Project Code, Model Name, Build Date and etc. 1-2 To...
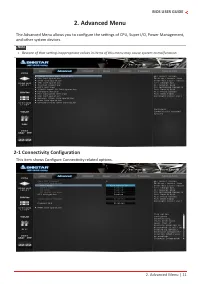
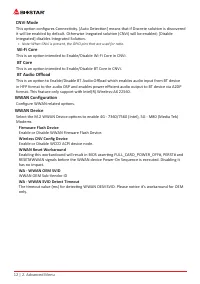
Page 11 - � Advanced Menu; and other system devices.; -1 Connectivity Configuration; This item shows Configure Connectivity related options.
2. Advanced Menu | 11 BIOS USER GUIDE 2� Advanced Menu The Advanced Menu allows you to configure the settings of CPU, Super I/O, Power Management, and other system devices. Note » » Beware of that setting inappropriate values in items of this menu may cause system to malfunction. 2-1 Connectivity C...
Page 12 - CNVi Mode; Integrated] disables Integrated Solution.; This is an option intended to Enable/Disable Wi-Fi Core in CNVi.; BT Core; This is an option intended to Enable/Disable BT Core in CNVi.; BT Audio Offload; Configure WWAN related options.; WWAN Device; Firmware Flash Device
12 | 2. Advanced Menu CNVi Mode This option configures Connectivity. [Auto Detection] means that if Discrete solution is discovered it will be enabled by default. Otherwise Inegrated solution (CNVi) will be enabled; [Disable Integrated] disables Integrated Solution. » » Note: When CNVi is present, ...
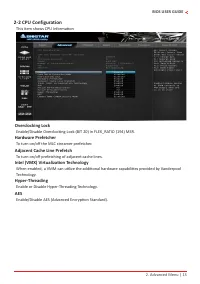
Page 13 - -2 CPU Configuration; This item shows CPU Information; Overclocking Lock; To turn on/off the MLC streamer prefetcher.; Adjacent Cache Line Prefetch; To turn on/off prefetching of adjacent cache lines.; AES
2. Advanced Menu | 13 BIOS USER GUIDE 2-2 CPU Configuration This item shows CPU Information Overclocking Lock Enable/Disable Overclocking Lock (BIT 20) in FLEX_RATIO (194) MSR. Hardware Prefetcher To turn on/off the MLC streamer prefetcher. Adjacent Cache Line Prefetch To turn on/off prefetching of ...
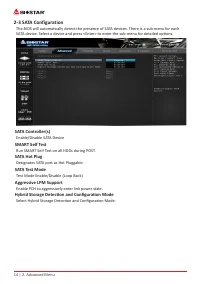
Page 14 - -3 SATA Configuration; Enable/Disable SATA Device; SMART Self Test; Run SMART Self Test on all HDDs during POST.; SATA Hot Plug; Designates SATA port as Hot Pluggable.; SATA Test Mode; Enable PCH to aggressively enter link power state.; Hybrid Storage Detection and Configuration Mode; Select Hybrid Storage Detection and Configuration Mode.
14 | 2. Advanced Menu 2-3 SATA Configuration The BIOS will automatically detect the presence of SATA devices. There is a sub-menu for each SATA device. Select a device and press <Enter> to enter the sub-menu for detailed options. SATA Controller(s) Enable/Disable SATA Device SMART Self Test Ru...
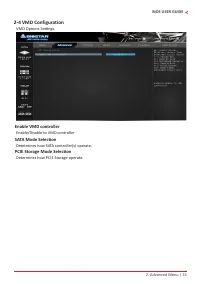
Page 15 - -4 VMD Configuration; VMD Options Settings.; Enable VMD controller; Enable/Disable to VMD controller; SATA Mode Selection; Determines how PCIE Storage operate.
2. Advanced Menu | 15 BIOS USER GUIDE 2-4 VMD Configuration VMD Options Settings. Enable VMD controller Enable/Disable to VMD controller SATA Mode Selection Detetmines how SATA controller(s) operate. PCIE Storage Mode Selection Determines how PCIE Storage operate.
Page 16 - -5 Trusted Computing
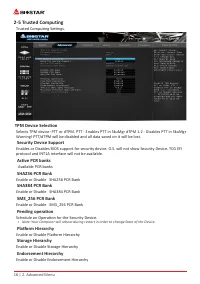
16 | 2. Advanced Menu 2-5 Trusted Computing Trusted Computing Settings. TPM Device Selection Selects TPM device: PTT or dTPM. PTT - Enables PTT in SkuMgr dTPM 1.2 - Disables PTT in SkuMgr Warning! PTT/dTPM will be disabled and all data saved on it will be lost. Security Device Support Enables or Dis...
Page 17 - Support new TCG2 protocol and event format for Win10 or later.
2. Advanced Menu | 17 BIOS USER GUIDE TPM 2�0 UEFI Spec Version Select the TCG2 Spec Version Support, TCG_1_2: the Compatible mode for Win8/Win10. TCG_2: Support new TCG2 protocol and event format for Win10 or later. Physical Presence Spec Version Sekect to Tell O.S. to support PPI Spec Version 1.2 ...
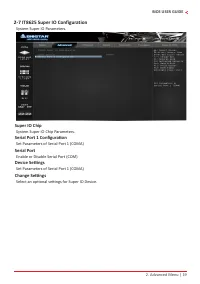
Page 19 - System Super IO Parameters.; Super IO Chip; System Super IO Chip Parameters.; Serial Port 1 Configuration; Select an optional settings for Super IO Device.
2. Advanced Menu | 19 BIOS USER GUIDE 2-7 IT8625 Super IO Configuration System Super IO Parameters. Super IO Chip System Super IO Chip Parameters. Serial Port 1 Configuration Set Parameters of Serial Port 1 (COMA) Serial Port Enable or Disable Serial Port (COM) Device Settings Set Parameters of Seri...
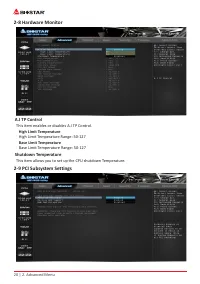
Page 20 - A�I TP Control; This item enables or disables A.I TP Control.; High Limit Temperature; Shutdown Temperature; This item allows you to set up the CPU shutdown Temperature.; -9 PCI Subsystem Settings
20 | 2. Advanced Menu 2-8 Hardware Monitor A�I TP Control This item enables or disables A.I TP Control. High Limit Temperature High Limit Temperature Range: 50-127Base Limit Temperature Base Limit Temperature Range: 50-127 Shutdown Temperature This item allows you to set up the CPU shutdown Temperat...
Page 21 - -10 USB Configuration; USB Configuration Parameters.
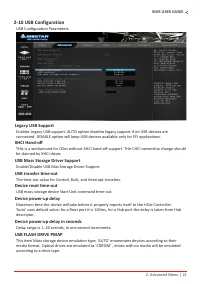
2. Advanced Menu | 21 BIOS USER GUIDE 2-10 USB Configuration USB Configuration Parameters. Legacy USB Support Enables Legacy USB support. AUTO option disables legacy support if no USB devices are connected. DISABLE option will keep USB devices available only for EFI applications. XHCI Hand-off THis ...
Page 22 - -11 Network Stack Configuration; Network Stack Settings.
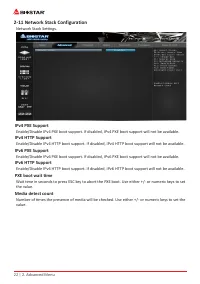
22 | 2. Advanced Menu 2-11 Network Stack Configuration Network Stack Settings. IPv4 PXE Support Enable/Disable IPv4 PXE boot support. If disabled, IPv4 PXE boot support will not be available. IPv4 HTTP Support Enable/Disable IPv4 HTTP boot support. If disabled, IPv4 HTTP boot support will not be ava...
Page 23 - -12 NVMe Configuration; The item shows NVMe controller and driver information.; -13 Offboard PCIe SATA Controller
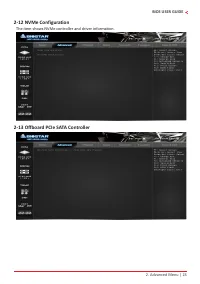
2. Advanced Menu | 23 BIOS USER GUIDE 2-12 NVMe Configuration The item shows NVMe controller and driver information. 2-13 Offboard PCIe SATA Controller
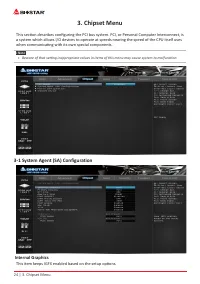
Page 24 - � Chipset Menu; when communicating with its own special components.; Internal Graphics; This item keeps IGFX enabled based on the setup options.
24 | 3. Chipset Menu 3� Chipset Menu This section describes configuring the PCI bus system. PCI, or Personal Computer Interconnect, is a system which allows I/O devices to operate at speeds nearing the speed of the CPU itself uses when communicating with its own special components. Note » » Beware ...
Page 26 - When ErP is enabled, the system will meet ErP requirement.; BIOS Lock; SMM protection of flash.
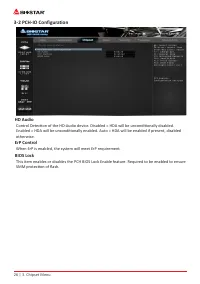
26 | 3. Chipset Menu 3-2 PCH-IO Configuration HD Audio Control Detection of the HD-Audio device. Disabled = HDA will be unconditionally disabled. Enabled = HDA will be unconditionally enabled. Auto = HDA will be enabled if present, disabled otherwise. ErP Control When ErP is enabled, the system will...
Page 27 - Onboard LAN1; This item enables or disables Onbaord LAN1.
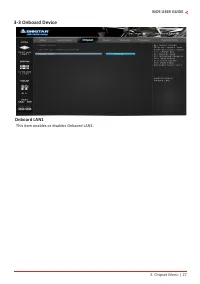
3. Chipset Menu | 27 BIOS USER GUIDE 3-3 Onboard Device Onboard LAN1 This item enables or disables Onbaord LAN1.
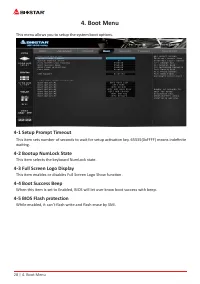
Page 28 - � Boot Menu; This menu allows you to setup the system boot options.; -1 Setup Prompt Timeout; This item selects the keyboard NumLock state.; -3 Full Screen Logo Display; This item enables or disables Full Screen Logo Show function.; -4 Boot Success Beep; While enabled, it can’t flash write and flash erase by SMI.
28 | 4. Boot Menu 4� Boot Menu This menu allows you to setup the system boot options. 4-1 Setup Prompt Timeout This item sets number of seconds to wait for setup activation key. 65535(0xFFFF) means indefinite waiting. 4-2 Bootup NumLock State This item selects the keyboard NumLock state. 4-3 Full Sc...
Page 29 - If Disabled, Redirection function will be disabled.; GateA20 Active; this option is useful when any RT code is executed above 1MB; Option ROM Messages; This item sets the display mode for Option ROM.
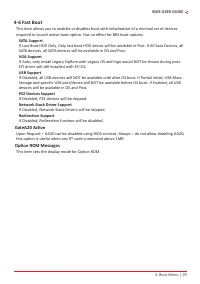
4. Boot Menu | 29 BIOS USER GUIDE 4-6 Fast Boot This item allows you to enables or disables boot with initialization of a minimal set of devices required to launch active boot option. Has no effect for BBS boot options. SATA Support If Last Boot HDD Only, Only last boot HDD device will be available ...
Page 30 - This option enables or disables CSM support.; Network; -8 Fixed Boot order Priorities; It controls the placement of newly detected UEFI boot options.
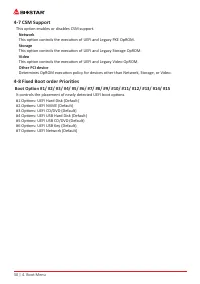
30 | 4. Boot Menu 4-7 CSM Support This option enables or disables CSM support. Network This option controls the execution of UEFI and Legacy PXE OpROM.Storage This option controls the execution of UEFI and Legacy Storage OpROM.Video This option controls the execution of UEFI and Legacy Video OpROM.O...
Page 31 - � Security Menu; -1 Administrator Password; This item sets Administrator Password.
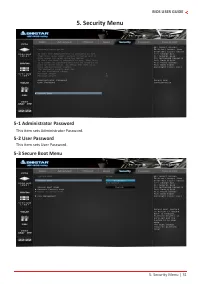
5. Security Menu | 31 BIOS USER GUIDE 5� Security Menu 5-1 Administrator Password This item sets Administrator Password. 5-2 User Password This item sets User Password. 5-3 Secure Boot Menu
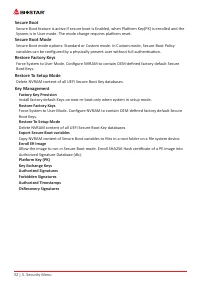
Page 32 - Secure Boot; System is in User mode. The mode change requires platform reset.; Secure Boot Mode; Delete NVRAM content of all UEFI Secure Boot Key databases.; Key Management; Factory Key Provision
32 | 5. Security Menu Secure Boot Secure Boot feature is active if secure boot is Enabled, when Platform Key(PK) is enrolled and the System is in User mode. The mode change requires platform reset. Secure Boot Mode Secure Boot mode options: Standard or Custom mode. In Custom mode, Secure Boot Policy...
Page 33 - � Tweaker Menu; You can set the entrance page when you enter UEFI BIOS Setup.
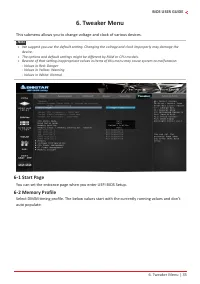
6. Tweaker Menu | 33 BIOS USER GUIDE 6� Tweaker Menu This submenu allows you to change voltage and clock of various devices. Note » » We suggest you use the default setting. Changing the voltage and clock improperly may damage the device. » » The options and default settings might be different by...
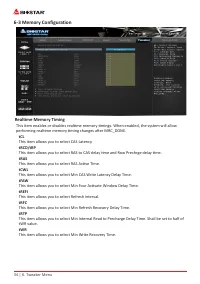
Page 34 - -3 Memory Configuration; Realtime Memory Timing; performing realtime memory timing changes after MRC_DONE.; tCL; This item allows you to select Min Write Recovery Time.
34 | 6. Tweaker Menu 6-3 Memory Configuration Realtime Memory Timing This item enables or disables realtime memory timings. When enabled, the system will allow performing realtime memory timing changes after MRC_DONE. tCL This item allows you to select CAS Latency.tRCD/tRP This item allows you to se...
Page 35 - This item allows you to select System command tate.
6. Tweaker Menu | 35 BIOS USER GUIDE tRRD_L This item allows you to select Min Row Active to Row Active Delay Time.tRRD_S This item allows you to select Min Row Active to Row Active Delay Time.tWTR_L This item allows you to select Min Internal Write to Read Command Delay Time, Same Bank Group.tWTR_S...
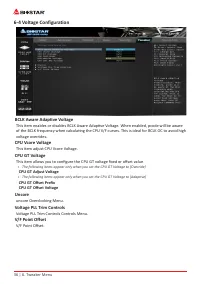
Page 36 - -4 Voltage Configuration; BCLK Aware Adaptive Voltage; This item adjust CPU Vcore Voltage.; CPU GT Voltage; CPU GT Adjust Voltage; Uncore; uncore Overclocking Menu.; Voltage PLL Trim Controls; Voltage PLL Trim Controls Controls Menu.
36 | 6. Tweaker Menu 6-4 Voltage Configuration BCLK Aware Adaptive Voltage This item enables or disables BCLK Aware Adaptive Voltage. When enabled, pcode will be aware of the BCLK frequency when calculating the CPU V/F curves. This is ideal for BCLK OC to avoid high voltage overrides. CPU Vcore Volt...
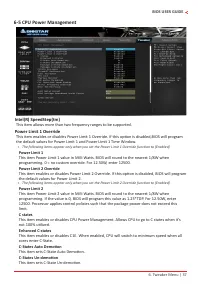
Page 37 - -5 CPU Power Management; This item allows more than two frequency ranges to be supported.; Power Limit 1 Override; the default values for Power Limit 1 and Power Limit 1 Time Window.; Power Limit 1; the default values for Power Limit 2.; Power Limit 2
6. Tweaker Menu | 37 BIOS USER GUIDE 6-5 CPU Power Management Intel(R) SpeedStep(tm) This item allows more than two frequency ranges to be supported. Power Limit 1 Override This item enables or disables Power Limit 1 Override. If this option is disabled,BIOS will program the default values for Power...
Page 38 - Package C-State Demotion
38 | 6. Tweaker Menu Package C-State Demotion This item sets Package C state Demotion.Package C-State Un-demotion This item sets Package C-State Un-demotion.CState Pre-Wake Disable - Sets bit 30 of POWER_CTL MSR(0x1FC) to 1 to disable the Cstate Pre-Wake.Dual Tau Boost This item allows you to set Du...
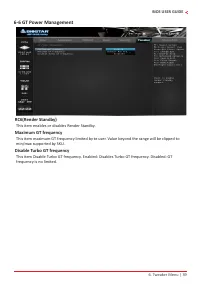
Page 39 - -6 GT Power Management; This item enables or disables Render Standby.; Maximum GT frequency; frequency is no limited.
6. Tweaker Menu | 39 BIOS USER GUIDE 6-6 GT Power Management RC6(Render Standby) This item enables or disables Render Standby. Maximum GT frequency This item maximum GT frequency limited by te user. Value beyond the range will be clipped to min/max supported by SKU. Disable Turbo GT frequency This i...
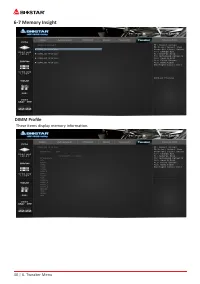
Page 40 - DIMM Profile; These items display memory information.
40 | 6. Tweaker Menu 6-7 Memory Insight DIMM Profile These items display memory information.
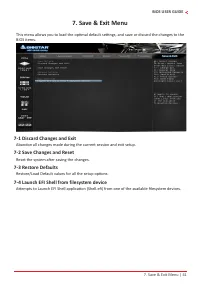
Page 41 - -1 Discard Changes and Exit; Reset the system after saving the changes.; -4 Launch EFI Shell from filesystem device
7. Save & Exit Menu | 41 BIOS USER GUIDE 7� Save & Exit Menu This menu allows you to load the optimal default settings, and save or discard the changes to the BIOS items. 7-1 Discard Changes and Exit Abandon all changes made during the current session and exit setup. 7-2 Save Changes and Res...