Page 2 - Instructions; General safety instructions; Risk of personal injury
Instructions 4 1 Instructions 1.1 General safety instructions Risk of personal injury • During use the appliance and its accessible parts become very hot. • Never touch the heating elements during use. • Keep children under eight years of age at a safe distance if they are not constantly supervised....
Page 3 - For this appliance; Manufacturer liability; Power voltage
Instructions 5 EN For this appliance • Ensure that the appliance is switched off before replacing the bulb. • Do not rest any weight or sit on the open door of the appliance. • Take care that no objects are stuck in the doors. 1.2 Manufacturer liability The manufacturer declines all liability for da...
Page 4 - Identification plate; Danger of suffocation
Instructions 6 Our appliances are packed in non-polluting and recyclable materials.• Consign the packing materials to the appropriate selective collection centres. 1.5 Identification plate The identification plate bears the technical data, serial number and brand name of the appliance. Do not remove...
Page 5 - Description; General Description; Backguard
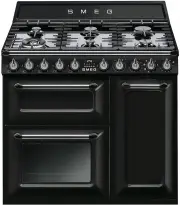
Description 7 EN 2 Description 2.1 General Description 1 Backguard 2 Cooking hob 3 Control panel 4 Oven light 5 Seal 6 Door 7 Fan Rack/tray support frame shelf
Page 6 - to light the relative burners.
Description 8 2.2 Cooking hob AUX = AuxiliarySR = Semi-rapid R = RapidUR = Ultra rapid 2.3 Control panel Hob burner knobs (1) Useful for lighting and adjusting the hob burners.Press and turn the knobs anti-clockwise to the value to light the relative burners. Turn the knobs to the zone between the m...
Page 7 - Lower multifunction oven indicator light (6)
Description 9 EN Auxiliary oven variable grill indicator light (4) The indicator light comes on to indicate that the auxiliary oven is heating up. It turns off as soon as it reaches the set temperature. It flashes regularly to indicate that the temperature set inside the oven is kept constant. Lower...
Page 8 - Shelves; Available accessories; Rack
Description 10 2.4 Other parts Shelves The appliance features shelves for positioning trays and racks at different heights. The insertion heights are indicated from the bottom upwards (see 2.1 General Description). Cooling fan The fan cools the ovens and comes into operation during cooking.The fan c...
Page 9 - Oven tray
Description 11 EN Oven tray Useful for collecting fat from foods placed on the rack above. Deep tray Useful for collecting fat from foods placed on the rack above and for cooking pies, pizzas and baked desserts. Plate rack To be used for warming plates. Reduction pan stand Useful when using small co...
Page 10 - Use; Danger of burns
Use 12 3 Use 3.1 Instructions High temperature inside the oven during use Danger of burns • Keep the oven door closed during cooking. • Protect your hands wearing heat resistant gloves when moving food inside the oven. • Do not touch the heating elements inside the oven. • Do not pour water directly...
Page 11 - Using the accessories; Racks and trays
Use 13 EN 3.2 First use 1. Remove any protective film from the outside or inside of the appliance, including accessories. 2. Remove any labels (apart from the technical data plate) from the accessories and from the cooking compartments. 3. Remove all the accessories from the appliance and clean them...
Page 12 - Tray rack
Use 14 Tray rack The tray rack has to be inserted into the tray. In this way fat can be collected separately from the food which is being cooked. Reduction pan stands The reduction pan stands have to be placed on the hob grids. Make sure they are properly placed. Plate rack 1. Insert the plate rack ...
Page 13 - and wait 60 seconds before trying
Use 15 EN 3.4 Using the hob All the appliance's control and monitoring devices are located together on the front panel. The burner controlled by each knob is shown next to the knob. The appliance is equipped with an electronic ignition device. Simply press the knob and turn it anti-clockwise to the ...
Page 14 - Switching on the multifunction oven
Use 16 3.5 Using the ovens Switching on the multifunction oven To switch on the multifunction oven:1. Select the cooking function using the function knob. 2. Select the temperature using the temperature knob. Opening and closing the doors of the multifunction/side ovens The multifunction and side ov...
Page 15 - Functions list; and
Use 17 EN Functions list ECO Depending on the function it is combined with, this ensures the greatest possible energy savings during cooking. Static As the heat comes from above and below at the same time, this system is particularly suitable for certain types of food. Traditional cooking, also know...
Page 16 - General advice
Use 18 3.6 Cooking advice General advice • Use a fan assisted function to achieve consistent cooking at several levels. • It is not possible to shorten cooking times by increasing the temperature (the food could be overcooked on the outside and undercooked on the inside). Advice for cooking meat • C...
Page 17 - Advice for defrosting and proving
Use 19 EN • Grilling processes should never last more than 60 minutes using multifunction ovens, 30 minutes inside the auxiliary oven. Advice for cooking desserts/pastries and biscuits • Use dark metal moulds: they help to absorb the heat better. • The temperature and the cooking time depend on the ...
Page 18 - Setting the time
Use 20 3.7 Programmer clock 1 Minute minder timer key 2 Cooking duration key 3 End of cooking key 4 Value decrease key 5 Value increase key Setting the time On the first use, or after a power failure, the digits will be flashing on the appliance's display. 1. Press the and keys at the same time. The...
Page 19 - Programmed cooking
Use 21 EN 4. At the end of cooking the heating elements will be deactivated. On the display, symbol turns off, symbol flashes and the buzzer sounds. 5. To turn off the buzzer just press any key of the programmer clock. 6. Press keys and at the same time to reset the programmer clock. Programmed cook...
Page 20 - Minute minder timer
Use 22 Minute minder timer The minute minder timer can be activated at any time. 1. Press key. The display will shows the digits and the indicator light flashing between the hours and the minutes. 2. Use the or key to set the required minutes. 3. Wait approx. 5 seconds without pressing any key to fi...
Page 21 - Cooking information table
Use 23 EN Cooking information table Food Weight (Kg) Function Runner position from the bottom Temperature (°C) Time (minutes) Lasagne 3 Static 1 or 2 220 - 230 40 - 50 Pasta bake 2.5 Static 1 or 2 220 - 230 40 Roast veal 1 Circulaire 2 180 - 190 70 - 80 Pork loin 1 Circulaire 2 180 - 190 70 - 80 Por...
Page 22 - Cleaning and maintenance; Cleaning the appliance; Ordinary daily cleaning
Cleaning and maintenance 24 4 Cleaning and maintenance 4.1 Instructions 4.2 Cleaning the appliance To keep the surfaces in good condition, they should be cleaned regularly after use. Let them cool first. Ordinary daily cleaning Always use only specific products that do not contain abrasives or chlor...
Page 23 - Flame-spreader crowns and burner caps; Removing the door of the; Grasp the door on both sides with both
Cleaning and maintenance 25 EN Flame-spreader crowns and burner caps For easier cleaning, the flame-spreader crowns and the burner caps can be removed. Wash them in hot water and non-abrasive detergent. Carefully remove any encrustation, then wait until they are perfectly dry. Refit the flame-spread...
Page 24 - To reassemble the door, put the hinges in; Cleaning the door glazing; Multifunction oven doors
Cleaning and maintenance 26 3. To reassemble the door, put the hinges in the relevant slots in the oven, making sure that grooved sections A are resting completely in the slots. Lower the door and once it is in place remove the pins from the holes in the hinges. 4.4 Cleaning the door glazing The gla...
Page 25 - Auxiliary oven door
Cleaning and maintenance 27 EN 4. Remove the intermediate glass pane. First raise it upwards ( 1 ) and then remove it pulling it downwards ( 2 ). 5. Clean the external glass pane and the panes previously removed. Use absorbent kitchen roll. In case of stubborn dirt, wash with a damp sponge and neutr...
Page 26 - Remove the intermediate glass pane by; Cleaning the inside of the oven
Cleaning and maintenance 28 3. Remove the intermediate glass pane by lifting it upwards. 4. Clean the external glass pane and the panes previously removed. Use absorbent kitchen roll. In case of stubborn dirt, wash with a damp sponge and neutral detergent. 5. Refit the panes in the reverse order in ...
Page 27 - Removing racks/trays support frames; cleaning; Preliminary operations
Cleaning and maintenance 29 EN Removing racks/trays support frames Removing the guide frames enables the sides to be cleaned more easily. This operation should be performed each time the automatic cleaning cycle is used (on some models only).To remove the guide frames: Pull the frame towards the ins...
Page 28 - Vapor Clean setting
Cleaning and maintenance 30 • Spray a water and washing up liquid solution inside the oven using a spray nozzle. Direct the spray against the side walls, upwards, downwards and towards the deflector. • Close the door. Vapor Clean setting 1. Turn the function knob to the symbol and the temperature kn...
Page 29 - Extraordinary maintenance; Replacing the internal light bulb
Cleaning and maintenance 31 EN 4.8 Extraordinary maintenance Replacing the internal light bulb 1. Completely remove all accessories from inside the oven. 2. Remove the racks/trays support frames. 3. Remove the bulb cover using a tool (e.g. a screwdriver). 4. Slide out and remove the lamp. 5. Replace...
Page 30 - Installation; Clearances above and around domestic appliances; Requirements
Installation 32 5 Installation 5.1 Clearances above and around domestic appliances Requirements 1. Overhead clearances – (Measurement A) Range hoods and exhaust fans shall be installed in accordance with the manufacturer’s instructions. However, in no case shall the clearance between the highest par...
Page 31 - Additional requirements for
Installation 33 EN 3. Additional requirements for Freestanding and Elevated Cooking Appliaces – (Measurements D & E) Where D, the distance from the periphery of the nearest burner to a horizontal combustible surface is less than 200 mm, then E shall be 10 mm or more, or the horizontal surface sh...
Page 32 - The regulator supplied must be fitted
Installation 34 Connection of the appliance to the gas supply must be in accordance with the requirements of AS5601. A ½” BSP connector at the inlet is recommended and the gas supply line to the appliance must be of adequate length to allow sufficient withdrawal of appliance for service or disconnec...
Page 33 - Room ventilation
Installation 35 EN Room ventilation The room containing the appliance should have a permanent air supply in accordance with the standards in force. The room where the appliance is installed must have enough air flow needed for the regular combustion of gas and the necessary air change in the room it...
Page 34 - Adaptation to different types of; Replacing nozzles
Installation 36 5.3 Adaptation to different types of gas In case of operation with other types of gas, the burner nozzles must be changed and the minimum flame adjusted on the gas taps. Replacing nozzles 1. Remove the pan stands, burner caps and flame-spreader crowns to access the burner casings. 2....
Page 35 - Adjusting the minimum setting for LPG
Installation 37 EN Adjusting the minimum setting for LPG Tighten the screw located at the side of the tap rod clockwise all the way. Lubrication of gas taps Over time the gas taps may become difficult to turn and get blocked. Clean them internally and replace the lubrication grease. Burner and nozzl...
Page 36 - Electrical connection; General information
Installation 38 5.4 Electrical connection General information Check the grid characteristics against the data indicated on the plate.The identification plate bearing the technical data, serial number and brand name is visibly positioned on the appliance.Do not remove this plate for any reason.Perfor...
Page 37 - Heavy appliance
Installation 39 EN Fixed connection Fit the power line with an omnipolar circuit breaker in compliance with installation regulations.The circuit breaker should be located near the appliance and in an easily reachable position. Connection with plug and socket Make sure that the plug and socket are of...
Page 38 - Assembling the skirt
Installation 40 Assembling the skirt The backguard must always be positioned and secured correctly on the appliance.1. Loosen the 6 screws on the back of the top ( A ) and unscrew the 2 screws ( B ) on the side part of the backguard. 2. Place the backguard on the top. Align the 6 bottom slots of the...
Page 39 - Positioning and levelling the appliance
Installation 41 EN Positioning and levelling the appliance After making the electrical and/or gas connections, properly level the appliance on the floor to ensure better stability. Screw or unscrew the bottom part of the foot until the appliance is stable and level on the floor. Wall fixing 1. Attac...