Page 2 - Instructions; General safety instructions
Instructions 4 1 Instructions 1.1 General safety instructions Risk of personal injury • During use the appliance and its accessible parts become very hot. Never touch the heating elements during use. • Protect your hands by wearing oven gloves when handling food inside the oven cavity. • Never try t...
Page 3 - Risk of damaging the appliance
Instructions 5 EN • DO NOT SPRAY AEROSOLS IN THE VICINITY OF THIS APPLIANCE WHILE IT IS IN OPERATION. • Switch the appliance off immediately after use. • DO NOT MODIFY THIS APPLIANCE. • Always use any necessary/ required personal protective equipment (PPE) before performing any work on the appliance...
Page 4 - Installation
Instructions 6 • Do not place pans or trays directly on the bottom of the oven cavity. • If you wish to use greaseproof paper, place it so that it will not interfere with the hot air circulation inside the oven. • Do not use the open door to rest pans or trays on the internal glass pane. • Do not us...
Page 5 - For this appliance
Instructions 7 EN For this appliance • Ensure that the appliance is switched off before replacing the bulb. • Do not rest any weight or sit on the open door of the appliance. • Take care that no objects are stuck in the doors. 1.2 Appliance purpose • This appliance is intended for cooking food in th...
Page 6 - How to read the user manual; Power voltage
Instructions 8 1.7 Disposal To dispose of the appliance:• Cut the power supply cable and remove it along with the plug. • Consign the appliance to the appropriate selective collection centres for electrical and electronic equipment waste, or deliver it back to the retailer when purchasing an equival...
Page 7 - Description; General Description; Control panel
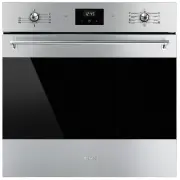
Description 9 EN 2 Description 2.1 General Description 1 Control panel 2 Oven light 3 Seal 4 Door 5 Fan 6 Rack/tray support frames Frame shelf
Page 8 - Use
Use 10 2.2 Control panel 1 Temperature knob This knob allows you to select the cooking temperature.Turn the knob clockwise to the required value, between the minimum and maximum setting. 2 Thermostat indicator light The indicator light comes on to indicate that the oven is heating up. It turns off a...
Page 9 - Interior lighting; Available accessories; Tray
Use 11 EN Interior lighting The appliance’s interior lighting comes on:• When the door is opened.• When any function is selected, apart from the ECO and Pyrolytic functions. 2.4 Available accessories Tray Useful for collecting fat from foods placed on the rack above and for cooking pies, pizzas and ...
Page 10 - Danger of burns
Use 12 3 Use 3.1 Instructions 3.2 First use 1. Remove any protective film from the outside or inside of the appliance, including accessories. 2. Remove any labels (apart from the technical data plate) from the accessories and from the oven cavity. 3. Remove and wash all the appliance accessories (se...
Page 11 - Using the accessories; Racks and trays
Use 13 EN 3.3 Using the accessories Racks and trays Racks and trays have to be inserted into the side guides until they come to a complete stop.• The mechanical safety locks that prevent the rack from being removed accidentally must face downwards and towards the back of the oven cavity. Tray rack T...
Page 12 - Functions list
Use 14 Functions list ECO (Energy-saving cooking) This low energy consumption function is particularly suitable for cooking on a single shelf.Ideal when cooking meat, fish and vegetables. It is not recommended for foods that require proving.For greater energy savings and to reduce the time required,...
Page 13 - General advice; Pyrolytic cleaning
Use 15 EN 3.5 Cooking advice General advice • Use a fan assisted function to achieve consistent cooking at several levels. • It is not possible to shorten cooking times by increasing the temperature (the food could be overcooked on the outside and undercooked on the inside). Advice for cooking meat ...
Page 14 - Advice for defrosting and proving
Use 16 Advice for cooking desserts/pastries and biscuits • Use dark metal moulds: They help to absorb the heat better. • The temperature and the cooking time depend on the quality and consistency of the dough. • To check whether the dessert is cooked right through: At the end of the cooking time, pu...
Page 15 - “Touch” Programmer clock; Setting the time
Use 17 EN 3.6 “Touch” Programmer clock Value decrease key Clock key Value increase key Setting the time On the first use, or after a power failure, the digits will be flashing on the appliance’s display. 1. Hold down the clock key for two seconds. The dot between the hours and the minutes flashes. 2...
Page 16 - Timed cooking
Use 18 Timed cooking 1. Keep the clock key pressed until the symbol appears. 1. Press the clock key again. On the display the symbol and the text appear, alternating with the current time. 2. Use the value increase and value decrease keys to set the required minutes of cooking. 3. Select a function ...
Page 17 - Programmed cooking
Use 19 EN Programmed cooking 1. Set the cooking time as described in the previous point “Timed cooking”. 2. Hold the menu key down for 2 seconds. 3. Press the menu key again. The display will show the digits and the text in sequence, while the symbol flashes (for example, the current time is 17:30) ...
Page 18 - Minute minder timer
Use 20 Minute minder timer The minute minder timer can be activated at any time. 1. Keep the clock key pressed for per a few seconds. The display shows the figures and the symbol flashing between the hours and minutes. 2. Use the value increase and value decrease keys to set the number of minutes re...
Page 19 - Cooking information table
Use 21 EN Cooking information table Food Weight (Kg) Function Shelf Temperature (°C) Time (minutes) Lasagne 3 - 4 Convection 1 220 - 230 45 - 50 Pasta bake 3 - 4 Convection 1 220 - 230 45 - 50 Roast veal 2 Supercook/Fan Assisted 2 180 - 190 90 - 100 Pork 2 Supercook/Fan Assisted 2 180 - 190 70 - 80 ...
Page 20 - Cleaning and maintenance; Cleaning the appliance; Ordinary daily cleaning
Cleaning and maintenance 22 4 Cleaning and maintenance 4.1 Instructions 4.2 Cleaning the appliance To keep the surfaces in good condition, they should be cleaned regularly after use. Let them cool first. Ordinary daily cleaning Always use only specific products that do not contain abrasives or chlor...
Page 21 - Cleaning the door; Removing the door
Cleaning and maintenance 23 EN 4.3 Cleaning the door Removing the door For easier cleaning, the door can be removed and placed on a canvas.To remove the door proceed as follows:1. Open the door completely and insert two pins into the holes on the hinges indicated in the figure. 2. Grasp the door on ...
Page 22 - Removing the internal glass panels
Cleaning and maintenance 24 Removing the internal glass panels For easier cleaning, the internal glass panels of the door can be removed.1. Remove the internal glass panel by pulling the rear part gently upwards, following the movement indicated by the arrows ( 1 ). 2. Then, pull the front part upwa...
Page 23 - Cleaning the inside of the oven; Advice for cleaning the oven cavity
Cleaning and maintenance 25 EN 4.4 Cleaning the inside of the oven Advice for cleaning the oven cavity In order to keep your oven in the best possible condition, clean it regularly after letting it cool down.Do not allow food residues to dry inside the oven cavity because doing so could damage the e...
Page 24 - Pyrolytic
Cleaning and maintenance 26 Pyrolytic Preliminary operations Before starting the Pyrolytic cycle:• Clean the internal glass panel following the usual cleaning instructions. • For very stubborn encrustations spray an oven cleaning product onto the glass (read the warnings on the product); leave for 6...
Page 25 - Setting a programmed Pyrolytic cycle
Cleaning and maintenance 27 EN 7. Return the function knob to the O position. 8. The door remains locked as long as the temperature inside the oven returns to safety levels (the door lock indicator light comes off). 9. Wait for the oven to cool down and collect the residues deposited inside with a d...
Page 26 - Extraordinary maintenance; Replacing the internal light bulb
Cleaning and maintenance 28 4.5 Extraordinary maintenance Replacing the internal light bulb 1. Completely remove all accessories from inside the oven. 2. Remove the rack/tray support frames. 3. Remove the bulb cover using a tool (e.g. a screwdriver). 4. Slide the lamp out and remove it. 5. Replace t...
Page 27 - Installation; Electrical connection
Installation 29 EN 5 Installation 5.1 Electrical connection General information Check the grid characteristics against the data indicated on the plate.The identification plate bearing the technical data, serial number and brand name is visibly positioned on the appliance.Do not remove this plate for...
Page 28 - Position of the power cable
Installation 30 5.2 Positioning Position of the power cable (rear view) Front panel seal Glue the seal provided to the rear of the front panel to prevent water or other liquids from leaking in. Heavy appliance Crushing hazard • Position the appliance into the cabinet cutout with the help of a second...
Page 29 - Fastening bushings
Installation 31 EN Fastening bushings 1. Remove the bushing covers inserted on the front of the appliance. 2. Mount the appliance into the recess. 3. Secure the appliance to the piece of furniture using the screws. 4. Cover the bushings using the covers that were previously removed. Appliance overal...


 Smeg SFA7300TVX User Manual
 Smeg SFP9395X1 User Manual
 Smeg SFPA6300TVX User Manual
 Smeg SFPA6301TVN User Manual
 Smeg SFPA6309X User Manual
 Smeg SFPA7395X2 User Manual
 Smeg SFRA9300TVX User Manual
 Smeg SFRA9300X User Manual
 Smeg SO4102S3B3 User Manual
 Smeg SO6102S3PB3 User Manual
 Smeg SO6104APG User Manual
 Smeg SOPA3302TPX User Manual
 Smeg SOPA6301TN User Manual