Smeg SI850P5 SMEG FORNI INCASSO FORNO ARROTONDATO SERIE 800, ELETTRICO , PANNA, 60 CM. CLASSE ENERGETIC - User Manual

Smeg SI850P5 SMEG FORNI INCASSO FORNO ARROTONDATO SERIE 800, ELETTRICO , PANNA, 60 CM. CLASSE ENERGETIC – User Manual, read for free online in PDF format. We hope this helps you resolve any issues you may have. If you have further questions, please contact us through the contact form.


Table of Contents:
- Page 2 – Introduction; INSTRUCTIONS FOR SAFE AND PROPER USE
- Page 3 – The manufacturer declines all responsibility; for damage to persons
- Page 4 – Instructions for the installer; INSTALLATION; Electrical connection; This label must never be removed.; in an; Ovens with hob controls; In the ovens with hob controls the; power cable is not supplied
- Page 5 – use an
- Page 6 – Installing the oven
- Page 7 – Never use the oven door to lever the oven into; Connecting the hob to the oven
- Page 8 – Instructions for the user; DESCRIPTION OF CONTROLS; Front control panel; All the oven controls are grouped together on the front panel.; STATIC MODEL
- Page 9 – ° and; FUNCTION CONTROL KNOB
- Page 10 – THERMOSTAT KNOB
- Page 11 – Model with clock and minute minder; Adjusting the clock; ”, setting the indicator on the time you
- Page 12 – Clock + timer with end of cooking; Knob
- Page 13 – Analog Programmer; Regolazione dell'ora
- Page 14 – USE OF THE OVEN; Warnings and general advice; °C) long enough to burn off any manufacturing oily; Oven light; ).The light will remain on throughout the entire cooking
- Page 15 – AVAILABLE ACCESSORIES; support; Rotisserie/Spit frame; Some models do not feature all accessories.
- Page 16 – COOKING HINTS; Keep the oven door closed during cooking; Traditional cooking (multifunction models); FUNCTION SWITCH
- Page 17 – different foods is the same.; Grill cooking
- Page 19 – THERMOSTAT SWITCH; the temperature inside the oven is regular.
- Page 20 – Recommended cooking table; TRADITIONAL COOKING; GRILLING
- Page 21 – FAN COOKING
- Page 22 – CLEANING AND MAINTENANCE; Cleaning stainless steel; Ordinary Daily Cleaning; To clean and preserve the stainless steel surfaces, always use; only; pour the product on a damp cloth and wipe the surface,; Food stains or residues
- Page 23 – Using the self-cleaning liners; Remove all accessories from the oven; Door glass
- Page 24 – ADDITIONAL MAINTENANCE; Before any intervention, disconnect the power supply.; Replacement of light bulb; Remove the bulb protector
- Page 25 – Removing; Raise levers on each hinge; Oven door seal
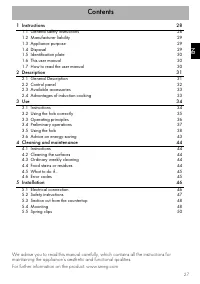
Contents
INSTRUCTIONS FOR SAFE AND PROPER USE _______________ 29
INSTALLATION _________________________________________ 31
DESCRIPTION OF CONTROLS ____________________________ 35
USE OF THE OVEN ______________________________________ 41
AVAILABLE ACCESSORIES _______________________________ 42
COOKING HINTS ________________________________________ 43
CLEANING AND MAINTENANCE ___________________________ 49
ADDITIONAL MAINTENANCE ______________________________ 51
INSTRUCTIONS FOR THE INSTALLER: these are intended for the
qualified technician
who must install the appliance, set it functioning
and carry out an inspection test.
INSTRUCTIONS FOR THE USER: these contain user advice,
description of the controls and the correct procedures for cleaning and
maintenance of the appliance.
28
"Loading the manual" means you need to wait until the file loads and becomes available for online reading. Some manuals are very large, and the time they take to appear depends on your internet speed.
Was this manual helpful?
About this manual
- Brand
- Smeg
- Model
- SI850P5 SMEG FORNI INCASSO FORNO ARROTONDATO SERIE 800, ELETTRICO , PANNA, 60 CM. CLASSE ENERGETIC
- Document type
- User Manual
- Language(s)
- English
- Pages
- 25
- File size
- 1.8 MB
- Format
Summary
Introduction 1. INSTRUCTIONS FOR SAFE AND PROPER USE THIS MANUAL IS AN INTEGRAL PART OF THE APPLIANCE AND THEREFORE MUST BE KEPT IN ITS ENTIRETY AND IN AN ACCESSIBLE PLACE FOR THE WHOLE WORKING LIFE OF THE OVEN. WE ADVISE CAREFUL READING OF THIS MANUAL AND ALL THE INSTRUCTIONS THEREIN BEFORE USING T...
Introduction NEVER PUT INFLAMMABLE OBJECTS IN THE OVEN: THEY COULD BE ACCIDENTALLY CATCH LIGHT AND CAUSE FIRES. DURING USE THE APPLIANCE BECOMES VERY HOT. TAKE CARE NOT TO TOUCH THE HEATING ELEMENTS INSIDE THE OVEN. THE I.D. PLATE WITH TECHNICAL DATA, REGISTRATION NUMBER AND BRAND NAME IS POSITIONED...
Instructions for the installer 2. INSTALLATION 2.1 Electrical connection Check that the mains voltage and power cable ratings are as per the information provided on the label attached to the oven door frame. This label must never be removed. It is obligatory for the electrical system to be earthed a...
Ask a question
Related manuals
Popular Smeg Other




More Smeg Other models
 Smeg SI1F7845B User Manual
 Smeg SI1M7643B User Manual
 Smeg SI1M7733B User Manual
 Smeg SI2M7643D User Manual
 Smeg SI2M7643DW User Manual
 Smeg SI2M7953DW User Manual
 Smeg SI5632D User Manual
 Smeg SI5952B User Manual
 Smeg SI7633B User Manual
 Smeg SI7844B User Manual
 Smeg SIH7933B User Manual
 Smeg SNZ61MFA1 Manual