Smeg SI5952B - User Manual
Smeg SI5952B – User Manual, read for free online in PDF format. We hope this helps you resolve any issues you may have. If you have further questions, please contact us through the contact form.


Table of Contents:
- Page 2 – Instructions; General safety instructions
- Page 3 – For this appliance; Manufacturer liability; Power voltage
- Page 4 – Identification plate; Danger of suffocation
- Page 5 – Description; General Description
- Page 6 – Activates the Power function.
- Page 7 – Available accessories; Scraper; Advantages of induction cooking; • Energy saving thanks to the direct
- Page 8 – Use; High temperature
- Page 9 – Using the hob correctly; • Enamelled steel cookware with thick
- Page 10 – Operating principles; Limiting the cooking duration; Improper use
- Page 11 – Preliminary operations; Place a pan full of water on each of the; OFF setting
- Page 12 – Switching on the cooking zone
- Page 13 – Power function
- Page 14 – Keep warm function
- Page 15 – Pause function
- Page 16 – Minute minder
- Page 18 – Cleaning and maintenance; Cleaning the surfaces; Dirt
- Page 19 – Changes in colour
- Page 20 – Installation; Electrical connection; General information
- Page 21 – Fixed connection; Safety instructions; Risk of fire
- Page 22 – Section cut from the countertop; Dimensions for flush mounting; opens on bottom
- Page 23 – Over empty kitchen unit or drawers; Ventilation
- Page 24 – Hob seal
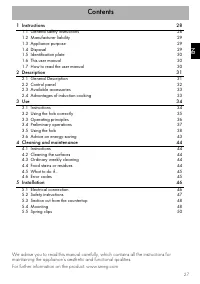
Contents
27
EN
1 Instructions
28
1.1 General safety instructions
28
1.2 Manufacturer liability
29
1.3 Appliance purpose
29
1.4 Disposal
29
1.5 Identification plate
30
1.6 This user manual
30
1.7 How to read the user manual
30
2 Description
31
2.1 General Description
31
2.2 Control panel
32
2.3 Available accessories
33
2.4 Advantages of induction cooking
33
3 Use
34
3.1 Instructions
34
3.2 Using the hob correctly
35
3.3 Operating principles
36
3.4 Preliminary operations
37
3.5 Using the hob
38
3.6 Advice on energy-saving
43
4 Cleaning and maintenance
44
4.1 Instructions
44
4.2 Cleaning the surfaces
44
4.3 Ordinary weekly cleaning
44
4.4 Food stains or residues
44
4.5 What to do if...
45
4.6 Error codes
45
5 Installation
46
5.1 Electrical connection
46
5.2 Safety instructions
47
5.3 Section cut from the countertop
48
5.4 Mounting
48
5.5 Spring clips
50
We advise you to read this manual carefully, which contains all the instructions for
maintaining the appliance’s aesthetic and functional qualities.
For further information on the product: www.smeg.com
"Loading the manual" means you need to wait until the file loads and becomes available for online reading. Some manuals are very large, and the time they take to appear depends on your internet speed.
Was this manual helpful?
About this manual
- Brand
- Smeg
- Model
- SI5952B
- Document type
- User Manual
- Language(s)
- English
- Pages
- 24
- File size
- 594.1 KB
- Format
Summary
Instructions 28 1 Instructions 1.1 General safety instructions Risk of personal injury • During use the appliance and its accessible parts become very hot. • Never touch the heating elements during use. • Keep children under eight years of age at a safe distance if they are not constantly supervised...
Instructions 29 EN For this appliance • If your hob has a cookware detector, do not rely on it exclusively. • Remove any traces of liquid from the lid (if fitted) before opening. • Let the cooking surface cool down before closing the lid. • If cracks or fissures form, or if the glass ceramic cooking...
Instructions 30 • Deliver the appliance to the appropriate recycling centre for electrical and electronic equipment waste, or return it to the retailer when purchasing an equivalent product, on a one for one basis. Our appliances are packed in non-polluting and recyclable materials.• Deliver the pac...
Ask a question
Related manuals
Popular Smeg Other




More Smeg Other models
 Smeg SI1M7733B User Manual
 Smeg SI2M7643D User Manual
 Smeg SI2M7643DW User Manual
 Smeg SI2M7953DW User Manual
 Smeg SI850P5 SMEG FORNI INCASSO FORNO ARROTONDATO SERIE 800, ELETTRICO , PANNA, 60 CM. CLASSE ENERGETIC User Manual
 Smeg SI5632D User Manual
 Smeg SI7633B User Manual
 Smeg SI7844B User Manual
 Smeg SIH7933B User Manual
 Smeg SNZ61MFA1 Manual
 Smeg SNZ91MFX Manual
 Smeg SRA416TP2 User Manual