Smeg SACD82 - User Manual
Smeg SACD82 Dryer – User Manual, read for free online in PDF format. We hope this helps you resolve any issues you may have. If you have further questions, please contact us through the contact form.


Table of Contents:
- Page 2 – Please read this user manual first!; Explanation of symbols
- Page 3 – Important safety and environmental instructions; Authorized Service Agent
- Page 7 – • The lint must not be allowed to accumulate around the tumble dryer.; Mounting over a washing machine; the authorized service agent.; Installation Table for Washing Machine and Dryer
- Page 9 – Compliance with the WEEE Directive and; This product does not contain the harmful and prohibited; Packaging information; points designated by the local authorities.
- Page 10 – Values stated on markers on the dryer or in the other published; Technical Specifications
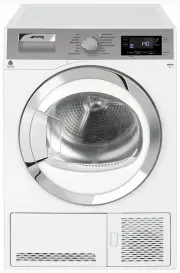
- Page 11 – Your Dryer
- Page 12 – Installation; Appropriate installation location; on the power; Removing the transportation safety; Connecting to the drain
- Page 13 – Electrical connection
- Page 14 – LAUNDRY DRYING SYMBOLS; Preparation
- Page 16 – Operating the product
- Page 17 – perating the product; Preparing the machine; Additional programmes
- Page 18 – Delicates
- Page 19 – Programme selection and consumption table
- Page 20 – Auxiliary functions; Volume level low; Drying level damp
- Page 21 – Anti-creasing 0 minute; Favourite selection button
- Page 22 – Starting the programme
- Page 23 – Changing the programme after it has; Canceling the programme
- Page 24 – Cleaning the sensor; Maintenance and cleaning; Inner Surface
- Page 25 – aintenance and cleaning; Draining the water tank
- Page 27 – Suggested solutions for problems
SACD82
Dryer
User Manual
SMEG_SACD82_CND_EN/110515.0927
"Loading the manual" means you need to wait until the file loads and becomes available for online reading. Some manuals are very large, and the time they take to appear depends on your internet speed.
Was this manual helpful?
About this manual
- Brand
- Smeg
- Model
- SACD82
- Document type
- User Manual
- Category
- Dryer
- Language(s)
- English
- Pages
- 29
- File size
- 2.4 MB
- Format
Summary
Dryer / User Manual 2 EN Please read this user manual first! Dear Customer, Thank you for preferring an Smeg product. We hope that your product which has been manufactured with high quality and technology will give you the best results. We advise you to read through this manual and the other accompa...
Dryer / User Manual 3 / 28 EN 1 Important safety and environmental instructions This section contains safety instructions that will help protect from risk of personal injury or property damage. Failure to follow these instructions shall void any warranty. 1.1 General safety • Dryer can be used by th...
Dryer / User Manual 7 / 28 EN Important safety and environmental instructions • Make sure that pets do not enter the dryer. Check the inside of the dryer before operating it. • Do not lean on the loading door of your dryer when it is open, otherwise it may fall over. • The lint must not be allowed t...
Ask a question
Related manuals
Other Smeg appliances
 Smeg 50's Retro style Troubleshooting Guide
 Smeg 19590 0653 00 Manual
 Smeg 142468 User Manual
 Smeg A1PYID-9 User Manual
 Smeg A2-5 User Manual
 Smeg A2-8 User Manual
 Smeg A4-6 User Manual
 Smeg A11CER-6 User Manual
 Smeg A31X-6 User Manual
 Smeg A41C-5 Manual
 Smeg A42-5 User Manual
 Smeg ABM30 Manual
 Smeg BCC02WHMEU User Manual
 Smeg BLF01CRUS User Manual
 Smeg BQ6030 Manual
 Smeg C6GGXU Manual
 Smeg C6GMX Manual
 Smeg C6GMXA8 User Manual
 Smeg C9GMX User Manual
 Smeg C9GMXA User Manual