Page 2 - Contents
2 English C ontents Contents Using this manual 3 The following symbols are used in this User Manual: 3 Safety instructions 3 Important safety precautions 3 Correct Disposal of This Product (Waste Electrical & Electronic Equipment) 6 Auto energy saving function 6 Installation 7 What’s included 7 ...
Page 3 - Safety instructions; Important safety precautions; Using this manual; The following symbols are used in this User Manual:; or property damage; personal injury and/or property
English 3 Safety ins truc tions Safety instructions Installation of this oven must be performed only by a licensed electrician. The installer is responsible for connecting the appliance to the mains power supply in observance of the relevant safety recommendations. Important safety precautions WARNI...
Page 6 - Auto energy saving function
6 English Safety ins truc tions Safety instructions Correct Disposal of This Product (Waste Electrical & Electronic Equipment) (Applicable in countries with separate collection systems) This marking on the product, accessories or literature indicates that the product and its electronic accessori...
Page 7 - Installation; What’s included
English 7 Installation Installation WARNING This oven must be installed by a qualified technician. The installer is responsible for connecting the oven to the main power, while observing the relevant safety regulations of your area. What’s included Make sure all parts and accessories are included in...
Page 8 - Prepare to install the oven; Cabinet mount
8 English Installation Installation Prepare to install the oven Phillips Screwdriver Drill Power connection 01 02 03 L N 01 BROWN or BLACK 02 BLUE or WHITE 03 YELLOW and GREEN Plug the oven into an electrical socket. If a plug-type socket is not available due to allowable current limitations, use a ...
Page 10 - Before you start; Initial settings; OK
10 English Befor e you s tar t After installation is complete, remove the protective film, tape, and other packing material, and take out the provided accessories from inside the oven. To remove the oven from the cabinet, first disconnect power to the oven and remove 2 screws on both sides of the ov...
Page 11 - New oven smell
English 11 Befor e you s tar t New oven smell Before using the oven for the first time, clean inside the oven to remove the new oven smell. 1. Remove all accessories from inside the oven. 2. Run the oven with Convection 200 °C or Conventional 200 °C for an hour. This will burn any remaining producti...
Page 13 - Flexible Door
English 13 Befor e you s tar t Flexible Door This oven has a unique Flexible Door that is hinged in the middle, so you only need to open the top half to access the upper zone. When you’re using the Dual Cook capability, you can access the top oven space much more easily and with greater energy effic...
Page 14 - Dual cook mode
14 English Befor e you s tar t Before you start Mechanical lock (applicable models only) Installation A 1. Insert the thin part (A) of the mechanical lock into the corresponding slot of the lock handle as shown. 2. Tighten the screw on the lock handle. Uninstallation • Loosen and remove the screw fr...
Page 15 - Operations; Control panel
English 15 Oper ations Operations Control panel The front panel comes in a wide range of materials and colours. For improved quality, the actual appearance of the oven is subject to change without notice. 01 04 02 06 08 10 03 05 07 09 11 12 01 Mode selector Turn to select a cooking mode or function....
Page 16 - Common settings
16 English Oper ations Operations Common settings It is common to change the default temperature and/or cooking time across all cooking modes. Follow the steps below to adjust the temperature and/or cooking time for the selected cooking mode. Temperature 1. Turn the mode selector to choose a mode or...
Page 23 - Dual cook mode temperature setting range
English 23 Oper ations Dual cook mode temperature setting range You can use both the upper and lower compartments simultaneously for different cooking operations.In Dual Cook mode, the temperature range of one compartment is affected by the temperature settings of the other compartment. For instance...
Page 24 - To stop cooking; Special function
24 English Oper ations Operations To stop cooking While cooking is in process, turn the mode selector to “ ”. The oven turns off in a few seconds. This is because, to avoid accepting incorrect commands by users, the oven waits a few seconds so that they can correct their selection. To stop cooking f...
Page 25 - Auto cook
English 25 Oper ations Auto cook For inexperienced cooks, the oven offers a total of 50 auto cooking recipes. Take advantage of this feature to save you time or shorten your learning curve. The cooking time and temperature will be adjusted according to the selected recipe. 1. Turn the mode selector ...
Page 26 - Steam cleaning
26 English Oper ations Operations 4. Turn the value dial to select a programme for the upper compartment, and press OK . 5. Turn the value dial to select a serving size. The weight range depends on the programme. 6. Press OK to start cooking. NOTE For more information, see the Auto cook programmes s...
Page 27 - Timer; Cooking smart; Manual cooking; Accessory tips
English 27 C ooking smar t Timer Timer helps you check the time or operating duration while cooking. 1. Press . 2. Turn the value dial to set the time, and then press OK . NOTE • When the time has elapsed, the oven beeps with a blinking message of “00:00” on the display. • You can change the timer s...
Page 28 - Roasting
28 English C ooking smar t Cooking smart Food Accessory Level Type of heating Temp. (°C) Time (min.) Apple pie Wire rack, ø 20 cm tin 2 160-170 65-75 Chilled pizza Universal tray 3 180-200 5-10 Roasting Food Accessory Level Type of heating Temp. (°C) Time (min.) Meat (Beef/Pork/Lamb) Sirloin of beef...
Page 29 - Grilling
English 29 C ooking smar t Grilling We recommend preheat the oven using large grill mode. Turn over after half of time. Food Accessory Level Type of heating Temp. (°C) Time (min.) Bread Toast Wire rack 5 250-270 2-4 Cheese toast Universal tray 4 200 4-8 Beef Steak * Wire rack + Universal tray 41 240...
Page 31 - Dual cook
English 31 C ooking smar t Dual cook Before using dual cook function insert the divider into the oven. We recommend preheat the oven for best results.The following table presents 5 dual cook guides we recommended for cooking, roasting and baking. Using dual cook function, you will be able to cook yo...
Page 32 - ECO convection
32 English C ooking smar t Cooking smart ECO convection This mode uses the optimized heating system so that you save the energy during cooking your dishes. The times of this category are suggested to not be preheated before cooking for saving more energy. Food Accessory Level Temp. (°C) Time (min.) ...
Page 33 - Dual cook – eco convection mode; Auto cook programmes; Single cook
English 33 C ooking smar t Dual cook – eco convection mode You can alse use eco convection mode at upper or lower compartment to save power.The times of this category are sugessted to not be preheated before cooking for saving more energy. Upper Food Accessory Level Temp. (°C) Time (min.) Lasagne Wi...
Page 39 - Test dishes
English 39 C ooking smar t Test dishes According to standard EN 60350-1 1. Baking The recommendations for baking refer to a preheated oven. Do not use the fast preheat function. Always put trays the slanted side to the door front. Type of food Accessory Level Type of heating Temp. (°C) Time (min.) S...
Page 40 - Collection of frequent auto cook recipes
40 English C ooking smar t Cooking smart Collection of frequent auto cook recipes Potato gratin Ingredients 800 g potatoes, 100 ml milk, 100 ml cream, 50 g beaten whole egg, 1 tbsp each of salt, pepper, nutmeg, 150 g grated cheese, butter, thyme Directions Peel potatoes and slice them to 3 mm thickn...
Page 43 - Maintenance; Cleaning
English 43 Maint enanc e Maintenance Cleaning For easier cleaning, regularly clean the oven. WARNING • Make sure the oven and accessories are cool before cleaning. • Do not use abrasive cleaning agents, hard brushes, scouring pads or cloths, steel wool, knives or any other abrasive materials. Oven i...
Page 44 - Detaching the door
44 English Maint enanc e Maintenance Side racks (applicable models only) 1. Press the top line of the left side rack, and lower by approximately 45°. 2. Pull and remove the bottom line of the left side rack. 3. Remove the right side rack in the same way. 4. Clean both side racks. 5. When done, follo...
Page 45 - Replacement; Troubleshooting; Checkpoints
English 45 Tr ouble shoo ting Replacement Bulbs 1. Remove the glass cap by turning anti-clockwise. 2. Replace the oven light. 3. Clean the glass cap. 4. When done, follow step 1 above in the reverse order to reinsert the glass cap. WARNING • Before replacing a bulb, turn off the oven and unplug the ...
Page 47 - Information codes
English 47 Tr ouble shoo ting Information codes If the oven fails to operate, you may see an information code on the display. Check the table below and try the suggestions. Code Meaning Action C-d1 Door lock malfunctions Turn off the oven and then restart. If the problem continues, turn off all powe...
Page 48 - Technical specifcations
48 English Technic al specif cations Code Meaning Action -dC- If the divider is removed during cooking in Dual cook mode.If the divider is inserted during cooking in Single cook mode. The divider must not be removed during cooking in Dual cook mode.Turn off the oven and then restart. If the problem ...
Page 49 - Appendix; Product data sheet
English 49 Appendix Energy saving tips • During cooking, the oven door should remain closed except for turning food over. Do not open the door frequently during cooking to maintain the oven temperature and to save energy. • Plan oven use to avoid turning the oven off between cooking one item and the...
Page 50 - Memo
Memo NV75N5641RS_EU_DG68-01057C-04_EN.indd 50 11/23/2018 5:42:01 PM
Page 53 - Einbaubackofen; Benutzer- und Installationshandbuch
Einbaubackofen Benutzer- und Installationshandbuch NV75N5641RS / NV75N5641RB / NV75N5641BS / NV75N5642BS NV75N5641RS_EU_DG68-01057C-04_DE.indd 1 11/23/2018 5:44:05 PM
Page 54 - Inhalt
2 Deutsch Inhalt Inhalt Hinweise zu dieser Bedienungsanleitung 3 In diesem Benutzerhandbuch werden folgende Symbole verwendet: 3 Sicherheitshinweise 3 Wichtige Hinweise zur Sicherheit 3 Korrekte Entsorgung von Altgeräten (Elektroschrott) 6 Automatische Energiesparfunktion 6 Aufstellen des Geräts 7 L...
Page 55 - Sicherheitshinweise; Wichtige Hinweise zur Sicherheit; Hinweise zu dieser Bedienungsanleitung; In diesem Benutzerhandbuch werden folgende Symbole verwendet:; schweren Verletzungen, Tod und/oder Sachschäden; Verletzungen und/oder Sachschäden
Deutsch 3 Sicherheit shinw eise Sicherheitshinweise Die Installation dieses Geräts darf nur von einem zugelassenen Elektriker durchgeführt werden. Der Installateur ist dafür verantwortlich, das Gerät an das Stromnetz anzuschließen und dabei die einschlägigen Sicherheitsbestimmungen zu beachten. Wich...
Page 58 - Korrekte Entsorgung von Altgeräten (Elektroschrott); Automatische Energiesparfunktion
6 Deutsch Sicherheit shinw eise Sicherheitshinweise Korrekte Entsorgung von Altgeräten (Elektroschrott) (Gilt für Länder mit Abfalltrennsystemen) Die Kennzeichnung auf dem Produkt, Zubehörteilen bzw. auf der dazugehörigen Dokumentation gibt an, dass das Produkt und Zubehörteile (z. B. Ladegerät, Kop...
Page 59 - Aufstellen des Geräts; Lieferumfang
Deutsch 7 A uf stellen de s Ger ät s Aufstellen des Geräts WARNUNG Dieses Gerät darf nur von sachkundigem Fachpersonal installiert werden. Der Installateur ist dafür verantwortlich, das Gerät an das Stromnetz anzuschließen und dabei die vor Ort geltenden Sicherheitsbestimmungen zu beachten. Lieferum...
Page 60 - Vorbereitung zur Installation des Ofens; Einbau in einen Küchenschrank
8 Deutsch A uf stellen de s Ger ät s Aufstellen des Geräts Vorbereitung zur Installation des Ofens Kreuzschlitzschraubendreher Bohren Netzanschluss 01 02 03 L N 01 BRAUN oder SCHWARZ 02 BLAU oder WEIß 03 GELBGRÜN Schließen Sie das Gerät an eine Steckdose an. Wenn auf Grund von Beschränkungen hinsich...
Page 62 - Vor der ersten Verwendung; Anfangseinstellungen
10 Deutsch Vor der er sten Verwendung Entfernen Sie nach dem Einbau Schutzfolien, Klebebänder und sonstiges Verpackungsmaterial, und nehmen Sie die mitgelieferten Zubehörteile aus dem Garraum des Geräts. Wenn Sie das Gerät aus dem Schrank ausbauen möchten, trennen Sie zunächst die Stromversorgung, u...
Page 63 - Gerüche in Neugeräten
Deutsch 11 Vor der er sten Verwendung Gerüche in Neugeräten Reinigen Sie vor der ersten Inbetriebnahme des Geräts den Garraum, um die Gerüche des Neugeräts zu entfernen. 1. Entnehmen Sie alle Zubehörteile aus dem Garraum des Geräts. 2. Betreiben Sie das Gerät eine Stunde lang bei 200 °C Heißluft ode...
Page 65 - Flexible Tür
Deutsch 13 Vor der er sten Verwendung Flexible Tür Dieses Gerät verfügt über eine besondere flexible Tür, die in der Mitte mit Scharnieren versehen ist, so dass nur die obere Hälfte geöffnet werden muss, um auf die obere Zone zuzugreifen. Wenn Sie den Doppelgarraumbetrieb nutzen, können Sie die ober...
Page 66 - Mechanische Sicherung (nur bestimmte Modelle); Doppelgarraumbetrieb
14 Deutsch Vor der er sten Verwendung Vor der ersten Verwendung Mechanische Sicherung (nur bestimmte Modelle) Aufstellen des Geräts A 1. Setzen Sie den dünnen Teil (A) der mechanischen Sicherung – wie gezeigt – in den entsprechenden Schlitz des Sicherungsverriegelung ein. 2. Ziehen Sie die Schraube ...
Page 67 - Bedienung; Bedienfeld
Deutsch 15 Bedienung Bedienung Bedienfeld Die Front des Geräts ist in verschiedenen Material- und Farbausführungen erhältlich. Änderungen am tatsächlichen Aussehen des Geräts zum Zweck der Qualitätsverbesserung sind vorbehalten. 01 04 02 06 08 10 03 05 07 09 11 12 01 Moduswähler Hiermit können Sie d...
Page 68 - Häufig genutzte Einstellungen
16 Deutsch Bedienung Bedienung Häufig genutzte Einstellungen In allen Betriebsarten muss die Standardtemperatur und/oder -garzeit häufig geändert werden. Im Folgenden wird beschrieben, wie Sie die Temperatur und/oder die Garzeit für die ausgewählte Betriebsart nach Ihren Bedürfnissen einstellen könn...
Page 75 - Temperaturbereiche im Doppelgarraumbetrieb
Deutsch 23 Bedienung Temperaturbereiche im Doppelgarraumbetrieb Sie können den oberen und unteren Garraum gleichzeitig für unterschiedliche Garvorgänge verwenden.Im Doppelgarraumbetrieb wird der verfügbare Temperaturbereich für einen der Garräume jedoch durch die Temperatureinstellung für den jeweil...
Page 76 - Unterbrechen des Garvorgangs; Sonderfunktionen
24 Deutsch Bedienung Bedienung Unterbrechen des Garvorgangs Drehen Sie den Moduswähler während eines Garvorgangs auf „ “. Das Gerät wird nach wenigen Sekunden ausgeschaltet. Um Fehleingaben zu vermeiden, gibt das Gerät Ihnen einige Sekunden Zeit, um Ihre Auswahl zu korrigieren. Unterbrechen des Garv...
Page 77 - Automatikprogramme
Deutsch 25 Bedienung Automatikprogramme Für unerfahrene Köche bietet das Gerät insgesamt 50 Automatikprogramme. Mit Hilfe der Automatikprogramme können Sie Zeit sparen und schneller Kochen und Backen lernen. Die Garzeit und -temperatur wird entsprechend dem ausgewählten Rezept automatisch eingestell...
Page 78 - Dampfreinigung
26 Deutsch Bedienung Bedienung 4. Wählen Sie mit Hilfe des Funktionswählers ein Programm für den oberen Garraum aus, und drücken Sie auf OK . 5. Stellen Sie durch Drehen am Funktionswähler die Portionsgröße ein. Das einstellbare Gewicht hängt vom jeweiligen Programm ab. 6. Drücken Sie auf OK , um de...
Page 79 - Verwendung; Manuelles Garen; Tipps zu den Zubehörteilen
Deutsch 27 Verwendung Timer Mit Hilfe der Timerfunktion können Sie bei einem Garvorgang die benötigte Zeit bzw. Betriebsdauer überprüfen. 1. Drücken Sie die Taste . 2. Stellen Sie mit Hilfe des Funktionswählers die Zeit ein, und drücken Sie auf OK . HINWEIS • Wenn die eingestellte Zeit abgelaufen is...
Page 80 - Braten
28 Deutsch Verwendung Verwendung Gericht Zubehör Einschubhöhe Betriebsart Temp. (°C) Zeit (Min.) Tiefgefrorener Blätterteigstücke, gefüllt Universalblech 2 180-200 20-25 Quiche Gitterrost, Auflaufform (22-24 cm) 2 180-190 25-35 Gedeckter Apfelkuchen Gitterrost, Form (Ø 20 cm) 2 160-170 65-75 Pizza a...
Page 81 - Grillen
Deutsch 29 Verwendung Grillen Es wird empfohlen, den Garraum mit dem Großflächengrill vorzuheizen. Nach der Hälfte der Zeit wenden. Gericht Zubehör Einschubhöhe Betriebsart Temp. (°C) Zeit (Min.) Brot Toast Gitterrost 5 250-270 2-4 Käsetoast Universalblech 4 200 4-8 Rind Steak * Gitterrost + Univers...
Page 82 - Tiefgefrorene Fertiggerichte
30 Deutsch Verwendung Verwendung Tiefgefrorene Fertiggerichte Gericht Zubehör Einschubhöhe Betriebsart Temp. (°C) Zeit (Min.) Teifgefrorene Pizza (0,4-0,6 kg) Gitterrost 3 200-220 15-25 Tiefgefrorene Lasagne Gitterrost 3 180-200 45-50 Tiefgefrorene Backofen-Pommes Universalblech 3 220-225 20-25 Tief...
Page 85 - Doppelgarraumbetrieb – Betriebsart „Öko-Heißluft“; Garen auf einer Einschubhöhe
Deutsch 33 Verwendung Doppelgarraumbetrieb – Betriebsart „Öko-Heißluft“ Um Energie zu sparen, können Sie auch die Betriebsart „Öko-Heißluft“ im oberen oder unteren Garraum verwenden.Die in diesem Abschnitt angegebenen Garzeiten beziehen sich auf einen Garvorgang ohne Vorheizen. Bei dieser Art der Zu...
Page 91 - Testgerichte
Deutsch 39 Verwendung Testgerichte Gemäß EN 60350-1 1. Backen Die Backempfehlungen gehen von einem vorgeheizten Garraum aus. Verwenden Sie nicht die Funktion „Schnelles Vorheizen“. Schieben Sie die Bleche immer so ein, dass die schräge Seite zur Gerätetür weist. Gericht Zubehör Einschubhöhe Betriebs...
Page 92 - Häufig verwendete Rezepte für die Automatikprogramme
40 Deutsch Verwendung Verwendung Häufig verwendete Rezepte für die Automatikprogramme Kartoffelgratin Zutaten 800 g Kartoffeln, 100 ml Milch, 100 ml Sahne, 50 g aufgeschlagenes Ei, je 1 EL Salz, Pfeffer und Muskat, 150 g geriebener Käse, Butter, Thymian Anleitung Kartoffeln schälen und in 3 mm dicke...
Page 95 - Pfege; Reinigung
Deutsch 43 Pf eg e Pfege Reinigung Das Reinigen des Ofens ist einfacher, wenn Sie die Reinigung regelmäßig durchführen. WARNUNG • Vergewissern Sie sich vor jeder Reinigung, dass das Gerät und die verwendeten Zubehörteile vollständig abgekühlt sind. • Verwenden Sie keinesfalls schleifende Reinigungsm...
Page 96 - Ausbauen der Gerätetür
44 Deutsch Pf eg e Pfege Seitengitter (nur bestimmte Modelle) 1. Drücken Sie mittig auf den oberen Bereich des linken Seitengitters und kippen Sie es um etwa 45° in den Garraum. 2. Ziehen Sie das linke Seitengitter unten aus den beiden Bohrungen. 3. Entfernen Sie das rechte Seitengitter auf die glei...
Page 97 - Ersetzen von Teilen; Fehlerbehebung; Problembeschreibungen
Deutsch 45 Fehlerbehebung Ersetzen von Teilen Glühlampe 1. Drehen Sie die Glasabdeckung gegen den Uhrzeigersinn ganz heraus. 2. Tauschen Sie die Glühlampe aus. 3. Reinigen Sie die Glasabdeckung. 4. Drehen Sie die Glasabdeckung anschließend wieder auf die Halterung, indem Sie den obigen Schritt 1 in ...
Page 99 - Informationscodes
Deutsch 47 Fehlerbehebung Informationscodes Bei Störungen Ihres Geräts wird ein Informationscode im Display angezeigt. Schlagen Sie in der folgenden Tabelle nach, und probieren Sie die beschriebenen Abhilfemaßnahmen aus. Code Bedeutung Abhilfemaßnahme C-d1 Problem mit der Verriegelung der Gerätetür ...
Page 100 - Technische Daten
48 Deutsch Technische D at en Code Bedeutung Abhilfemaßnahme -dC- Tritt auf, wenn der Garraumteiler während eines Garvorgangs im Doppelgarraumbetrieb entfernt wird.Tritt auf, wenn der Garraumteiler während eines Garvorgangs im Einfachbetrieb eingesetzt wird. Der Garraumteiler darf während eines Garv...
Page 101 - Anhang; Produktdatenblatt
Deutsch 49 Anhang Energiespartipps • Halten Sie die Gerätetür während des Garvorgangs immer geschlossen, es sei denn, Sie müssen die Lebensmittel wenden. Öffnen Sie die Gerätetür während des Garvorgangs so selten wie möglich, um die Temperatur im Garraum zu erhalten und so Energie zu sparen. • Plane...
Page 102 - Notizen
Notizen NV75N5641RS_EU_DG68-01057C-04_DE.indd 50 11/23/2018 5:44:32 PM
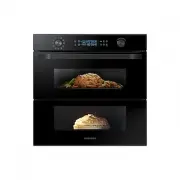


 Samsung NV70K3370BS User Manual
 Samsung NV70M3541RB/EO User Manual
 Samsung NV75J3140BS/EU User Manual
 Samsung NV75J5540RS User Manual
 Samsung NV75K5541RS User Manual
 Samsung NV75K5571RS User Manual
 Samsung NV75N5641RS User Manual
 Samsung NV75R7646RB User Manual
 Samsung NV75T9879CD User Manual
 Samsung NV75T9979CD User Manual
 Samsung NV6786BNESR User Manual
 Samsung NX58M6850SG User Manual