Page 2 - See this fold-out section for all of the figures
ii See this fold-out section for all of the figures referenced in the operator’s manual. Consulter l’encart à volets afin d’examiner toutes les figures mentionnées dans le manuel d’utilisation. Consulte esta sección desplegable para ver todas las figuras a las que se hace referencia en el manual del...
Page 6 - TABLE OF CONTENTS; TABLE DES MATIÈRES / ÍNDICE DE CONTENIDO; INTRODUCTION; INTRODUCTION / INTRODUCCIÓN
2 — English Introduction ...................................................................................................................................................................... 2 Introduction / Introducción Important Safety Instructions .............................................
Page 7 - READ ALL INSTRUCTIONS; IMPORTANT SAFETY INSTRUCTIONS
3 — English WARNING: READ AND UNDERSTAND ALL INSTRUCTIONS. Failure to follow all instructions listed below and on the machine may result in electric shock, fire, and/or serious personal injury. READ ALL INSTRUCTIONS This cutting machine is capable of amputating hands and feet and throwing objects....
Page 10 - SYMBOLS
6 — English Some of the following symbols may be used on this product. Please study them and learn their meaning. Proper interpretation of these symbols will allow you to operate the product better and safer. SYMBOL NAME DESIGNATION/EXPLANATION Safety Alert Indicates a potential personal injury haza...
Page 12 - ELECTRICAL; DOUBLE INSULATION; ELECTRICAL CONNECTION; GFCI
8 — English Make sure the extension cord is securely attached as shown in Figure 9, then connect the plug end of the power cord into the receptacle end of the extension cord. Check that connection is secure. **Ampere rating (on product data plate) 0-2.0 2.1-3.4 3.5-5.0 5.1-7.0 7.1-12.0 12.1-16.0 Cor...
Page 13 - FEATURES
9 — English PRODUCT SPECIFICATIONS Motor .................................120 V, AC only, 60 Hz, 13 AmpsCutting Path ............................................................... 16 in. Height Adjustments .................................. .75 in. to 2.25 in.Wheel Size ...............................
Page 14 - ASSEMBLY; UNPACKING
10 — English ASSEMBLY UNPACKING This product requires assembly. Carefully remove the product and any accessories from the box. Make sure that all items listed in the packing list are included. WARNING: Do not use this product if any parts on the Packing List are already assembled to your product w...
Page 15 - SETTING BLADE HEIGHT
11 — English Pull up on the upper handle to raise it into operating po- sition. Make sure that the upper handle is seated in the grooves at the top of the lower handle. DANGER: Do not allow any part of the power cord on the mower or extension cord to become pinched or trapped when assembling or ra...
Page 16 - OPERATION
12 — English INSTALLING / REMOVING EXTENSION CORD See Figure 9. Insert the female end of the extension cord into the prod- uct as shown. Connect the male end of the extension cord to the power source. Make sure the extension cord is secured before beginning operation. NOTICE: Always use cord r...
Page 17 - SLOPE OPERATION; EMPTYING THE GRASS CATCHER
13 — English SLOPE OPERATION See Figure 11. WARNING: Slopes are a major factor related to slip and fall accidents that can result in severe injury. Operation on slopes requires extra caution. If you feel uneasy on a slope, do not mow it. For your safety, do not attempt to mow slopes greater than 15 ...
Page 18 - MAINTENANCE
14 — English WARNING: Before performing any maintenance, make sure the power supply is disconnected to avoid accidental starting and possible serious personal injury. WARNING: Always wear eye protection with side shields marked to comply with ANSI Z87.1. Failure to do so could result in objects bein...
Page 19 - TROUBLESHOOTING; PROBLEM
15 — English TROUBLESHOOTING IF THESE SOLUTIONS DO NOT SOLVE THE PROBLEM CONTACT YOUR AUTHORIZED SERVICE DEALER. PROBLEM POSSIBLE CAUSE SOLUTION Handle not in position. Handle locks not locked. Lock upper and lower handle locks. Mower not starting. Power supply not connected. Connect to power supply...
Page 20 - WARRANTY; LIMITED WARRANTY STATEMENT
16 — English WARRANTY LIMITED WARRANTY STATEMENT Techtronic Industries North America, Inc., warrants to the original retail purchaser that this RYOBI ® brand outdoor product is free from defect in material and workmanship and agrees to repair or replace, at Techtronic Industries North America, Inc.’...
Page 21 - LISEZ TOUTES LES INSTRUCTIONS; INSTRUCTIONS IMPORTANTES CONCERNANT LA SÉCURITÉ
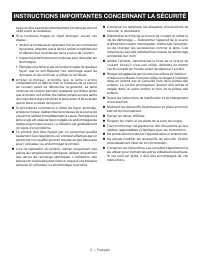
3 — Français AVERTISSEMENT : LISEZ ET VEILLEZ À COMPRENDRE TOUTES LES INSTRUCTIONS. Le non respect des instructions énumérées ci-dessous et sur la machine pourrait résulter en un choc électrique, un incendie, et/ou des blessures sérieuses. LISEZ TOUTES LES INSTRUCTIONS Cet outil coupant est capabl...
Page 24 - SYMBOLES
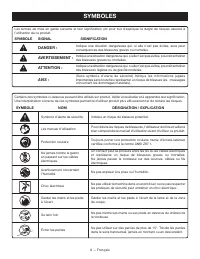
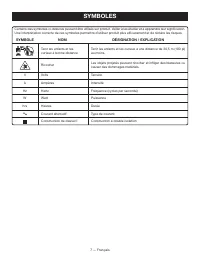
6 — Français Les termes de mise en garde suivants et leur signification ont pour but d’expliquer le degré de risques associé à l’utilisation de ce produit. SYMBOLE SIGNAL SIGNIFICATION DANGER : Indique une situation dangereuse qui, si elle n’est pas évitée, aura pour conséquences des blessures grave...
Page 26 - DOUBLE ISOLATION; CONNEXIONS ÉLECTRIQUES; CARACTÉRISTIQUES ÉLECTRIQUES
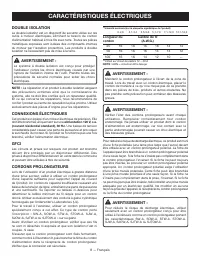
8 — Français DOUBLE ISOLATION La double isolation est un dispositif de sécurité utilisé sur les outils à moteur électriques, éliminant le besoin de cordon d’alimentation habituel à trois fils avec terre. Toutes les pièces métalliques exposées sont isolées des composants internes du moteur par l’isol...
Page 27 - CARACTÉRISTIQUES
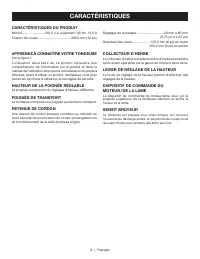
9 — Français CARACTÉRISTIQUES DU PRODUIT Moteur ........................120 V, c.a. seulement, 60 Hz, 13,0 AChemin de coupe .................................... 406,4 mm (16 po) Réglages de la hauteur .............................. 20 mm à 60 mm (0,75 po à 2,25 po) Grandeur des roues ..................
Page 28 - ASSEMBLAGE; DÉBALLAGE
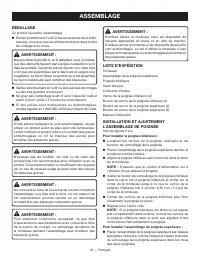
10 — Français ASSEMBLAGE DÉBALLAGE Ce produit nécessite l’assemblage. Retirez prudemment l’outil et les accessoires de la boîte. Assurez-vous que tous les articles énumérés dans la liste de colisage sont inclus. AVERTISSEMENT : Ne pas utiliser le produit si, en le déballant, vous constatez que des...
Page 29 - RÉGLAGE DE LA HAUTEUR DE LA LAME
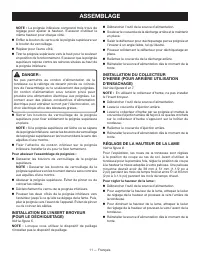
11 — Français NOTE : La poignée inféreiure comprend trois trous de réglage pour ajuster la hauteur. S’assurer d’utiliser la même hauteur pour chaque côté. Enfiler le bouton du verrou de la poignée supérieure sur le boulon de verrouillage. Répéter pour l’autre côté. Tirer la poignée supérieure ...
Page 30 - CONSEILS DE TONDAISON; UTILISATION
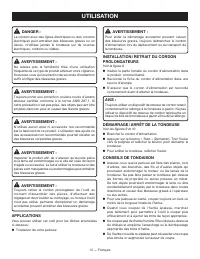
12 — Français DANGER : Le contact avec des lignes électriques ou des cordons électriques peut entraîner des blessures graves ou un décès. N’utilisez jamais la tondeuse sur de sources électriques, cordons ou câbles. AVERTISSEMENT : Ne laissez pas la familiarité tirée d’une utilisation fréquente de ce...
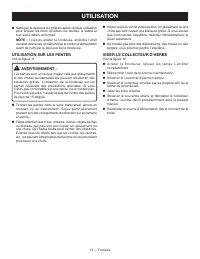
Page 31 - UTILISATION SUR LES PENTES; VIDER LE COLLECTEUR D’HERBE
13 — Français Nettoyez le dessous du châssis après chaque utilisation pour enlever les brins d’herbes, les feuilles, la saleté et tout autre débris accumulé. NOTE : Toujours arrêter la tondeuse, attendre l’arrêt complet des lames, et débranchez le cordon d’alimentation avant de nettoyer le dessous...
Page 32 - ENTRETIEN
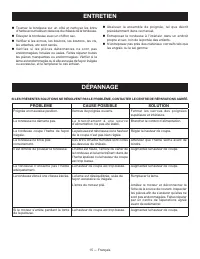
14 — Français AVERTISSEMENT : Lors de réparation du produit, s’assurer que l’alimentation électrique du la tondeuse ont été retirées afin d’éviter un démarrage accidentel et des blessures graves. AVERTISSEMENT : Toujours porter une protection oculaire munie d’écrans latéraux certifiée conforme à la ...
Page 33 - DÉPANNAGE; PROBLÈME
15 — Français DÉPANNAGE SI LES PRÉSENTES SOLUTIONS NE RÉSOLVENT PAS LE PROBLÈME, CONTACTER LE CENTRE DE RÉPARATIONS AGRÉÉ. PROBLÈME CAUSE POSSIBLE SOLUTION Poignée en mauvaise position. Verrous de poignée ouverts. F e r m e r l e s v e r ro u s d e s p o i g n é e s supérieure et inférieure. La tond...
Page 34 - GARANTIE; ÉNONCÉ DE LA GARANTIE LIMITÉE
16 — Français GARANTIE ÉNONCÉ DE LA GARANTIE LIMITÉE Techtronic Industries North America, Inc., garantit à l’acheteur original que ce produit RYOBI ® est exempt de tous vices de matériaux ou de fabrication et s’engage à réparer ou remplacer gratuitement, à son choix, tout produit s’avérant défectueu...
Page 35 - LEA TODAS LAS INSTRUCCIONES; INSTRUCCIONES DE SEGURIDAD IMPORTANTES
3 — Español ADVERTENCIA: LEA Y COMPRENDA TODAS LAS INSTRUCCIONES. El incumplimiento de las instrucciones señaladas abajo y en la máquina puede causar descargas eléctricas, incendios y/o lesiones serias. LEA TODAS LAS INSTRUCCIONES Esta máquina de corte es capaz de amputar manos y pies, y de lanzar...
Page 38 - SÍMBOLOS
6 — Español Es posible que se empleen en este producto algunos de los siguientes símbolos. Le suplicamos estudiarlos y aprender su significado. Una correcta interpretación de estos símbolos le permitirá utilizar mejor y de manera más segura el producto. SÍMBOLO NOMBRE DENOMINACIÓN/EXPLICACIÓN Alerta...
Page 39 - SÍMBOLO
7 — Español SÍMBOLOS Es posible que se empleen en este producto algunos de los siguientes símbolos. Le suplicamos estudiarlos y aprender su significado. Una correcta interpretación de estos símbolos le permitirá utilizar mejor y de manera más segura el producto. SÍMBOLO NOMBRE DENOMINACIÓN/EXPLICACI...
Page 40 - DOBLE AISLAMIENTO; ASPECTOS ELÉCTRICOS
8 — Español DOBLE AISLAMIENTO El doble aislamiento es una característica de seguridad de las herramientas eléctricas, la cual elimina la necesidad de usar el típico cordón eléctrico de tres conductores con conexión a tierra. Todas las partes metálicas expuestas están aisladas de los componentes metá...
Page 41 - CARACTERÍSTICAS
9 — Español ESPECIFICACIONES DEL PRODUCTO Motor ..........................120 V, c.a. solamente, 60 Hz, 13,0 ATrayectoria de corte ............................. 406,4 mm (16 pulg.) Ajustes de altura ........................................ 20 mm à 60 mm (0,75 pulg. à 2,25 pulg.) Tamaño de las ruedas...
Page 42 - ARMADO; DESEMPAQUETADO
10 — Español ARMADO DESEMPAQUETADO Este producto requiere armarse. Extraiga cuidadosamente de la caja la herramienta y los accesorios. Asegúrese de que estén presentes todos los artículos enumerados en la lista de empaquetado. ADVERTENCIA: No utilice este producto si alguna pieza incluida en la li...
Page 43 - AJUSTE DE LA ALTURA DE LA CUCHILLA
11 — Español NOTA: El mango inferior tiene tres configuraciones de agujeros para el ajuste de altura. Asegúrese de usar la misma configuración de altura en cada lado. Inserte la perilla del seguro del mango superior en el perno del mango. Repita este paso del otro lado. Tire hacia arribaatrás ...
Page 44 - ENCENDIDO Y APAGADO DE LA PODADORA; SUGERENCIAS PARA EL PODADO; FUNCIONAMIENTO
12 — Español ADVERTENCIA: Para evitar un arranque accidental que podría causar lesiones corporales serias, siempre desconecte la podadora del suministro de corriente a fin de evitar arranques accidentales que pueden causar lesiones serias. INSTALACIÓN / DESMONTAR DEL CORDONES DE EXTENSIÓN Vea la fig...
Page 45 - MANEJO EN PENDIENTES
13 — Español FUNCIONAMIENTO Limpie la parte inferior del piso de la podadora después de cada uso para eliminar recortes de hierba, hojas, suciedad y otros desechos acumulados. NOTA: Siempre detenga la podadora, permita que las hojas se detengan completamente y desconecte el suministro de alimentac...
Page 46 - MANTENIMIENTO; REEMPLAZO DE LA CUCHILLA
14 — Español ADVERTENCIA: Al dar servicio a la unidad, asegúrese de que desconecte el suministro de corriente para evitar el arranque accidental y posibles lesiones graves. ADVERTENCIA: Siempre póngase protección ocular con protección lateral con la marca de cumplimiento de la norma ANSI Z87.1. Si n...
Page 47 - CORRECCIÓN DE PROBLEMAS; PROBLEMA
15 — Español CORRECCIÓN DE PROBLEMAS SI CON ESTAS SOLUCIONES NO SE RESUELVE EL PROBLEMA, COMUNÍQUESE CON EL CONCESIONARIO DE SERVICIO AUTORIZADO DE SU PREFERENCIA. PROBLEMA CAUSA POSIBLE SOLUCIÓN El mango no está en posición. Las trabas de los mangos no están cerradas. Cierre las trabas del mango su...
Page 48 - GARANTÍA
16 — Español GARANTÍA DECLARACIÓN DE LA GARANTÍA LIMITADA Techtronic Industries North America, Inc. garantiza al comprador original al menudeo que este producto de la marca RYOBI ® carece de defectos en los materiales y en la mano de obra, y acuerda reparar o remplazar, a la sola discreción de Techt...
Page 52 - OPERATOR’S MANUAL; MANUEL D’UTILISATION / MANUAL DEL OPERADOR; TECHTRONIC INDUSTRIES POWER EQUIPMENT; CALIFORNIA PROPOSITION 65
OPERATOR’S MANUAL MANUEL D’UTILISATION / MANUAL DEL OPERADOR 16 IN. LAWN MOWER TONDEUSE DE 406,4 mm (16 po)PODADORA DE 406,4 mm (16 pulg.) RYAC160 TECHTRONIC INDUSTRIES POWER EQUIPMENT 1428 Pearman Dairy Road, Anderson, SC 29625 USA 1-800-860-4050 • www.ryobitools.com • PARTS AND SERVICE: Prior to r...


 Ryobi RY401170 User Manual
 Ryobi RY401210 User Manual
 Ryobi RY401220 User Manual
 Ryobi RYPM8010 User Manual
 Ryobi 4-in-1 RLM53175S 5133002555 User Manual
 Ryobi MAX POWER RLM36X41H40 5133002806 User Manual
 Ryobi P1108BTL User Manual
 Ryobi RLM36 User Manual
 Ryobi RLM4614 5133002550 User Manual
 Ryobi RLM46173 5133002552 User Manual
 Ryobi RLM53190YV 5133003672 User Manual
 Ryobi RY401110 User Manual