Page 2 - SHFLÀFDWLRQV; Contents
3 7 Adjust settings 27 General setup 27 Audio setup 28 Video setup 28 Preference setup 29 8 Adjust volume level and sound effect 31Adjust volume level 31 Select a sound effect 31 Adjust treble/bass level 31 Mute sound 31 9 Product information 32 6SHFLÀFDWLRQV 32 Suppor ted disc formats 33 USB playab...
Page 3 - Important; Safety; shock, this apparatus should not be exposed to; Important Safety Instructions
4 g Do not block any ventilation openings. Install in accordance with the manufacturer’s instructions. h Do not install near any heat sources such as radiators, heat registers, stoves, or RWKHUDSSDUDWXVLQFOXGLQJDPSOLÀHUVWKDW produce heat. i Protect the power cord from being walked on or pinched, par...
Page 4 - Notice; Do not place any sources of danger on; Mains plug
5 ,IWKHÀWWHGSOXJLVQRWVXLWDEOHIRU\RXUVRFNHW outlets, it should be cut off and an appropriate SOXJÀWWHGLQLWVSODFH If the mains plug contains a fuse, this should have a value of 5 Amp. If a plug without a fuse is used, the fuse at the distribution board should not be greater than 5 Amp. Note: The sever...
Page 5 - Recycling; Your product is designed and manufactured
6 Please inform yourself about the local rules on separate collection of batteries. The correct disposal of batteries helps prevent potentially QHJDWLYHFRQVHTXHQFHVRQWKHHQYLURQPHQWDQG human health. Environmental information All unnecessar y packaging has been omitted. We have tried to make the packa...
Page 6 - ,IWKLVHTXLSPHQWGRHVFDXVHKDUPIXO
7 Note 7KLVHTXLSPHQWKDVEHHQWHVWHGDQGIRXQGWRFRPSO\ with the limits for a Class B digital device, pursuant to Par t 15 of the FCC Rules. These limits are designed to provide reasonable protection against harmful LQWHUIHUHQFHLQDUHVLGHQWLDOLQVWDOODWLRQ7KLVHTXLSPHQWJHQHUDWHVXVHVDQGFDQUDGLDWHUDGLRIUHTXH...
Page 7 - The unit supports these media/disc formats:; What’s in the box; Your DVD; ZHOFRPHWR3KLOLSV7RIXOO\EHQHÀWIURPWKH; Introduction
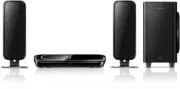
8 The unit supports these media/disc formats: You can play DVD discs with the following region codes: DVD region code Countries Europe What’s in the box Check and identify the contents of your package: Main unit Speakers (x 2) Digital wireless subwoofer Remote control (with batteries) Power ...
Page 8 - Overview of the main unit
9 Overview of the main unit a c b d e f g h j i r q k l m no p English EN
Page 11 - Component video provides better picture; TV; Connect; Connect speakers
12 a &RQQHFWDQ+'0,FDEOHQRWVXSSOLHG to: - the HDMI OUT socket on this unit. - the HDMI input socket on the TV. Tip If your TV has only a DVI connection, connect through a HDMI/DVI adaptor. An extra audio connection is needed to complete this connection. Option 2: Connect through component v...
Page 12 - EOXHJUHHQQRWVXSSOLHGWR
13 1 Connect the supplied AV cable to: - the AV OUT socket on this unit. - the AV In sockets on the SCART adaptor. 2 Connect the SCART adapter to the TV. Option 4: Connect through AV out - Basic quality AV out provides basic analog connectivity. a Connect the supplied AV cable to: - the AV OUT...
Page 13 - &RQQHFWGLJLWDODPSOLÀHUUHFHLYHU; Connect through Aux in; AUX; Connect through MP3 Link
14 a Connect the supplied MP3 link cable to: - the MP3 LINK socket on the main unit.- the headphone socket on an external device. b Press MP3 LINK. c Operate the controls of the connected device to play music (see the user manual RIWKHGHYLFH &RQQHFWGLJLWDODPSOLÀHUUHFHLYHU OPTICAL OUT Connect...
Page 14 - Connect FM antenna; Connect the supplied FM antenna to the; Place the unit
15 1 Complete the connections (see above), then mount on the back panel to keep the back smooth. 2 Mount on the stand and place the main unit near to the TV. a &RQQHFWDQRSWLFDOFDEOHQRWVXSSOLHG to: - the OPTICAL IN socket on this unit. - the Optical output socket on the GLJLWDODPSOLÀHUUHFHLYH...
Page 15 - Prepare the remote control; Open the batter y compar tment.; Connect power
16 Prepare the remote control Caution Risk of explosion! Keep batteries away from heat, VXQVKLQHRUÀUH1HYHUGLVFDUGEDWWHULHVLQÀUH Risk of decreased batter y life! Never mix different brands or types of batteries.Risk of product damage! When the remote control is not used for long periods, remove...
Page 16 - Connect the power adaptor to the
17 Note Before connecting AC power, ensure you have completed all other connections. 1 Connect the power adaptor to the DC socket on the unit and a wall outlet. 2 Connect the power plug of the digital wireless subwoofer to a wall outlet. b c English EN
Page 17 - Set up wireless connection manually; SOURCE; DISC; Get started; VHTXHQFH; Turn on; SDLULQJÁDVKHV
18 Set up wireless connection manually 1 In standby mode, press and hold SOURCE on the main unit for 3 seconds. » [PAIRING] SDLULQJÁDVKHV 2 Press and hold PAIR on the subwoofer for 3 seconds. The blue and green indicators on the » VXEZRRIHUÁDVKDOWHUQDWHO\ If wireless connection succeeds, » [PAIR OK]...
Page 18 - Turn on Progressive Scan; SLFWXUHUHVROXWLRQDQGTXDOLW\; Select menu display language
19 One touch play[Auto Wakeup TV] When you press , this unit will wake up from standby mode and star t disc play (if a video disc is found in the disc compar tment). At the same time, your TV will also be turned on and be switched to the correct viewing channel. One touch power-off[System Standby] W...
Page 19 - Turn off progressive scan manually; OPTIONS
20 7 Select [Progressive] > [On] , then press OK . A warning message is displayed. » 8 To proceed, select [Ok] and press OK . The progressive setup is complete. » Note If a blank/distor ted screen is displayed, wait for 15 seconds for auto recover y or turn off progressive scan manually. 9 Turn...
Page 20 - A contents menu is displayed.; Watch video; VHOHFWDÀOHDQGWKHQSUHVV2.; Select source; Ensure that the label faces upwards.
21 Note Ensure that the USB device contains playable music, pictures or video. a Insert the USB device to the socket. b Press USB to select the USB source. A contents menu is displayed. For connected MP3 device (see ‘Connect through MP3 Link’ on page 15) Watch video a Select source. (see ‘Select...
Page 21 - Select an audio language; AUDIO; Select a subtitle language; AUDIO SYNC; Use the disc menu; To return to the menu during play:; Fast forward/backward; OK
22 Select an audio language You can select an audio language on DVDs, DiVx video or VCDs. 1 During disc play, press AUDIO . The language options appear. » Note For some DVDs, the language can only be changed from the disc menu. Press MENU/BACK to access the menu. Select a subtitle language Note Th...
Page 22 - Listen to music; )RU03VHOHFWDIROGHUÀUVWWKHQVHOHFWD; HOHFWUHSHDWVKXIÁHSOD\RSWLRQV; Display play information
23 Note You can only play DivX videos rented or purchased through the DivX registration code of this unit. 6XEWLWOHÀOHVZLWKWKHIROORZLQJÀOHQDPHH[WHQVLRQVVU W .smi, .sub, .ssa, .ass) are suppor ted but do not appear on WKHÀOHQDYLJDWLRQPHQX7KHVXEWLWOHÀOHQDPHKDVWREHWKHVDPHDVWKHÀOH name of the vide...
Page 23 - HOHFWDÀOHWRSOD\WKHQSUHVV; Start slideshow of pictures; HOHFWDÀOHWKHQSUHVV
24 To display the selected photo only, press OK . Rotate picture 1 During play, press / to rotate the picture anti-clockwise/clockwise. Start musical slideshow <RXFDQSOD\03:0$PXVLFÀOHVDQG-3(*SKRWRÀOHVVLPXOWDQHRXVO\WRFUHDWHPXVLFDOVOLGHVKRZ7KH03:0$DQG-3(*ÀOHVPXVW be stored on the same disc or USB...
Page 24 - WRFRQÀUP; Tune to a preset radio station; Set RDS clock; Tune to FM
25 Program radio stations manually Note You can program a maximum of 20 preset radio stations. 1 Tune to a radio station. 2 Press REPEAT / PROGRAM to activate programming. 3 Press / to allocate a number from 1 to 20 to this radio station, then press REPEAT / PROGRAM WRFRQÀUP 7KHSUHVHWQXPEHUDQGWKHI...
Page 25 - Show RDS information; VWDWLRQVDUHSURJUDPPHGÀUVW
26 1 Tune to a RDS radio station that transmits time signals. The apparatus reads the RDS time and » sets the clock automatically. Note The accuracy of the transmitted time depends on the RDS station that transmits the time signal. Show RDS information RDS (Radio Data System) is a ser vice that al...
Page 26 - Switch to standby mode; Adjust settings; General setup
27 Note Philips does not guarantee 100% interoperability with all HDMI CEC devices. [EasyLink] [Auto Wakeup TV] - Turn on or off one touch play. [System Standby] - Turn on or off one touch power-off. [System Audio Control] - Turn on or off one touch audio play. [Display Dim] Turn on or off a...
Page 27 - HOHFWDSUHGHÀQHGVHWRISLFWXUHFRORUVHWWLQJV; Audio setup; HQMR\TXLHWYLHZLQJDWQLJKW; Video setup
28 [PAL] – For TV with PAL color system. [NTSC] – For TV with NTSC color system. [Multi] – For TV that is compatible with both PAL and NTSC . [TV Display] The TV format determines the aspect ratio of display according to the type of TV you have connected. [4:3 Pan Scan] – For 4:3 screen TV: ...
Page 28 - WKHÀUVWWLWOH; Preference setup
29 Note Rated discs above the level you set in [Parental] UHTXLUHDSDVVZRUGWREHSOD\HG The ratings are countr y-dependent. To allow all discs to play, select ‘ 8 ’. Some discs have ratings printed on them but are not recorded with ratings. This function has no effect on such discs. Tip You can s...
Page 29 - Greek; Display the software version of this apparatus.; and
30 Note If you forget the password, enter ‘0000’ before you set a new password. [DivX Subtitle] Select a character set that suppor ts the DivX subtitle. [Standard] English, Irish, Danish, Estonian, Finnish, French, German, Italian, Por tuguese, Luxembourgish, 1RUZHJLDQ%RNPnODQG Nynorsk), Spanish, ...
Page 30 - Mute sound; Adjust volume; Adjust volume level; Select a preset sound effect; SOUND; Select surround sound effect; SURROUND; Adjust treble/bass level; TREBLE
31 2 Within 5 seconds, press +/- to set the level for high tones (treble) or low tones (bass). Mute sound 1 During play, press to mute/unmute sound. 8 Adjust volume level and sound effect Adjust volume level 1 During play, press + - to increase/ decrease the volume level. Select a sound effect Note ...
Page 31 - Speakers; Product; Disc
32 7XQHU)0 Tuning Range 87.5 - 108MHz Tuning grid 50KHz Sensitivity - Mono, 26dB S/N Ratio <22dBf Search Selectivity >28dBf Total Harmonic Distor tion <3% Signal to Noise Ratio >50dB Speakers Speaker Impedance 8ohm Speaker Driver, subwoofer 6.25” subwoofer Speaker Driver, woofer 3” woofe...
Page 32 - XSSRU WHGVDPSOLQJIUHTXHQFLHVIRU03; USB playability information; Compatible USB devices:; General information; Supported disc formats
33 Max. MP3 track number : 999. 6XSSRU WHGVDPSOLQJIUHTXHQFLHVIRU03 disc: 32 kHz, 44.1 kHz, 48 kHz.Suppor ted Bit-rates of MP3 disc are: 32, 64, 96, 128, 192, 256 (kbps).The following formats are not suppor ted: Files like *.VMA, *.AAC, *.DLF, *.M3U, *.PLS, *.WAV Non-English Album/Title n...
Page 33 - 0 Troubleshooting; UHTXHVWLQJVHU YLFH,IWKHSUREOHPUHPDLQV
34 No disc detected or disc does not play Inser t a disc. Check if the disc is inser ted upside down. Check the disc type, color system and regional code. Disable the password for parental control or change the rating level.Check for any scratches or smudges on the disc.Replace or clean th...
Page 35 - Screw on the supplied mounting screws.; Mount to a wall; What’s in the supplied mounting kit; Electric drill; Mount the main unit and speakers
36 2 Screw on the supplied mounting screws. 3 If you have installed the back bracket on the back of the main unit, take it off. 4 Mount the back bracket on the back bottom side of the main unit. 2 1 2mm 11 Appendix Mount to a wall Caution Risk of product damage! Always consult professional personn...
Page 36 - Hook the main unit and speakers in place.
37 5 Hook the main unit and speakers in place. English EN


 Philips HDD6320 Manual
 Philips HDD6320, HD6630, HDD6335 Manual
 Philips HDR1000 Manual
 Philips HDRW720 Manual
 Philips HDRW720/69 Manual
 Philips HeartStart MRx Manual
 Philips HF319 Manual
 Philips HF370/HF375 Manual
 Philips HF3332 Manual
 Philips HF3419/01 User Manual
 Philips HF3431/60 User Manual
 Philips HF3451 Manual