Page 2 - IMPORTANT SAFEGUARDS; Read all instructions.; SAVE THESE INSTRUCTIONS
IMPORTANT SAFEGUARDS When using electrical appliances, basic safety precautions should always be followed, including the following: 1. Read all instructions. 2. Do not touch hot surfaces. Use handles or knobs. 3. To protect against fire, electric shock and injury to persons do not immerse cord, plug...
Page 3 - CAUTION; corresponds with your voltage.; INSTRUCTIONS FOR THE POWER; If a long detachable power-supply cord or extension cord is used,
CAUTION This appliance is for household use only. Any servicing, other than cleaning and user maintenance, should be performed by an authorized service center. Do not immerse machine in water. To reduce the risk of fire or electric shock, do not disassemble the machine. There are no parts inside the...
Page 4 - ENGLISH; CONTENTS
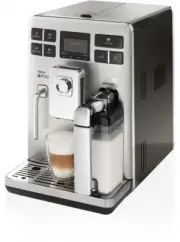
2 ENGLISH Congratulations on your purchase of a Saeco Exprelia full automatic espresso machine! To fully benefi t from the support that Saeco off ers, please register your product at www.philips.com/welcome . This user manual applies to HD8854 / HD8856. The machine is suitable for preparing espresso...
Page 6 - IMPORTANT; WARNING; Warning
4 ENGLISH IMPORTANT Safety instructions This machine is equipped with safety features. Nevertheless read the safety instructions carefully and only use the machine as described in these instructions to avoid accidental injury or damage. Keep this user manual for future reference. The term WARNING an...
Page 7 - Never insert fi ngers or other objects into the coff ee grinder.; Caution; ces, farms or other work; Compliance with standards
5 ENGLISH 5 • Children should be supervised to ensure that they do not play with the machine. • Never insert fi ngers or other objects into the coff ee grinder. Caution • The machine is for household use only. It is not intended for use in en-vironments such as staff kitchens of shops, offi ces, far...
Page 8 - INSTALLATION; Product overview
6 INSTALLATION Product overview 22 23 26 24 25 37 36 31 30 27 28 29 32 35 33 34 12 3 6 78 9 10 45 11 12 13 14 15 16 17 18 19 20 21
Page 9 - General description
7 ENGLISH 7 General description 1. Water tank 2. Pre-ground coff ee compartment 3. Service door 4. Dispensing spout 5. Hot water/steam wand 6. Full drip tray indicator 7. Coff ee bean hopper with lid 8. Grinder adjustment 9. Control panel 10. Carafe coupling cap 11. Drip tray (external) 12. Brew gro...
Page 10 - PREPARING FOR USE; Remove the drip tray with grill from the packaging.
8 ENGLISH PREPARING FOR USE Machine packaging The original packaging has been designed and constructed to protect the machine during transport. We recommend keeping the packaging material for possible future transport. Machine installation 1 Remove the drip tray with grill from the packaging. 2 Remo...
Page 11 - Open the lid and remove the water tank by the handle.
9 ENGLISH 9 5 Open the lid and remove the water tank by the handle. 6 Rinse the water tank under fresh water. 7 Fill the tank with fresh water up to the MAX level and re-insert it into the machine. Make sure it is fully inserted. Caution: Never fi ll the water tank with warm, hot, sparkling water or...
Page 13 - USING THE MACHINE FOR THE FIRST TIME; Place a container under the dispensing spout to catch the small; Manual rinse cycle; Place a container under the dispensing spout.
11 ENGLISH 11 USING THE MACHINE FOR THE FIRST TIME Automatic rinse/self-cleaning cycle When warm-up is completed, the machine automatically performs a rinse/self-cleaning cycle of the internal circuit with fresh water. This takes less than a minute. 16 Place a container under the dispensing spout to...
Page 15 - Measuring and programming water hardness
13 ENGLISH 13 8 Once the water has been dispensed, remove and empty the container. 9 Repeat the process from step 5 to step 8 until the water tank is empty. Then, continue with step 10. 10 At the end, fi ll the water tank again up to the MAX level. Now the ma- chine is ready for brewing coff ee. Not...
Page 17 - “INTENZA+” water fi lter installation; Remove the “INTENZA+” water fi lter from its packaging, immerse it ver-
15 ENGLISH 15 “INTENZA+” water fi lter installation We recommend you to install the “INTENZA+” water fi lter as this prevents lime scale to build up in your machine and preserves a more intense aroma to your espresso coff ee. You can purchase separately the INTENZA+ water fi lter. Please refer to th...
Page 19 - Replacing the “INTENZA+” water fi lter
17 ENGLISH 17 12 Press the “ ” button to confi rm that you have inserted the water fi lter and fi lled the water tank. 13 Press the “ ” button to confi rm that a container is placed under the water spout. 14 The machine starts dispensing water. This page will be displayed. Once the machine stops dis...
Page 20 - ADJUSTMENTS; Open the lid of the coff ee bean hopper.
18 ENGLISH ADJUSTMENTS The machine allows for certain adjustments so that you can brew the best tasting coff ee possible. Saeco Adapting System Coff ee is a natural product and its characteristics may change according to its origin, blend and roast. The machine is equipped with a self-adjusting syst...
Page 21 - Press and turn the grinder adjustment knob one notch at a time. You; Adjusting coff ee crema and intensity (Saeco Brewing System); The coff ee fl ow speed may be adjusted while brewing.
19 ENGLISH 19 2 Press and turn the grinder adjustment knob one notch at a time. You will taste the diff erence after brewing 2-3 cups of espresso. 3 The reference marks on the coff ee bean hopper lid indicate the grind setting. There are 8 diff erent grind settings to choose from: - Very coarse grin...
Page 22 - Adjusting the dispensing spout; Selection must be made prior to selecting coff ee.
20 ENGLISH Adjusting the dispensing spout The height of the dispensing spout can be adjusted to better fi t thedimensions of the cups that you wish to use. Move the dispensing spout up or down with your fi ngers to adjust its height as shown in the image. Adjusting the aroma (coff ee strength) Choos...
Page 23 - For the use of large cups
21 ENGLISH 21 The recommended positions are:For the use of small cups; For the use of large cups; For the use of latte macchiato cups. Note: The dispensing spout can also be removed to allow the use of very large containers. Two cups can be placed under the dispensing spout to brew two cups of coff ...
Page 24 - Adjusting the coff ee length; STOP
22 ENGLISH Adjusting the coff ee length The machine allows you to adjust the amount of brewed coff ee or milk according to your taste and the size of your cups.Each time one of the buttons “ ” “ ” “ ” and “ ” is pressed, the machine brews a pre-set amount of product. Each button may be individually ...
Page 25 - ESPRESSO, COFFEE AND LONG COFFEE BREWING
23 ENGLISH 23 ESPRESSO, COFFEE AND LONG COFFEE BREWING Before brewing coff ee, make sure that there are no warnings shown on the display, and that the water tank and coff ee bean hopper are fi lled. Espresso, coff ee and long coff ee brewing using coff ee beans 1 Place 1 or 2 cups under the dispensi...
Page 26 - Espresso, coff ee and long coff ee brewing using pre-ground coff ee
24 ENGLISH Espresso, coff ee and long coff ee brewing using pre-ground coff ee This function allows to use pre-ground and decaff einated coff ee.With the pre-ground coff ee function you can only brew one coff ee at a time. 1 To select the pre-ground coff ee function, press the “ ” button until this ...
Page 28 - MILK CARAFE; The milk carafe needs be fi lled before use.
26 ENGLISH MILK CARAFE This chapter explains how to use a milk carafe to prepare a cappuccino, latte macchiato or hot milk. Note: Before using the milk carafe, clean it thoroughly as described in the chap-ter “Cleaning and Maintenance” chapter. We recommend to fi ll it with cold milk (approx. 5°C). ...
Page 29 - The milk carafe is now ready to use.; Inserting the milk carafe
27 ENGLISH 27 4 Place back the lid and close the milk carafe dispenser by turning it counter clockwise. The milk carafe is now ready to use. Inserting the milk carafe 1 Slightly tilt the milk carafe and then insert the front part into the ma- chine. C D A B B 2 At this stage the carafe holes (A) are...
Page 30 - Push the carafe towards the bottom while rotating at the same time,; Do not use force while inserting the carafe.; Removing the milk carafe; Close the milk carafe dispenser by turning it counter clockwise.
28 ENGLISH 3 Push the carafe towards the bottom while rotating at the same time, until it is locked at the (external) drip tray (E). Caution: Do not use force while inserting the carafe. Removing the milk carafe 1 Close the milk carafe dispenser by turning it counter clockwise. E 2 Rotate the carafe...
Page 31 - Emptying the milk carafe; Open the milk carafe dispenser by turning it clockwise.
29 ENGLISH 29 Emptying the milk carafe 1 Open the milk carafe dispenser by turning it clockwise. 3 Lift the lid. Empty the milk carafe and clean it properly. Note: After each use, clean the milk carafe as described in the “Cleaning and Maintenance” chapter. 2 Press the release buttons to allow the l...
Page 32 - CAPPUCCINO BREWING; Place a cup under the coff ee dispensing spout.
30 ENGLISH CAPPUCCINO BREWING Warning: Danger of scalding! Dispensing may be preceded by short sprays of milk and steam. Risk of burning. Never seize the carafe handle during the cleaning cycle: risk of scal-ding! Wait until the end of the cycle before removing the milk carafe. 1 Fill the milk caraf...
Page 34 - Adjusting the cappuccino length; MEMO”
32 ENGLISH Adjusting the cappuccino length Each time the “ ” button is pressed, the machine brews a pre-set quan- tity of cappuccino into the cup. The machine allows you to adjust the amount of cappuccino according to your taste and the size of your cups. 1 Fill the milk carafe with milk and install...
Page 37 - Hot milk
35 ENGLISH 35 4 Once the milk froth has been poured, the machine brews coff ee. The brewing can be stopped earlier by pressing the “ ” button. LATTE MACCHIATO HOT MILK HOT WATER SPECIAL BEVERAGES 2 Press the “ ” button to enter the SPECIAL BEVERAGES menu. 3 After selecting “LATTE MACCHIATO” by press...
Page 38 - Hot water dispensing
36 ENGLISH 2 Press the “ ” button to enter the SPECIAL BEVERAGES menu. 3 After selecting “HOT MILK” by pressing the “ ” or “ ” scrolling button, confi rm with “ ”. 4 The machine starts pouring hot milk. The pouring can be stopped earlier by pressing the “ ” button. Hot water dispensing Warning: Dang...
Page 39 - Steam dispensing
37 ENGLISH 37 2 Press the “ ” button to enter the SPECIAL BEVERAGES menu. 3 After selecting HOT WATER by pressing the “ ” or “ ” scrolling button, confi rm with “ ”. 4 Hot water is dispensed. The dispensing can be stopped earlier by pres- sing the “ ” button. 5 At the end, remove the container with ...
Page 40 - BEVERAGE PROGRAMMING
38 ENGLISH 3 After selecting STEAM by pressing the “ ” or “ ” scrolling button, confi rm with “ ”. 4 Steam is dispensed. 5 Immerse the hot water/steam wand in the product to be heated. The dispensing can be stopped earlier by pressing the “ ” button. BEVERAGE PROGRAMMING You can program the machine ...
Page 41 - Cappuccino programming; COFFEE QUANTIT Y
39 ENGLISH 39 Cappuccino programming The following procedure describes the programming of a cappuccino. Below the settings of the each submenu are explained. You can select these by pressing the “ ” or “ ” scrolling button. Confi rm your settings with “ ”. Press “ ” to select CAPPUCCINO from the bev...
Page 42 - Hot water programming
40 ENGLISH COFFEE LENGTH By adjusting the bar on the display by pressing the “ ” or “ ” scrolling button, you can choose the quantity of water used for coff ee brewing.Press OK to confi rm the adjustment. By adjusting the bar on the display by pressing the “ ” or “ ” scrolling button, you can choose...
Page 43 - WATER QUANTIT Y; MACHINE PROGRAMMING
41 ENGLISH 41 WATER QUANTIT Y DEFAULT 2 Select HOT WATER by pressing the “ ” or “ ” scrolling button. Press “ ” to confi rm. By adjusting the bar on the display by pressing the “ ” or “ ” scrolling button, you can choose the quantity of hot water to be dispensed.Press OK to confi rm the adjustment. ...
Page 44 - General menu; The general menu allows you to change the operation settings.; Display menu
42 ENGLISH General menu The general menu allows you to change the operation settings. GENERAL MENU TONE ECOMODE STAND-BY SETTINGS The TONE function de-/activates the sound feedback. The ECOMODE enables you to save energy by limiting the boiler activation to one when the machine starts up. If you wan...
Page 45 - Water menu; WATER MENU
43 ENGLISH 43 Water menu The WATER MENU allows adjusting water parameters for optimal coff ee. WATER MENU HARDNESS ENABLE FILTER ACTIVATE FILTER Under HARDNESS, you can set the level of water hardness. To measure water hardness, refer to chapter “MEASURING AND PROGRAM-MING WATER HARDNESS” By enablin...
Page 46 - Maintenance menu
44 ENGLISH Maintenance menu The MAINTENANCE MENU allows setting all the functions for correct ma-chine maintenance. MAINTENANCE COUNTERS DESCALING BREW GROUP CLEAN CARAFE CLEANING CARAFE CLEAN The COUNTERS function shows how many products have been brewed for every single type of coff ee since the l...
Page 47 - CLEANING AND MAINTENANCE; Use a soft, dampened cloth to clean the machine.
45 ENGLISH 45 CLEANING AND MAINTENANCE Daily cleaning of the machine Caution: Timely cleaning and maintenance of your machine is very important as it prolongs the life of your machine. Your machine gets exposed to moist, coff ee and lime scale continuously!In this chapter it is described in detail w...
Page 48 - Empty the coff ee grounds drawer and wash it with fresh water.; Daily cleaning of water tank; led) from the water tank and wash it with fresh water.
46 ENGLISH 3 Empty the coff ee grounds drawer and wash it with fresh water. 4 Empty and wash the (internal) drip tray and the cover with fresh water. 5 Correctly reinstall all the components. 6 Insert the tray and the coff ee grounds drawer and close the service door. Note: If the coff ee ground dra...
Page 49 - Weekly cleaning of the machine
47 ENGLISH 47 Daily cleaning of the milk carafe: AUTO CLEAN cycle (after each use) After each brewing of a milk beverage the machine performs an automatic cleaning cycle by routing shots of steam through the milk dispenser. This cycle may also be manually activated by pressing the “ ” button on the ...
Page 50 - Remove the grill and wash it thoroughly.
48 ENGLISH 3 Remove the grill and wash it thoroughly. 4 Remove the support under the grill. Wash the support and the drip tray. 5 Dry, reassemble and reinsert it in the machine. 6 Remove the dispensing spout and wash it with water. 7 Clean the pre-ground coff ee compartment with a brush or a dry clo...
Page 51 - Clean the hot water/steam wand and the display with a dry cloth.; Weekly cleaning of the milk carafe; The carafe must be removed from the machine and emptied before
49 ENGLISH 49 8 Clean the hot water/steam wand and the display with a dry cloth. Weekly cleaning of the milk carafe The weekly cleaning is more thorough as it removes any milk residues from the milk dispenser of the carafe. 1 The carafe must be removed from the machine and emptied before cleaning. 2...
Page 52 - Do NOT wash the carafe components in the dishwasher.
50 ENGLISH 5 Remove the connector which is in contact with the machine. 6 Remove the handle with the suction tube. 7 Remove the suction tube. 8 Pull out the external fi tting. 9 Remove the internal fi tting. 10 Clean all the parts thoroughly with lukewarm water. 11 Reassemble the parts following the...
Page 53 - Weekly cleaning of the brew group; Do not use detergent/soap to clean the brew group.
51 ENGLISH 51 Weekly cleaning of the brew group The brew group should be cleaned every time the coff ee bean hopper is fi lled or at least once a week. 1 Press the button and open the service door. 2 Remove the (internal) drip tray and coff ee grounds drawer. 3 To remove the brew group, press the «P...
Page 54 - Make sure the hook to lock the brew group is in the correct position
52 ENGLISH 8 Gently pull down the lever until it is in contact with the brew group base and the two reference signs on the side of the brew group do match. 9 Make sure the hook to lock the brew group is in the correct position by fi rmly pressing the “PUSH” button until you hear a click. Check if th...
Page 55 - Monthly cleaning of the milk carafe
53 ENGLISH 53 Monthly cleaning of the milk carafe In the monthly cleaning cycle we use the Saeco Milk Circuit Cleaner to keep the entire circuit clean of milk residues. You can purchase separately the Milk Circuit Cleaner. Please refer to the maintenance products page for further details. 1 Select t...
Page 56 - Put the lid back on.
54 ENGLISH 6 Put the lid back on. 7 Rotate the milk dispenser counter-clockwise to the lock position. 8 Insert the milk carafe into the machine. 9 Place a large container (1,5 lt ) under coff ee the dispensing spout. Open the milk dispenser by turning it clockwise.
Page 57 - Never drink the solution dispensed during the procedure.
55 ENGLISH 55 10 Press the “ ” button to start the cycle. The machine starts dispensing the cleaning solution through the milk dispenser. 11 This icon is displayed. The bar shows the cycle progress. Warning: Never drink the solution dispensed during the procedure. 12 When the machine stops dispensin...
Page 58 - dispenser. The bar shows the cycle progress.; Monthly lubrication of the brew group; Apply the lubricant evenly on both side guides.
56 ENGLISH 16 The machine starts dispensing water from both the coff ee and the milk dispenser. The bar shows the cycle progress. 17 At the end of the cycle, the machine returns to the product brew menu page. 18 Disassemble and wash the milk carafe as described in the “Weekly cleaning of the milk ca...
Page 59 - Lubricate the shaft too.; Monthly cleaning of the brew group with “Coff ee Oil Remover”; Select the MAINTENANCE option in the machine menu.
57 ENGLISH 57 2 Lubricate the shaft too. 3 Insert the brew group in its seat until it locks into place (see “Weekly Cleaning of the Brew Group” chapter). 4 Insert the (internal) drip tray and coff ee grounds drawer and close the service door. Monthly cleaning of the brew group with “Coff ee Oil Remo...
Page 61 - This icon is displayed. The bar shows the cycle progress.; When the machine stops dispensing, remove and empty the container.; Monthly cleaning of the coff ee bean hopper
59 ENGLISH 59 7 This icon is displayed. The bar shows the cycle progress. Warning: Never drink the solution dispensed during the procedure. 8 When the machine stops dispensing, remove and empty the container. 9 Clean the brew group as described in the chapter “Weekly Cleaning of the Brew Group. Mont...
Page 62 - DESCALING
60 ENGLISH DESCALING The descaling process takes approx. 35 minutes. Lime scale builds up inside the machine during use. It needs to be remo-ved regularly as it may clog the water and coff ee circuit of your machine. The machine indicates when descaling is needed. Caution: Not doing this will ultima...
Page 65 - The descaling cycle is now complete.
63 ENGLISH 63 19 The descaling cycle is now complete. Note: At the end of the descaling cycle, wash the brew group as described in the “Weekly Cleaning of the Brew Group” chapter. The rinsing cycle is performed in order to have the circuit cleaned with a preset amount of water to ensure proper machi...
Page 66 - MEANING OF THE DISPLAY; Help Message Displayed
64 ENGLISH MEANING OF THE DISPLAY Help Message Displayed How to Reset the Message CLOSE HOPPER DOOR Close the bean hopper inner cover. ADD COFFEE Fill the coff ee beans hopper. INSERT BREW GROUP The brew group must be inserted into the machine. INSERT COFFEE GROUNDS DRAWER Insert the coff ee grounds...
Page 67 - Insert the milk carafe to start brewing. Press “; ESC; The machine needs the “INTENZA+” water fi lter to be replaced.
65 ENGLISH 65 Help Message Displayed How to Reset the Message TURN CARAFE INTO BREWING POSITION ESC Open the milk dispenser of the carafe to brew products.Press the button “ ESC ” to exit. TURN CARAFE INTO RINSING POSITION ESC Close the milk dispenser of the carafe to start the rinsing cycle of the ...
Page 68 - TROUBLESHOOTING; for a list of frequently; Machine actions; The power button is set to “0”.
66 ENGLISH TROUBLESHOOTING This chapter summarizes the most common problems you could en-counter with your machine. If you are unable to solve the problem with the information below, visit www.philips.com/support for a list of frequently asked questions or contact the Philips Saeco hotline in your c...
Page 69 - Gear is not in initial position.
67 ENGLISH 67 Machine actions Causes Solutions The machine takes a long time to warm up or the amount of water dis-pensed from the wand is too little. The machine circuit is clogged by limescale. Descale the machine. The brew group cannot be removed. The brew group is out of place. Turn the machine ...
Page 71 - ENERGY SAVING
69 ENGLISH 69 ENERGY SAVING Stand-by The Saeco full automatic espresso machine is designed for energy saving- proven by the Class A energy label. After a certain time of inactivity that can be programmed individually (see chapter “Machine Programming”), the machine turns off automatically. If a prod...
Page 72 - Disposal
70 ENGLISH Disposal Do not throw away the machine with the normal household waste at the end of its life, but hand it in at an offi cial collection point for recycling. By doing this, you help to preserve the environment. - The packing materials can be recycled. - Machine: unplug the machine and cut...
Page 73 - TECHNICAL SPECIFICATION
71 ENGLISH 71 TECHNICAL SPECIFICATION The manufacturer reserves the right to make changes to the technical specifi cations of the product Nominal Voltage - Power Rating - Power Supply See label on the appliance Housing material Thermoplastic material Size (w x h x d) 245 x 360 x 420 mm Weight 13.4 K...
Page 74 - ORDERING MAINTENANCE PRODUCTS; service
72 ENGLISH ORDERING MAINTENANCE PRODUCTS For cleaning and descaling, use Saeco maintenance products only.You can purchase these at the Philips online shop at www.shop.philips.com/ service , your local dealer or at authorised service centers. If you have any diffi culties obtaining maintenance produc...
Page 75 - - Maintenance Kit CA 6706
73 ENGLISH 73 - Maintenance Kit CA 6706 - Milk Circuit Cleaner CA6705


 Philips HD7900/50 User Manual
 Philips HD8425/19 User Manual
 Philips HD8602/91 User Manual
 Philips HD8743 Manual
 Philips HD8743/19 Quick Guide
 Philips HD8745/19 Quick Guide
 Philips HD8856/04 Quick Guide
 Philips HD8856/06 Quick Guide
 Philips HD9100/80 User Manual
 Philips HD9126/00 User Manual
 Philips HD9126/90 User Manual
 Philips HD9137/90 User Manual