Page 2 - Introduction
2 Recycling Directive – To minimise harm to the environment, the batteries suppliedwith the TV set do not contain mercury or nickel cadmium. If possible, when disposing of batteries, use recycling means available to you. Your TV set uses materials whichare reusable or which can be recycled. To minim...
Page 3 - Safety Information
3 S AFETY I NFORMATION AND U SEFUL T IPS Safety Information • Disconnect mains plug when : – the red light below the TV screen is flashing continuously. – a bright white line is displayed across the screen. – cleaning the TV screen. Never use abrasive cleaning agents. Use a slight damp chamoisleathe...
Page 4 - Symptom; Mute
4 B EFORE C ALLING S ERVICE Below is a list of frequently occurred symptoms. Before you call for service, make these simplechecks. Some of these symptoms can easily be rectified if you know what to do. Symptom What you should do Colour patch • Switch off the TV by the mains power button. Wait for 20...
Page 5 - Antenna Connection; Connect the aerial plug to the antenna socket; Mains Connection; Note; Switching on the Set; Power; OOKING UP; ARE OF; • Insert the correct type of batteries into the
5 Antenna Connection • Connect the aerial plug to the antenna socket ¬ ¬ ¬ ¬ ¬ on the backcover. • Insert the mains plug into the wall socket. Mains Connection • For correct mains voltage, refer to type sticker at the rear of the TV set • Consult your dealer if mains supply is different. Note : This...
Page 7 - “Pr” INPUT; sockets on the TV to the; “Pr” OUTPUT; sockets on the DVD to view playback of DVD discs.
7 C ONNECTING THE A UDIO /V IDEO S OCKETS (P LACKBACK ) You can view the playback of DVD discs by using the COMPONENT VIDEO INPUT sockets on therear of the TV. – Connect the “Y”, “Pb” and the “Pr” INPUT sockets on the TV to the “Y”, “Pb” and “Pr” OUTPUT sockets on the DVD to view playback of DVD dis...
Page 8 - Connection for recording from the TV channel; INPUT; Connection for recording from one VCR to another VCR; MONITOR OUTPUT; Back of VCR
8 C ONNECTING THE A UDIO /V IDEO S OCKETS (R ECORDING ) Connection for recording from the TV channel – Connect the corresponding INPUT sockets of the VCR to the MONITOR OUTPUT sockets on the rear of the TV. – To enhance the sound of your TV, connect the AUDIO L and R sockets to an external audio sys...
Page 9 - UNCTIONS
9 & Power button – Switch set off temporarily to standby mode.(The red light indicator lights up when the setis on standby mode). – To switch on set from standby mode, pressChannel +/– , Digit (0 -9) or Power button. é Colour buttons – In teletext mode, the colour buttons allow you toaccess dire...
Page 10 - Frownie button; Allows you to select the next item on the menu.; Sleeptimer Button
10 F UNCTIONS OF R EMOTE C ONTROL 3 Main Index Button In teletext mode, press button to return to themain index page. 4 Frownie button Allows to delete stored personal preferencechannels in your Personal Preference list. Fordetailed description of functions, refer to section on“Personal Zapping ”. 5...
Page 11 - TV; ONTROLS
11 F UNCTIONS OF TV C ONTROLS A A A A A A 1 Mains Power button Switch mains power on or off. 2 Standby Light indicator Indicate red light when standby mode is activated. 3 Remote Sensor Acts as a sensor for activating the controls of the TVwhen remote control handset is aimed at it. 4 Volume button ...
Page 12 - ELECTING; Select; Install; Enter the Install menu.
12 ¸ Operating instructions generally explains the operation of the TVset using the buttons on the remote control unless otherwise stated.Please read the following instructions carefully and follow the stepsas shown to familiarise yourself with the installations and all featuresavailable in your set...
Page 13 - Press button repeatedly until; Auto Store; Step
13 A UTOMATIC T UNING OF C HANNELS Automatic tuning of channels allows you to store each programme automatically. Enter main menu. Press button repeatedly until Install is selected. Enter install menu. Select Auto Store . Start automatic tuning ofchannels. When tuning is completed,exit menu from scr...
Page 15 - Channel; Key in the channel number.; Store; Store tuned channel.; Exit menu from screen.
15 C HANNELS M ANUAL T UNING OF C HANNELS ¸ Manual Store o ■ Colour System ■ Sound System ■ Search ✔ Channel 2 π ■ Fine Tune ■ Store œ Manual Store o ■ Colour System ■ Sound System ■ Search ■ Channel ■ Fine Tune ✔ Store Store? π œ ˙ ¸ 9 10 11 Manual Store o ■ Colour System ■ Sound System ■ Search ■ ...
Page 17 - Enter manual store menu.
17 F INE T UNING OF C HANNELS This feature allows you to adjust picture reception in areas of weak reception. Enter main menu. Press button repeatedly until Install is selected. Enter install menu. Press button repeatedly until Manual Store is selected. Enter manual store menu. Press button repeated...
Page 18 - OW
18 E DITING OF C HANNELS This feature allows you to skip or edit channels which have bad or weak TV signal or channelsthat you do not watch often. Note : Once a channel is skipped, you cannot have access to it by the CH (Channel) + or – button. You can only have access to the channel by the Digit (0...
Page 19 - TV P; ICTURE; The picture menu allows you to make adjustments to the picture.; Picture menu items
19 ¸ A DJUSTING THE TV P ICTURE The picture menu allows you to make adjustments to the picture. Main o ✔ Picture π Brightness ■ Sound Colour ■ Features Contrast ■ Install SharpnessColour TempMore... œ Picture o ✔ Brightness p ❘ ❘ ❘ ❘ ❘ ❘ ❘ ❘ ❘ ❘ ❘ ❘ ❘ ❘ ❘ ❘ ❘ ❘ ❘ ❘ ❘ ❘ ❘ 59 π ■ Colour ■ Contrast ■ S...
Page 20 - TV S; OUND; The sound menu allows you to make adjustments to the sound.; Enter; Sound; Sound menu items
20 A DJUSTING THE TV S OUND The sound menu allows you to make adjustments to the sound. Display the main menu on screen. Select Sound menu. Enter Sound menu. Select item. Adjust level or select desiredsetting. Exit menu from screen. Main o ✔ Picture π Brightness ■ Sound Colour ■ Features Contrast ■ ...
Page 21 - FORMAT; or; When to use the Screen Formats
21 U SING THE S CREEN F ORMAT You can have a choice of two formats for your viewing pleasure, namely : - 4:3 mode and the EXPAND 4:3 mode through the FORMAT menu. Display the main menu on screen. Press button repeatedly until Features is selected. Enter the Features menu. Press button repeatedly unt...
Page 22 - Display the main menu on screen.; Signal Strength; Press the button to select; On
22 A CTIVATING THE S IGNAL S TRENGTH The Signal Strength feature displays the signal strength level when the On option is selected. The signal strength level will be indicated at the bottom of the screen whenever you switchchannel. Display the main menu on screen. Press button repeatedly until Signa...
Page 23 - Defintion of Picture Settings
23 S MART P ICTURE C ONTROL Whether you are watching a movie or video game, your TV has automatic video controlsettings matched to your current program source or content. The Smart Picture feature quicklyresets your TV’s video controls of program for a number of different types of programs andviewin...
Page 24 - Press botton repeatedly to cycle through the 4 settings namely,; Definition of Sound Settings; : Sound settings are set to your preference.
24 S MART S OUND C ONTROL Whether you are watching a movie or video game, your TV has automatic sound controlsettings matched to your current program source or content. The Smart Sound feature quicklyresets your TV’s sound controls of program for a number of different types of programs andviewing co...
Page 25 - Adding Channels to the Favourite list; To view through the favourite list; Press button to display list.
25 P ERSONAL Z APPING A list or series of favourite TV programs can be selected and stored in the 4 coloured buttonswith the Personal Zapping feature. With this feature you can easily viewed up to a total of 10preferred channels for each coloured button. Adding Channels to the Favourite list Select ...
Page 26 - Press button
26 U SING T HE T ELETEXT If a TV channel broadcast contains teletext information, each channel that broadcaststeletext transmits a page (index page) with information on how to use the teletext system,usually on page 100. The system transmitted is indicated in the option line at the bottomof the scre...
Page 27 - Interrupt; Press the button once to reveal; Concea
27 U SING T HE T ELETEXT § Interrupt Press the button to change to TVmode. Press the button again toreturn to teletext mode and to theteletext page. è Enlarge Press the button once to enlargeand view the top half of the page.Press the button the second timeto enlarge and view the bottomhalf of the p...
Page 28 - PECIFICATIONS
28 S PECIFICATIONS NoteFor Operating Voltage, Frequency, Power Consumption and Version Number, refer to thetype number at the rear of the set. 28-29_21PT5207/E 07/16/03, 3:26 PM 28 Acr41.pdf 2005-09-08 1:56:22 PM Acr41.pdf 2005-09-08 1:56:22 PM 21PT5107 / 5121 Picture tube screen size 550 mm Picture...


 Philips 32PW8609 Manual
 Philips 32PW8719 User Manual
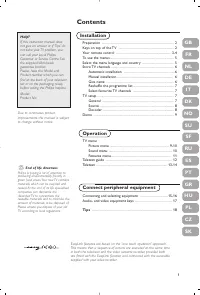 Philips 32PW9520 User Manual
 Philips 32PW9551 User Manual
 Philips 14PT1374 User Manual
 Philips 21PT5121 Manual
 Philips 21PT5458 User Manual
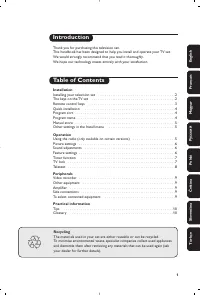 Philips 21PT5507 User Manual
 Philips 21PT5618 User Manual
 Philips 25PT4457 User Manual
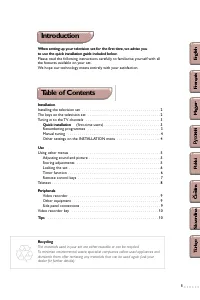 Philips 25PT5105 User Manual
 Philips 28PW9551 Manual