Page 2 - Caring for the environment; Saving energy; Disposing of your old appliance
Caring for the environment 2 Disposing of the packagingmaterial The packaging material is used forhandling and protects the appliancefrom transport damage. The packagingmaterial used is selected from materialswhich are environmentally friendly fordisposal and can generally be recycled.Recycling the ...
Page 3 - Contents; Changing bean system settings (
Contents 3 Caring for the environment ......................................................................................... 2 Saving energy .................................................................................................................. 2 Warning and Safety instructions ..........
Page 4 - Switching MobileStart
Contents 4 Expert mode ................................................................................................................... 38 Switching Expert mode on and off............................................................................... 38 Expert mode: assigning bean containers .......
Page 5 - System lock; Cleaning and care
Contents 5 Display ............................................................................................................................. 48 Brightness .................................................................................................................. 48 Colour scheme ............
Page 7 - Warning and Safety instructions
Warning and Safety instructions 7 This coffee machine complies with all the stipulated safetyrequirements. Inappropriate use can, however, lead to personalinjury and material damage. Read the operating instructions carefully before using the coffeemachine. They contain important information on safet...
Page 8 - Correct application
Warning and Safety instructions 8 Correct application This coffee machine is intended for home use. This coffee machine is not intended for outdoor use. This coffee machine must not be used at altitudes above 2000 m. It must only be used as a domestic appliance to make espresso, cappuccino, ...
Page 9 - Technical safety
Warning and Safety instructions 9 Danger of suffocation! Whilst playing, children may become entangled in packaging material (such as plastic wrapping) or pull thepackaging material over their head, presenting the risk of suffocation.Keep packaging material away from children. Technical safety I...
Page 10 - Mains water connection
Warning and Safety instructions 10 For safety reasons, this machine may only be used when it has been built in. If the coffee machine is to be built in above another appliance, there must be a full-width, closed intermediate shelf between them(except when it is combined with a Gourmet drawer or ...
Page 11 - Correct use
Warning and Safety instructions 11 Correct use Danger of burning and scalding on the dispensing spouts. The liquids and steam dispensed are very hot.Keep well away from the area underneath the spouts when hotliquids and steam are being dispensed.Do not touch hot components.Hot liquid or steam coul...
Page 12 - Accessories and spare parts
Warning and Safety instructions 12 Do not use coffee beans which have been treated with caramel, sugar or other substances including sugary liquids. Sugar will damagethe coffee machine. If decaffeinated coffee beans are used after dispensing a drink with caffeinated beans, there may still be res...
Page 14 - Appliance description; Exterior view
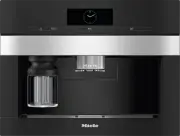
Appliance description 14 Exterior view 1 2 3 4 5 6 7 8 9 10 11 a On/Off button b Optical interface (for the Miele Customer Service Department only) c MobileStart sensor d Movement sensor e “Back” sensor f Touch display g “Light” sensor h Door handle i Height-adjustable central spout with...
Page 15 - Interior view
Appliance description 15 Interior view a Bean containers ( Type A and Type C ) b Milk valve c Height-adjustable central spout with lighting d Grinder setting e Bean container ( Type B ) f Fan outlet g Water container h Drip tray with lid i Brew unit j Waste container k Maintenance container l Recept...
Page 16 - The milk container; cannot
Appliance description 16 The milk container a Lid b Milk suction tube c Sensor d Glass flask Central spout with cup rimsensor The central spout with cup rim sensorfeatures automatic spout adjustment.Thanks to this spout adjustmentfunction, the central spout moves downautomatically at the start of a ...
Page 17 - Symbols in the display; Symbol; OK
Appliance description 17 Symbols in the display The display shows symbols as well as text, e.g. symbols for the various drinks.Some of these are explained below. Symbol Explanation This symbol indicates that there is additional information andadvice about using the coffee machine. Select OK to con...
Page 18 - Operation; Touch display; Miele; Long coffee; centre
Operation 18 Touch display The delicate touch display can be scratched by pointed or sharp objects, e.g.pens.Only touch the display with your fingers. The touch display is split into multiple areas. 12:00 Miele Long coffee Coffee Espresso Ristretto Profiles The menu path appears on the...
Page 19 - Operating actions; orange; Entering numbers with the roller
Operation 19 Operating actions All the selectable options are displayed in black or white according to your selectedcolour scheme.Each time you touch a possible option, the relevant characters (word and/orsymbol) light up orange . Selecting a menu option Touch the field or value you want in the di...
Page 20 - Entering numbers using the numerical keypad; Entering a name; Displaying the context menu
Operation 20 Entering numbers using the numerical keypad Touch the centrally displayed orange value and keep your finger on it until thenumerical keypad appears. OK Select the value you want: as soon as you enter a valid value, OK turns green. Use the arrow to delete the last number entered. ...
Page 23 - Before using for the first time; Selecting the display language; Setting the date; Setting the time of day; Setting the water hardness level
Before using for the first time 23 Before using for the first time Connect the coffee machine to thewater and electricity supplies. Install the coffee machine by buildingit in. Remove any notices from themachine. Remove the protective foil from thedrip tray cover. Clean the water container...
Page 24 - On; Fitting the cleaning cartridge
Before using for the first time 24 Selecting the water supply (Mainswater) The coffee machine is intended to beplumbed into the mains water supply.You can select one of the followingoptions: - On : The water container will be filled automatically via the mains waterconnection. - Off : You must fill ...
Page 25 - Fitting the descaling cartridge; Close the appliance door.; and select the required; Selecting the Performance mode; Select the mode you want.
Before using for the first time 25 Screw the cleaning cartridge into theholder upside down. Push the holder and cartridge into thecoffee machine until the holderaudibly clicks into place. Fitting the descaling cartridge Take the descaling cartridge out of itspackaging. Pull the descaling car...
Page 26 - Setting up the bean system; Filling the bean containers
Before using for the first time 26 Setting up the bean system After setting up the coffee machine, youwill be prompted to set up the beansystem. The coffee machine will assistyou when first filling and naming thebean containers. Touch Yes . If you select No , the assistant for setting up the bean...
Page 27 - Assigning bean types
Before using for the first time 27 Now name the other 2 beancontainers. <Type XY> Allocate “” will appear in the title bar of the display. Assigning bean types Assign the individual bean types to thecoffee drinks you would like. Select the drinks that are to beprepared with this bean type....
Page 28 - Bean system; Type of beans
Bean system 28 Coffee or espresso can be made fromwhole roasted coffee beans which arefreshly ground for each portion.Your coffee machine has a bean systemwith 3 bean containers which can befilled with different types of beans oreven just one type. You can allocatebean types to individual coffee dri...
Page 29 - Touch; Change the assignment as required.; to select all the
Bean system 29 If you switch from having identicalnames to having different names, youwill then need to assign coffee drinksto the newly named bean type. Changing how the bean containers areassigned If you have created extra user profilesfor coffee drinks in addition to thestandard Miele profile, th...
Page 30 - Filling the water container; Risk to health due to; every day; Risk of damage due to incorrect
Filling the water container 30 Risk to health due to contaminated water.Bacteria can develop in water whichhas been sitting in the watercontainer for too long and is a risk toyour health. Water that gets left inthe inlet hose can also impair theflavour if you do not make any drinksfor a long time....
Page 31 - Switching on and off; Touch the On/Off switch
Switching on and off 31 Switching the coffee machineon Touch the On/Off switch . The coffee machine heats up and rinsesthe pipework. Hot water will run out ofthe central spout.You can now make drinks. If the coffee machine is already atoperating temperature, rinsing will nottake place. Switchin...
Page 32 - Making drinks; Coffee
Making drinks 32 Danger of burning and scalding on the dispensing spouts.The liquids and steam dispensed arevery hot and can cause scalding.Keep well away from the areaunderneath the spouts when hotliquids and steam are beingdispensed.Do not touch hot components. Coffee Coffee drinks in detail You...
Page 33 - Rinse the milk pipework manually; Filling and inserting the milk container; Milk is; not; cooled in the milk
Making drinks 33 As soon as you select a drink containingmilk, the machine will start to heat up.The milk will be drawn up into thecentral spout where it is heated bysteam and also frothed for drinksrequiring milk froth.You can prepare hot milk and milk frothusing cow’s milk or alternative plant-bas...
Page 35 - Tea
Making drinks 35 Touch the symbol immediately before or after you start making adrink. Dispensing starts and the symbol is highlighted in orange in the display.2 portions of the desired drink will bedispensed. Coffee pot You can make several cups of coffee oneafter the other automatically wi...
Page 37 - Dispensing warm or hot water; The drinks menu is displayed.
Making drinks 37 Select the number of cups you want(3 to 8). You can interrupt preparation at anytime. Touch Cancel . Dispensing warm or hot water You can choose between the followingoptions: - Hot water at approx. 90 °C- Warm water at approx. 65 °C The drinks menu is displayed. Place a suitab...
Page 38 - Dispensing
Expert mode 38 In Expert mode, you can allocate a beantype temporarily and change the portionsize while the drink is being made. Thesetting will not be saved and will only apply for the current drink. Switching Expert mode on andoff Expert mode is located in the pull-downmenu at the top edge of the ...
Page 39 - Degree of grinding; too coarse; Adjusting the degree of grinding; exactly 1
Degree of grinding 39 The degree of grinding determines thecontact time between the ground coffeeand the water, known as the extractiontime. Only when the ideal degree ofgrinding is selected can the machinedispense a perfect cup of coffee with afine, hazelnut brown crema. Identifying the ideal degre...
Page 40 - Parameters; too low; too high; if the; Pre-brewing the ground coffee; We particularly recommend using; Portion size
Parameters 40 Type of beans You can display which type of bean iscurrently being used for this coffee drinkor change which bean container isallocated to it. Quantity of coffee The coffee machine can grind and brew7.5–12.5 g of coffee beans per cup. Thegreater the quantity of ground coffee,the strong...
Page 41 - Changing the portion size
Parameters 41 For coffee drinks with milk, you can alsoset the proportions of milk and milkfroth to suit your personal taste. You canalso set the portion sizes for hot milkand milk froth separately. The changed portion size is alwayssaved in the current profile. The nameof the current profile is sho...
Page 42 - Manual
Profiles 42 Profiles In addition to the Miele drinks menu(Miele profile), you can create individualprofiles to cater for different tastes andpreferences.Within the profile, you can adjust theportion sizes and parametersindividually for all drinks. The name of the current profile isshown in the top l...
Page 43 - Profiles: creating and editing drinks; Creating a drink; The; Select the profile you want.; Edit the entry as required.
Profiles: creating and editing drinks 43 You can save frequently made drinks in aprofile with your own individual settings(see “Profiles”).You can also change the names of yourdrinks and delete any unwanted drinksfrom your profile. You can save amaximum of 9 drinks in a profile. Creating a drink You...
Page 44 - MyMiele: adding an entry; MyMiele: deleting or moving an entry
MyMiele 44 You can display drinks you makefrequently, drinks from profiles andmaintenance programmes in theMyMiele screen. Tip: You can also set menu options that you have entered in MyMiele as yourstart screen (see “Settings – Startscreen”).The main menu is displayed. Touch MyMiele . You can now ...
Page 45 - MobileStart
MobileStart 45 With MobileStart you can, for example, start making a drink via theMiele app. You will only be able to useMobileStart if Miele@home has beenset up for your coffee machine. Danger of burning and scalding on the dispensing spouts.If liquids or steam are dispensedwhile the machin...
Page 46 - Language
Settings 46 You can personalise your coffeemachine by adapting the factory defaultsettings to suit your requirements. Displaying and changingsettings The drinks menu is displayed. Touch the sensor. Select Settings . Select the option you want to change. Change the setting. If necessary, c...
Page 47 - Appliance timer; On at
Settings 47 Timer Appliance timer The coffee machine has 3 timers: - Switch on at - Switch off at - Switch off after You can allocate the individual timerfunctions to different days of the week.For example, you can set different timesfor the timer at the weekend ( Sat. and Sun. ) and/or from Monday ...
Page 48 - Volume
Settings 48 TeaTimer You can use the TeaTimer function to start a minute minder when making tea.There is a preset brewing time for thetype of tea selected. You can adjust thepreset brewing time (up to a maximumof 14:59 minutes).There are 2 TeaTimer functions availableand they can be started independ...
Page 49 - Altitude; Eco mode; Water hardness
Settings 49 Altitude If the coffee machine is installed at highaltitudes, the lower air pressure willcause the water to boil at acorrespondingly lower temperature. Youcan set the local altitude to ensure theideal drink preparation temperatures. Performance mode You can select the appropriateperforma...
Page 50 - or ppm; If your water hardness is >21 °dH; Movement sensor
Settings 50 calcium content is specified on the labelof the bottle in mg /l Ca 2+ or ppm (mg Ca 2+ /l). Do not use carbonated water. The hardness level is set to 21 °dH bydefault. Water hardness Calciumcontent mg /l Ca 2+ or ppm (mg Ca 2+ /l) Setting s °dH mmol/l 1 0.2 7 1 2 0.4 14 2 3 0.5 21 3 4 0....
Page 52 - SuperVision; SuperVision display; When SuperVision is on (; Display in Standby mode; Appliance list; RemoteUpdate; Running a RemoteUpdate; The update may take several minutes.
Settings 52 You can change the coffee machinesettings, for example, in the Miele appwhen remote control is switched on. Tostart making a drink via the app,MobileStart must be activated as well.The remote control function is switchedon by default. SuperVision The SuperVision option appears whenthe co...
Page 53 - Software version; Factory defaults
Settings 53 Please note the following informationabout the RemoteUpdate function: - You will only receive a message when a RemoteUpdate is available. - Once a RemoteUpdate has been installed, it cannot be undone. - Do not switch the coffee machine off during the update. Otherwise, theupdate will be ...
Page 54 - Risk to health due to inadequate cleaning; Overview of cleaning intervals
Cleaning and care 54 Risk to health due to inadequate cleaning Heat and moisture inside the coffee machine can cause coffee residues tobecome mouldy and/or milk residues to go off and pose a risk to health.Carefully clean the coffee machine regularly. Overview of cleaning intervals Recommended fre...
Page 56 - Unsuitable cleaning agents
Cleaning and care 56 Unsuitable cleaning agents Contact with unsuitable cleaningagents can alter or discolour theexternal surfaces. All surfaces aresusceptible to scratching. Scratcheson glass can in some circumstanceslead to breakage.Remove all cleaning agent residuesimmediately. To protect the mac...
Page 57 - Open the appliance door.; Taking the drip tray apart; The orange clips are not removable.; Cleaning the contacts on the drip tray; Dry all parts thoroughly.
Cleaning and care 57 Open the appliance door. Remove the drip tray and wastecontainer from the appliance. Empty the waste container afterremoving it from the drip tray. The waste container may contain asmall amount of water from rinsing aswell as the leftover coffee grounds. Taking the drip tr...
Page 58 - Reassembling the drip tray; Cleaning the drip tray cover
Cleaning and care 58 Reassembling the drip tray Attach the drip tray lid as follows:slide the lid under the lug next to thecontacts and apply pressure to the liduntil the catches at the sides audiblyclick into place. Place the waste container on the lid. Push the drip tray and wastecontainer b...
Page 59 - Cleaning the central spout; Removing the central spout; remove the milk pipework
Cleaning and care 59 Clean and dry the surface that thewater container sits on. Push the water container all the wayinto the coffee machine until you feelresistance. Close the appliance door. Cleaning the central spout Only ever clean the central spout’sstainless steel cover by hand usingwarm ...
Page 60 - Clean all parts thoroughly by hand.; Inserting the central spout; Fit the dispensing unit back together.
Cleaning and care 60 Grip the dispensing unit by the sidesand pull it down to remove it. Take the dispensing unit apart,separating it into 3 components: theY-piece, the spouts and the holder. Cleaning the central spout Only ever clean the central spout’sstainless steel cover by hand usingwarm wa...
Page 61 - Cleaning the cup rim sensor
Cleaning and care 61 Slide the dispensing unit into thecoffee machine. Connect the milk pipework. Refit the stainless steel cover. Close the appliance door. Fit cover to central spout will appear in the display. Confirm with OK . Cleaning the cup rim sensor Clean the cup rim sensor at lea...
Page 62 - Reassemble the milk container.
Cleaning and care 62 Use a clean cloth to dry all parts,paying particular attention to thethreads on the lid and on the glass. Reassemble the milk container. Use a damp sponge cloth to clean themilk container holder on the coffeemachine. Cleaning the milk valve (daily) The milk valve seal can ...
Page 63 - Removing the milk valve
Cleaning and care 63 milk sprays out during dispensing, themilk valve may be blocked. Clean themilk valve more often if necessary. Removing the milk valve Only remove the milk valve when thecoffee machine is switched off. Do not switch on the coffee machine whilethe milk valve is removed. Switch t...
Page 64 - Cleaning the milk valve
Cleaning and care 64 Press the latches on the left and right-hand sides of the milk valve holderand pull the holder forwards toremove it. Take the holder and silicone sealapart. Pull the stainless steel bolt upwardsand out. Cleaning the milk valve The milk valve cover is notdishwasher-safe.The...
Page 65 - If necessary, turn the milk pipework
Cleaning and care 65 Insert the holder and silicone sealuntil they audibly click into place. Connect together the angularmoulded hose and longer milkpipework. Start by attaching themoulded hose to the top of thecentral spout. The black connectingpiece should be pointing to the rear. Then, conn...
Page 66 - Cleaning the bean containers
Cleaning and care 66 Cleaning the bean containers Risk of damage from incorrect use and cleaning.Immersing the bean containers inliquids can result in malfunctions. Ifthey are taken apart, bits may breakoff or the mechanism may no longerwork properly once they arereassembled.Do not disassemble the...
Page 68 - Cleaning the inside of the appliance; turn the handle backwards
Cleaning and care 68 Wipe any coffee residue from thefilters. One filter is located in thefunnel. The other filter can be found tothe left of the funnel. Dry the funnel to prevent groundcoffee sticking to it the next time acoffee is made. Cleaning the inside of the appliance Use your vacuum cl...
Page 69 - Cleaning the appliance front
Cleaning and care 69 Cleaning the interior, inside ofthe appliance door and drip tray Clean the interior and appliance front aspart of the normal cleaning process. Forinstance, if you remove the watercontainer, use this as an opportunity toclean the area under the water containerat the same time. Th...
Page 70 - Maintenance programmes
Cleaning and care 70 Tip: You can also use a Miele microfibre cloth to clean the appliance front. Maintenance programmes The coffee machine has maintenanceprogrammes for: - Rinsing the machine- Rinsing the milk pipework- Cleaning the milk pipework*- Degreasing the brew unit*- Descaling the machine* ...
Page 72 - Degreasing the brew unit; Cleaning the brew unit and interior
Cleaning and care 72 Confirm the message with OK . This message will keep being displayeduntil the brew unit has been degreased. Degreasing the brew unit The Maintenance menu is displayed. Touch Degrease the brew unit . The maintenance programme will thenstart. Follow the instructions in the ...
Page 73 - Clean the brew unit; by hand under; without using; Descaling the machine
Cleaning and care 73 Clean the brew unit by hand under warm running water without using any cleaning agents. Wipe any coffee residue from thefilters. One filter is located in thefunnel and the other to the left of thefunnel. The process of removing the brew unitcauses ground coffee to drop onto ...
Page 74 - must be carried out
Cleaning and care 74 depend on the water hardness level inyour area. Limescale must be removedregularly.The appliance will guide you through thedescaling process. Various messageswill appear in the display, e.g. you will beprompted to empty the drip tray or fillthe water container.Descaling must be ...
Page 75 - Add; Carrying out descaling; When; appears in the display:
Cleaning and care 75 Add 2 descaling tablets to the water container. Follow the instructions for thedescaler mixing ratio carefully. It isimportant that you do not fill thewater container with too much or toolittle water. Otherwise, the descalingprocess will be cancelledprematurely. Carrying out ...
Page 76 - Automatic cleaning and descaling; cartridges are fitted.; be
Automatic cleaning and descaling 76 Risk of damage from spilt cleaningand descaling solution.Sensitive surfaces and/or naturalfloors can suffer damage.One way to catch the cleaning anddescaling solution is to place themaintenance container under thecentral spout before switching off themachine.Clear...
Page 77 - Automatic cleaning; The Miele cleaning cartridge
Automatic cleaning and descaling 77 - The appliance door is closed when the programme is started. - The coffee machine is switched off. Automatic cleaning If you have made a drink containingmilk, the milk pipework will be cleaned4 days later at the latest.If you have made a coffee, the brew unitwill...
Page 78 - empty; Replacing the cleaning cartridge
Automatic cleaning and descaling 78 If no cleaning cartridge has been fitted or if the fitted cartridge is empty or has expired , the milk pipework and brew unit must becleaned manually. For this, you willneed the appropriate cleaning agents(see “Cleaning and care” – “Cleaningthe milk pipework” and ...
Page 79 - Automatic descaling; . As the descaling cartridge fill level
Automatic cleaning and descaling 79 Screw the new cartridge into theholder upside down. Push the holder and cartridge into thecoffee machine until the holderaudibly clicks into place. Put the maintenance container backinside the appliance. Close the appliance door. Automatic descaling Automa...
Page 80 - Removing the descaling cartridge
Automatic cleaning and descaling 80 If a descaling cartridge is not fitted, an empty cartridge is fitted or an expired cartridge is fitted, the coffee machine needs to be descaled usingthe Descale the appliance maintenance programme. To do this, theappropriate descaling agent isrequired (see “Clean...
Page 81 - Maintenance Timer; Setting the Maintenance Timer
Automatic cleaning and descaling 81 Tip: You can seal the descaling cartridge with the cap that can be found on thecartridge. This cap can be easilydetached by snapping it off. Dispose of the cartridge with yourhousehold waste. Fitting the descaling cartridge Insert the cartridge and push itupwa...
Page 82 - five times
Automatic cleaning and descaling 82 Cancelling automatic cleaningand descaling You can cancel the automatic cleaningprogrammes during the activation time. If the automatic cleaning programmeis not performed five times in a row, the dispensing of drinks is blocked.You will only be able to make drinks...
Page 83 - Problem solving guide; Messages in the display; Error messages must be confirmed with; Problem; There is an internal fault.
Problem solving guide 83 Many malfunctions and faults that can occur in daily operation can be easilyremedied. You can save time and money in many cases, as you do not need to callthe Miele Customer Service Department.Information to help you rectify faults yourself can be found at www.miele.com/serv...
Page 86 - Unusual performance of the coffee machine
Problem solving guide 86 Unusual performance of the coffee machine Problem Cause and remedy The display remains darkwhen the coffeemachine is turned onusing the On/Off button . The On/Off button was not held for long enough. Touch and hold the On/Off button for at least 3 seconds. The pl...
Page 87 - appears in
Problem solving guide 87 Problem Cause and remedy A fan can be heard eventhough no drinks arebeing prepared or thecoffee machine isswitched off. This is not a fault.Once a drink has been dispensed or the machine hasbeen switched off, the internal fan will continue to rununtil the interior is suffici...
Page 89 - Faults with automatic cleaning and/or descaling; The machine door was not closed.
Problem solving guide 89 Faults with automatic cleaning and/or descaling Problem Cause and remedy After switching on, amessage appearsinforming you thatautomatic cleaning and/or descaling could notbe carried out. The coffee machine was not ready for operation: allremovable parts, such as the water c...
Page 90 - No drinks can be made.; Unsatisfactory results
Problem solving guide 90 Problem Cause and remedy When the machine isswitched on, one ofthese messagesappears: Automatic cleaning could not be carriedout. Start Automaticcleaning (duration min.)now? Otherwise Automaticcleaning will be permanentlyswitched off Or: Automatic maintenancecould not be car...
Page 91 - Fill the coffee bean container with fresh beans.; once a
Problem solving guide 91 Problem Cause and remedy The coffee grindermakes a louder noisethan usual. The coffee bean container has become empty duringthe grinding process. Fill the coffee bean container with fresh beans. There may be foreign objects such as plastic or stonesin amongst the coffee be...
Page 93 - After sales service and warranty; Contact in the event of a fault
After sales service and warranty 93 Information to help you rectify faultsyourself and about Miele spare partscan be found at www.miele.com/service. Contact in the event of a fault In the event of any faults which youcannot remedy yourself, please contactyour Miele dealer or the MieleCustomer Servic...
Page 94 - Accessories
Accessories 94 These products and other usefulaccessories can be ordered via theMiele webshop, from Miele (see backcover for contact details) or from yourMiele dealer. - Microfibre cloth for removing finger marks and lightsoiling - Cleaning agent for milk pipework for cleaning the milk system - Clea...
Page 95 - Installation; Risk of injury and appliance; angled; end of the stainless
Installation *INSTALLATION* 95 Mains water connection Risk of injury and appliance damage if appliance is not connectedproperly.Failing to connect the applianceproperly can result in personal injuryand/or material damage.The appliance may only beconnected to the mains waterconnection by suitably q...
Page 96 - Connecting the water supply; Disconnect the coffee machine
Installation *INSTALLATION* 96 Screw the coupling nut on thestainless steel hose onto thestopcock. Ensure that the threaded union isproperly connected and does not leak. Connecting the water supply Disconnect the coffee machine from the mains power supply beforeconnecting it to the water line....
Page 97 - Electrical connection; Risk of fire from overheating.
Installation *INSTALLATION* 97 Electrical connection The coffee machine is supplied with amains cable and moulded plug ready forconnection to a suitable earthed socket.The socket must be easily accessibleafter the coffee machine has beeninstalled. If the socket is not easilyaccessible, ensure that a...
Page 98 - Building-in dimensions; Installation in a tall unit; Maintain a minimum installation height of 850 mm.
Installation *INSTALLATION* 98 Building-in dimensions Installation in a tall unit Maintain a minimum installation height of 850 mm. All dimensions are given in mm. The appliance can be combined with other Miele built-in appliances. If the coffeemachine is to be built in above another appliance, ther...
Page 99 - Installation and connections; All dimensions are given in mm.
Installation *INSTALLATION* 99 Installation and connections All dimensions are given in mm. a Mains connection cable b Mains water connection c No electrical or mains water connection in this area
Page 100 - Building in the coffee machine; Danger of injury due to incorrect; Removing the transport safety device; Remove the silicone plug; before
Installation *INSTALLATION* 100 Building in the coffee machine Danger of injury due to incorrect operation.An appliance that has not been builtin is not safe and can cause injuries.Only ever use the coffee machineonce it has been built-in. Danger of damage due to incorrect operation.If the ambie...
Page 101 - Door opening limiters
Installation *INSTALLATION* 101 Pushing in and aligning the coffeemachine When pushing the appliance into theniche, make sure that the electricaland mains water connections do notget trapped or damaged. Push the coffee machine all the wayinto the niche until you feel someresistance. Check the he...
Page 102 - Removing the door opening limiters
Installation *INSTALLATION* 102 Removing the door opening limiters Make sure that sufficient space isavailable for the larger door openingangle and that the machine door isnot going to hit an adjacent wall. Remove the door opening limitersfrom the hinges, e.g. by prising themout with a screwdriver...
Page 103 - Technical data; Electricity consumption in standby:
Technical data 103 Electricity consumption in standby: < 0.8 W Electricity consumption in networkedstandby: < 1.4 W Frequency band of the WiFi module 2.4000 GHz – 2.4835 GHz Maximum transmitting power of theWiFi module < 100 mW
Page 104 - EU Conformity declaration
EU Conformity declaration 104 Miele hereby declares that this coffeemachine complies with Directive2014/53/EU. The complete text of the EU declarationof conformity is available from one ofthe following internet addresses: - Products, Download from www.miele.ie - For service, information, operating i...
Page 105 - UK Conformity declaration; manuals and enter the name of the product or the serial number; This; Statement of Compliance; confirms this Miele product fully complies with the; Paul Wright
UK Conformity declaration 105 Miele hereby declares that this coffee machine complies with UK Radio EquipmentRegulations 2017, as amended. The complete text of the UK declaration of conformity is available from one of thefollowing internet addresses: - Products, Download from www.miele.co.uk- For se...
Page 106 - Copyrights and Licences; in the appliance for the Open Source components contained
Copyrights and Licences 106 Miele uses their own and third party software which is not subject to any so-calledOpen Source Licence for the operation and control of the appliance. This software/these software components are protected by copyright. The copyright powers ofMiele and third parties have t...
Page 107 - United Kingdom
United Kingdom Miele Co. Ltd., Fairacres, Marcham Road, Abingdon, Oxon, OX14 1TWTel: 0330 160 6600, Internet: www.miele.co.uk, E-mail: [email protected] Australia Miele Australia Pty. Ltd.ACN 005 635 398ABN 96 005 635 398Level 4, 141 Camberwell RoadHawthorn East, VIC 3123Tel: 1300 464 353E-mail: [em...


 Miele WWD380 WCS PWash&Steam&9kg User Manual
 Miele W 1614 Manual
 Miele G 5266 SCVi SFP Active Plus User Manual
 Miele Classic C1 Turbo Team PowerLine - SBAN0 User Manual
![Miele PDR 307 [EL]](https://manualsarea.com/img/product/thumbs/48/ba/fd/bafde84806e8abc8b420f34eaf8fcd6e.webp) Miele PDR 307 [EL] User Manual
Miele PDR 307 [EL] User Manual Miele F 1911 Vi Manual
![Miele PDR 908 [EL MAR 3N AC 400V 50-60Hz]](https://manualsarea.com/img/product/thumbs/48/05/b7/05b705998b251f92b271e908423e1ecb.webp) Miele PDR 908 [EL MAR 3N AC 400V 50-60Hz] Installation Manual
Miele PDR 908 [EL MAR 3N AC 400V 50-60Hz] Installation Manual Miele K 9757 iD Manual


