Makita LF1000 - Manual
Makita LF1000 Miter Saw – Manual, read for free online in PDF format. We hope this helps you resolve any issues you may have. If you have further questions, please contact us through the contact form.


Table of Contents:
- Page 2 – tandard equipment; Assorted TCT saw blades; ptional accessories
- Page 3 – epair
- Page 10 – When installing Sleeve 13 and Connecting rod on Knob 40
- Page 16 – pitches
- Page 17 – Installing Bracket on Square pipe 32-510
- Page 19 – Foot nut; Frame section; Stopper hook; Feet section; Lever; Fastening the left Feet section to Frame, left
- Page 20 – degree adjusting screw; Degree Bevel
- Page 22 – Motor Housing
- Page 23 – ircuit diagram
- Page 24 – iring diagram; Opening A; [1] Wiring on the Rear End Surface of Motor Housing
- Page 25 – How to Connect lead wires to Brake switch
- Page 26 – Small end of Grommet
- Page 29 – Switch
Model No.
Description
NEW TOOL
C
ONCEPT AND MAIN APPLICATIONS
S
pecification
P 1 / 30
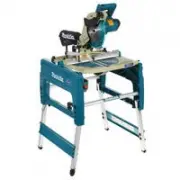
Flip Over Saw 260mm (10-1/4")
Model LF1000 is the first flip over saw from Makita.
Miter saw and Table saw are combined for great versatility.
Its main advantages are;
Weighs only 32kg (70lbs) for easy transport to job sites.
Quick miter saw/table saw conversion
Electronic with constant speed control and soft start
Rigid cast aluminum table
LF1000
Saw blade
Electronic feature
Protection against electric shock
Power supply cord: m (ft)
Net weight: kg (lbs)
*When cutting with 260mm diameter blade
Mode
Miter saw
Table saw
No load speed: min-
1
= rpm
Continuous rating input: W
Type
Diameter: mm (")
Hole diameter: mm (")
Dimensions: mm (")
Width (W)
(H1)
Height
Length (L)
in Miter Saw mode
in Table Saw mode
660 (26)
660 (26)
650 (25-1/2)
650 (25-1/2)
1,220 (48)
1,060 (41-3/4)
(H2)
800 (31-1/2)
845 (33-1/4)
High voltage
Low voltage
Soft start
Constant speed control
0 degree
45 degrees bevel
0 degree
0 degree
45 degrees
Miter angle
Bevel angle
0 degree
70 (2-3/4)
20 x 210 (13/16 x 8-1/4)
68 x 155 (2-11/16 x 6-1/8)
50 x 150 (2 x5-7/8)
Double insulation
TCT Saw blade
260 (10-1/4)
30 (1-3/16)
1,650 (230V)
1,650 (110V)
2,700
Yes
Yes
2.5 (8.2)
32 (70)
48 (1-7/8)
Cutting angle
H2
H2
W
L
[in Miter Saw mode]
[in Table Saw mode]
H1: to the table top, H2: to the tool head
T
ECHNICAL INFORMATION
H1
H1
Continuous Rating (W)
Voltage (V)
Cycle (Hz)
Input
Output
Max. Output (W)
110
220
230
240
15
8.5
8.4
8.3
50/ 60
50/ 60
50/ 60
50/ 60
1,650
1,650
1,650
1,650
900
900
900
900
2,200
2,200
2,200
2,200
Current (A)
Cutting capacity*
(height x width): mm (")
[T
able sa
w: height only]
"Loading the manual" means you need to wait until the file loads and becomes available for online reading. Some manuals are very large, and the time they take to appear depends on your internet speed.
Summary
P 2 / 30 S tandard equipment Assorted TCT saw blades Note: The standard equipment for the tool shown above may differ by country. TCT saw blade ......... 1 pcVise ass'y ................. 1 pcDust bag ass'y .......... 1 pcRuler ass'y ................ 1 pc Box wrench 13-3 ...... 1 pcPush stick ..........
P 3 / 30 R epair [1] NECESSARY REPAIRING TOOLS CAUTION: Remove the saw blade from the machine for safety before repair/ maintenance ! Code No. 1R003 Retaining ring S Pliers ST-2N Removing Retaining ring from Safety cover 1R207 45 degree Set square Setting the miter/bevel angle of saw blade to 45 deg...
P 10/ 30 R epair [3] DISASSEMBLY/ASSEMBLY Fig. 23 Fig. 24 Fig. 25 ASSEMBLING [3] -5. Blade Case Section (cont.) Slide Sleeve 13 as far as possible toward Steel ball 6. At this time, the distance between Sleeve 13 and the neck ofKnob 40 will be about 7mm. While keeping the distance, secure Connecting...