Page 2 - SPECIFICATIONS; Applicable battery cartridge and charger; SAFETY WARNINGS; IMPORTANT SAFETY; WARNING; To reduce the risk of fire, electric shock
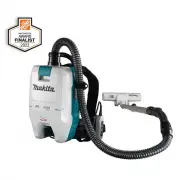
2 ENGLISH ENGLISH (Original instructions) SPECIFICATIONS Model: GCV05 Capacity Filter bag 2.0 L (0.53 gal.) Dust bag 1.5 L (0.40 gal.) Maximum air volume (With hose ø32 mm (1-1/4″) x 1.0 m (3-15/16″)) 2.4 m 3 /min (84.8 cu.ft/min) Vacuum 18 kPa Dimensions (L x W x H) (excluding the harness, with BL4...
Page 3 - SAVE THESE
3 ENGLISH 6. Do not handle appliance with wet hands. 7. Do not put any object into open- ings. Do not use with any opening blocked; keep free of dust, lint, hair, and anything that may reduce air flow. 8. Keep hair, loose clothing, fingers, and all parts of body away from openings and moving parts. ...
Page 4 - ADDITIONAL; Solidifying and conductive fine; Symbols; Important safety; It may result in
4 ENGLISH ADDITIONAL SAFETY RULES 1. Read this instruction manual and the charger instruction manual care- fully before use. 2. Do not vacuum the following: • Flammable liquid (kerosene, gasoline, solvents such as ben- zine, thinner, etc.) • Hot substances that are burn- ing or smoking (cigarettes, ...
Page 5 - tery cartridge can explode in a fire.; Such conduct may result in a fire,; Tape or mask off open contacts and; Tips for maintaining maximum
5 ENGLISH 5. Do not short the battery cartridge: (1) Do not touch the terminals with any conductive material. (2) Avoid storing battery cartridge in a container with other metal objects such as nails, coins, etc. (3) Do not expose battery cartridge to water or rain. A battery short can cause a large...
Page 6 - FUNCTIONAL; Installing or removing battery; Indicating the remaining battery
6 ENGLISH FUNCTIONAL DESCRIPTION CAUTION: Always be sure that the appli- ance is switched off and the battery cartridge is removed before adjusting or checking function on the appliance. Installing or removing battery cartridge CAUTION: Always switch off the tool before installing or removing of the...
Page 7 - Appliance / battery protection; Overload protection; Overheat protection; Adjusting belts
7 ENGLISH Indicating the remaining battery capacity 1 2 Fig.3 ► 1. Battery indicator 2. button Press the button to indicate the remaining battery capacities. Battery indicator status Remaining battery capacity On Off Blinking 50% to 100% 20% to 50% 0% to 20% Charge the battery Appliance / battery pr...
Page 8 - Carrying hook; Switch action
8 ENGLISH Shoulder belts 1 2 Fig.5 ► 1. Strap 2. Fastener Upper belt 1 2 Fig.6 ► 1. Strap 2. Fastener Carrying hook CAUTION: Use the hanging/mounting parts for their intended purposes only. Using for unin- tended purpose may cause accident or personal injury. Always grab the carrying hook when handl...
Page 9 - LED light; Hose band; Hose hook
9 ENGLISH LED light LED light is installed in the head of the switch box to ease the operations in dark places. Press and hold button to turn the light on. To turn off, press and hold button again. Fig.9 CAUTION: Do not look in the light or see the source of light directly. Never aim the light to ot...
Page 10 - ASSEMBLY; Assembling hose; Assembling nozzle and wand
10 ENGLISH ASSEMBLY CAUTION: Always be sure that the appliance is switched off and the battery cartridge is removed before carrying out any work on the appliance. Assembling hose Insert the hose cuff into the vacuum cleaner body and turn it clockwise. 1 2 Fig.13 ► 1. Hose cuff 2. Vacuum cleaner body...
Page 12 - Connecting the tool
12 ENGLISH For the aluminum bending pipe / aluminum straight pipe (Only for the model with ø38 mm hose and front cuff 38) Shoulder the vacuum cleaner body then twist and insert the pipe into the front cuff. To disconnect, twist and extract it. 1 4 2 3 Fig.20 ► 1. Front cuff 38 2. Aluminum bending pi...
Page 15 - OPERATION
15 ENGLISH 3. Align the hole of the filter bag with the hose cuff and push the cardboard portion to the end. Make sure that the rubber ring on the filter bag goes over the rim on the hose cuff. 1 3 4 2 Fig.29 ► 1. Rubber ring on the filter bag 2. Rim on the hose cuff 3. Cardboard portion of the filt...
Page 16 - MAINTENANCE; Cleaning the HEPA filter
16 ENGLISH 3. Replace the filter bag when it becomes full. Open the lid and take out the filter bag. Pull the strip on the side of the opening to shut the filter bag and dispose of the filter bag in whole. 1 Fig.33 ► 1. Strip When using a dust bag, take out the dust bag and dis- pose of the dust by ...
Page 17 - OPTIONAL
17 ENGLISH 3. To install the HEPA filter, insert the side without the flap into the holder then push the HEPA filter downward until the flap is secured by the rib. 2 4 3 1 Fig.36 ► 1. Holder 2. HEPA filter 3. Rib 4. Flap Cleaning the dust bag Regularly clean the dust bag with soap and water. Turn th...
Page 18 - Disposing of dust
18 ENGLISH • Corner nozzle • Shelf brush • Round brush • Bent pipe assembly • Filter bag • Dust bag • Front cuff • HEPA filter • Pipe• Harness cover • Cyclone attachment • Makita genuine battery and charger NOTE: Some items in the list may be included in the tool package as standard accessories. The...
Page 20 - ESPECIFICACIONES; Cartucho de batería y cargador aplicables; ADVERTENCIAS DE; INSTRUCCIONES; GUARDE ESTAS; No lo utilice sobre superficies
20 ESPAÑOL ESPAÑOL (Instrucciones originales) ESPECIFICACIONES Modelo: GCV05 Capacidad Bolsa del filtro 2,0 L (0,53 gal.) Bolsa recolectora de polvo 1,5 L (0,40 gal.) Volumen de aire máximo (Con manguera diámetro32 mm (1-1/4″) x 1,0 m (3-15/16″)) 2,4 m 3 /min (84,8 cu.ft/min) Vacío 18 kPa Dimensione...
Page 22 - REGLAS DE
22 ESPAÑOL 26. No use ningún alimentador con cableado eléctrico como un adaptador para bate- ría o una unidad portátil de alimentación eléctrica con esta máquina. El cable de dicho alimentador podría impedir la opera- ción y ocasionar una lesión personal. GUARDE ESTAS INSTRUCCIONES. Este aparato est...
Page 23 - Símbolos; Instrucciones; No desarme ni modifique el cartucho de
23 ESPAÑOL 8. Los niños deben supervisarse para asegurar que ellos no empleen los aparatos como juguete. Símbolos A continuación se muestran los símbolos utilizados para la herramienta. volts o voltios corriente directa o continua Instrucciones importantes de seguridad para el cartucho de batería 1....
Page 24 - Esto podría ocasionar un des-; Consejos para alargar al máximo; DESCRIPCIÓN DEL; Instalación o extracción del
24 ESPAÑOL 14. El cartucho de batería podría absorber calor durante y después de su uso, lo que ocasionaría quemaduras o quema- duras a baja temperatura. Tenga cui- dado con la manipulación de los cartu- chos de batería que estén calientes. 15. No toque el terminal de la herra- mienta inmediatamente...
Page 25 - Indicación de la capacidad restante; Indicación de capacidad restante de
25 ESPAÑOL PRECAUCIÓN: Introduzca siempre com- pletamente el cartucho de batería hasta que el indicador rojo no pueda verse. Si no, podría accidentalmente salirse de la herramienta y caer al suelo causando una lesión a usted o alguien a su alrededor. PRECAUCIÓN: No instale el cartucho de batería a l...
Page 27 - Gancho de sujeción; Accionamiento del interruptor; Luz LED
27 ESPAÑOL Gancho de sujeción PRECAUCIÓN: Utilice las partes para col- gado/montaje para sus propósitos pretendidos solamente. El uso para un propósito no pretendido podría ocasionar un accidente o una lesión personal. Siempre agarre el gancho de sujeción cuando manipule el cuerpo de la aspiradora. ...
Page 28 - MONTAJE; Ensamble de la manguera
28 ESPAÑOL Abrazadera de la manguera La abrazadera de la manguera puede utilizarse para sujetar la manguera o la boquilla amplia. Para fijar la manguera al cuerpo de la aspiradora, pase la abrazadera de la manguera a través de la ranura en el cuerpo. Usted puede fijar la abrazadera de la man - guera...
Page 29 - Ensamble de la boquilla y el tubo
29 ESPAÑOL Para extraerlo, afloje el manguito del conjunto de tubo curvo respecto de la manguera. 1 2 3 Fig.14 ► 1. Manguera 2. Conjunto de tubo curvo 3. Manguito Ensamble de la boquilla y el tubo Accesorio opcional NOTA: El tipo de boquilla y de tubo incluidos en el producto varía según el país. En...
Page 31 - Conexión de la herramienta; Al utilizar la manguera de extracción
31 ESPAÑOL Conexión de la herramienta NOTA: Si el conjunto de tubo curvo está acoplado a la manguera, extráigalo primero. Para conectar una herramienta a la aspiradora, hacen falta la manguera especificada y/o accesorios adiciona - les. Dependiendo del modelo de aspiradora, necesitará reemplazar la ...
Page 32 - Instalación de la bolsa del filtro/
32 ESPAÑOL Al utilizar manguera de ø38 mm con boca delantera 38 1. Inserte girando la junta o la boca delantera a la pieza de entrada de la manguera, dependiendo de la herramienta que se vaya a conectar. 2. Conecte la boca delantera a la salida de extrac- ción de la herramienta. 12 4 3 Fig.24 ► 1. J...
Page 34 - OPERACIÓN
34 ESPAÑOL OPERACIÓN ADVERTENCIA: Los operadores deberán recibir las instrucciones adecuadas sobre el uso de la aspiradora. ADVERTENCIA: Esta aspiradora no es apro- piada para recoger polvo peligroso. PRECAUCIÓN: Esta aspiradora está dise- ñada exclusivamente para el uso en seco. PRECAUCIÓN: Siempre...
Page 35 - MANTENIMIENTO; Limpieza del filtro HEPA
35 ESPAÑOL Cuando utilice una bolsa recolectora de polvo, retire la bolsa recolectora de polvo y deseche el polvo liberando la aldabilla. 1 Fig.34 ► 1. Aldabilla AVISO: Inspeccione periódicamente la bolsa del filtro para ver si está llena. El uso continuo de la bolsa del filtro cuando está llena oca...
Page 36 - ACCESORIOS
36 ESPAÑOL Limpieza de la bolsa recolectora de polvo Limpie regularmente la bolsa recolectora de polvo con agua y jabón. Voltee al revés la bolsa recolectora de polvo y retire el polvo adherido. Lávela ligeramente con la mano y enjuague bien con agua. Séquela por com - pleto antes de instalarla en l...
Page 37 - Eliminación del polvo
37 ESPAÑOL Colector ciclónico NOTA: Cuando utilice el colector ciclónico con este aparato, también se requiere el tubo curvo. 1 Fig.40 ► 1. Colector ciclónico Acerca del colector ciclónico El uso de la aspiradora con el colector ciclónico instalado reduce la cantidad de polvo que ingresa a la bolsa ...
Page 38 - Ésta Garantía no aplica para México
38 ESPAÑOL Limpieza Cuando la caja para polvo se ensucia o el filtro de malla se obstruye, quítelos y lávelos con agua. (Consulte la sección “Eliminación del polvo” para el procedimiento de eliminación). Seque las piezas por completo antes de reinstalarlas y usarlas. 1 2 Fig.43 ► 1. Caja para polvo ...
Page 40 - Makita Corporation
Some dust created by power sanding, sawing, grinding, drilling, and other construction activities contains chemicals known to the State of California to cause cancer, birth defects or other reproductive harm. Some examples of these chemicals are: • lead from lead-based paints, • crystalline silica f...