Page 2 - SPECIFICATIONS; Applicable battery cartridge and charger; SAFETY WARNINGS; IMPORTANT; To reduce the risk of fire, electric shock
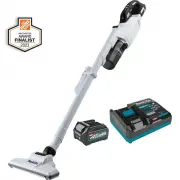
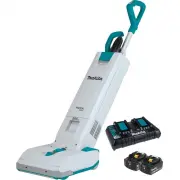
2 ENGLISH ENGLISH (Original instructions) SPECIFICATIONS Model: GLC03 Capacity 250 mL (0.07 gal.) Continuous use (with battery BL4025) 1 (Quiet mode) Approx. 80 min 2 (Normal speed mode) Approx. 40 min 3 (High speed mode) Approx. 25 min 4 (Max speed mode) Approx. 16 min Overall length (with pipe, no...
Page 3 - SAVE THESE
3 ENGLISH 7. Do not put any object into openings. Do not use with any opening blocked; keep free of dust, lint, hair, and any- thing that may reduce air flow. 8. Keep hair, loose clothing, fingers, and all parts of body away from openings and moving parts. 9. Turn off all controls before removing th...
Page 4 - Solidifying and conductive fine; Symbols; The followings show the symbols used for; Important safety
4 ENGLISH 2. Do not vacuum the following: • Flammable liquid (kerosene, gasoline, solvents such as ben- zine, thinner, etc.) • Hot substances that are burn- ing or smoking (cigarettes, matches, incense sticks, can- dles, hot ashes), sparks and metal dust generated by cutting or grinding metal, etc. ...
Page 5 - tery cartridge can explode in a fire.; Tips for maintaining maximum
5 ENGLISH 6. Do not store and use the tool and battery cartridge in locations where the temperature may reach or exceed 50 °C (122 °F). 7. Do not incinerate the battery car- tridge even if it is severely damaged or is completely worn out. The bat- tery cartridge can explode in a fire. 8. Do not nail...
Page 6 - FUNCTIONAL DESCRIPTION; Installing or removing battery cartridge; Battery protection system
6 ENGLISH FUNCTIONAL DESCRIPTION CAUTION: Always be sure that the tool is switched off and the battery cartridge is removed before adjusting or checking function on the tool. CAUTION: Take care not to trap finger(s) between cleaner and battery as shown in diagram when loading battery. Trapping finge...
Page 7 - Switch action
7 ENGLISH Indicator lamps Remaining capacity Lighted Off Blinking 75% to 100% 50% to 75% 25% to 50% 0% to 25% Charge the battery. The battery may have malfunctioned. NOTE: Depending on the conditions of use and the ambient temperature, the indication may differ slightly from the actual capacity. NOT...
Page 8 - PARTS DESCRIPTION; ASSEMBLY; Installing and removing cleaner; When using attachment with lock
8 ENGLISH PARTS DESCRIPTION 1 2 3 4 5 6 7 8 Fig.6 1 250 mL (0.07 gal.) dust case 2 Mesh filter 3 Cyclone body 4 High performance filter (Filter frame in gray color) (Optional accessory) 5 HEPA filter (Filter frame in white color) (Optional accessory) 6 Sponge sheet 7 Cleaner body 8 Hand strap (Count...
Page 9 - When using attachment without lock function; OPERATION; Nozzle
9 ENGLISH To remove attachment, pull it off the cleaner while pressing and holding the arms of the release button. 1 2 3 4 Fig.8 ► 1. Release button 2. Arm of release button 3. Attachment with lock function 4. Suction inlet When using attachment without lock function NOTICE: To install attachment wi...
Page 10 - Corner nozzle + Extension wand; Cleaning without nozzle; Disposing of dust
10 ENGLISH You can store the corner nozzle in the nozzle holder. 1 2 Fig.13 ► 1. Nozzle holder 2. Corner nozzle CAUTION: Be careful not to trap finger(s) between the corner nozzle and the nozzle holder. Trapping finger(s) may cause injury. Corner nozzle + Extension wand (Straight pipe) In tight quar...
Page 11 - MAINTENANCE; After use; Cleaner body
11 ENGLISH 2. Empty the dust case and clean the adhered dust off the mesh filter. Fig.18 3. Place the dust case back onto the cyclone body to secure it in place with clicks. 1 2 3 Fig.19 ► 1. Dust case 2. Release buttons 3. Cyclone body CAUTION: The dust may fly up when dis - posed out of the dust c...
Page 12 - Cyclone unit and filters; Cyclone unit
12 ENGLISH Cyclone unit and filters NOTICE: Dust off and clean out inside the cyclone unit and filters, when suction perfor - mance becomes less effective regardless of the amount of dust collected in the dust case. NOTICE: After washing filters, dry them thor - oughly before use. Insufficiently dri...
Page 13 - High performance filter; HEPA filter
13 ENGLISH High performance filter Optional accessory 1. Disassemble the cyclone unit from the cleaner body. 2. Hold the mounting end of high performance filter and pull it apart from the cleaner body. 1 2 Fig.26 ► 1. High performance filter 2. Cleaner body 3. Wipe and shake dust off the high perfor...
Page 14 - Sponge sheet
14 ENGLISH 4. Wipe and shake dust off the high performance prefilter and HEPA filter by hand. Fig.32 5. Wash the high performance prefilter and HEPA filter in soapy water. Rinse and dry them thoroughly in the shade before use. Fig.33 NOTE: Avoid fastening the attachment end (rubber sealing ring) of ...
Page 16 - Condition-based maintenance; Mesh filter
16 ENGLISH Condition-based maintenance NOTICE: Clean the mesh filter in the cyclone unit when they become clogged. Continued use in the clogged condition may result in heating or motor malfunction. Deep and spot cleaning needs to be carried out accord- ing to your tool performance. Mesh filter Clean...
Page 17 - Air channels in cyclone unit
17 ENGLISH 5. Wash the filters and mesh pipe in soapy water when they are clogged with dust and dirt. Dry them out thoroughly in the shade before use. Fig.46 6. Reassemble the mesh filter. i Insert the tubular sponge filter into the prefilter. ii Insert the mesh pipe into the tubular sponge filter a...
Page 19 - Troubleshooting; OPTIONAL; MAKITA LIMITED
19 ENGLISH Troubleshooting Before asking for repairs, check the following points. Symptom Area to be investigated Fixing method Weak suction power Is dust case or inside cyclone unit full of dust? Empty dust case or inside cyclone unit. Are filters clogged? Dust down or wash high performance filter/...
Page 20 - ESPECIFICACIONES; Cartucho de batería y cargador aplicables; ADVERTENCIAS DE; INSTRUCCIONES; GUARDE ESTAS; No lo utilice sobre superficies
20 ESPAÑOL ESPAÑOL (Instrucciones originales) ESPECIFICACIONES Modelo: GLC03 Capacidad 250 ml (0,07 gal.) Uso continuo (con batería BL4025) 1 (Modo silencioso) Aprox. 80 min 2 (Modo velocidad normal) Aprox. 40 min 3 (Modo velocidad alta) Aprox. 25 min 4 (Modo velocidad máxima) Aprox. 16 min Longitud...
Page 21 - ficado podría dañar la batería e incre
21 ESPAÑOL 5. No lo utilice con una batería dañada. Si el aparato no está funcionando como debiera, se ha dejado caer, se ha dañado, se ha dejado a la intem- perie o ha caído sobre agua, llévelo a un centro de servicio. 6. No manipule el aparato con las manos mojadas. 7. No introduzca ningún objeto ...
Page 22 - REGLAS DE
22 ESPAÑOL 24. Pida que el servicio lo realice un técnico en reparaciones calificado y que utilice únicamente piezas de repuesto idénti- cas a las originales. Esto garantizará que se mantenga la seguridad del producto. 25. No modifique ni intente reparar el aparato ni el paquete de baterías salvo co...
Page 23 - Símbolos; A continuación se muestran los símbolos; Instrucciones; No desarme ni modifique el cartucho
23 ESPAÑOL Símbolos A continuación se muestran los símbolos utilizados para la herramienta. volts o voltios corriente directa o continua Instrucciones importantes de seguridad para el cartucho de batería 1. Antes de utilizar el cartucho de batería, lea todas las instrucciones e indicaciones de preca...
Page 24 - Consejos para alargar al máximo; DESCRIPCIÓN DEL; Instalación o extracción del
24 ESPAÑOL 14. El cartucho de batería podría absorber calor durante y después de su uso, lo que ocasionaría quemaduras o quema- duras a baja temperatura. Tenga cui- dado con la manipulación de los cartu- chos de batería que estén calientes. 15. No toque el terminal de la herra- mienta inmediatamente...
Page 26 - Accionamiento del interruptor; Encendido de la lámpara; DESCRIPCIÓN DE LAS PIEZAS
26 ESPAÑOL Accionamiento del interruptor 1 2 1 2 3 4 Fig.4 ► 1. Botón de cambio de potencia de succión 2. Botón de encendido/apagado Para poner en marcha la aspiradora, simplemente oprima el botón de encendido/apagado. Para apagarla, oprima el botón de encendido/apagado nuevamente. Usted puede cambi...
Page 27 - MONTAJE; Instalación y desinstalación de los; Cuando se utiliza el aditamento con; Cuando se utiliza el aditamento sin la
27 ESPAÑOL MONTAJE PRECAUCIÓN: Asegúrese siempre de que la herramienta esté apagada y el cartucho de batería haya sido extraído antes de realizar cualquier trabajo en la misma. AVISO: Asegúrese de que todos los accesorios y componentes estén asegurados en su lugar correctamente antes de usarlos. Ins...
Page 28 - OPERACIÓN; Boquilla; Boquilla para esquinas + Tubo de
28 ESPAÑOL OPERACIÓN PRECAUCIÓN: No ponga la cara cerca de la abertura de ventilación cuando utilice la aspira- dora. Si las partículas sopladas se introducen en los ojos, podrían causar lesiones. AVISO: Evite usar la aspiradora en posición horizontal o hacia arriba. De lo contrario, podría ocasiona...
Page 30 - MANTENIMIENTO; Después del uso
30 ESPAÑOL PRECAUCIÓN: El polvo podría salir volando cuando se desecha de la caja para polvo. Tenga cuidado de que el polvo no alcance sus ojos. AVISO: Cuando la caja para polvo se ensucie, extráigala y lávela con agua. Seque bien la caja para polvo antes de volver a montarla y utilizarla. AVISO: As...
Page 31 - Unidad ciclónica
31 ESPAÑOL Unidad ciclónica 1. Golpee la unidad ciclónica varias veces con la mano para eliminar el polvo adherido a la superficie interna de la unidad ciclónica y el filtro. 1 Fig.22 ► 1. Unidad ciclónica 2. Con la entrada de succión apuntando hacia abajo, gire la unidad ciclónica como se muestra e...
Page 32 - Filtro de alto rendimiento; Filtro HEPA
32 ESPAÑOL Filtro de alto rendimiento Accesorio opcional 1. Desmonte la unidad ciclónica del cuerpo de la aspiradora. 2. Sostenga el extremo de montaje del filtro de alto rendimiento, y sepárelo del cuerpo de la aspiradora. 1 2 Fig.26 ► 1. Filtro de alto rendimiento 2. Cuerpo de la aspiradora 3. Lim...
Page 33 - Lámina de esponja
33 ESPAÑOL 3. Desmonte el prefiltro de alto rendimiento del filtro HEPA girándolo con la mano. 1 2 Fig.31 ► 1. Prefiltro de alto rendimiento 2. Filtro HEPA 4. Limpie y sacuda el polvo del prefiltro de alto rendi - miento y el filtro HEPA manualmente. Fig.32 5. Lave el prefiltro de alto rendimiento y...
Page 35 - Mantenimiento según la condición; Filtro de malla
35 ESPAÑOL Mantenimiento según la condición AVISO: Limpie el filtro de malla de la unidad ciclónica cuando se obstruya. El uso continuo en la condición obstruida podría provocar su calentamiento o avería del motor. Debe realizarse una limpieza profunda y puntual de acuerdo con el desempeño de su her...
Page 38 - Detección y solución de problemas; ACCESORIOS; GARANTÍA LIMITADA DE; Ésta Garantía no aplica para México
38 ESPAÑOL Detección y solución de problemas Antes de solicitar una reparación, verifique los siguientes puntos. Síntoma Área a ser investigada Método de solución Potencia de succión deficiente ¿La caja para polvo o el interior de la unidad ciclónica están llenos de polvo? Vacíe la caja para polvo o...
Page 40 - Makita Corporation
Some dust created by power sanding, sawing, grinding, drilling, and other construction activities contains chemicals known to the State of California to cause cancer, birth defects or other reproductive harm. Some examples of these chemicals are: • lead from lead-based paints, • crystalline silica f...