Page 2 - PRODUCT FEATURES
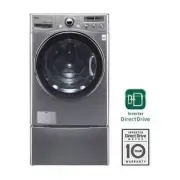
2 PRODUCT FEATURES PRODUCT FEATURES INVERTER DIRECT-DRIVE MOTOR The inverter motor, which is directly connected to the tub, minimizes energy loss and produces little noise and vibration. SMARTDIAGNOSIS™ Should you experience any technical difficulty with your washing machine, it has the capability o...
Page 3 - IMPORTANT SAFETY INSTRUCTIONS; READ ALL INSTRUCTIONS BEFORE USE; WARNING; DANGER; WARNING
3 IMPORTANT SAFETY INSTRUCTIONS ENGLISH IMPORTANT SAFETY INSTRUCTIONS READ ALL INSTRUCTIONS BEFORE USE WARNING For your safety, the information in this manual must be followed to minimize the risk of fire or explosion, electric shock, or to prevent property damage, injury to persons, or death. Your ...
Page 4 - BASIC SAFETY PRECAUTIONS; GROUNDING INSTRUCTIONS
4 IMPORTANT SAFETY INSTRUCTIONS IMPORTANT SAFETY INSTRUCTIONS READ ALL INSTRUCTIONS BEFORE USE WARNING For your safety, the information in this manual must be followed to minimize the risk of fire or explosion, electric shock, or to prevent property damage, injury to persons, or death. BASIC SAFETY ...
Page 5 - SAFETY INSTRUCTIONS FOR INSTALLATION
5 IMPORTANT SAFETY INSTRUCTIONS ENGLISH IMPORTANT SAFETY INSTRUCTIONS READ ALL INSTRUCTIONS BEFORE USE WARNING For your safety, the information in this manual must be followed to minimize the risk of fire or explosion, electric shock, or to prevent property damage, injury to persons, or death. SAFET...
Page 6 - SAVE THESE INSTRUCTIONS
6 IMPORTANT SAFETY INSTRUCTIONS IMPORTANT SAFETY INSTRUCTIONS READ ALL INSTRUCTIONS BEFORE USE WARNING For your safety, the information in this manual must be followed to minimize the risk of fire or explosion, electric shock, or to prevent property damage, injury to persons, or death. SAFETY INSTRU...
Page 7 - TABLE OF CONTENTS
7 TABLE OF CONTENTS ENGLISH TABLE OF CONTENTS 2 PRODUCT FEATURES 3 IMPORTANT SAFETY INSTRUCTIONS 4 BASIC SAFETY PRECAUTIONS 4 GROUNDING INSTRUCTIONS 5 SAFETY INSTRUCTIONS FOR INSTALLATION 6 SAFETY INSTRUCTIONS FOR USE, CARE, CLEAN-ING, AND DISPOSAL 8 INTRODUCING YOUR wASHING MACHINE 8 Parts and Acce...
Page 8 - NOTE; INTRODUCING YOUR wASHING MACHINE; Parts and Accessories; Parts; Accessories
8 INTRODUCING YOUR WASHING MACHINE NOTE Contact LG Customer Service at 1-800-243-0000 (1-888-542-2623 in Canada) if any accessories are missing. y For your safety and for extended product life, use only authorized components. The manufacturer is not responsible for y product malfunction or accidents...
Page 9 - Control panel features; Operation
9 INTRODUCING YOUR WASHING MACHINE ENGLISH Button Description Turns the washing machine on and off. y (During the wash cycle) stops operation, and cancels the settings. y STEAM FRESH™ y - For dress shirt and blouses (see page 24) ALLERGIENE™ y - For cotton, underwear (see page 24) SANITARY y - For u...
Page 10 - Display
10 INTRODUCING YOUR WASHING MACHINE Display Operation (continued) Button Description (Press before wash cycle) Pre-wash heavily soiled laundry (See y page. 26). (Press and hold during wash cycle) Lock/Unlock the button (See y page. 28). (Press before wash cycle) Tumbles clothes to prevent wrinkle (S...
Page 11 - INSTALLATION INSTRUCTIONS; Preview installation order
11 INSTALLATION INSTRUCTIONS ENGLISH INSTALLATION INSTRUCTIONS Preview installation order WARNING Washer is heavy! Two or more people are required when moving and unpacking the washer. y Failure to do so can result in back or other injury. Store and install the washer where it will not be exposed to...
Page 12 - Checking and choosing the proper
12 INSTALLATION INSTRUCTIONS Checking and choosing the proper location Install the washing machine on a solid floor that is strong and rigid enough to support the weight of the washing machine, even when fully loaded, without flexing or bouncing. If the floor has too much flex, you may need to reinf...
Page 13 - Unpacking and removing shipping bolts
13 INSTALLATION INSTRUCTIONS ENGLISH Unpacking and removing shipping bolts When removing the washer from the carton base, be sure to remove the foam drum support in the middle of the carton base. If you must lay the washer down to remove the base packaging materials, always lay it carefully on its s...
Page 14 - Connecting the water lines
14 INSTALLATION INSTRUCTIONS Connecting the water lines 1 Check the rubber seals on both sides of the hose. - Insert a rubber seal into the threaded fittings on each hose to prevent leaking. Rubber seal Water hose (To water inlet on the washing machine) Rubber seal Water hose (To faucet) 2 Connect t...
Page 15 - Connecting the drain line
15 INSTALLATION INSTRUCTIONS ENGLISH Connecting the drain line Secure the drain hose in place to prevent moving and leaking. NOTE The drain hose should be properly secured. Failure to y properly secure the drain hose can result in flooding and malfunction.Total height of the house end should not exc...
Page 16 - Leveling the washing machine
16 INSTALLATION INSTRUCTIONS Leveling the washing machine The washer tub of your new washing machine spins at very high speeds. To minimize vibration, noise, and unwanted movement, the floor must be perfectly level and solid. 1 Check the washing machine’s level. - Check the precise level by rocking ...
Page 17 - Plugging in the power cord and
17 INSTALLATION INSTRUCTIONS ENGLISH Plugging in the power cord and grounding Make sure to ground the washing machine to prevent a short circuit or an electric shock when plugging in. Using a 3-prong outlet Plug in the electrical outlet without additional grounding. WARNING The power outlet must be ...
Page 18 - PREPARATION; Sorting wash loads; Precautions for fabric care before wash cycle
18 PREPARATION Check all pockets to make sure that they are empty. u -Items such as clips, matches, pens, coins, and keys can damage both your washer and your clothes. Close zippers, hooks, and drawstrings to prevent these u items from snagging or tangling on other clothes. Pretreat heavily stained ...
Page 19 - Fabric care labels; Sorting laundry
19 PREPARATION ENGLISH Category Label Directions Washing Hand Wash Machine Wash, Normal Cycle Use Permanent Press/Wrinkle Resistant washing machine setting (which has a cool down or cold spray before the reduced spin) Use Gentle/Delicate washing machine setting (slow agitation and/ or reduced wash t...
Page 20 - Loading the dispenser; Using detergent/fabric softener; Recommended detergent
20 PREPARATION Loading the dispenser The detergent dispenser drawer of the washing machine has a dispenser compartment for each detergent type. Add the appropriate detergents into its respective compartments. 1 Pull out the detergent dispenser drawer. 2 Add the appropriate detergent to its allocated...
Page 22 - USING YOUR WASHING MACHINE; Basic operation
22 USING YOUR WASHING MACHINE USING YOUR WASHING MACHINE Basic operation Load the laundry into the washing machine and close the door. 1 2 3 4 5 6 Press A . - The lights around the cycle selector knob will illuminate and a chime will sound. Turn B to the desired cycle. - The proper default option is...
Page 23 - Cycle guide
23 USING YOUR WASHING MACHINE ENGLISH Cycle guide The cycle guide below shows the options and recommended fabric types for each cycle. ● = Available option CYCLE FABRIC TYPE DISPLAY TIME(MIN) BASIC OPTION ( =DEFAULT) ADDITIONAL OPTIONS WASH TEMP. SPIN SPEED SOIL LEVEL PRE- WASH FRESH CARE EXTRA RI...
Page 24 - Reduce laundry allergen,; ALLERGIENETM; SANITARY; Blankets or bulky items,; HEAVY DUTY; Main cycle; Reduce odor and wrinkles,; STEAM FRESHTM
24 USING YOUR WASHING MACHINE Reduce laundry allergen, ALLERGIENE™ This cycle is a powerful, high temperature cycle designed specifically to reduce certain allergens. NOTE Selecting the ALLERGIENE™ cycle automatically y incorporates steam into the wash cycle.The ALLERGIENE™ cycle can significantly r...
Page 25 - Cycle setting buttons; Setting options before cycle; Setting the water temperature,
25 USING YOUR WASHING MACHINE ENGLISH Sheer items, f This cycle is for washing lingerie or sheer and lacy clothes which can easily be damaged. Items labeled wool or hand-washable, g This cycle is for washing shrinkable woolen or hand-washable items requiring delicate care. Only wash woolen items tha...
Page 26 - SPIN SPEED
26 USING YOUR WASHING MACHINE Setting spin speed, SPIN SPEED You can set the desired spin speed. Use this feature properly according to the characteristics of the load. 1 Press A and turn B to the desired cycle. 2 Press repeatedly to select the desired spin speed. - When an optional item is selected...
Page 27 - Adding extra rinse cycle,
27 USING YOUR WASHING MACHINE ENGLISH Adding extra rinse cycle, EXTRA RINSE You can add an extra rinse cycle to the default rinse cycle. 1 Press A and turn B to the desired cycle. 2 Press . - light will turn on. 3 Press the desi red option to use the other options. - Skip to step 4 to use the defaul...
Page 28 - COLDWASH; Setting options during cycle; Button lock feature,
28 USING YOUR WASHING MACHINE Saving energy, COLDWASH ™ Adding the COLDWASH™ option to thee cycles reduces energy usage and provides the same washing performance as a warm water wash. By using 6 different washing motion (Tumbling, Rolling, Stepping, Scrubbing, Swing, Filtration), fabrics get the cle...
Page 29 - Care; Care after wash; Care in cold climates; MAINTENANCE
29 MAINTENANCE ENGLISH Care Care after wash After the cycle is finished, wipe the door and the inside of the door seal to remove any moisture. Leave the door open to dry the washer tub interior. Wipe the body of the washing machine with a dry cloth to remove any moisture. WARNING Unplug the washer b...
Page 30 - Cleaning; Clean your the drum,
30 MAINTENANCE When the Drain Line is Frozen 1 Pour hot water in the washer tub and close the door. - Leave it for 10 minutes. 2 Press A after 10 minutes. 3 Press for draining and spinning. 4 Press C . - Check if the water drains. Cleaning Periodically clean the washing machine to maintain its perfo...
Page 33 - Cleaning the drain pump filter
33 MAINTENANCE ENGLISH Cleaning the drain pump filter The washing machine fails to drain if the drain pump filter is clogged. Periodically clean the drain filter to prevent clogging with foreign objects. 1 Press A to turn off the washing machine and pull out the plug. 2 Open the drain pump filter co...
Page 34 - Cleaning the door seal
34 MAINTENANCE Cleaning the door seal Clean the door seal once a month to prevent build-up of dirt in the door seal. 1 Wear rubber gloves and protective goggles. 2 Dilute 3/4 cup (177 ml) of liquid chlorine bleach in 1 gallon (3.8 L) of water. 3 Soak a sponge or a soft cloth in this diluted solution...
Page 35 - TROUBLESHOOTING; Checking error messages
35 TROUBLESHOOTING ENGLISH TROUBLESHOOTING Checking error messages If the following message appears on the display, check the following and take the appropriate corrective action. Message Possible Causes Solutions Item of clothing have machine gathered on one side of the tub. There are not enough it...
Page 36 - Before calling for service
36 TROUBLESHOOTING Before calling for service Check the following before calling for service. Problem Possible Causes Solutions Clicking sound Do you hear a sound when you close or lock y and unlock the door? This sound is normal and occurs when the y door is closed, locked or unlocked. Spraying or ...
Page 37 - SPECIFICATIONS
37 SPECIFICATIONS ENGLISH Problem Possible Causes Solutions Power is not turned on Is the power cord plugged in properly? y Has a house fuse blown, a circuit breaker y tripped, or a power outage occurred? Make sure that the plug is secured in a y grounded 3-prong, 120 V (60 Hz) outlet.Reset the circ...
Page 38 - USING SMARTDIAGNOSISTM
38 USING SMARTDIAGNOSIS™ - Only use this feature when instructed to do so by the call center. The transmission sounds similar to a fax machine, and so has no meaning except to the call center. - SMARTDIAGNOSIS™ cannot be activated if the washer does not power up. If this happens, then troubleshootin...
Page 39 - LG WASHING MACHINE LIMITED WARRANTY (USA)
39 WARRANTY ENGLISH THIS LIMITED WARRANTY DOES NOT COVER:1. Service trips to deliver, pick up, or install the product or for instruction on product use.2. Replacing house fuses or resetting of circuit breakers, correction of house wiring or plumbing, or correction of product installation.3. Damage o...
Page 40 - LG WASHING MACHINE LIMITED WARRANTY (CANADA)
40 WARRANTY LG WASHING MACHINE LIMITED WARRANTY (CANADA) WARRANTY: Should your LG Washer (“Product”) fail due to a defect in material or workmanship under normal home use during the warranty period set forth below, LG Canada will at its option repair or replace the Product upon receipt of proof of o...
Page 41 - MANUAL DE PROPIETARIO; LAVADORA; Lea este manual con cuidado antes de utilizar la
MANUAL DE PROPIETARIO LAVADORA WM3550H*** Lea este manual con cuidado antes de utilizar la lavadora y guárdelo para futuras consultas. P/NO : MFL62526872 www.lg.com ESP AÑOL
Page 42 - CARACTERÍSTICAS DEL PRODUCTO
2 CARACTERÍSTICAS DEL PRODUCTO CARACTERÍSTICAS DEL PRODUCTO MOTOR DIRECT-DRIVE INVERTER El motor inverter, el cual está conectado directamente al tambor, minimiza la pérdida de energía y produce menos ruido yvibraciones. SMARTDIAGNOSIS™ Si experimenta alguna dificultad técnica con su lavadora, éste ...
Page 43 - INSTRUCCIONES IMPORTANTES DE SEGURIDAD; LEA TODAS LAS INSTRUCCIONES ANTES DE USAR; ADVERTENCIA; PELIGRO; ADVERTENCIA
3 INSTRUCCIONES IMPORTANTES DE SEGURIDAD ESP AÑOL INSTRUCCIONES IMPORTANTES DE SEGURIDAD LEA TODAS LAS INSTRUCCIONES ANTES DE USAR ADVERTENCIA Por su seguridad, debe seguir la informacion indicada en este manual para minimizar el riesgo de incendio o explosion, descarga electrica, o para prevenir da...
Page 44 - PRECAUCIONES BÁSICAS DE SEGURIDAD; INSTRUCCIONES PARA LA CONEXIÓN A TIERRA
4 INSTRUCCIONES IMPORTANTES DE SEGURIDAD INSTRUCCIONES IMPORTANTES DE SEGURIDAD LEA TODAS LAS INSTRUCCIONES ANTES DE USAR ADVERTENCIA Por su seguridad, se debe seguir la informacion indicada en este manual para minimizar el riesgo de incendio o explosion, descarga electrica, o para prevenir danos a ...
Page 45 - INSTRUCCIONES DE SEGURIDAD PARA LA INSTALACIÓN
5 INSTRUCCIONES IMPORTANTES DE SEGURIDAD ESP AÑOL INSTRUCCIONES IMPORTANTES DE SEGURIDAD LEA TODAS LAS INSTRUCCIONES ANTES DE USAR ADVERTENCIA Por su seguridad, se debe seguir la informacion indicada en este manual para minimizar el riesgo de incendio o explosion, descarga electrica, o para prevenir...
Page 46 - GUARDE ESTAS INSTRUCCIONES
6 INSTRUCCIONES IMPORTANTES DE SEGURIDAD INSTRUCCIONES IMPORTANTES DE SEGURIDAD LEA TODAS LAS INSTRUCCIONES ANTES DE USAR ADVERTENCIA Por su seguridad, se debe seguir la informacion indicada en este manual para minimizar el riesgo de incendio o explosion, descarga electrica, o para prevenir danos a ...
Page 47 - ÍNDICE
7 ÍNDICE ESP AÑOL ÍNDICE 2 CARACTERÍSTICAS DEL PRODUCTO 3 INSTRUCCIONES IMPORTANTES DE SEGURIDAD 4 PRECAUCIONES BÁSICAS DE SEGURIDAD 4 INSTRUCCIONES PARA LA CONEXIÓN A TIERRA 5 INSTRUCCIONES DE SEGURIDAD PARA LA IN-STALACIÓN 6 INSTRUCCIONES DE SEGURIDAD PARA LA UTI-LIZACIÓN, CUIDADO Y LIMPIEZA, Y LA...
Page 48 - NOTA; INTRODUCCIóN A LA LAvADORA; Partes y Accesorios; Partes; Accesorios incluidos
8 INTRODUCCIÓN A LA LAVADORA NOTA Póngase en contacto con el Departamento de atención al cliente de LG, en el número 1-800-243-0000 (1-888-542-2623 en y Canadá) si falta alguno de los accesorios.Para su seguridad, y con el fin de extender la vida útil de su lavadora, utilice sólo componentes autoriz...
Page 49 - Características del panel de control; Funcionamiento
9 INTRODUCCIÓN A LA LAVADORA ESP AÑOL Botón Descripción Enciende y apaga la lavadora. y (Durante el ciclo de lavado) Detiene el funcionamiento, y cancela los ajustes. y STEAM FRESH™ y - Para camisas y blusas (véase página 24) ALLERGIENE™ y - Para algodón, ropa interior (véase página 24) SANITARY y -...
Page 50 - Pantalla
10 INTRODUCCIÓN A LA LAVADORA Funcionamiento (continuación) Pantalla Botón Descripción (Seleccione antes del ciclo de lavado) Prelavar prendas bien sucias (Véase página 26). y (Durante el ciclo de lavado, mantenga pulsado) Bloquear / Desbloquear el botón (Véase página 28). y (Seleccione antes del ci...
Page 51 - INSTRUCCIONES DE INSTALACIóN; vista previa del orden de instalación
11 INSTRUCCIONES DE INSTALACIÓN ESP AÑOL INSTRUCCIONES DE INSTALACIóN vista previa del orden de instalación ADVERTENCIA La lavadora es pesada. Se necesitan dos o más personas para instalar y trasladar el electrodoméstico. y Si esto no se cumple se podrán sufrir heridas en la espalda u otras herida. ...
Page 52 - Comprobación y elección de la ubicación
12 INSTRUCCIONES DE INSTALACIÓN Comprobación y elección de la ubicación adecuada Instale la lavadora sobre un suelo con la resistencia y rigidez suficiente para soportar el peso de la máquina, incluso con la carga completa, sin que se flexione o rebote. Si el suelo tiene una flexibilidad excesiva, q...
Page 53 - Desempaque y retiro de los tornillos de
13 INSTRUCCIONES DE INSTALACIÓN ESP AÑOL Desempaque y retiro de los tornillos de transporte Al retirar la lavadora de la base de cartón, asegúrese de quitar el soporte del tambor de foam colocado en la mitad de la base de cartón. Si debe acostar la lavadora para quitar los materiales de empaque de l...
Page 54 - Conexión de las tuberías de agua
14 INSTRUCCIONES DE INSTALACIÓN Conexión de las tuberías de agua 1 Revise las juntas herméticas de goma de ambos extremos de la manguera. - Inserte una junta de goma en los acoples roscados de cada manguera para evitar fugas. Junta hermética de goma Manguera de agua (A entrada de agua de la lavadora...
Page 55 - Conexión del tubo de desagüe
15 INSTRUCCIONES DE INSTALACIÓN ESP AÑOL Conexión del tubo de desagüe Fije el tubo de desagüe para evitar que se mueva y que se produzcan fugas. NOTA La manguera de desagüe debe fijarse correctamente. y En caso contrario, podría resultar en inundación o funcionamiento incorrectoLa longitud total de ...
Page 56 - Nivelación de la lavadora
16 INSTRUCCIONES DE INSTALACIÓN Nivelación de la lavadora El tambor de su nueva lavadora gira a alta velocidad . Para reducir las vibraciones, el ruido y los movimientos no deseados, el suelo debe estar nivelado y debe ser una superficie sólida. 1 Compruebe que la lavadora esté nivelada. - Compruebe...
Page 57 - Conexión del enchufe y la toma de tierra; PRECAUCIÓN
17 INSTRUCCIONES DE INSTALACIÓN ESP AÑOL Conexión del enchufe y la toma de tierra Conecte a tierra la lavadora para evitar un cortocircuito o descargas eléctricas durante la conexión. Utilización de una toma de 3 clavijas Conecte el enchufe en la toma sin conexión a tierra adicional. PRECAUCIÓN El t...
Page 58 - PREPARACIÓN; Clasificación de las cargas de lavado
18 PREPARACIÓN PREPARACIÓN Clasificación de las cargas de lavado Precauciones para el cuidado de los tejidos antes del ciclo de lavado Lea y cumpla con las siguientes instrucciones para evitar que la ropa se encoja o se dañe. Revise todos los bolsillos para asegurarse de que esten u vacios. - Articu...
Page 59 - Etiquetas de cuidado de las telas; Clasificación de la carga de ropa
19 PREPARACIÓN ESP AÑOL Categoría Etiqueta Instrucciones Lavado Lavado a mano Lavado a máquina, ciclo normal Utilice el ajuste de planchado permanente/ resistente a las arrugas (la cual tiene un enfriado o rociado con agua fría antes del centrifugado reducido)Utilice el ajuste de prendas delicadas (...
Page 60 - Cargando el dispensador; Utilización de detergente/suavizante; Detergente recomendado
20 PREPARACIÓN Cargando el dispensador El cajón dispensador de detergente de la lavadora tiene un compartimiento dispensador para cada tipo de detergente.Añada los detergentes adecuados en sus compartimentos respectivos 1 Saque el cajón dispensador de detergente. 2 Añada el detergente apropiado en e...
Page 62 - UTILIZACIÓN DE LA LAVADORA; Funcionamiento básico
22 UTILIZACIÓN DE LA LAVADORA UTILIZACIÓN DE LA LAVADORA Funcionamiento básico Cargue la ropa en la lavadora y cierre la puerta. 1 2 3 4 5 6 Pulse A . - Las luces alrededor del dial selector de ciclos se iluminarán y sonará una señal acústica. Gire B al ciclo deseado. - Se selecciona automáticamente...
Page 63 - Guía de ciclos
23 UTILIZACIÓN DE LA LAVADORA ESP AÑOL Guía de ciclos La guía de ciclos indicada más abajo muestra las opciones y tipos de telas recomendadas para cada ciclo. ● = Opcion disponible CICLO TIPO DE TEJIDO` TIEMPO DESPLEGADO (MIN) BASIC OPTION ( =DEFAULT) ADDITIONAL OPTIONS TEMPERATURA DE LAVADO VELOC...
Page 65 - Botones de ajuste de ciclo; Opciones de ajuste antes del ciclo; Ajuste de la temperatura del agua,
25 UTILIZACIÓN DE LA LAVADORA ESP AÑOL Prendas delicadas, f Este ciclo se utiliza para lavar lencería o ropa con encajes que se pueda dañar fácilmente. Prendas de lana, g Este ciclo se utiliza para lavar ropa de lana que puede encogerse o ropa delicada que necesita lavarse con mucho cuidado. Utilíce...
Page 66 - Ajuste de la velocidad de centrifugado,
26 UTILIZACIÓN DE LA LAVADORA Ajuste de la velocidad de centrifugado, SPIN SPEED Puede seleccionar la velocidad de centrifugado que desee. Utilice esta función correctamente, según las características de la carga. 1 Pulse A y gire B al ciclo deseado. 2 Pulse repetidamente para seleccionar la velocid...
Page 67 - Añadiendo ciclo de enjuague extra,
27 UTILIZACIÓN DE LA LAVADORA ESP AÑOL Añadiendo ciclo de enjuague extra, EXTRA RINSE Puede añadir un ciclo de enjuague extra al ciclo de enjuague por defecto. 1 Pulse A y gire B al ciclo deseado. 2 Pulse . - Se iluminará la luz . 3 Pulse el botón de la opción deseada para utilizar otras opciones. -...
Page 68 - Opciones de ajuste durante el ciclo; Función de bloqueo de botones,
28 UTILIZACIÓN DE LA LAVADORA Ahorro de energía, COLDWASH ™ Agregar la opcion COLDWASH™ a estos ciclos brinda una reduccion de energia y el mismo desempeno de lavado que un lavado con agua tibia. Mediante el uso de 6 movimientos de lavado diferentes (rotacion, balanceo, salto, refregado,oscilacion y...
Page 69 - Cuidados; Cuidados tras el lavado; MANTENIMIENTO
29 MANTENIMIENTO ESP AÑOL Cuidados Cuidados tras el lavado Una vez finalizado el ciclo, limpie la puerta y el interior de la junta hermética de la puerta para eliminar la humedad. Deje la puerta abierta para secar el interior del tambor. Limpie el cuerpo de la lavadora con un trapo seco para elimina...
Page 70 - Limpieza; Limpieza del tambor,
30 MANTENIMIENTO Cuando se congela el tubo de desagüe 1 Vierta agua caliente en el tambor de la lavadora y cierre la puerta.- Deje el agua adentro durante 10 minutos. 2 Pulse A después de 10 minutos. 3 Pulse . 4 Pulse C . - Verifique si se vacía el agua. Limpieza Limpie la lavadora periódicamente pa...
Page 73 - Limpieza del filtro de la bomba de
33 MANTENIMIENTO ESP AÑOL Limpieza del filtro de la bomba de desagüe La lavadora no se vaciará correctamente si el filtro de la bomba de desagüe está obstruido. Limpie periódicamente el filtro para evitar obstrucciones por objetos extraños. 1 Pulse A para apagar la lavadora y desconecte el enchufe. ...
Page 74 - Limpieza de la junta de la puerta
34 MANTENIMIENTO Limpieza de la junta de la puerta Limpie la junta hermética de la puerta una vez al mes para evitar la acumulación de suciedad. 1 Utilice guantes de goma y gafas de protección. 2 Diluya 3/4 de taza (177 mL) de blanqueador líquido con lejía en 1 galón (3.8 litros) de agua. 3 Remoje u...
Page 75 - SOLUCIÓN DE PROBLEMAS; Comprobación de los mensajes de error
35 ESP AÑOL SOLUCIÓN DE PROBLEMAS SOLUCIÓN DE PROBLEMAS Comprobación de los mensajes de error Si aparece el siguiente mensaje en la pantalla, compruebe lo siguiente y tome la acción correctiva apropiada. Mensaje Causas posibles Solución No hay suficiente ropa en la lavadora. ¿Se ha acumulado la ropa...
Page 76 - Antes de llamar al servicio técnico
36 SOLUCIÓN DE PROBLEMAS Antes de llamar al servicio técnico Haga las siguientes comprobaciones antes de llamar al servicio técnico. Problema Causas posibles Solución Sonido de clic ¿Oye un sonido cuando cierra y bloquea o y desbloquea la puerta? Este sonido es normal cuando se cierra, se y bloquea ...
Page 77 - ESPECIFICACIONES
37 ESPECIFICACIONES ESP AÑOL Problema Causas posibles Solución Ropa arrugada ¿Ha retirado la carga inmediatamente después y que se acabó el ciclo?¿Ha sobrecargado el tambor? y ¿Ha invertido las entradas de agua caliente y y agua fría? Retire la ropa inmediatamente cuando haya y acabado el ciclo.No s...
Page 78 - UTILIZACIÓN DEL SMARTDIAGONOSIS
38 UTILIZACIÓN DEL DIAGNÓSTICOINTELIGENTE™ - Utilice esta función sólo cuando así se lo indique el agente del Centro de Atención al Cliente. La transmisión tiene un sonido similar al de un fax, y no tiene ningún significado, excepto para el Centro de Atención al Cliente. - El DiagnósticoInteligente™...
Page 81 - MANUEL D’UTILISATION; MACHINE À LAVER; mode d’emploi et conservez-le pour vous y référer ultérieurement.
MANUEL D’UTILISATION MACHINE À LAVER WM3550H*** Avant d’utiliser votre machine à laver (laveuse), lisez attentivement ce mode d’emploi et conservez-le pour vous y référer ultérieurement. P/NO : MFL62526872 www.lg.com FRANÇAIS
Page 82 - CARACTERISTIQUES DU PRODUIT
2 CARACTERISTIQUES DU PRODUIT CARACTERISTIQUES DU PRODUIT INVERSEUR MOTEUR D’ENTRAINEMENT DIRECT Le moteur de l’inverseur qui est directement connecté à la cuve réduit la perte énergétique et produit moins de bruits et de vibrations. SMARTDIAGNOSIS™ Si votre lave-linge présente des difficultés techn...
Page 83 - INSTRUCTIONS IMPORTANTES DE SÉCURITÉ; LISEZ TOUTES LES DIRECTIVES AVANT D’UTILISER L’APPAREIL; AVERTISSEMENT; AVERTISSEMENT
3 INSTRUCTIONS IMPORTANTES DE SÉCURITÉ FRANÇAIS INSTRUCTIONS IMPORTANTES DE SÉCURITÉ LISEZ TOUTES LES DIRECTIVES AVANT D’UTILISER L’APPAREIL AVERTISSEMENT Pour votre sécurité, vous devez suivre l’information contenue dans ce manuel afi n de réduire les risques d’incendie et d’explosion, de choc élec...
Page 84 - INSTRUCTIONS DE MISE À LA TERRE; PRÉCAUTIONS DE SÉCURITÉ DE BASE
4 INSTRUCTIONS IMPORTANTES DE SÉCURITÉ INSTRUCTIONS DE MISE À LA TERRE Cet appareil doit être raccordé à la terre. Dans l’éventualité d’un dysfonctionnement ou d’une panne, la mise à la terre réduira le risque de choc électrique en fournissant au courant électrique un chemin de moindre résistance. C...
Page 85 - PRÉCAUTIONS DE SÉCURITÉ POUR L’INSTALLATION
5 INSTRUCTIONS IMPORTANTES DE SÉCURITÉ FRANÇAIS INSTRUCTIONS IMPORTANTES DE SÉCURITÉ LISEZ TOUTES LES DIRECTIVES AVANT D’UTILISER L’APPAREIL AVERTISSEMENT Pour votre securite, vous devez suivre l’information contenue dans ce manuel afin de reduire les risques d’incendie et d’explosion, de choc elect...
Page 86 - CONSERVEZ CES DIRECTIVES
6 INSTRUCTIONS IMPORTANTES DE SÉCURITÉ INSTRUCTIONS IMPORTANTES DE SÉCURITÉ LISEZ TOUTES LES DIRECTIVES AVANT D’UTILISER L’APPAREIL AVERTISSEMENT Pour votre securite, vous devez suivre l’information contenue dans ce manuel afin de reduire les risques d’incendie et d’explosion, de choc electrique ain...
Page 87 - TABLE DES MATIERES
7 TABLE DES MATIERES FRANÇAIS TABLE DES MATIERES 2 CARACTERISTIQUES DU PRODUIT 3 INSTRUCTIONS IMPORTANTES DE SÉCU- RITÉ 4 PRÉCAUTIONS DE SÉCURITÉ DE BASE 4 INSTRUCTIONS DE MISE À LA TERRE 5 PRÉCAUTIONS DE SÉCURITÉ POUR L’INSTALLATION 6 PRÉCAUTIONS DE SÉCURITÉ POUR LA UTILI-SATION, LA ENTRETIEN ET NE...
Page 88 - REMARQUE; PRÉSENTATION DE LA MAChINE à LAvER; Pièces et Accessores; Pièces; ccessoires
8 PRÉSENTATION DE LA MACHINE À LAVER REMARQUE Contactez le Service à la clientèle LG au 1-800-243-0000 (1-888-542-2623 au Canada) si un accessoire quelconque est y manquant.Pour votre sécurité et pour la longévité du produit, utilisez uniquement des composants autorisés. Le fabricant décline toute y...
Page 89 - Caractéristiques du panneau de configuration; Fonctionnement
9 PRÉSENTATION DE LA MACHINE À LAVER FRANÇAIS Bouton Fonction Permet de mettre la machine à laver en marche et hors tension. y (Pendant le cycle de lavage) permet d’arrêter le système d’annuler les paramètres. y STEAM FRESH™ y - Pour chemises habillées et chemisiers (voir page 24) ALLERGIENE™ y - Po...
Page 90 - Affichage
10 PRÉSENTATION DE LA MACHINE À LAVER Fonctionnement (suite) Affichage Button Description (Appuyer brièvement avant le cycle de lavage), sélectionnez Prélavage linge très sale y (Voir page 26). (Maintenez appuyé pendant le cycle de lavage) Verrouiller/déverrouiller le bouton (Voir page 28). y (Appuy...
Page 91 - CONSIGNES RELATIvES à L’INSTALLATION; Aperçu de l’ordre d’installation
11 CONSIGNES RELATIVES À L’INSTALLATION FRANÇAIS CONSIGNES RELATIvES à L’INSTALLATION Aperçu de l’ordre d’installation AVERTISSEMENT La machine a laver est lourde! Deux personnes ou plus sont necessaires lorsque vous deballez et deplacez la machine a y laver. Tout non-respect de ces instructions peu...
Page 92 - vérification et sélection de l’emplacement
12 CONSIGNES RELATIVES À L’INSTALLATION vérification et sélection de l’emplacement approprié Installez la machine à laver sur un sol ferme, suffisamment résistant et dur pour supporter son poids même lorsqu’il est entièrement chargé, sans flexion, ni rebond. Si le sol est très mou, vous devez le ren...
Page 93 - Déballage et retrait des boulons
13 CONSIGNES RELATIVES À L’INSTALLATION FRANÇAIS Déballage et retrait des boulons d’expédition Al retirar la lavadora de la base de carton, asegurese de quitar el soporte de tambor de espuma colocado en la mitad de la base de carton.Si debe asentar la lavadora hacia abajo para quitar los materiales ...
Page 94 - Raccordement des conduites d’eau
14 CONSIGNES RELATIVES À L’INSTALLATION Raccordement des conduites d’eau 1 Vérifiez les joints en caoutchouc sur les deux côtés du tuyau.- Introduisez un joint en caoutchouc dans les raccords filetés de chaque tuyau pour empêcher des fuites.. Joint en caoutchouc Tuyau d’eau (admission d’eau dans la ...
Page 95 - Raccordement de la conduite d’évacuation
15 CONSIGNES RELATIVES À L’INSTALLATION FRANÇAIS Utilisation de la cuve de lavage 1 Fixez l’extrémité du tuyau sur le support du coude. - Raccordez le support du coude à 4 pouces (10cm) à partir de l’extrémité du tuyau d’évacuation. Si le support du coude est raccordé à plus de 4 pouces (10cm) de l’...
Page 96 - Stabilisation de la machine à laver
16 CONSIGNES RELATIVES À L’INSTALLATION Stabilisation de la machine à laver La cuve de lavage de votre nouvelle machine tourne à uneà grande vitesse. Pour réduire des vibrations, des bruits, et tout déplacement accidentel de la machine, le plancher doit être parfaitement uniforme et solide. 1 Vérifi...
Page 97 - Branchement du cordon d’alimentation et
17 CONSIGNES RELATIVES À L’INSTALLATION FRANÇAIS Branchement du cordon d’alimentation et mise à la terre Veillez à ce que la machine à laver soit mise à la masse pour éviter un court circuit ou un choc électrique lorsque vous la branchez. Utilisation de la sortie à 3 broches Branchez la sortie élect...
Page 98 - AVANT D’UTILISER LA MACHINE; Tri des charges de lessivage; Précautions à prendre pour les vêtements avant le cycle de lavage
18 AVANT D’UTILISER LA MACHINE AVANT D’UTILISER LA MACHINE Tri des charges de lessivage Précautions à prendre pour les vêtements avant le cycle de lavage Lisez et respectez les instructions suivantes pour éviter d’endommager ou de rétrécir les vêtements. Verifiez toutes les poches pour vous assurer ...
Page 99 - Étiquettes d’entretien des tissus; Tri du linge
19 AVANT D’UTILISER LA MACHINE FRANÇAIS Etiquette Directives Lavage Lavage manuel Lavage avec la machine, cycle normal Utilisez le paramètre Pressage permanent/Résistant au plissage au niveau de la machine à laver (qui est dotée d’un pulvérisateur de refroidissement ou de froid avant la réduction de...
Page 100 - Chargement du distributeur; Utilisation du détergent/de; Détergent recommandé
20 AVANT D’UTILISER LA MACHINE Chargement du distributeur Le bac de distribution du détergent de la machine à laver est doté d’un compartiment du distributeur pour chaque type de détergent. Ajoutez les détergents appropriés dans leurs compartiments respectifs. 1 Tirez le bac de distribution du déter...
Page 102 - UTILISATION DE VOTRE MACHINE A LAVER; Exploitation élémentaire
22 UTILISATION DE VOTRE MACHINE A LAVER UTILISATION DE VOTRE MACHINE A LAVER Exploitation élémentaire Chargez le linge dans la machine à laver et fermez la porte. 1 2 3 4 5 6 Appuyez sur A . - Les voyants placés autour du bouton de sélection des cycles s’allument et un son se fait entendre. Tournez ...
Page 104 - Cycle principal
24 UTILISATION DE VOTRE MACHINE A LAVER REMARQUE En sélectionnant le cycle ALLERGIENEMC, de la vapeur y est automatiquement integree au cycle de lavage. Le cycle ALLERGIENEMC peut reduire considerablement y les allergenes dans la literie et les vetements. Le cycle ALLERGIENEMC aide a reduire les aca...
Page 105 - Eléments extra fins,; Boutons de configuration de cycle; Configuration des options avant le cycle; Réglage de la température de l’eau,
25 FRANÇAIS UTILISATION DE VOTRE MACHINE A LAVER Eléments extra fins, f Ce cycle est prévu pour le lavage de la lingerie ou desvêtements extra fins ou en dentelle qui peuvent facilement se gâter. Eléments en laine, g Ce cycle sert à lessiver la laine susceptible de se rétrécir ou le linge lavable à ...
Page 106 - Réglage de la vitesse d’essorage,
26 UTILISATION DE VOTRE MACHINE A LAVER Réglage de la vitesse d’essorage, SPIN SPEED Vous pouvez régler la vitesse d’essorage de votre choix. Utilisez cette fonctionnalité correctement en fonction des caractéristiques de la charge. 1 Appuyez sur A et tournez B en fonction du cycle souhaité. 2 Appuye...
Page 107 - Ajout d’un cycle de rinçage supplémentaire,
27 FRANÇAIS UTILISATION DE VOTRE MACHINE A LAVER Ajout d’un cycle de rinçage supplémentaire, EXTRA RINSE Vous pouvez ajouter un cycle de rinçage supplémentaire au cycle de rinçage par défaut. 1 Appuyez sur A et tournez B en fonction du cycle souhaité. 2 Appuyez sur . - Le voyant va s’allumer. 3 Appu...
Page 108 - Pour économiser de l’énergie,; Configuration des options pendant le cycle; Fonctionnalité du verrouillage des boutons,
28 UTILISATION DE VOTRE MACHINE A LAVER Pour économiser de l’énergie, COLDWASH™ Ajouter l’option COLDWASH™ a ces cycles permet de reduire l’utilisation d’energie et d’obtenir la meme performance de lavage qu’un lavage chaud. En utilisant 6 mouvements de lavage differents (culbutage,roulement, marche...
Page 109 - Entretien; Entretien après le lavage; Entretien dans les zones à climat froid; ENTRETIEN
29 MAINTENANCE FRANÇAIS Entretien Entretien après le lavage A la fin du cycle, essuyez la porte et l’intérieur du sas d’étanchéité pour enlever la moisissure. Laissez la porte ouverte pour faire sécher l’intérieur de la cuve de lavage. Essuyez la coque de la machine à laver à l’aide d’un tissu sec p...
Page 110 - Nettoyage; Nettoyez le tambour,
30 MAINTENANCE Lorsque la conduite d’évacuation se congèle 1 Versez l’eau chaude dans la cuve à laver et fermez la porte. Patientez pendant 10 minutes. 2 Appuyez sur A après 10 minutes. 3 Appuyez sur pour le drainage et la filature. 4 Appuyez sur C . - Vérifiez si l’eau est évacuée. Nettoyage Nettoy...
Page 113 - Nettoyage du filtre de la pompe de
33 MAINTENANCE FRANÇAIS Nettoyage du filtre de la pompe de vidange Il est impossible de vidanger la machine à laver si le filtre de la pompe de vidange est bouché. Nettoyez régulièrement le filtre d’entrée d’eau pour éviter qu’il soit bouché par des corps étrangers. 1 Appuyez sur A pour mettre la ma...
Page 114 - Nettoyage du sas d’étanchéité
34 MAINTENANCE Nettoyage du sas d’étanchéité Nettoyez le sas d’étanchéité une fois par mois pour éviter l’accumulation de la saleté à ce niveau. 1 Mettez les gangs en caoutchouc et des lunettes de sécurité. 2 Diluez 3/4 du gobelet (177ml) de l’eau de javel liquide avec chlore dans 3,8 L (1 gallon) d...
Page 115 - DEPANNAGE; Vérification des messages d’erreurs
35 FRANÇAIS DEPANNAGE DEPANNAGE Vérification des messages d’erreurs Si le message ci-dessous s’affiche à l’écran, vérifiez les éléments suivants et prenez les mesures correctives nécessaires. Message Causes probables Solutions Le linge s’est accumulé sur un côté de la cuve de lavage dans la machine....
Page 116 - Avant d’appeler le service de maintenance
36 DEPANNAGE Avant d’appeler le service de maintenance Vérifiez les éléments suivants avant d’appeler le service. Problème Causes probables Solutions Clic perceptible Entendez-vous un son lorsque vous fermez, y verrouillez ou déverrouiller la porte? Ce son est normal et est perceptible lorsque la y ...
Page 117 - SPÉCIFICATIONS
37 SPECIFICATIONS FRANÇAIS Problème Causes probables Solutions Plissage Avez-vous enlevé la charge immédiatement y après la fin du cycle?Avez-vous surchargé la cuve? y Avez-vous inversé les entrées d’eau chaude et y d’eau froide? Retirez la charge immédiatement dès qu’elle y est finie.Ne surchargez ...
Page 118 - UTILISATION DE SMARTDIAGNOSISTM
38 UTILISATION DE SMARTDIAGNOSIS™ - Utilisez cette fonction uniquement selon les instructions du centre d’appels. Le son de la transmission ressemble à celui d’un télécopieur et seul le centre d’appel peut l’interpréter. - SmartDiagnosisMC ne peut être activé que si le lave-linge est sous tension. S...
Page 119 - GARANTIE LIMITEE POUR LA MACHINE A LAVER LG (CANADA)
39 FRANÇAIS GARANTIE GARANTIE LIMITEE POUR LA MACHINE A LAVER LG (CANADA) GARANTIE: En cas de défaillance de votre machine à laver (“produit”) consécutive à une défaillance matérielle ou à un vis de fabrication dans le cadre d’une exploitation ménagère normale pendant la période de garantie définie ...
Page 120 - OWNER’S MANUAL; WASHING MACHINE; Please read this manual carefully before operating; Register your product Online!
OWNER’S MANUAL WASHING MACHINE WM2301* Please read this manual carefully before operating your washing machine and retain it for future reference. P/NO : MFL62526862 www.lg.com This product qualifies for ENERGY STAR in the “factory default (Home Use)” setting.Changing the factory default settings or...