Page 4 - Table of Contents
2 Important Customer Information...............................................1 Table of Contents .......................................................................2 The Basics ...................................................................................5 Phone Overview ....................
Page 7 - The Basics; Phone Overview; Front View; LED Indicator; Back Key
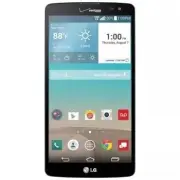
5 The Basics Phone Overview Front View Front Camera QuickTap Bar Back Key Home Key Recent Apps Key Home Screen Earpiece Proximity Sensor LED Indicator NOTES • All screen shots in this guide are simulated. Actual displays may vary. • Instructions to perform tasks in this guide are based on the defaul...
Page 8 - Recent Apps Key; Front Camera; Earpiece; Rear View
6 The Basics 5. Recent Apps Key Tap this Touch Key to display recently used apps. Touch and hold it to open an Options menu with options that affect the current screen or app. This only applies when available, depending on the screen or app. 6. Home Screen Displays all of the items needed to operate...
Page 9 - Top and Bottom View
7 The Basics 10. Rear Camera Use to take photos and record videos. Keep it clean for optimal performance. 11. Laser Detection Auto-focus Detects the distance between the rear camera lens and nearby objects using laser technology. This feature helps the camera to focus quickly and accurately at short...
Page 10 - LED Sensor; Help; Apps; Setting Up Your Phone; Step 1. Remove the Back Cover
8 The Basics 17. 3.5mm Headset Jack Allows you to plug in an optional headset for convenient, hands-free conversations. You can also plug in headphones to listen to music. 18. LED Sensor Allows you to use your phone as a remote for other devices (such as your TV). 19. Microphone Use to transmit your...
Page 11 - Step 2. Insert the Battery; Charging the phone
9 The Basics Step 2. Insert the Battery Insert the battery in its compartment, making sure to align the gold contacts. Press down gently to secure the battery. Step 3. Replace the Back Cover Place the cover over the back of the phone, then press down along the edges to secure the cover. Step 4. Char...
Page 12 - Removing the Battery and SIM Card; Removing the battery; and lift the cover up gently.
10 The Basics NOTE It’s important to fully charge the battery before initial use of the phone to maximize the battery's lifetime. Removing the Battery and SIM Card Removing the battery 1. Insert your fingernail into the slot located on the lower left of the back cover and lift the cover up gently. 2....
Page 13 - Removing the SIM card; Turn the phone off, then remove the back cover and the battery (as
11 The Basics SIM card/SD card slot location SIM Slot MicroSD Slot Removing the SIM card The SIM card is pre-installed in your smartphone. If you need to replace your SIM card, consult the following instructions. 1. Turn the phone off, then remove the back cover and the battery (as demonstrated in t...
Page 14 - Inserting and Removing a Memory Card; Inserting a microSD card; Remove the back cover (as demonstrated in the; To remove the microSD card; To unmount the microSD card; From the Home screen, touch and hold the
12 The Basics Inserting and Removing a Memory Card Inserting a microSD card 1. Remove the back cover (as demonstrated in the previous instructions) and locate the dual slot just above the upper-right corner of the battery compartment. (microSD is inscribed near the slot opening.) 2. Position the mic...
Page 15 - Charging the Phone; Charging with the USB Cable; USB Cable
13 The Basics Charging the Phone Your phone comes with a USB Cable and a Charger Adapter which connect together to charge your phone. Correctly orient the USB Cable plug before inserting it in the USB/Charger Port to avoid damaging your phone. NOTE Please only use an approved charging accessory to c...
Page 16 - Optimizing Battery Life; Tips to extend the life of your battery; To check the battery charge level
14 The Basics on your PC. It’s best to use the rear USB port when connecting to a desktop PC. The USB hub should be powered by an external power source. NOTE You may experience a slower charging rate when charging from your computer. Optimizing Battery Life You can extend your battery’s life between...
Page 17 - OR; Battery saver mode
15 The Basics Tap Battery saver to view and/or modify your Battery saver settings. To monitor and control what uses the battery The Battery use screen allows you to see which apps are consuming the most battery power. Information on this screen allows you to identify downloaded apps you may want to ...
Page 18 - Turning the Phone On and Off; Turning the phone on; Power off; Turning the screen on using the Knock Code feature
16 The Basics when the charge drops to 10%, 20%, 30%, or 50%. If you turn off Battery saver mode, when the battery charge becomes low, a notification prompts you to turn it on. From the Battery saver screen, checkmark the saving items you want, which include Auto-sync, Wi-Fi, Bluetooth, Vibrate on ta...
Page 19 - To unlock the phone
17 The Basics • If Knock Code isn't your unlock sequence, you can use the KnockON feature by double-tapping the screen to turn it on. Setting up the Knock Code feature 1. From the Home screen, touch and hold the Recent Apps Key (in the Touch Keys bar) > Lock screen settings . 2. Tap Select screen...
Page 20 - To turn the phone sounds off; Your Google Account
18 The Basics 2. From the center of the screen, swipe in any direction to unlock it. To use a shortcut, swipe the shortcut icon (at the bottom of the screen) in any direction. The screen will unlock and launch the app. NOTE The default Lock screen simply locks the screen to prevent unintentional act...
Page 22 - Phone’s Status Icons; Call icons
20 The Basics Phone’s Status Icons The Status Bar appears at the top of every screen. It displays icons indicating that you’ve received notifications (on the left) and icons indicating the phone’s status (on the right), along with the current time. Notification icons Status icons If you’ve more notific...
Page 24 - Getting to Know the Home Screen; QuickTap bar icons; Phone
22 The Basics Getting to Know the Home Screen The Home screen is your starting point to access all of the features on your phone. It displays app shortcuts, icons, widgets, and other features. Status Bar Shows device status information, including the time, signal strength, battery status, and notific...
Page 25 - Modifying the QuickTap bar; Touch Keys; Modifying the keys in the Touch Key bar
23 The Basics Modifying the QuickTap bar You can modify the icons in the QuickTap bar to suit your needs. Rearrange : Touch and hold the icon to move, then drag it to another position in the QuickTap bar. Add : Open the Applications screen, then drag the icon you want onto the QuickTap bar. Delete :...
Page 27 - Mini panel view; Add panel
25 The Basics Pinch in on the Home screen to display the mini panel view, then tap the Home screen panel you want to view. Tap here to set the default Home screen. Tap here to add another panel. Full screen view Mini panel view Mini panel view Mini panel view allows direct access to any of the Home ...
Page 28 - Using Dual View; To return to the full screen view, tap the; Home screen layout; To change to EasyHome; From the Android Home screen, touch and hold the
26 The Basics Hiding items on the Home screen Place two fingers on the screen, then spread them apart to hide the items on your Home screen so that only your wallpaper and the Status Bar are displayed. To redisplay your normal Home screen with all of its apps and widgets, pinch in on the screen, or t...
Page 29 - To change back to the Android Home screen; Global access
27 The Basics Apps screen icon, and the Add icon that allows you to select an app of your choice for that position. The Weather widget is displayed at the top of the screen. The EasyHome Home screen has two panels. Slide the screen to the left to access your other Home screen panel and add additiona...
Page 30 - Touchscreen; Touch or tap
28 The Basics Mini view Activate Mini view to reduce the viewing size of the screen. Mini view is useful for one-handed operation of the phone. Checkmark the Mini view checkbox (in the One-handed operation menu) to enable this function. Using Mini view To activate Mini view, swipe left or right on t...
Page 31 - Move your finger quickly across the surface of the; Use your index finger and thumb in a pinch motion (to
29 The Basics Swipe, slide, or flick Move your finger quickly across the surface of the screen, without pausing when you first touch it (so you don’t drag an item instead). For example, you can browse through the different Home screens by swiping from left to right (and vise versa), slide the screen up...
Page 32 - Rotate the screen; Capturing the screen; The Smart screen feature
30 The Basics Rotate the screen From many apps, the orientation of the screen adjusts to the phone’s physical orientation by rotating the screen. You can deactivate this function in the Display settings menu. NOTE The Home screen doesn't rotate to landscape view. Rotate the phone sideways for landsc...
Page 33 - Text Input Methods; Modifying your LG keyboard characteristics
31 The Basics Text Input Methods On-screen Keyboard The on-screen keyboard displays automatically on the screen when you need to enter text. To manually display the on-screen keyboard, simply tap a text field where you want to enter text. Toggles between 123/SYM mode and ABC mode. Selection Box Tap a...
Page 35 - Text input settings
33 The Basics Text input settings To change your text input settings and see the dictionary of terms you’ve used, from the Home screen, touch and hold the Recent Apps Key (in the Touch Keys bar) > Settings > Language & input . The following options are available in the KEYBOARD & INPUT...
Page 38 - Languages; To change the default language
36 The Basics Languages You can set only one default language for your phone, but you can set multiple languages used for the on-screen keyboard. To change the default language From the Home screen, touch and hold the Recent Apps Key (in the Touch Keys bar) > Settings > Language & input &g...
Page 39 - Opening and Closing the Applications screen; Opening the Applications screen; Home Key
37 The Basics Apps: How to View, Open, and Switch All of the apps on your phone, including any apps that you downloaded and installed from Play Store or other sources, are grouped together on the Applications screen, which you access from your Home screen. If you’ve more apps than can fit on the Appl...
Page 40 - Closing the Applications screen; Customizing the Applications screen
38 The Basics Closing the Applications screen To manually close the Applications screen, tap the Home Key or the Back Key (in the Touch Keys bar). NOTE The Applications screen closes automatically when you tap an icon to open its app. Dragging an icon onto your Home screen also closes the Applicatio...
Page 41 - Checking app information
39 The Basics Rearranging the Applications screen icons You can rearrange the order of the icons on the Applications screen to provide more convenient access to the apps you use the most. 1. From the Home screen, tap the Apps icon (in the QuickTap bar), then tap the Apps tab, if necessary. 2. Tap th...
Page 42 - Opening an app; Open an app simply by tapping its icon on the screen.; Opening multiple apps; Switching between multiple apps
40 The Basics Opening and Switching Apps Multi-tasking is easy with Android™ because you can use and switch among several open apps. Android™ manages each app, stopping and starting them as needed, to ensure that idle apps don’t consume resources unnecessarily. Opening an app Open an app simply by t...
Page 43 - Adding items to the Home screen; Applications screen; Dual view; Moving apps to other Home screen panels
41 The Basics NOTE Navigation in the Recent apps screen depends on the phone orientation. When held sideways, swipe left and right to view the entire list. Flick an app icon up or down off the screen to close the app and remove it from the list. TIP Pinch in on the Recent apps screen to view small a...
Page 44 - Edit; OK
42 The Basics Customizing an app icon on your Home screen You can create your own custom app icon(s) using the images in your Gallery. Your customized app icon(s) are only applied to icons on your Home screen. The Applications screen is not affected. Touch, hold, release, then tap an icon to edit it...
Page 45 - Working with Menus; Options menus; Menu
43 The Basics Changing an icon into a widget Some app icons can be changed into a convenient widget to use on your Home screen. 1. Touch and hold the icon you want to customize, then release the icon. 㻌 A blue frame appears around the icon if it can be resized and changed into a widget (if it can’t,...
Page 46 - Managing Notifications; To open the Notifications panel; Touch and drag the Status Bar to the bottom of the screen.
44 The Basics Context menus Context menus contain options that apply to a specific item on the screen. To open a Context menu, touch and hold an item on the screen. Not all items have Context menus. If you touch and hold an item that has no Context menu, nothing will happen. When you touch and hold c...
Page 47 - To respond to a notification; Clear; To close the Notifications panel; Touch and drag the handle
45 The Basics Clear Button Tap here to clear your list of event-based notifications. Tap a notification to open it. Quick Settings Bar Flick right or left to scroll through the list and tap an icon to change its setting. Settings Menu Icon Home screen Notifications Panel To respond to a notification 1. ...
Page 48 - Using the Quick settings icons
46 The Basics Quick settings on the Notifications panel The top of the Notifications panel includes a Quick settings bar. The icons in this bar provide a quick, convenient way to change settings without accessing any apps. If you set more than five icons on the bar, swipe left and right to scroll throu...
Page 49 - Customizing the Quick settings bar icons; QSlide apps on the Notifications panel; Using the QSlide apps
47 The Basics Tap the Settings icon (at the upper-right corner of the screen) to access the complete Settings menu. Customizing the Quick settings bar icons You can set the order of the icons displayed in the Quick settings bar as well as which icons are displayed. 1. Open the Notifications panel, th...
Page 50 - Searching Your Phone and the Web; Phone and Web search using text entry; Google
48 The Basics 2. Tap the Edit icon (on the far right of the QSlide apps bar). Drag one of the icon handles (at the right side of the screen) to move its icon to another position in the QSlide apps bar. Checkmark the QSlide apps you want to display and remove the checkmark for the ones you want to re...
Page 52 - Locking Your Phone; The default Lock screen
50 The Basics Text Link Text Link recommends apps related to text in messages or other text you’ve selected. It connects directly to the Calendar, Contacts, Phone, Messaging, Email, Web, Maps, YouTube, Calculator, and more. To use Text Link: Tap a message bubble with the Link icon . Highlight text o...
Page 53 - Setting your Lock screen; Setting a Screen Lock for the First Time
51 The Basics Changing the items on the default Lock Screen 1. From the Home screen, touch and hold the Recent Apps Key (in the Touch Keys bar) > Lock screen settings . 2. Tap Shortcuts. 3. Tap one of the icons at the bottom of the screen, then tap the app you want to replace it with. 4. Tap Save...
Page 54 - Disabling a Screen Lock
52 The Basics The first time you set a knock code, you'll see a tutorial with instructions on how to create it. Tap a sequence on the displayed grid (from 3 to 8 taps), then tap Done . Tap your sequence again and tap Confirm . NOTE You're prompted to create a Backup PIN as a safety measure in case you...
Page 55 - Security lock timer
53 The Basics 3. Confirm your unlock information (if necessary). 4. Tap the desired screen lock option. 5. You’re prompted to enter your screen lock, then confirm it. If necessary, enter a Backup PIN and tap Continue . Then confirm your Backup PIN and tap OK . NOTES • If you've set up a Microsoft Excha...
Page 57 - Guest Mode; Setting up Guest mode
55 The Basics Read ALL steps before attempting. 1. Turn the phone off. 2. Press and hold the following keys (on the back of the phone) at the same time: Volume Down Key + Power/Lock Key . 3. Release both of the key when the System recovery screen is displayed. 4. Press either of the Volume Keys to h...
Page 58 - Using Guest mode; Customizing the Home Screen; To add an item to the Home screen
56 The Basics Checkmark the apps that you want to allow to be accessed in Guest mode. Remove checkmarks from the apps to hide in Guest mode. Tap the Back Key (in the Touch Keys bar) when all of the checkboxes are set as you want. 4. Tap Wallpaper to set the wallpaper to easily recognize your Guest m...
Page 59 - To move an item on the Home screen; Remove
57 The Basics 2. The Apps , Widgets , and Wallpapers category tabs are displayed at the bottom of the screen. Tap the one that corresponds to the item you want to add. Item List Touch and hold an icon, then drag it onto the panel where you want it. Category Tabs Tap one of the item categories you wa...
Page 61 - Connecting to Networks and Devices; Connecting to Mobile Networks; To disable data when roaming
59 Connecting to Networks and Devices Connecting to Mobile Networks When you buy your phone and sign up for service, your phone is configured to use your provider’s mobile networks for voice calls and for transmitting data. Different locations may have different mobile networks available. Initially, ...
Page 62 - Connecting to Wi-Fi Networks; Modify network; To turn Wi-Fi on and connect to a Wi-Fi network
60 Connecting to Networks and Devices Connecting to Wi-Fi Networks Wi-Fi is a wireless networking technology that can provide Internet access at distances of up to 100 meters, depending on the Wi-Fi router and your surroundings. To use Wi-Fi on your phone, you must connect to a wireless access point...
Page 63 - To forget a Wi-Fi network; Forget network
61 Connecting to Networks and Devices To add a Wi-Fi network You can add a Wi-Fi network so the phone will remember it, along with any security credentials, and connect to it automatically when it’s in range. You can also add a Wi-Fi network manually if it doesn’t broadcast its name (SSID) or if you...
Page 64 - USB Connection; To select a USB mode for a connection; Using the Status Bar to change the connection mode setting; SmartShare; To enjoy SmartShare
62 Connecting to Networks and Devices USB Connection USB connection is a feature that allows your phone to connect to a PC using a USB Cable. To select a USB mode for a connection 1. From the Home screen, touch and hold the Recent Apps Key (in the Touch Keys bar) > Settings > Storage > Menu...
Page 65 - To enjoy content from nearby devices on your phone
63 Connecting to Networks and Devices 1. Access the app that has the content you want to use with SmartShare, then tap the Share icon . NOTE SmartShare may be accessed from the Options menu, depending on the app. 2. Select the content to share, tap Share (at the bottom of the screen), then tap Smart...
Page 66 - Calls; Placing and Ending Calls; To open the Phone app
64 Calls Placing and Ending Calls The Phone app allows you to dial phone numbers manually or make calls from your phone’s memory. Manually dial calls using the Dial tab. Dial from your phone’s memory using the Recent calls tab, the Contacts tab, the Favorites tab, or the Groups tab. To open the Phon...
Page 67 - Delete Key
65 Calls To place a call by dialing 1. From the Home screen, tap the Phone icon (in the QuickTap bar) to open the Dial tab of the Phone app. Touch and hold to enter the plus ( + ) symbol to dial an international number. Delete Key Tap here to delete incorrect number(s) (appears after you begin enter...
Page 68 - To end a call; Calling numbers in your phone’s memory
66 Calls NOTE If you opened other apps while on a call, you'll need to return to the Call screen to end the call. To return to the Call screen, you can tap the Home Key (in the Touch Keys bar ), then tap the Phone icon (in the QuickTap bar), or tap the In-call box at the upper-left corner of the Hom...
Page 69 - To place a Direct dial widget on your Home screen; Answering or Rejecting Calls; To answer a call
67 Calls To place a Direct dial widget on your Home screen 1. Touch and hold an empty area on your Home screen. 2. Tap the Widgets tab (at the bottom of the screen) > Direct dial . 3. Tap the contact in your Contacts list. Answering or Rejecting Calls When you receive a phone call, the Incoming c...
Page 70 - To ignore a call and send a text message
68 Calls To ignore a call and divert it to voicemail If the screen is unlocked, simply tap the Ignore icon . If the screen is locked, swipe the Ignore icon in any direction to ignore the call. The caller is sent directly to your voicemail box to leave a message. Tap the Ignore with message icon to s...
Page 71 - Working With the Recent Tab; To open the Recent tab; Viewing call entry details
69 Calls Working With the Recent Tab The Recent tab records all of the calls you’ve dialed, received, or missed. It offers a convenient way to redial a number, return a call, or add a number to your Contacts. To open the Recent tab From the Home screen, tap the Phone icon (in the QuickTap bar), then...
Page 72 - To add a number from the Recent tab to your Contacts
70 Calls Tap the Back Key (in the Touch Keys bar ) to return to the Recent tab screen. To dial a number in the Recent tab From the Recent tab, tap the Call Key at the right of the call entry. From the Recent tab, tap the image to the left of the call entry to view all of the contact's numbers saved ...
Page 73 - Calling Your Contacts; To call a contact; To call a favorite contact; Contacts; Instant List; Sequence matches
71 Calls Calling Your Contacts Instead of manually dialing phone numbers using the dialpad, you can use your Contacts list to dial quickly and easily. You can also quickly call a contact using Quick Contact or Direct dial icons that you placed on your Home screen. If you’ve contacts on the web, they...
Page 74 - Selecting an Instant list entry; Options During a Call; To mute the microphone
72 Calls Instant list icon (on the right side of the screen) to view the entire list of matching entries. Tap Cancel (at the bottom of the list) to close the list. Selecting an Instant list entry Tap an entry in the Instant list to insert it on the dialpad and tap the Call Key (on the dialpad) to di...
Page 75 - To switch between a Bluetooth headset and the phone; Bluetooth; Managing Multiple Calls; To switch between current calls; Swap calls
73 Calls The speaker is turned off automatically when the call ends. WARNING! To avoid damage to your hearing, don't hold the phone against your ear when the speakerphone is turned on. To switch between a Bluetooth headset and the phone When a Bluetooth headset is paired and connected to your phone,...
Page 76 - Place a call to the first participant.
74 Calls To set up a conference call Contact your wireless service provider to find out whether they support conference calls and how many participants you can include. 1. Place a call to the first participant. 2. When you’re connected, tap the Add call button (on the Call screen). 3. Enter the new ph...
Page 77 - Listening to Your Voicemail; To listen to your Voicemail; To set up your Voicemail
75 Calls Listening to Your Voicemail When you’ve a new voicemail message, the Voicemail notification icon appears in the Status Bar. If you haven’t set up your voicemail number, or if you need to change it, you can do that in the Call settings. To listen to your Voicemail Open the Notifications panel ...
Page 79 - Web; Browse web pages; Chrome; Search the web
77 Web Chrome The Chrome app allows you to access the Internet from your phone. Access and selections within this feature are dependent upon your service provider. For specific information on Internet access through your phone, contact your service provider. NOTES • You may incur additional charges f...
Page 81 - Browse with tabs; Create a new tab
79 Web Browse with tabs Your phone displays webpages in a tab format allowing you to browse several webpages simultaneously. Create multiple tabs for the sites you want, then tap the Open tabs icon (at the top right of the screen) to quickly and easily access them. Create a new tab From the Chrome a...
Page 82 - Working with tabs; Open an Incognito tab (browse in private)
80 Web Working with tabs Open an Incognito tab (browse in private) From the Chrome app, tap the Menu icon (at the upper-right corner of the screen), then tap New incognito tab . When browsing in incognito mode, your browsing history, cookies, and cache are automatically cleared once you’ve closed al...
Page 83 - Download files; To view downloaded files:
81 Web Close all tabs : Tap the Open tabs icon , tap the Menu icon (at the upper-right corner of the screen), then tap Close all tabs . NOTE Closing the Chrome app (or even turning the phone off) will not close your open tabs. Your tabs remain open until you close them. Download files 1. Touch and ho...
Page 84 - Using bookmarks; Create a bookmark; Edit or delete bookmark
82 Web Using bookmarks Bookmarks let you revisit your favorite webpages with one touch. Create a bookmark 1. While viewing the page you want to set as a Favorite, tap the Menu icon (at the upper-right corner of the screen), then tap the Favorites icon (at the top of the Options menu). 2. Edit the bo...
Page 85 - Chrome Settings; BASICS
83 Web Add a webpage to your Home screen Save time by adding webpages you use frequently to your Home screen as shortcuts. 1. From the Chrome app, access the webpage you want to add as a shortcut. 2. Tap the Menu icon (at the upper-right corner of the screen). 3. Tap Add to homescreen . 4. Edit the ...
Page 86 - Enable or disable autofill; Save passwords; Enable or disable saving passwords
84 Web Tap Disconnect Google Account (at the bottom of the screen). Search engine Sets your default search engine for searching the Internet. 1. From the Chrome app, tap the Menu icon (at the upper-right corner of the screen) > Settings > Search engine . 2. Tap the search engine you want to us...
Page 87 - Manage password prompts; ADVANCED; Set your search privacy settings
85 Web Manage password prompts If you enable Chrome to save your passwords, you’ll get a prompt every time when you sign in to a new website. Tap Yes if you want Chrome to remember your sign-in credentials for that site. Chrome will automatically complete the sign-in fields for you when you visit the...
Page 88 - Adjust text size on webpages and force enable zoom; Manage Content settings
86 Web Accessibility Adjust text size on webpages and force enable zoom 1. From the Chrome app, tap the Menu icon (at the upper-right corner of the screen) > Settings > Accessibility . 2. Drag the Text scaling slider along the bar to adjust the text size scaling. The Preview box displays how i...
Page 89 - Preload webpages
87 Web Google Translate : Tap the switch (at the top of the Google translate screen) to toggle it On or Off. On allows Google to translate pages written in other languages using Google translate. You can also reset your translate settings from this setting. Location settings : Tap the switch (at the...
Page 90 - Tap the switch icon; About Chrome; From the
88 Web 3. Tap the switch icon (in the upper-right corner of the screen) to toggle it On or Off. On compresses pages you visit before downloading them and enables Chrome’s Safe Browsing system to protect you from phishing, malware, and harmful downloads. NOTE SSL and Incognito pages will not be compr...
Page 91 - Communication; To open your Contacts app; From the Home screen, tap; Contacts list; icon
89 Communication Contacts The Contacts app allows you to store names, phone numbers, and other information in your phone’s memory. Entries are listed alphabetically. You can scroll through the list, or tap the Favorites tab or Groups tab at the top of the screen. Use the Contacts app to add, view, a...
Page 94 - Adding Contacts; To add a new contact
92 Communication Tap the Menu icon (at the upper-right corner of the screen) to access the following menu options: Delete , Share , Join, Separate, Set as default , Export , Add to Home screen , and All calls to voice mail. Adding Contacts You can add contacts on your phone and synchronize them with...
Page 95 - Favorites Contacts; Adding or removing contacts in your Favorites list
93 Communication 6. Personalize the contact entry. Tap the Picture frame icon to select a picture to display next to the name in your list of contacts and in other apps. Set a ringtone to identify calls from this contact. 7. When you’re finished, tap Save (at the bottom of the screen). Editing a Cont...
Page 97 - Setting Speed dial with the Speed dial icon; Communicating With Your Contacts; General communication
95 Communication 3. Tap the speed dial number to assign. 4. Tap the Contact entry. NOTE If the entry includes multiple numbers, make sure you tap the number you want set to that speed dial. Setting Speed dial with the Speed dial icon The Speed dial icon in the contact entry allows you to set speed d...
Page 98 - Quick Contact for Android; Messaging; To open the Messaging app
96 Communication 2. Tap the icon corresponding to the type of communication you want to start. The Dial icon places a call to the number. The Messages icon starts a message. The Email icon starts an email. NOTE The communication icons displayed depend on the types of information you've saved for the...
Page 99 - To delete a message thread from the Messaging window
97 Communication Tap the New message icon (at the top right of the screen) to start a new text or multimedia message. Tap here to create a new message. Tap an existing message thread to open it. NOTE Pinch in (or spread apart) on your list of messages to resize it for easier viewing or navigation. T...
Page 101 - To send a group message
99 Communication 4. Tap the Menu icon (at the upper-right corner of the screen) > Add subject to add a message subject. The subject text appears above the body text in bold letters. 5. Tap the Attachment icon to open a dialog box where you can choose the type of media file to attach to the message...
Page 102 - Using Direct message
100 Communication Tap the Group Conversation button (below the recipients) to allow all of the recipients to be viewed by each other so they can respond to you and the group. The message is sent as a multimedia message (MMS). Tap the Individual Messages button (below the recipients) so that none of ...
Page 103 - Changing Messaging Settings; Set default SMS app
101 Communication To respond to messages you receive While viewing the received message, tap the text field at the bottom of the screen, complete your response as necessary, then tap the Send button (on the right side of the text field). Changing Messaging Settings To change the Messaging settings, op...
Page 105 - Email; Email icons
103 Communication New message pop-up : Checkmark to show a pop-up when new messages are received which allows you to directly respond in the pop-up window. Preview : Checkmark to preview message contents when a new message is received. Notification sound : Tap to select the ringtone to sound when you...
Page 106 - Using the Email app
104 Communication To open the Email app From the Home screen, tap the Apps icon (in the QuickTap bar) > the Apps tab (if necessary) > Email or tap Email directly from the Home screen. The first time you open the Email app, a setup wizard opens to help you add an email account. After the initial...
Page 107 - Reading Your Email; To read an email; Email settings; General settings
105 Communication Tap the Menu icon to open the Options menu to access QSlide, Refresh, Folders, Sort by, Downloads , and Settings . Tap the QSlide icon to open the Email app in a QSlide window. Message search Tap the Search icon (at the top of the screen), enter the text you’re looking for, then ta...
Page 108 - ACCOUNTS
106 Communication Select download storage : Tap to set the download storage location to Internal storage or SD card. Email preview : Tap to set how many lines of email text to download on your phone as a preview. Conversation view : Checkmark to view email messages sent or received with the same sub...
Page 110 - NOTIFICATIONS; To add an account; Voice Mail
108 Communication NOTIFICATIONS Notifications: Checkmark to display new email notifications. Notifications sound : Tap to set the sound when you receive a new email notification. Vibrate : Tap to set when the phone will vibrate for a new email notification. SERVER SETTINGS Exchange server settings (for E...
Page 111 - Gmail; To open the Gmail app
109 Communication To be able to use Voice Maill 1. From the Home screen, tap the Apps icon (in the QuickTap bar) > the Apps tab (if necessary) > Verizon folder > Voice Mail or tap Voice Mail directly on the Home screen. NOTE Listening to voicemail and setting up your voicemail service depen...
Page 112 - Adding another Google Account
110 Communication Your Gmail Inbox The current Google Account is displayed in the header at the top of the Inbox. If you have more than one account, you can switch accounts to view the messages in each Inbox. Conversations with new messages are displayed with bold subject lines. To read a message in...
Page 113 - Message search; Search; Navigating and using the Gmail app; Compose
111 Communication To switch accounts Gmail displays conversations and messages from one Google Account at a time. If you set up more than one Google Account on your phone, you can easily switch between them. From your Gmail Inbox, tap the current account (at the upper-left corner of the Inbox header...
Page 115 - Reading Your Messages; Gmail message header icons
113 Communication Reading Your Messages From your Gmail Inbox, tap a conversation that contains the message you want to read. The conversation opens to the first new (unread) message, or to the first starred message, if you’ve previously starred a message in the conversation. Tap to set labels for the...
Page 116 - Composing and Sending a Message; To compose and send a message
114 Communication To reread a message When you open a conversation, messages that you’ve already read are minimized into a tab that indicates the number of hidden messages. 1. From your Gmail Inbox, tap the conversation you want to view. 2. Tap the contact name to open that message. While reading a ...
Page 117 - Replying to or Forwarding a Message; To reply to or forward a message; Gmail account settings
115 Communication Replying to or Forwarding a Message Continue an email conversation by replying to a message or by forwarding it without changing the Subject text. Change the Subject text to start a new conversation. NOTE The conversation text and previous messages are also included in your reply (...
Page 119 - Hangouts; To Open the Hangouts app
117 Communication Vacation responder : Sets up an automatic email to respond with when you’re out of the office (or otherwise unavailable). Tap the switch to turn it on, enter the dates for the responder, and enter the subject/message. Sync Gmail : Checkmark to automatically sync your account. Days o...
Page 120 - Send; Hangouts chatting list; Switching between the chatting list and a chat screen
118 Communication Tap the name of the person in your contacts list. If your friend isn’t yet on Hangouts, your friend will receive an SMS inviting them to Hangouts. OR Tap the text field to enter a name, email, number, or circle. 3. Tap the message box (at the bottom of the screen), then enter your m...
Page 121 - Hangouts Option menu
119 Communication Blocking your Friends To block a friend from exchanging messages with you, tap the friend in the chatting list. Tap the Menu icon (at the upper-right corner of the screen) > People & options . Tap the Block icon next to the friend's name, then tap Block . To remove a friend ...
Page 122 - Entertainment; Camera and Video; To open the Camera app; Getting to know the viewfinder; Taking Pictures
120 Entertainment Camera and Video You can use the Camera app to take and share pictures and videos. Your phone comes with a 8 megapixel camera that lets you capture sharp pictures and videos. It has many state-of-the-art features, such as laser auto-focus, that will allow you to easily and creative...
Page 123 - Record Videos; Camera and Video Settings
121 Entertainment To take a picture: 1. From the Home screen, tap Camera (in the QuickTap bar). 2. Frame your subject on the screen. Tap the screen to choose the focus point. A square around the subject indicates that the camera has focused. Place two fingers on the screen and spread them apart to zo...
Page 125 - Switch camera
123 Entertainment • Help : Displays a quick guide so you can learn how each Camera function works. Switch camera Swipe to switch front and rear cameras, and take photos, including selfies. Gesture shot Allows you to take a picture with hand gesture. This is ideal for taking selfies because there’s no ...
Page 126 - Gallery Options
124 Entertainment View Your Pictures The Gallery is where you can access all of your stored camera images. You can view them in a slideshow, share them with your friends, as well as delete and edit them. 1. From the Home screen, tap the Apps icon (in the QuickTap bar) > the Apps tab (if necessary...
Page 129 - Play a Video
127 Entertainment Playback controls : Displays the Playback timeline and allows you to play , pause , rewind , and . Volume : Displays the Volume slider bar to adjust the playback volume. Favorites : Allows you to assign the video to your Favorites. Lock/Unlock : Locks the Touch Keys to prevent unin...
Page 130 - Dual Play; To start Dual Play, tap the; Gallery; Open the Gallery app to view albums of your pictures and videos.; To open the Gallery app; From the Home screen, tap the
128 Entertainment Live Zoom Live Zoom allows you to zoom in or zoom out on a portion of a video that’s being played to make the desired section appear larger or smaller. When viewing a video, use your index finger and thumb in a pinching or spreading motion to zoom in or out. NOTE Don't press too har...
Page 131 - Working with photos; To view and browse photos
129 Entertainment Viewing your albums The Gallery app presents the pictures and videos saved in your phone, including those you’ve taken with the Camera app and those you downloaded from the web or other locations. When another app saves a picture, it automatically creates a Downloads folder to cont...
Page 132 - Working with Videos; To play videos
130 Entertainment 2. Open an album, tap a picture, then tap the screen to display the available controls and options. 3. Tap the screen to display the icon bar (at the top of the screen) and the Touch Keys bar (at the bottom of the screen). The following options are available. Tap the Delete icon , ...
Page 134 - Play Store; To open the Play Store app
132 Entertainment 2. Checkmark the video(s) you want to share, tap Share (at the bottom of the screen), select how to share the file(s), then complete as necessary. To delete a video 1. Open an album to view its contents, then tap the Delete icon (at the top of the Gallery screen). 2. Checkmark the v...
Page 135 - The app details screens include a description, ratings, reviews,; Downloading and Installing Apps; To download and install an app
133 Entertainment To open a screen with details about an app At any time while browsing in Play Store, tap an app to open its details screen. The app details screens include a description, ratings, reviews, comments, and related information about the app. From this screen, you can download, install,...
Page 136 - Music; Transferring Music Files to Your Phone; To copy music files into your phone
134 Entertainment 3. Tap the app you want to open its details screen. 4. Tap INSTALL or the Price button to download the app. 5. If you agree with the app's access requirements, tap ACCEPT . 6. The app will be downloaded and installed. Play Store menu options The Play Store menu icon (at the upper-l...
Page 137 - Your Music library
135 Entertainment panel and tap USB connected > Media sync (MTP) . Your computer will prompt you with different actions to take. Choose to open the folder to view files. 2. Use the computer to copy music and other audio files into the folder that you created on the phone. 3. To disconnect your phon...
Page 138 - Playing Music; To play music
136 Entertainment Tap the Menu icon (at the upper-right corner of the screen) to open the Options menu that includes Cloud, Select to play , Add to playlist , Shuffle all , Delete , Share , Settings , and Help . To search From the Music library screen, tap the Search icon (at the top right of the scr...
Page 140 - Press the phone’s up/down; To stop music playback and exit the Music Player
138 Entertainment Tap to restart the current track or skip to the previous track in the album, playlist, or shuffle. Touch and hold to rewind. Tap to display the Volume slider bar, then adjust the playback volume on the slider bar. Tap to set audio effects. Tap to open the menu. Choose from Cloud , S...
Page 141 - To use a song as a ringtone; Working with Playlists; To create a playlist
139 Entertainment NOTE From the Lock screen, you can swipe left and right across the top of the screen to toggle between the Music widget and the current time/date. To be able to unlock the screen, tap the Lock icon (at the bottom of the screen). To use a song as a ringtone You can use a song as you...
Page 142 - YouTubeTM; Opening YouTube and Watching Videos
140 Entertainment To remove a song from a playlist 1. Open a playlist. 2. Touch and hold the song you want to remove, then tap Remove from playlist in the Context menu that appears. To delete a playlist 1. Open the Playlists library. 2. Touch and hold the playlist, then tap Delete in the Context men...
Page 144 - Tools; Dual window; To activate the Dual window function
142 Tools Dual window The Dual window function allows you to split the screen to view two apps at the same time. To use this function, activate it in the Settings menu. To activate the Dual window function 1. From the Home screen, touch and hold the Recent Apps Key (in the Touch Keys bar) > Setti...
Page 145 - Close; To create a QuickMemo+; QuickMemo+ backgrounds
143 Tools Tap the Close icon to close the selected window. NOTE The Dual window function can also be opened from the Recent Apps screen. From the Home screen, tap the Recent Apps Key (in the Touch Keys bar), then tap Dual window (at the lower-right corner of the screen). QuickMemo+ The QuickMemo+ fe...
Page 146 - QuickMemo+ Menu Options
144 Tools 1. Open the QuickMemo+ app. 2. Tap the Menu icon (at the upper-right corner of the screen), then tap Paper style . Tap the Screen image (on the left) to use the current screen for the background. Tap the Page image (on the right) to use a plain background, tap the paper color you want, the...
Page 147 - QSlide; QSlide icons on the Notifications panel
145 Tools To Exit the QuickMemo+ feature Tap the Back Key (in the Touch Keys bar) to exit the QuickMemo+ feature. Viewing saved QuickMemos QuickMemos are saved in the Gallery app or QuickMemo+ app. From the Home screen, tap the Apps icon (in the QuickTap bar) > the Apps tab (if necessary) > Ga...
Page 148 - Open the Notifications panel (tap the; Using QSlide
146 Tools To open a QSlide window Open the Notifications panel (tap the QSlide icon , if necessary), then tap the desired app from the QSlide apps bar. OR While using an app that supports QSlide, tap the QSlide icon . OR Using QSlide The QSlide function opens the associated app in a window in the for...
Page 149 - Customizing the QSlide apps bar icons
147 Tools Tap to exit the QSlide function and view the app in full screen. Slide to adjust the transparency. Tap to exit the QSlide function. Drag the QSlide title bar to move it on the screen. Drag the bottom right corner of the QSlide window to resize it. Move the circle on the slider bar to the l...
Page 150 - QuickRemote; To open the QuickRemote app and set up your QuickRemote
148 Tools QuickRemote QuickRemote turns your phone into a Universal Remote for your home TV, and set-top box. NOTE QuickRemote may not be available for some devices. To open the QuickRemote app and set up your QuickRemote 1. From the Home screen, tap the Apps icon (in the QuickTap bar) > the Apps...
Page 151 - QuickRemote options
149 Tools Set up from the Notifications panel You can also perform the initial set up of your QuickRemote from the Notifications panel. Swipe the Status Bar downward, tap the QuickRemote icon (in the Quick Settings bar), if necessary, tap ADD REMOTE in the dialog box, then continue set up as necessary...
Page 152 - Calendar; Viewing Your Calendar and Events; To open the Calendar app
150 Tools Calendar Viewing Your Calendar and Events The Calendar app allows you to track your schedule of events (that you created or that you’ve been invited to), organized by day, week, month, year, or agenda. When you first set up your phone, you configured it to use an existing Google Account or y...
Page 153 - Adding an event to your calendar
151 Tools Tap the Add icon (at the top right of the screen) to add a new event to any of your accounts. Tap the Menu icon to access Go to date, Search, Sync now, Calendars to sync, Delete , and Settings . QSlide for the Calendar app You can view your Month calendar in a QSlide window allowing you to...
Page 155 - Viewing Event Details; To view information about an event; While viewing an event’s Details view:
153 Tools Reminders sets the reminder notification for the event. Show me as sets your Google status during the event. Privacy sets the event as Calendar default, private, or public. 5. Tap Save (at the bottom of the screen) to save the event in the calendar. Viewing Event Details You can view more i...
Page 156 - Calculator; To open and use the Calculator
154 Tools To share an event, from the event’s details screen, tap the Menu icon (at the upper-right corner of the screen), then tap Share in the Options menu. Choose the method for sharing and complete as necessary. The Options menu also accesses Choose event color, Copy , and Add to Tasks . Calenda...
Page 158 - Clock; To open the Clock app; Setting and Activating Alarms; To set an alarm
156 Tools Tap the Close icon (at the upper-right corner of the title bar) to close the Calculator QSlide window. Clock You use the Clock app to access the Alarms, Timer, World clock, and Stopwatch functions. Access these functions by tapping the tabs across the top of the screen, or swiping horizont...
Page 160 - Setting the Timer; Setting the World Clock; Managing the World Clock Cities
158 Tools Tap Snooze to stop the alarm for the snooze duration you set. NOTE If Puzzle lock is set to On, using the gesture feature of turning the phone over will snooze the alarm instead of turning it off. Setting the Timer The Timer tab can be used to alert you with an audible signal when a set am...
Page 161 - Using the Stopwatch; Maps; To open the Maps app
159 Tools Touch and hold an entry in the list to open a Context menu to select Set daylight saving or Delete . Using the Stopwatch The Stopwatch tab allows you to use your phone as a Stopwatch. 1. Open the Clock app, then select the Stopwatch tab (if necessary). 2. Tap the green Start button (at the...
Page 163 - Weather; To add and view a Weather widget; To add a city or update your current location
161 Tools Weather The Weather app provides weather forecasts and other city information. The Weather widget on your Home screen displays a summary of your local weather and provides access the Weather app for more detailed information. NOTE The Weather widget on your Home screen allows you to quickl...
Page 164 - Changing Weather settings; Voice Recorder; Record a Voice Memo
162 Tools Managing your City list From the Weather app, tap the Menu icon (at the upper-right corner of the screen) > Settings > Edit city list . NOTE You can also access your City list by tapping the City list icon (at the top of the Weather app screen). Tap the Add icon (at the upper-right c...
Page 166 - File Manager
164 Tools 3. Tap the voice memo you want to play. 4. Use the following options (at the bottom of the screen) while listening to a voice memo. Tap the Pause button to pause the recording. Tap the Stop button to end the playback and return to the List screen. Tap the Volume icon to increase or decreas...
Page 168 - Tasks; To synchronize MS Exchange
166 Tools Tasks The Tasks app can be synchronized with your MS Exchange account. You can create a task, revise it, and delete it using your phone, or from MS Outlook or MS Office Outlook Web Access. To synchronize MS Exchange 1. From the Home screen, touch and hold the Recent Apps Key (in the Touch K...
Page 169 - To open the Settings app; Viewing Settings categories
167 Settings Settings The Settings app contains most of the tools for customizing and configuring your phone. All of the settings in the Settings app are described in this section. For settings specific to the Chrome app, see the Chrome section and for settings specific to the Google account, see the G...
Page 179 - DEVICE; Sound
177 Settings Roaming state : Displays your current roaming state. Default message app : Sets your default messaging app. Choose from Messaging, Hangouts , and Message+ . VPN : Sets up and manages Virtual Private Networks (VPNs). Basic VPN : Sets your phone to use the built-in Android VPN client supp...
Page 185 - Battery
183 Settings Storage Use the Storage menu to monitor the used and available space in your phone. INTERNAL STORAGE Total space : Displays the total amount of space in the phone’s memory. It’s listed in Gigabytes and also on a colored bar graph with a color-coordinated list of the apps as well as the ...
Page 187 - PERSONAL; Guest mode
185 Settings and ALL apps. Tap an entry to view more information, tap Stop (or Force stop ), then OK to stop an app from running. Tap the Menu icon (at the upper-right corner of the screen) to access Sort by, Reset app preferences, Reset default apps, Show cached processes, and Uninstall apps. Dual ...
Page 194 - SYSTEM; Shortcut key
192 Settings Ads : Displays your advertising ID, advertising ID reset, Opt out checkbox, and information about Google ads in apps on your phone. Add account : Allows you to add accounts to your phone. SYSTEM The System category allows you to view your phone’s system information, as well as manage va...
Page 199 - Safety; This product contains chemicals known to the State of; HAC
197 Safety WARNING: This product contains chemicals known to the State of California to cause cancer and birth defects or reproductive harm. Call (800) 243-0000 for more information. Wash hands after handling. HAC This phone has been tested and rated for use with hearing aids for some of the wireles...
Page 200 - Caution
198 Safety Body-worn Operation This device was tested for typical body-worn operations with the back of the phone kept 0.39inches (1cm) between the user’s body and the back of the phone. To comply with FCC RF exposure requirements, a minimum separation distance of 0.39 inches (1cm) must be maintaine...
Page 201 - - Reorient or relocate the receiving antenna.
199 Safety residential installation. This equipment generates, uses, and can radiate radio frequency energy and, if not installed and used in accordance with the instructions, may cause harmful interference to radio communications. However, there is no guarantee that interference will not occur in a...
Page 202 - Your wireless phone; Are wireless phones safe?
200 Safety Consumer Information About Radio Frequency Emissions Your wireless phone , which contains a radio transmitter and receiver , emits radio frequency energy during use. The following consumer information addresses commonly asked questions about the health effects of wireless phones. Are wire...
Page 203 - Can I minimize my RF exposure?
201 Safety available for sale to the public, it must be tested by the manufacturer and certified to the FCC that it does not exceed limits established by the FCC. One of these limits is expressed as a Specific Absorption Rate, or “SAR.” SAR is a measure of the rate of absorption of RF energy in the bo...
Page 204 - Do wireless phones pose any special risks to children?; FDA Consumer magazine November-December 2000
202 Safety wireless phone manufacturer’s instructions for the safe operation of your phone. Do wireless phones pose any special risks to children? The FDA/FCC website states that “the scientific evidence does not show a danger to users of wireless communication devices, including children.” The FDA/F...
Page 205 - Independent Expert Group on Mobile Phones
203 Safety Independent Expert Group on Mobile Phones http://www.iegmp.org.uk Royal Society of Canada Expert Panels on Potential Health Risks of Radio Frequency Fields from Wireless Telecommunication Devices 283 Sparks Street Ottawa, Ontario K1R 7X9 Canada Telephone: (613) 991-6990 http://www.rsc.ca/...
Page 206 - Engineering in Medicine and Biology Society; Consumer Information on SAR
204 Safety Engineering in Medicine and Biology Society , Committee on Man and Radiation (COMAR) of the Institute of Electrical and Electronics Engineers http://ewh.ieee.org/soc/embs/comar/ Consumer Information on SAR (Specific Absorption Rate) This model phone meets the government's requirements for ...
Page 209 - For information about hearing aids and digital wireless phones:
207 Safety The M mark is intended to be synonymous with the U mark. The T mark is intended to be synonymous with the UT mark. The M and T marks are recommended by the Alliance for Telecommunications Industries Solutions (ATIS). The U and UT marks are referenced in Section 20.19 of the FCC Rules. The...
Page 210 - or other wireless
208 Safety Caution: Avoid potential hearing loss. Prolonged exposure to loud sounds (including music) is the most common cause of preventable hearing loss. Some scientific research suggests that using portable audio devices, such as portable music players and cellular telephones, at high volume setti...
Page 211 - TIA Safety Information; Exposure to Radio Frequency Signal
209 Safety hearing difficulty after listening to your portable audio device, discontinue use and consult your doctor. TIA Safety Information The following is the complete TIA Safety Information for wireless handheld phones. Exposure to Radio Frequency Signal Your wireless handheld portable phone is a...
Page 212 - Phone Operation; For your phone to operate most efficiently:; Electronic Devices; Should not carry the phone in a breast pocket; Hearing Aids
210 Safety Phone Operation NORMAL POSITION: Hold the phone as you would any other telephone with the antenna pointed up and over your shoulder. Tips on Efficient Operation For your phone to operate most efficiently: Don’t touch the antenna unnecessarily when the phone is in use. Contact with the anten...
Page 214 - For Vehicles Equipped with an Air Bag; Safety Information; Do not disassemble or open crush, bend or deform, puncture or shred.
212 Safety facilities; vehicles using liquefied petroleum gas (such as propane or butane); areas where the air contains chemicals or particles (such as grain, dust, or metal powders); and any other area where you would normally be advised to turn off your vehicle engine. For Vehicles Equipped with an...
Page 215 - Battery usage by children should be supervised.; Charger Adapter and Cable Safety
213 Safety • Only authorized service providers shall replace battery (If the battery is non-user replaceable). • Promptly dispose of used batteries in accordance with local regulations. • Battery usage by children should be supervised. • Avoid dropping the phone or battery. If the phone or battery i...
Page 216 - The charger and adapter are intended for indoor use only.
214 Safety (power plug pin), metallic articles (such as a coin, paperclip or pen) may short-circuit the phone. Always cover the receptacle when not in use. • Recharge the battery after long periods of non-use to maximize battery life. Battery life will vary due to usage pattern and environmental con...
Page 217 - General Notice
215 Safety • Do not use harsh chemicals (such as alcohol, benzene, thinners, etc.) or detergents to clean your phone as this could cause a fire. • Do not place or answer calls while charging the phone as it may short-circuit the phone and/or cause electric shock or fire. Explosion, Shock, and Fire Haz...
Page 218 - Don’t paint your phone.; FDA Consumer Update; Do wireless phones pose a health hazard?
216 Safety • Don’t immerse your phone in water, liquid, or expose to high humidity. If the phone is expose to liquid, turn it off immediately and bring it to an LG Authorized Service Center. • Don’t paint your phone. • The data saved in your phone might be deleted due to careless use, repair of the ...
Page 219 - What is the FDA's role concerning the safety of wireless phones?
217 Safety 2. What is the FDA's role concerning the safety of wireless phones? Under the law, the FDA does not review the safety of radiation-emitting consumer products such as wireless phones before they can be sold, as it does with new drugs or medical devices. However, the agency has authority to...
Page 220 - What kinds of phones are the subject of this update?
218 Safety United States must comply with FCC safety guidelines that limit RF exposure. The FCC relies on the FDA and other health agencies for safety questions about wireless phones. The FCC also regulates the base stations that the wireless phone networks rely upon. While these base stations opera...
Page 221 - phones poses a health risk?
219 Safety pre-disposed to develop cancer in the absence of RF exposure. Other studies exposed the animals to RF for up to 22 hours per day. These conditions are not similar to the conditions under which people use wireless phones, so we Don’t know with certainty what the results of such studies mea...
Page 222 - How can I find out how much Radio Frequency energy exposure I can
220 Safety studies are conducted to address important questions about the effects of exposure to Radio Frequency (RF) energy. The FDA has been a leading participant in the World Health Organization International Electro Magnetic Fields (EMF) Project since its inception in 1996. An influential result ...
Page 223 - What has the FDA done to measure the Radio Frequency energy
221 Safety number on your phone so you can find your phone’s RF exposure level in the online listing. 8. What has the FDA done to measure the Radio Frequency energy coming from wireless phones? The Institute of Electrical and Electronic Engineers (IEEE) is developing a technical standard for measurin...
Page 224 - What about children using wireless phones?
222 Safety concerned about the RF exposure from these products, you can use measures like those described above to reduce your RF exposure from wireless phone use. 10. What about children using wireless phones? The scientific evidence does not show a danger to users of wireless phones, including chil...
Page 225 - Where can I find additional information?; Driving
223 Safety phones so that no interference occurs when a person uses a “compatible” phone and a “compatible” hearing aid at the same time. This standard was approved by the IEEE in 2000. The FDA continues to monitor the use of wireless phones for possible interactions with other medical devices. Shou...
Page 226 - 0 Driver Safety Tips; Don’t take notes or look up phone numbers while driving. If you are
224 Safety 10 Driver Safety Tips Your wireless phone gives you the powerful ability to communicate by voice almost anywhere, anytime. An important responsibility accompanies the benefits of wireless phones, one that every user must uphold. When operating a car, driving is your first responsibility. Wh...
Page 227 - Don't engage in stressful or emotional conversations that may be
225 Safety 6. Dial sensibly and assess the traffic; if possible, place calls when you aren't moving or before pulling into traffic. Try to plan your calls before you begin your trip or attempt to coincide your calls with times you may be stopped at a stop sign, red light, or otherwise stationary. But ...
Page 228 - Cautions; The user interface of Google apps (Google Search, Google Maps,
226 Safety otherwise restrict the manner in which a driver may use his or her phone while operating a vehicle. Cautions The user interface of Google apps (Google Search, Google Maps, Navigation, etc.) can vary depending on its software version. Locations are inaccurate when GPS and Wi-Fi are not set...
Page 229 - Laser Safety Statement; CDRH Compliance
227 Safety Laser Safety Statement CDRH Compliance THIS PRODUCT COMPLIES WITH APPLICABLE REQUIREMENT OF THE DHHS PERFORMANCE STANDARD FOR LASER PRODUCT, 21 CFR SUBCHAPTER J. Caution! This product employs a laser system. To ensure proper use of this product, please read this owner’s manual carefully a...
Page 230 - Specifications; DivX HD; DivX Certified
228 Specifications DivX HD ABOUT DIVX VIDEO: DivX ® is a digital video format created by DivX, LLC, a subsidiary of Rovi Corporation. This is an official DivX Certified ® device that has passed rigorous testing to verify that it plays DivX video. Visit divx.com for more information and software tools t...
Page 231 - FAQ
229 FAQ Please check to see if any issues you’ve encountered with your phone are described in this section, before taking the phone in for service or calling a service representative. CATEGORY SUB-CATEGORY QUESTION ANSWER Bluetooth Bluetooth Devices What are the functions available via Bluetooth? St...
Page 237 - LIMITED WARRANTY STATEMENT
235 LIMITED WARRANTY STATEMENT 1. WHAT THIS WARRANTY COVERS: LG offers you a limited warranty that the enclosed subscriber unit and its enclosed accessories will be free from defects in material and workmanship, according to the following terms and conditions: (1) The limited warranty for the produc...
Page 238 - (7) Damage resulting from use of non LG approved accessories.
236 LIMITED WARRANTY STATEMENT (5) Products which have had the serial number removed or made illegible. (6) This limited warranty is in lieu of all other warranties, express or implied either in fact or by operations of law, statutory or otherwise, including, but not limited to any implied warranty ...
Page 239 - Don’t RETURN YOUR PRODUCT TO THE ABOVE ADDRESS.
237 LIMITED WARRANTY STATEMENT Some states Don’t allow the exclusive limitation of incidental or consequential damages or limitations on how long an implied warranty lasts; so these limitations or exclusions may not apply to you. This warranty gives you specific legal rights and you may also have oth...
Page 241 - Index; Numbers
239 Index Numbers 10 Driver Safety Tips 224 A Adding an event to your calendar 151 Adding Contacts 92 Answering or Rejecting Calls 67 Apps: How to View, Open, and Switch 37 Avoid potential hearing loss. 208 B Browse with tabs 79 C Calculator 154 Calendar 150 Calling Your Contacts 71 Calls 64 Camera ...