Page 4 - Table of Contents
2 Important Customer Information........................................................... 1 Table of Contents ................................................................................... 2 The Basics ..............................................................................................
Page 7 - The Basics; Phone Overview; Front View
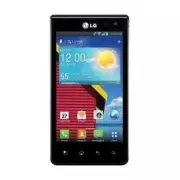
5 The Basics Phone Overview Front View NOTES ţ All screen shots in this guide are simulated. Actual displays may vary. ţ From the Home screen, tap the Apps Key then tap Help to access the brief & full device guides, video tutorials, and icon glossary. You can get information in detail right from...
Page 8 - Rear View
6 The Basics 7. Home screen Displays all of the information needed to operate your phone, such as applications, call status, date, time, signal status, and battery strength. 8. Proximity Sensor Senses proximity toward other objects (such as your head) so that tap commands are not accidentally activa...
Page 9 - Allows you to plug in an optional headset for
7 The Basics Top View and Side Views USB/Charger Port Volume Keys 3.5mm Headset Jack Power/ Lock Key 14. 3.5mm Headset Jack Allows you to plug in an optional headset for convenient, hands-free conversations. You can also plug in headphones to listen to music. 15. Volume Keys Allow you to adjust the ...
Page 10 - Setting Up Your Phone; Step1. Remove the Back Cover
8 The Basics Setting Up Your Phone Step1. Remove the Back Cover Place your fingernail in the cutout at the bottom of the phone and pop the cover off. Step2. Insert the Battery Insert the battery, making sure to align the gold contacts. Press down gently to secure the battery. Step3. Replace the Back ...
Page 11 - Installing the Battery and microSD Card; Installing the battery
9 The Basics Step4. Charge the phone Before turning on your phone, charge it fully. Be sure to use the charger that came with your phone. Installing the Battery and microSD Card NOTE It is important to fully charge the battery before initial use of the phone. Installing the battery The phone comes w...
Page 12 - to remove the back cover.; Inserting a microSD card; Remove the back cover (as demonstrated in the; To unmount the microSD card; Apps Key
10 The Basics Removing the battery 1. Turn the phone off and use the fingertip cutout at the bottom of the phone to remove the back cover. 2. Use the fingertip cutout at the bottom of the battery compartment to lift the battery out. NOTE Be careful not to scratch or damage the inside of the back cover...
Page 14 - Charging the Phone; Connect the USB Cable into the adapter.; Charging with the USB Cable
12 The Basics Charging the Phone Your phone comes with an adapter and a USB Cable which connect together to charge your phone. To charge your phone : NOTICE Please use only an approved charging accessory to charge your phone. Improper handling of the USB/Charger Port, as well as the use of an incomp...
Page 15 - Optimizing Battery Life; Tips to extend the life of your battery
13 The Basics Optimizing Battery Life You can extend your battery’s life between charges by turning off features that run in the background. You can also monitor how applications and system resources consume battery power. Tips to extend the life of your battery 㻌 Turn off radio communications that ...
Page 16 - Turning the Phone On and Off; Turning the phone on
14 The Basics 㻌 Tap an application or service in the Battery use screen to see the details about its power consumption, including either how long since last connected to a power source or how long you were last running on battery power. Different applications or services offer different kinds of inf...
Page 17 - . Your Lock Screen will; Shortcuts on the lock screen; Phone; About Lock Screen Improvement
15 The Basics To unlock the phone If you don’t use the phone for a while, the screen and backlight will shut off to conserve battery power. To unlock the phone : 1. Press the Power/Lock Key . Your Lock Screen will appear. 2. Tap the screen and when the circle appears, slide in any direction to unloc...
Page 18 - OR; Setting Up Your Device; To set up your device, follow the steps below:
16 The Basics Selectively Clear Notifications by Swiping After receiving several download, app upgrade, notification texts, and emails, the Notification Bar can get really full. There are times when users want to keep some of the notifications in the bar while dismissing others, just like a “to do” list...
Page 19 - Setting up your Google Account
17 The Basics 5. Set up your email accounts or tap Skip . 6. Read the Privacy caution and tap tap the I agree to share my location checkbox if you want to activate the location function. Then tap Next . 7. On the Help screen, you can select to view how-to tutorials, My Verizon video, or additional g...
Page 20 - Your Google Account; Help; To access Help, From the Home screen, tap the
18 The Basics NOTE This is automatic for the first Google account you add. When adding additional Google accounts, you have to select which options to synchronize Record your Google account information. Please keep this document in a safe place. Username:[email protected] Password:___________________...
Page 21 - Phone’s Status Icons; Call icons
19 The Basics Phone’s Status Icons The Status Bar appears at the top of every screen. It displays icons indicating that you’ve received notifications (on the left) and icons indicating the phone’s status (on the right), along with the current time. Notification icons Status icons If you have more noti...
Page 23 - Contacts
21 The Basics (FUUJOHUP,OPXUIF)PNFTDSFFO The Home screen is your starting point to access all of the features on your phone. It displays application shortcuts, icons, widgets, and other features. Status Bar Shows device status information, including the time, signal strength, battery status, and not...
Page 24 - Home Key; To view other Home screen canvases
22 The Basics New features for the Home screen Items (including Quick Keys bar) on the Home screen can be temporarily hidden to highlight the wallpaper. Pinch out to clean the screen and pinch in to restore. Clean view can be used to check the background picture without any icons and widgets. Shortc...
Page 25 - Mini canvas view; Add
23 The Basics Mini canvas view Mini canvas view allows direct access to any of the canvases and also allows you to manage your Home screen canvases. You can add up to two additional Home screen canvases (from 5 screens to 7 screens), delete canvases, and even rearrange canvas order to suit your need...
Page 26 - Icon Editing and Customizing; LG EXCLUSIVE; Clean View; LG EXCLUSIVE
24 The Basics )PNF4DSFFO'PMEFS$SFBUJPO*DPO&EJU.PEF Customizable Folder Creation ţ LG EXCLUSIVE The ability to create folders by dragging and dropping icons on each other is a great feature for those who like organization. You can now have folders specifically designated for work items, your child...
Page 27 - Touchscreen; Touch or tap; A single finger tap selects an item. For example, tap an icon; Tap and hold; Tap and hold an item on the screen by tapping it and not; Drag; Tap and hold an item for a moment and then, without lifting your; Swipe or slide; Move your finger quickly across the surface of the screen,
25 The Basics Touchscreen Your touchscreen provides an excellent way to interact with and use your Android phone. With the tap of your finger, you can download and use available applications, make menu selections, and access data saved to your phone. The following terms are used for describing the di...
Page 28 - Aspect ratio correction; From many applications, the orientation of the; Text Input Methods
26 The Basics Aspect ratio correction From many applications, the orientation of the screen rotates with the phone as you turn it from upright to sideways and back again. Rotate the phone sideways for landscape orientation. Rotate the phone upright for portrait orientation. Text Input Methods On-scr...
Page 29 - Text input settings
27 The Basics Typing tips Enter other characters Tap the Numbers Key to see the the symbols keyboard and tap to see additional symbols. Tap the Letters Key to exit from the symbols keyboard. Enter one capital letter Tap the Shift Key . Enter all capital letters Tap the Shift Key twice. Tap again to ...
Page 31 - Voice Search; Applications: How to View, Open and Switch
29 The Basics Voice Search - Allows you to set various voice search options. Text-to-speech output - Allows you to set the preferred speech engine, speech rate, and listen to an example of the speech engine. Applications: How to View, Open and Switch Home screen App screen From the Home screen, tap ...
Page 32 - Your Home screen; Customizing an application icon From the Home screen; Opening and Closing the Applications screen
30 The Basics Your Home screen Customizing an application icon From the Home screen You can further personalize the Home screen by editing application icons using the images in your Gallery. 1. Touch and hold an icon until the canvas grid is displayed, then release the icon. An editing icon appears ...
Page 33 - Reverting to alphabetical order
31 The Basics Customizing the Applications screen The phone includes a wide variety of applications and you can download even more applications to your device. You can customize these items on the Applications screen for faster access (less scrolling) to the applications you use most often. Rearrang...
Page 34 - Opening multiple applications; Switching between multiple applications
32 The Basics Opening and Switching Applications Multi-tasking is easy with Android™ because open applications keep running even when you open another application. There’s no need to quit an application before opening another. You can use and switch among several open applications. Android manages e...
Page 35 - You can place application icons on any of the Home screen canvases.
33 The Basics Adding application icons to the Home screen Customize your Home screen with the applications you use most often. 1. Open the Applications screen. 2. Tap and hold the application icon you want to add to your Home screen. Your Applications screen will close so that you can place the icon...
Page 36 - Working With Menus; There are two kinds of Android menus; Options menus; Context menus
34 The Basics Working With Menus There are two kinds of Android menus : Options menus and Context menus. Options menus Options menus contain tools that apply to the activities of the current screen or application, not to any specific item on the screen. To open the available Options menu, tap the Men...
Page 37 - Managing Notifications; To open the Notifications panel; Tap and drag the Status Bar to the bottom of the screen.; To respond to a notification
35 The Basics Managing Notifications Notification icons report the arrival of new messages, calendar events, alarms, as well as ongoing events, such as when you are on a call. When you receive a notification, the notification icon will be displayed in the Status Bar. You can open the Notifications panel ...
Page 38 - Clear; To close the Notifications panel; Back Key; Quick settings on the Notifications panel; Edit
36 The Basics To clear all notifications 1. Open the Notifications panel. 2. Tap Clear . All event-based notifications will be cleared; ongoing notifications will remain in the list. TIP You can also swipe the notifications to the left or right to remove them. To close the Notifications panel Tap and drag...
Page 39 - Searching Your Phone and the Web; Search; Phone and Web search using text entry; Search Key; Enter the text you’re searching for in the Quick Search Box.
37 The Basics Searching Your Phone and the Web You can search for information on your phone and on the web using the Search application. Some applications, such as Gmail , Contacts , and Browser have the ability to search contents within those specific applications. You can conduct the search by typi...
Page 40 - Locking the Screen
38 The Basics You can use the Search preferences to configure some aspects of web search (for example, whether it makes suggestions below the Quick Search Box as you type), and what phone features you want to include in searches. To access these settings,tap the Search Key to open the Search applicat...
Page 42 - Security lock timer
40 The Basics Changing your PIN or Password to Lock the Screen 1. From the Home screen, tap the Apps Key > Settings > Lock screen . 2. Tap Select screen lock . 3. Enter your current lock sequence. 4. Tap PIN to change your number lock sequence or tap Password to change your alphanumeric lock s...
Page 44 - Customizing the Home screen; To add an item to the Home screen; To move an item on the Home screen
42 The Basics Customizing the Home screen You can personalize your Home screen by adding application icons, shortcuts, widgets, and other items to any Home screen canvas. You can also change the wallpaper. To add an item to the Home screen 1. From the Home screen, touch and hold an empty space on a ...
Page 45 - To remove an item From the Home screen
43 The Basics 3. When the item is where you want it, lift your finger. NOTE If Move home screen items is enabled in the Gesture settings , simply tilt the device in the direction you want to move the item to one of the canvases. Lift your finger when it arrives at the canvas you want. To remove an ite...
Page 46 - OK; To reposition Home screen canvases; To remove Home screen canvases; Remove
44 The Basics To rename a folder 1. Tap the folder icon to open it. 2. Tap the folder window’s title bar. 3. Enter the new folder name. 4. Tap OK . NOTE You can also change the folder color under the Folder color section. To reposition Home screen canvases 1. Pinch in on the Home screen to display t...
Page 47 - Connecting Quickly With Your Contacts; Open your Contacts list and tap the contact’s picture
45 The Basics Connecting Quickly With Your Contacts As you build up your list of contacts on your phone, you can use Quick Contact for Android to quickly chat, email, text message, place a call, or locate your contacts. Quick Contact for Android is a special set of icons that you can use to quickly ...
Page 48 - Connecting to Wi-Fi Networks; The following Status Bar icon indicates your Wi-Fi status.; To turn Wi-Fi on and connect to a Wi-Fi network; Connecting to Networks and Devices
46 Connecting to Wi-Fi Networks Wi-Fi is a wireless networking technology that can provide Internet access at distances of up to 100 meters, depending on the Wi-Fi router and your surroundings. To use Wi-Fi on your phone, you must connect to a wireless access point, or “hotspot.” Some access points ...
Page 51 - USB Autorun; To select USB mode for Autorun; Internet connection mode
49 Connecting to Networks and Devices USB Autorun USB Autorun is a feature that allows your phone to connect to a PC using a USB Cable and set it up on that PC without a physical CD-ROM. Automatically installs the LG USB Modem driver. Allows the phone to be used as mass storage when a microSD card i...
Page 52 - This mode changes the phone to Modem mode from the PC.; is checkmarked, the USB selection window is; Autorun is not available when:; Using the Status Bar to change the settings; Connecting the phone to a PC; Connect your phone to your PC with a compatible USB Cable
50 Connecting to Networks and Devices More... > USB tethering > Mobile Broadband Connect . NOTE This mode can only be used by a user registered to a tethering plan. Modem: This mode changes the phone to Modem mode from the PC. Ask on connection You can choose to be asked to confirm the USB conn...
Page 53 - Downloading the LG USB Modem Driver.
51 Connecting to Networks and Devices NOTES ţ Autorun is only supported for Windows ® XP, Windows ® Vista, and Windows ® 7. ţ The USB Autorun feature works only under an Administrator account. The installer has insufficient privileges under a Non-Administrator account. Log on as Administrator. The de...
Page 54 - Installing the LG USB Modem Driver.; Make Your Device a Mobile Hotspot; The following Status Bar icon indicates your Wi-Fi Hotspot status.
52 Connecting to Networks and Devices Step 3. Installing the LG USB Modem Driver. Step 4. Installing the Utility Application. Make Your Device a Mobile Hotspot The Mobile Hotspot application can share the phone’s data connection with any Wi-Fi capable devices. WARNING! There are security risks assoc...
Page 55 - microSD Card; Unmounting and removing the microSD Card; . Now you can safely remove the microSD card.; Viewing Memory Information; The storage page is divided into five sections
53 microSD Card microSD Card NOTE The microSD card is sold separately. Unmounting and removing the microSD Card To safely remove the microSD card from your device, you must first unmount it before removing it from the phone. 1. From the Home screen, tap the Apps Key > Settings > Storage > Un...
Page 56 - to release the microSD card from device
54 microSD Card Formatting the microSD Card Formatting a microSD card permanently removes all files stored on the card. 1. From the Home screen, tap the Apps Key > Settings > Storage . 2. Tap Unmount SD card > OK to release the microSD card from device use. An icon appears within the Notifica...
Page 58 - Calls; Call Key; Instant List
56 Calls 3. Tap the Call Key to dial the number that you entered. You can use other phone features while the call is underway. If you open another application, the Call icon appears in the Status Bar for the duration of the call. Press the Volume Keys to adjust the call volume. Use the on-screen but...
Page 59 - Call; Airplane mode; Press and hold the
57 Calls Selecting an Instant list entry Tap an entry in the Instant list to insert it on the dialpad and tap the Call Key to dial it. Instant list Icon Tap to view more of the Instant list. Instant List Airplane mode Some locations may require you to turn off your phone’s wireless connections by pl...
Page 60 - Answering or Rejecting Calls; To answer a call; Answer Key; Unlocked Screen
58 Calls Answering or Rejecting Calls When you receive a phone call, the Incoming call screen opens with the caller ID and any additional information about the caller that you have saved in the Contacts list. All incoming calls are recorded in the Call log. To answer a call If the screen is unlocked...
Page 61 - If the screen is unlocked, tap the; To decline a call and send a text message; icon
59 Calls To decline a call and divert it to voicemail If the screen is unlocked, tap the Decline Key . If the screen is locked, swipe the Decline icon in any direction. The caller is sent directly to your voicemail box to leave a message. Unlocked Screen Locked Screen Tap the Quick msg Key to send a...
Page 62 - Working with the Call Log; To open the Call log; To dial a number in the Call log
60 Calls Working with the Call Log The Call log is a list of all of the calls you’ve dialed, received, or missed. It offers a convenient way to redial a number, return a call, or add a number to your Contacts list. To open the Call log Tap the Phone Key (in the Quick Keys bar) and then the Call logs...
Page 63 - Filtering Call log entries
61 Calls To take other actions on a Call log entry Tap a Call log entry to open a screen where you can call the contact, send the contact a message, add the number to your Contacts list (or view contact information), delete the call from the log, and learn more about the original call. Tap and hold ...
Page 64 - Calling Your Contacts; To call a contact; To call a favorite contact; Contacts Key
62 Calls Calling Your Contacts Instead of manually dialing phone numbers using the dial pad, you can use your Contacts list to dial quickly and easily. You can also quickly call a contact using Quick Contact. If you have contacts on the web, you can choose whether to synchronize with your phone when...
Page 65 - You can use the; To place a call by speaking; Voice Dialer; Options During a Call
63 Calls Voice Dialer You can use the Voice Dialer application to place a phone call by speaking the name of a contact or a phone number. To place a call by speaking 1. Tap Voice Dialer in the Applications screen. If you have a Bluetooth device that supports "voice-recognition" or "voice...
Page 66 - To switch between a Bluetooth device and the phone
64 Calls To mute the microphone during a call Tap Mute . The light bar on the Mute button illuminates blue to indicate that the microphone is muted. The Mute icon will appear in the Status Bar to remind you that the microphone is turned off. While viewing the in-call screen, you can unmute the micro...
Page 67 - Managing Multiple Calls; To switch between current calls
65 Calls Managing Multiple Calls Contact your wireless service provider to learn whether they support conference calls and how many participants you can include. To switch between current calls Tap Swap . The current call will be placed on hold and you will be connected with the other incoming call....
Page 68 - Listening to Your Voicemail; To listen to your Voicemail; To set up your Voicemail
66 Calls Listening to Your Voicemail When you have a new voicemail message, the Voicemail notification icon appears in the Status Bar. If you have not set up your voicemail number, or if you need to change it, you can do that in the Call settings. To listen to your Voicemail Open the Notifications pan...
Page 69 - Browser; Internet; Browse web pages; Web
67 Browser The Browser application allows you to access the internet from your Verizon Wireless device. Access and selections within this feature are dependent upon your service provider. For specific information on Browser access through your phone, contact your service provider. Internet Learn to a...
Page 71 - Bookmark your favorite web pages
69 Web To view the currently active windows, tap Tabs next to the URL field. You can scroll up and down to view the open tabs. To close the tab, tap or swipe the window to the right or left. The tab will disappear, indicating it has been closed. To open new incognito tab, tap the Tabs > Menu Key &...
Page 72 - Changing Browser settings
70 Web From the bookmarks list, tap and hold a bookmark and use the following options : To open the web page in the current window, tap Open . To open the web page in a new window, tap Open in new tab . To edit the bookmark details, tap Edit bookmark . To add the bookmark as a shortcut to one of the...
Page 74 - TEXT SIZE; Advanced; PAGE CONTENT
72 Web Accessibility Force enable zoom: Override a website’s request to control zoom behavior. TEXT SIZE Preview: Allows you to preview the text size. Text scaling: Adjust the text scaling by scrolling the button. Zoom on double-tap: Adjust the default zoom percentage when you double-tap a web page....
Page 75 - RESET DEFAULTS; Bandwidth management; Search result preloading:; Labs; Maps; To search for a location
73 Web Text encoding: Tap to set text encoding. RESET DEFAULTS Reset to default: Restore defaults settings. Bandwidth management Search result preloading: Allow browser to preload high confidence search results in the background. Load images: Allows the browser to display images on Web pages. Labs Qu...
Page 76 - Switching between common features
74 Web 4. Tap a suggestion or tap the Search Key on the keyboard. Red markers indicate search matches on the map. You can tap a marker to open a balloon that contains a label. Tap the balloon to open a screen with more information about the location, as well as options for obtaining directions. To g...
Page 77 - Checking the Weather; To get details about the weather
75 Web Tap the Maps menu icon in the top left corner of the screen to access Map, Local, Offers, Navigation, Join Latitude, Location history and My Places. Tap the Layers icon at the bottom of the screen to access Traffic, Satellite, Terrain, Transit Lines, Latitude, My Maps, Bicycling, Wikipedia, an...
Page 78 - To update or add city; Changing Weather Settings; DATA AND SYNCHRONIZATION
76 Web Swipe right or left to scroll through the weather information for each of the cities in your list. Tap the Refresh Icon in the lower right corner of the Weather application screen to update the current weather of the city displayed on the weather application screen. Tap the Add city icon to a...
Page 79 - Allows you to set how often to update (Every 1 hour,; Backup Assistant Plus; Read the information provided on the screen and tap
77 Web Refresh interval: Allows you to set how often to update (Every 1 hour, Every 3 hours, Every 6 hours, Every 12 hours, Daily) the weather. More frequent updates trade the convenience of current information for increased data use and decreased battery life between charges. (&/&3"-4&a...
Page 80 - Using Backup Assistant Plus; Manually backing up your contacts; to begin the backup process.; Changing the backup schedule; then tap the timeframe you want. For
78 Web Using Backup Assistant Plus Using Backup Assistant Plus On the schedule you selected, the Backup Assistant Plus application checks the phone’s address book to see if any changes have occurred since the last backup. If changes are detected, the application will launch and the backup. process w...
Page 81 - Using Your Contacts; To open your Contacts application; To open a list of your favorite contacts
79 Contacts The Contacts application allows you to store names, phone numbers and other information in your phone’s memory. Using Your Contacts Use the Contacts application to add, view, and communicate with your friends and acquaintances. To open your Contacts application From the Home screen, tap ...
Page 82 - Adding Contacts; To add a new contact
80 Communication To view details about a contact 1. Open your Contacts application. 2. Tap the contact whose details you want to view. 3. The Contact Info tab displays by default. Tap an icon to call, message, or open other applications. The Dial icon places a call to the number. The Message icon st...
Page 83 - Communication; and Sharing Contacts; To import contacts from your microSD card
81 Communication 2. Tap the New contact icon to the right of the Search box to start a new contact entry. 3. If you have more than one account with contacts, tap Contact type at the top of the screen and choose the account to which you want to add the contact. 4. Enter the contact’s name. 5. Tap a c...
Page 84 - Adding a Contact to Your Favorites; To add a contact to your Favorites list
82 Communication 6. Tap the contacts you want to import from the microSD card. Then tap Import to confirm. To export contacts to your microSD card You can export all of the contacts on your phone to your microSD card, as vCard files. You can then copy this file to a computer or another device that is c...
Page 85 - Searching for a Contact; To search for a contact
83 Communication To remove a contact from your Favorites list 1. Open the Contacts application. 2. Tap the contact to view its details. TIP If you have a long list of contacts, it may be faster to tap the Favorites tab then tap the contact entry to view its details. 3. Tap the yellow star to the rig...
Page 86 - To change a contact’s default phone number
84 Communication &EJUJOH$POUBDU%FUBJMT You can change or add details saved in your contact entries. You can also set specific ringtones to specific contacts. Some contact entries contain information from multiple sources : information that you added manually, information that Contacts joined from ...
Page 88 - To forward a Contact’s info
86 Communication 2. Tap the icon corresponding to the type of communication you want to start. The communication icons displayed in Quick Contact depend on the types of information you saved in the contact information. To communicate with a contact 1. Open the Contacts application. 2. Tap the contac...
Page 89 - Joining Contacts; application attempts to avoid duplication by; To join contacts; The contact information will be displayed in one contact entry.; Separating Contact Information; To separate contact information; Tap the contact entry whose information you want to separate.
87 Communication Joining Contacts When you add an account or add contacts in other ways, such as by exchanging emails, the Contacts application attempts to avoid duplication by joining contact information automatically. You can also join contacts manually. To join contacts 1. Open the Contacts appli...
Page 91 - Reading Your mail; To read a mail; Email settings
89 Communication The Accounts screen The Accounts screen lists all of your accounts. Open the Email application. If you’re not on the Accounts screen, tap the Menu Key > Accounts . Each account on the Accounts screen displays the number of unread mail. You can tap an account to view its Inbox. Th...
Page 93 - Gmail; To open the Gmail application; To open your Inbox when Gmail is running; To switch accounts
91 Communication (NBJM 0QFOJOH(NBJMBOE:PVS*OCPY When you open the Gmail application, the most recent conversations are displayed in your Inbox. To open the Gmail application From the Home screen, tap the Apps Key > Gmail . All of your conversations are displayed in your Inbox unless you delete, a...
Page 94 - Tap the account that contains the email you want to read.; Reading Your Messages; To read a message; Tap a conversation that contains the message you want to read.
92 Communication Tap here to switch accounts and labels. 2. Tap the account that contains the email you want to read. Reading Your Messages While viewing a list of conversations in your Inbox or in any list of labeled conversations, you can open a conversation to read its messages. To read a message...
Page 95 - Undo; To reread a message
93 Communication The Google Talk online status will appear next to the name of the sender of each message if the sender has a Google Account. Tap the contact’s picture to open Quick Contact. While reading messages in a conversation, you can use the keys at the bottom of the screen to archive the ent...
Page 96 - Composing and Sending a Message; To compose and send a message
94 Communication Composing and Sending a Message You can compose and send a message to people or groups with Gmail addresses or other email addresses. To compose and send a message 1. From the Home screen, tap the Apps Key > Gmail > Compose . 2. Enter a recipient’s address. As you enter text, ...
Page 97 - Replying to or Forwarding a Message; To reply to or forward a message; Reply all
95 Communication Replying to or Forwarding a Message You can continue an email conversation by replying to a message or by forwarding it. To reply to or forward a message 1. Tap the message actions icon on the message header to access action options for the message. 2. Tap to reply or and choose Rep...
Page 98 - Messaging; To open Messaging; To delete a message thread from the Messaging window; Delete thread
96 Communication Messaging To open Messaging Tap the Home Key , then tap the Messaging Key in the Quick Keys bar. The Messaging screen will open, where you can create a new message or open an ongoing message thread. Tap here to create a new message. Tap New message to start a new text or multimedia ...
Page 99 - New message
97 Communication &YDIBOHJOH.FTTBHFT You can send text messages (SMS) of up to 160 characters to another mobile phone. If you type more than the allotted text amount (up to 7 pages of 153 characters), the message is delivered as a series of messages (EMS). If you keep typing after the limit, your...
Page 102 - Changing Messaging Settings
100 Communication If the message contains a media file, tap Play to view, watch, or listen to it. Tap and hold the media file to open a Context menu with additional options. To view details about a message 1. Tap and hold a message in the message window. 2. Tap View message details in the Context menu...
Page 104 - Select input method; Powerful Voice Input Engine
102 Communication presented. Severe alert: Checkmark this setting to allow Severe alerts to be always presented. AMBER alert: Checkmark this setting to allow AMBER alerts to be always presented. Alert reminder: Opens a dialog box to set how often to be reminded. How to select the type of keyboard to...
Page 105 - Tap and hold the; TJOHUIF4XZQF,FZCPBSE; Swype Text Entry Tips; Put your finger on the first letter of the word and draw a path from
103 Communication To change the LG keyboard layout 1. Tap and hold the Numbers/Symbols Key . 2. Tap Input language & type > Settings . 3. Tap QWERTY keyboard , Phone keyboard , Handwriting , or Shape writer. Tap and hold . Tap Input language & type . Choose the type of keyboard you want. ...
Page 106 - Talk; To; To return to your Friends list
104 Communication Tap and hold a key to enter the alternate letter or symbol located at the top right corner of the key. Move your finger over the apostrophe to enter contractions. Double-tap the word you want to change or correct a misspelled word. Tap the Delete Key to erase one character. Tap and ...
Page 107 - Chatting with Friends; To chat with a friend; To end a chat
105 Communication Chatting with Friends To chat with a friend 1. From the Home screen, tap the Apps Key > Talk . 2. Tap the friend you want to chat with. 3. Enter your message then tap Send . Options from your Friends list From the Friends list, tap the Menu Key for the following options : Displa...
Page 108 - Changing and Monitoring Online Status; To change your online status
106 Communication Changing and Monitoring Online Status Google Talk allows you to change how you appear to others; you can change your online status and status messages, as well as the picture that appears next to your name on your friends’ list. To change your online status 1. From the Home screen,...
Page 111 - The Phone Application; Dial
109 Communication The Phone Application The phone features of your device include many ways to make calls. Tap the Home Key and then the Phone Key in the Quick Keys bar at the bottom of the screen. The Phone application has four tabs across the top of the screen : Dial , Call logs , Contacts , and F...
Page 112 - Favorites; to open an Options menu to select; Frequent list; Call a Contact by Voice Dialing; Open an Application using Voice Dialer; If a list of results is displayed, tap the one you want to use.
110 Communication Favorites This tab displays your Favorites, followed by a list of recent frequent contact. From here you can call or contact any of the entries based on the saved information or manage your list. For additional options, tap the Menu Key to open an Options menu to select Speed dials...
Page 113 - Entertainment; Camera; Getting to know the viewfinder; Photo options
111 Entertainment Camera To open the Camera application, from the Home screen, tap the Apps Key > Camera . TIP If you haven't locked your phone with a security lock sequence, from the locked screen, simply press the Power/Lock Key , then drag the Camera icon upward. Getting to know the viewfinder ...
Page 114 - Using the focus mode
112 Entertainment ISO : Controls the camera’s sensitivity to light. Choose from Auto, 400, 200 and 100. White balance : Improves color qualities under different lighting conditions. Choose from Auto, Incandescent, Sunny, Fluorescent, and Cloudy. Color effect : Applies artistic effects to pictures. C...
Page 117 - Video Camera
115 Entertainment Video Camera To open the Video Camera application, from the Home screen tap the Apps Key > Camera . Tap the Mode Switch icon to change to Video mode. Getting to know the viewfinder Brightness – Defines and controls of the amount of light entering the lens. Slide the brightness ind...
Page 119 - Watching your saved videos; Your Photos and Videos; Adjusting the volume when viewing a video
117 Entertainment Tap to delete the video you just made, and confirm by tapping OK . The viewfinder will reappear. Tap to shoot another video right away. Your current video will be saved in your Gallery. Tap to view the Gallery of your saved videos. Watching your saved videos 1. In the viewfinder, tap ...
Page 120 - Working with Albums; To view and browse pictures
118 Entertainment Open Gallery from the Camera application by tapping the thumbnail image at the bottom left corner of the screen. The Gallery application presents the pictures and videos saved in your phone, including those you’ve taken with the Camera application and those you downloaded from the ...
Page 121 - Working with Videos; Gallery; To play videos
119 Entertainment Editing options Tap here to go to next step. Tap here to go to previous step. Tap here to save. Tap here to access the editing tools. Working with Videos Use the Gallery application to play videos that you’ve taken with the Camera application and to share them with friends. To play...
Page 122 - Video Producer
120 Entertainment To share a video You can share your videos in a variety of ways, including sending it by email or multimedia message (MMS), or via SmartShare or a Bluetooth device. You even have the option to share your videos publicly by uploading it to the YouTube™ website. 1. From the Home scre...
Page 124 - Play Store; Opening Play Store and Finding Applications; To open the Play Store application; To get help with Play Store
122 Entertainment Play Store Opening Play Store and Finding Applications Open the Play Store application to browse and search for free and paid applications. To open the Play Store application From the Home screen, tap the Apps Key > Play Store . When you open the Play Store application for the fi...
Page 125 - On the Play Store homepage, tap a category on the screen.
123 Entertainment To browse for applications You can browse applications by category and sort them in different ways. 1. On the Play Store homepage, tap a category on the screen. 2. Swipe horizontally across the screen. The subcategories bar is displayed near the top of the screen to identify the co...
Page 126 - Downloading and Installing Applications; To download and install an application
124 Entertainment To open a screen with details about an application At any time while browsing through Play Store, tap an application to open its details screen. The Application details screens include a description, ratings, comments, and related information about the application. From this screen...
Page 127 - Install; If you agree to the application’s access requirements, tap
125 Entertainment This button indicates the price (for paid apps) or you can tap it do directly download free apps. 2. Tap Install (for free applications) or the Price button (for paid applications). The screen will display if the application requires access to your data or control of any functions ...
Page 128 - Music; Transferring Music Files to Your Phone; Music Player; To copy music files onto the phone’s microSD card
126 Entertainment To create a Google Checkout account You must have a Google Checkout account associated with your Google Account to purchase items from Play Store. On your computer, go to http : //checkout.google.com to establish a Google Checkout account. OR The first time you use your phone to buy...
Page 129 - Charge; Opening Music and Working with Your Library; To open Music and view your music library
127 Entertainment You can use subfolders on the microSD card to organize your music files or you can simply copy the audio files to the top level of the microSD card. 3. Open the Notifications panel and tap the USB connection type > Charge only . Then disconnect the USB Cable from the phone. Opening...
Page 130 - Playing Music; To play music
128 Entertainment To search for music in your library 1. Open the main Library screen then tap the Search Key . 2. Start typing the name of the artist, album, or track you’re looking for. Matching songs are displayed in the list below the search box. 3. Tap a matching song to play it or tap a matchi...
Page 131 - You can return to the Playback screen from any other application; To control playback
129 Entertainment Tap here to restart, play or skip. You can return to the Playback screen from most other screens in the Music Player application by tapping the currently playing song at the bottom of the screen. You can return to the Playback screen from any other application by opening the Notific...
Page 133 - Working with Playlists; To create a playlist
131 Entertainment To use a song as a ringtone You can set a song to be used as your phone ringtone in place of one of the ringtones that come with the phone. Tap and hold a song in a Library list. In the Context menu that opens, tap Set as ringtone . OR On the Playback screen, tap the Menu Key > ...
Page 134 - File Manager; File Manager Options
132 Entertainment 2. Tap and hold the song you want to remove then tap Remove from playlist in the Context menu that appears. To delete a playlist 1. Open the Playlists library. 2. Tap and hold the playlist to display a Context menu. 3. Tap Delete > OK to confirm. To rename a playlist 1. Open the ...
Page 135 - SmartShare; To turn SmartShare on and allow sharing contents
133 Entertainment Tap the Menu Key to access the following options. Sort by : Allows you to sort files and folders by Name, Size, Date, and Type. View by : Allows you to change the view mode to List or Grid. Copy : Allows you to copy files and folders and paste them in another location. Share : Allows...
Page 136 - To download contents from the remote content library
134 Entertainment NOTE Make sure that the DLNA functionality of your devices is properly configured (e.g., TV and PC). 1. From the Home screen, tap the Apps Key > SmartShare . 2. Tap To at the top right of the screen and select the device from the renderer device list. 3. Tap From at the top left ...
Page 137 - at the top left of the screen and select; Video Player; To open the Video Player application
135 Entertainment To upload contents from the remote content library NOTE Make sure that the microSD card is correctly mounted and the Receive files checkbox is marked in the SmartShare settings menu. 1. From the Home screen, tap the Apps Key > SmartShare . 2. Tap From at the top left of the scree...
Page 138 - Video Player list options
136 Entertainment Tap to activate or deactivate the Dolby Mobile setting, which enhances your music listening. Tap to display a slider bar to increase or decrease the media volume. Tap to lock the Video Player screen so that the video playback controls are not displayed when the screen is touched. A...
Page 139 - YouTubeTM; Opening YouTube and Watching Videos; To open the YouTube application
137 Entertainment YouTube™ Opening YouTube and Watching Videos You can browse, search for, view, upload, and rank YouTube videos on your phone with the YouTube application. To open the YouTube application From the Home screen, tap the Apps Key > YouTube . Tap a video to watch it or tap the Menu K...
Page 141 - Voice Recorder; Record a Voice Memo; Play a Voice Memo; Managing your Voice Memos
139 Entertainment Voice Recorder The Voice Recorder application records audible files for you to use in a variety of ways. Use your recordings to simply remind you about something you don’t want to forget (like a grocery list) or record sound effects that you can attach to a message or set as a ringt...
Page 142 - Calendar; To open the Calendar application; Working in Day View; Tools
140 Calendar 7JFXJOH:PVS$BMFOEBSBOE&WFOUT Open the Calendar application to view events you’ve created or that others have invited you to. When you first set up your phone, you configured it to use an existing Google Account or you created a new account. The first time you open the Calendar applicat...
Page 143 - Day; To learn more about events in Day view; New event
141 Tools To switch to Day view Tap at the top left corner of the screen to select Day . Tap here to create a new event. Tab here to switch to Day, Week, Month or Agenda View. To learn more about events in Day view Tap an event to view its details. Tap an event to view, edit, or delete the event. Al...
Page 144 - Working in Week View; To switch to Week view; Week; To learn more about events in Week view
142 Tools Working in Week View Week view displays a chart of the events of one week. All-day and multi-day events are displayed at the top. To switch to Week view Tap at the top left corner of the screen to select Week . Tap here to create a new event. Tab here to switch to Day, Week, or Agenda View...
Page 145 - Working in Month View; To switch to Month view; Month; To view more information about events in Month view; Working in Agenda View; To switch to Agenda view; Agenda
143 Tools Working in Month View Month view displays a chart of the events of the month. Segments of each day with scheduled events are green in the day’s vertical bar. To switch to Month view Tap at the top left corner of the screen to select Month . Tap here to create a new event. Drag the handler ...
Page 146 - FUUJOHBO&WFOU3FNJOEFS; To set an event reminder
144 Tools To learn more about events in Agenda view Tap an event. A screen with details about the event opens. 7JFXJOH&WFOU%FUBJMT You can view more information about an event in a number of ways, depending on the current view. To view information about an event In Agenda, Day, or Week view, tap...
Page 147 - Calculator; To open and use the Calculator
145 Tools 2. If no reminder is set, tap to automatically add a reminder for 10 minutes before the event. If a reminder is already set, tap to set more reminders for the event. 3. In the dialog box that opens, tap the length of time before the event that you want to be reminded of it. When the time c...
Page 148 - To open the Alarm/Clock application; Setting Alarms; To set an alarm; New alarm
146 Tools Tap and hold the Calculator’s display to open a Context menu where you can copy what you’ve entered and access other tools. Tap Clear to delete the last number or operator you entered. Tap and hold Clear to delete all of the entered information. Touch to view your calculator history. You c...
Page 150 - Setting the Timer
148 Tools Setting the Timer The Timer application can be used to alert you with an audible signal when a set amount of time has passed. 1. Open the Alarm/Clock application and tap the Timer tab. 2. Set the time by scrolling Hour, Minute and/or Second on the time wheel. 3. Tap Vibration to checkmark ...
Page 151 - Polaris Office; To access this application, From the Home screen tap the; Managing Files
149 Tools Polaris Office Polaris Office 3.0 is a professional Mobile Office Solution which enables users to conveniently view or edit various types of office documents including Word, Excel, and PowerPoint file extensions anywhere, anytime, using their mobile device. To access this application, From the ...
Page 152 - To open the ShareGenie application
150 Tools 4IBSF(FOJF ShareGenie allows you to view, edit, and share files easily. You can send images, videos, music, and documents (including APK files) between other LG devices preloaded with either the ShareGenie or FileShare app. Images You can share image files with ShareGenie using the Gallery ap...
Page 153 - To open the Settings application; Settings
151 Settings The Settings application contains most of the tools for customizing and configuring your phone. All of the settings in the Settings application are described in this section. For settings specific to the Browser application, see the Browser section. To open the Settings application From t...
Page 156 - Quick message settings:
154 Settings Quick message settings: Opens a dialog box for you to manage your Quick messages. Tap the New icon to create a new quick message, tap a message to edit it, or tap the Delete icon to delete the message. Show dialpad: Opens a dialog box to set which types of calls will automatically displ...
Page 158 - Screen
156 Settings Sound when roaming: Checkmark to enable Enhanced Roaming Indication. Emergency tone: Opens a dialog box where you can configure how the phone reacts when you place an emergency call. Vibrate on touch: Checkmark to set the phone to vibrate when you tap the front keys. Display This menu al...
Page 161 - INTERNAL MEMORY; Power saver; Turn Power saver on:
159 Settings INTERNAL MEMORY Total space: Displays the total amount of space in the phone’s memory. It’s listed in Gigabytes and also on a colored bar graph with a color-coordinated list of the applications as well as the amount of space they use. Remaining memory space is grey-colored. Available sp...
Page 166 - COMMON SETTINGS
164 Settings LG Keyboard: Checkmark to select the LG Keyboard to enter data. Tap to change the following settings : Input language & type: Opens a dialog box to select the keyboard language and type. COMMON SETTINGS Word suggestion: Opens a screen to set word prediction and auto word correction....
Page 167 - System
165 Settings Backup & reset This menu allows you to back up and erase your data. BACKUP & RESTORE Back up my data: Checkmark to backup application data, Wi-Fi passwords, and other settings to Google servers. Backup account: Opens a dialog box to select the account to backup. You can also add...
Page 170 - APPS; About phone; Hardware information:
168 Settings APPS Don't keep activities: Checkmark to force stop every activity as soon as the user leaves it. Background process limit: Opens a dialog box to set the background process limit. Show all ANRs: Checkmark to show a dialog box when Applications running in the background are not respondin...
Page 171 - Safety; This product contains chemicals known to the State of; TIA Safety Information; Exposure to Radio Frequency Signal; ICNIRP; Antenna Care
169 Safety WARNING: This product contains chemicals known to the State of California to cause cancer and birth defects or reproductive harm. Wash hands after handling. TIA Safety Information The following is the complete TIA Safety Information for wireless handheld phones. Exposure to Radio Frequenc...
Page 172 - Phone Operation; NORMAL POSITION; Tips on Efficient Operation; For your phone to operate most efficiently; Driving; conditions or the law require it.; Electronic Devices
170 Safety Phone Operation NORMAL POSITION : Hold the phone as you would any other telephone with the antenna pointed up and over your shoulder. Tips on Efficient Operation For your phone to operate most efficiently : Don’t tap the antenna unnecessarily when the phone is in use. Contact with the anten...
Page 173 - Should ALWAYS keep the phone more than six (6) inches from their
171 Safety Persons with pacemakers: O Should ALWAYS keep the phone more than six (6) inches from their pacemaker when the phone is turned ON; O Should not carry the phone in a breast pocket; O Should use the ear opposite the pacemaker to minimize the potential for interference; O Should turn the pho...
Page 174 - Aircraft; “Turn off two-way radio”. Obey all signs; Potentially Explosive Atmosphere; fueling areas (such as gasoline; For Vehicles Equipped with an Air Bag
172 Safety Aircraft FCC regulations prohibit using your phone while in the air. Switch OFF your phone before boarding an aircraft. Blasting Areas To avoid interfering with blasting operations, turn your phone OFF when in a “blasting area” or in areas posted : “Turn off two-way radio”. Obey all signs...
Page 175 - Safety Information
173 Safety Safety Information Please read and observe the following information for safe and proper use of your phone and to prevent damage. Also, keep the user guide in an accessible place at all times after reading it. Violation of the instructions may cause minor or serious damage to the product....
Page 176 - Charger and Adapter Safety
174 Safety O Your phone is an electronic device that generates heat during normal operation. Extremely prolonged, direct skin contact in the absence of adequate ventilation may result in discomfort or minor burns. Therefore, use care when handling your phone during or immediately after operation. Ch...
Page 177 - Explosion
175 Safety Explosion , Shock , and Fire Hazards O Do not put your phone in a place subject to excessive dust and keep the minimum required distance between the power cord and heat sources. O Unplug the power cord prior to cleaning your phone, and clean the power plug pin when it’s dirty. O When usin...
Page 179 - which you can hear adequately.
177 Safety O Set the volume in a quiet environment and select the lowest volume at which you can hear adequately. O When using headphones, turn the volume down if you cannot hear the people speaking near you or if the person sitting next to you can hear what you are listening to. O Do not turn the v...
Page 180 - American Academy of Audiology
178 Safety American Academy of Audiology 11730 Plaza American Drive, Suite 300 Reston, VA 20190 Voice : (800) 222-2336 Email : [email protected] Internet : www.audiology.org National Institute on Deafness and Other Communication Disorders National Institutes of Health 31 Center Drive, MSC 2320 Bethe...
Page 181 - FDA Consumer Update; Do wireless phones pose a health hazard?; type emitted by wireless phones
179 Safety FDA Consumer Update The U.S. Food and Drug Administration’s Center for Devices and Radiological Health Consumer Update on Mobile Phones : 1. Do wireless phones pose a health hazard? The available scientific evidence does not show that any health problems are associated with using wireless ...
Page 182 - user that is not necessary for device function and; What kinds of phones are the subject of this update?
180 Safety O Design wireless phones in a way that minimizes any RF exposure to the user that is not necessary for device function; and O Cooperate in providing users of wireless phones with the best possible information on possible effects of wireless phone use on human health. The FDA belongs to an...
Page 183 - What are the results of the research done already?
181 Safety These RF exposures are limited by FCC safety guidelines that were developed with the advice of the FDA and other federal health and safety agencies. When the phone is located at greater distances from the user, the exposure to RF is drastically lower because a person’s RF exposure decreas...
Page 185 - Experimental
183 Safety contracts with independent investigators. The initial research will include both laboratory studies and studies of wireless phone users. The CRADA will also include a broad assessment of additional research needs in the context of the latest research developments around the world. 7. How ...
Page 186 - What about children using wireless phones?
184 Safety consistency of measurements made at different laboratories on the same phone. SAR is the measurement of the amount of energy absorbed in tissue, either by the whole body or a small part of the body. It is measured in watts/kg (or milliwatts/g) of matter. This measurement is used to determ...
Page 187 - Where can I find additional information?
185 Safety precautionary; it was not based on scientific evidence that any health hazard exists. 11. What about wireless phone interference with medical equipment? Radio Frequency (RF) energy from wireless phones can interact with some electronic devices. For this reason, the FDA helped develop a det...
Page 188 - 0 Driver Safety Tips; Don’t take notes or look up phone numbers while driving. If you are
186 Safety International Commission on Nonlonizing Radiation Protection (http : //www. icnirp.de) World Health Organization (WHO) International EMF Project (http : //www. who.int/emf) Health Protection Agency (http : //www.hpa.org.uk/) 10 Driver Safety Tips Your wireless phone gives you the powerful...
Page 190 - Consumer Information on SAR
188 Safety your mobile device while operating a vehicle, it is recommended that you consult your applicable jurisdiction’s local laws or other regulations regarding such use. Such laws or other regulations may prohibit or otherwise restrict the manner in which a driver may use his or her phone while...
Page 191 - after searching on FCC ID ZNFVS840.
189 Safety Before a phone model is available for sale to the public, it must be tested and certified to the FCC that it does not exceed the limit established by the government adopted requirement for safe exposure. The tests are performed in positions and locations (e.g., at the ear and worn on the b...
Page 192 - Phones rated M3 or M4 meet FCC requirements and are likely
190 Safety FCC Hearing-Aid Compatibility (HAC) Regulations for Wireless Devices On July 10, 2003, the U.S. Federal Communications Commission (FCC) Report and Order in WT Docket 01-309 modified the exception of wireless phones under the Hearing Aid Compatibility Act of 1988 (HAC Act) to require digita...
Page 193 - For information about hearing aids and digital wireless phones
191 Safety In the example to the left, if a hearing aid meets the M2 level rating and the wireless phone meets the M3 level rating, the sum of the two values equal M5. This should provide the hearing aid user with “normal usage” while using their hearing aid with the particular wireless phone. “Norm...
Page 194 - Specifications; Dolby Mobile License notice
192 Specifications %JW9.PCJMF ABOUT DIVX VIDEO : DivX ® is a digital video format created by DivX, LLC, a subsidiary of Rovi Corporation. This is an official DivX Certified ® device that plays DivX video. Visit divx.com for more information and software tools to convert your files into DivX videos. ABOU...
Page 195 - FAQ
193 FAQ Please check to see if any problems you have encountered with your phone are described in this section before taking the phone in for service or calling a service representative. Category Sub-Category Question Answer Bluetooth Bluetooth Devices What are the functions available via Bluetooth?...
Page 201 - LIMITED WARRANTY STATEMENT
199 LIMITED WARRANTY STATEMENT 8)"55)*48"33"/5:$07&34 LG offers you a limited warranty that the enclosed subscriber unit and its enclosed accessories will be free from defects in material and workmanship, according to the following terms and conditions : (1) The limited warranty for ...
Page 202 - (7) Damage resulting from use of non LG approved accessories.
200 LIMITED WARRANTY STATEMENT (5) Products which have had the serial number removed or made illegible. (6) This limited warranty is in lieu of all other warranties, express or implied either in fact or by operations of law, statutory or otherwise, including, but not limited to any implied warranty ...
Page 203 - DO NOT RETURN YOUR PRODUCT TO THE ABOVE ADDRESS.
201 LIMITED WARRANTY STATEMENT lasts; so these limitations or exclusions may not apply to you. This warranty gives you specific legal rights and you may also have other rights which vary from state to state. )0850(&58"33"/5:4&37*$& If you experience any problems with either the Bl...
Page 204 - Numbers; Index
202 Numbers 10 Driver Safety Tips 186 A Adding a Contact to Your Favorites 82 Adding application icons to the Home screen 33 Adding Contacts 80 Advanced settings 72 Airplane mode 57 Alarm/Clock 146 and Sharing Contacts 81 Answering or Rejecting Calls 58 Applications 29 B Backup Assistant Plus 77 Boo...