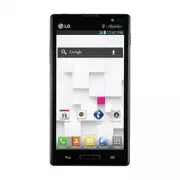
Page 3 - English
LG Optimus L9 User Guide • Screen displays and illustrations may differ from those you see on actual phone. • Some of the contents of this guide may not apply to your phone, depending on the software and your service provider. All information in this document is subject to change without notice. • T...
Page 4 - About this user guide; SERVICE ACTIVATION
2 If you are a new T-Mobile® customer and your service has not been activated, simply call Customer Care at 1-800-937-8997 from your landline phone and a T-Mobile Activations representative will assist you. You will need the following information when activating service: • Service Agreement and agen...
Page 5 - Table of contents
3 Table of contents SERVICE ACTIVATION ......................2Important notice ................................6Getting to know your phone ........... 12 Phone overview ...................................... 12 Installing the Micro SIM card and battery ..................................................
Page 8 - Important notice; Before you start using the phone, please read this!
6 Important notice Before you start using the phone, please read this! Please check to see if any problems you have encountered with your phone are described in this section before taking the phone in for service or calling a service representative. 1. Phone Memory In order to make more memory avail...
Page 9 - Installing an Open Source Operating System
7 • Some applications you have downloaded may cause your battery power to be reduced. • While using downloaded applications, check the battery charged level. To view the battery charge level 1 From the Home screen, tap the Menu Key and tap System settings > About phone > Battery . 2 The batter...
Page 10 - Screen Lock
8 4. Using Swipe, Face Unlock, Pattern, PIN, or Password Screen Lock Set a screen lock to secure your phone from unauthorized use. To set the screen lock, follow the process below.From the Home screen, tap the Menu Key > Lock screen settings > Select screen lock and select from Swipe , Face Un...
Page 11 - Using a microSD Card
9 Warning! If you perform a Hard Reset, all user applications and user data will be deleted. Please remember to back up any important data before performing a Hard Reset . 1 Turn the phone off. 2 Press and hold the following keys at the same time for 8 seconds: Volume Down Key + Home Key + Power / L...
Page 12 - Connecting Your Phone to a Computer via USB
10 Warning! Do not remove the microSD card without unmounting it first. Otherwise, it may damage the microSD card as well as your phone, and the data stored on the microSD card may be corrupted. To unmount the microSD card, from the Home screen, tap the Menu Key and tap System settings > Storage ...
Page 13 - Unlock Screen When Using Data Connection; Hold the Phone Straight Up; When the Screen Freezes; Do Not Connect Your Phone When You Power On/Off
11 10. Unlock Screen When Using Data Connection Your screen will go dark if untouched for a period of time when using a data connection. To turn on your LCD screen, press the Power/Lock Key . 11. Hold the Phone Straight Up Please hold the mobile phone straight up as a regular phone. While making/rec...
Page 14 - Phone overview; Getting to know your phone
12 Phone overview EarpieceFront-Facing Camera Lens Use to take a picture of yourself or to video chat on supported applications. Proximity Sensor Home Key • Returns to the Home screen from any screen. • Press and hold to view a list of the most recently used apps. Back Key • Returns to the previous ...
Page 16 - Installing the Micro SIM card and battery
14 Getting to know your phone Installing the Micro SIM card and battery Before you can start exploring your new phone, you’ll need to set it up. To insert the Micro SIM card and battery: 1 Hold the phone on your hand firmly. With the other hand, lift the back cover using the fingertip cutout located...
Page 17 - Charging your phone
15 4 Align the back cover over the battery compartment and press it down until it clicks into place . Charging your phone A rechargeable Li-ion battery is used to power your phone. A USB adapter, which is included with your phone, is used to charge the battery. Ask your local T-Mobile sales represen...
Page 19 - Inserting a microSD card
17 Inserting a microSD card Insert a microSD™ card to use the camera and other multimedia features. Multimedia contents can be saved in the microSD card. NOTE: This device supports up to a 32GB microSD card. 1 Turn the phone off before inserting or removing the microSD card. Remove the back cover. F...
Page 20 - Removing the microSD card; Formatting the microSD card
18 Removing the microSD card To safely remove the microSD card from your phone, first you need to unmount it. 1 From the Home screen, tap the Menu Key and tap System settings > Storage > Unmount SD card > OK . 2 Remove the back cover and battery, then gently pull the microSD card from the s...
Page 21 - Locking and unlocking the screen
19 Locking and unlocking the screen If you do not use the phone for a while, the screen will be automatically turned off and locked. This helps to prevent accidental touches and saves battery power.When you are not using the your phone, press the Power/Lock Key to lock your phone. If there are any p...
Page 22 - Your Home screen; Touch Screen tips
20 Your Home screen Touch Screen tips Here are some tips on how to navigate on your phone. Tap or touch – A single finger tap selects items, links, shortcuts and letters on the on-screen keyboard. Touch and hold – Touch and hold an item on the screen by touching it and not lifting your finger until ...
Page 23 - Home screen; Customizing the Home screen
21 Home screen Simply swipe your finger to the left or right to view the panels. You can customize each panel with apps, downloads, widgets and wallpapers. NOTE: Some screen images may be different depending on your phone provider. On your Home screen, you can view menu icons at the bottom of the sc...
Page 24 - Returning to recently-used applications; Notifications
22 TIP! Using folders You can add several app icons in a folder. Drop one app icon over another one on a Home screen, and a folder will be created. Returning to recently-used applications 1 Touch and hold the Home Key . The screen displays a pop-up containing the icons of applications you used recen...
Page 25 - Indicator icons on the Status Bar
23 Swipe down for notifications & settings Swipe the Status Bar down to open the Notifications Panel. To close the Notifications Panel, swipe the bar that is at the bottom of the screen upwards. NOTE: Touch and hold an icon from the Quick Settings to view the function's settings menu. Quick Sett...
Page 27 - Entering accented letters
25 Portable Wi-Fi hotspot is active Wi-Fi Direct activated SmartShare music playing SmartShare on NOTE: The icons location in the Status Bar may differ according to the function or service. On-screen keyboard You can enter text using the on-screen keyboard. The on-screen keyboard appears automatical...
Page 28 - Google account setup; To set up your Google account:
26 Google account setup When you first turn on your phone, you have the opportunity to activate the network, to sign into your Google Account and select how you want to use certain Google services. To set up your Google account: • Sign into a Google Account from the prompted set-up screen. OR • From...
Page 29 - Connecting to Networks and Devices; Connecting to Wi-Fi networks; Turning Wi-Fi on and connecting to a Wi-Fi network
27 Connecting to Networks and Devices Wi-Fi With Wi-Fi, you can use high-speed Internet access within the coverage of the wireless access point (AP). Enjoy wireless Internet using Wi-Fi, without extra charges. Connecting to Wi-Fi networks To use Wi-Fi on your phone, you need to access a wireless acc...
Page 30 - Bluetooth
28 Bluetooth You can use Bluetooth to send data by running a corresponding application, but not from the Bluetooth menu as on most other mobile phones. NOTE: • LG is not responsible for the loss, interception or misuse of data sent or received via the Bluetooth wireless feature. • Always ensure that...
Page 31 - Tethering
29 OR Open the item and tap the Menu Key > Share . 2 Tap Bluetooth to share via Bluetooth. NOTE: The method for selecting an option may vary by data type. 3 Search for and pair with a Bluetooth-enabled device. Receive data using the Bluetooth wireless feature 1 From the Home screen, tap Apps >...
Page 32 - Smartphone Mobile Hotspots; Enabling Wi-Fi Direct to share through SmartShare
30 NOTE: • To use your phone’s tethering capability, you must have the Smartphone Mobile Hotspot service added to your rate plan. Performance may vary depending on the number of devices connected and other factors. • You cannot access your phone’s microSD card on your computer when using USB tetheri...
Page 33 - SmartShare
31 NOTE: Wi-Fi Direct cannot be enabled while using other Wi-Fi functions. 1 From the Home screen, tap Apps > Apps tab > Settings > Wi-Fi from the WIRELESS & NETWORKS section. 2 Tap to turn it on and touch the Menu Key > Wi-Fi Direct . 3 Select a device to connect with from the scann...
Page 36 - Calls; Making a call; Locked screen
34 Calls Making a call 1 From the Home screen, tap Phone to open the keypad. 2 Enter the number on the keypad. To delete a digit, tap Clear . 3 Tap Call to make a call. 4 To end a call, tap End . TIP! To enter “+” to make international calls, touch and hold . Calling your contacts 1 From the Home sc...
Page 38 - Ending a Call from the Status Bar
36 If you exit the current call screen and return to the Home screen, you will be notified that you are still on an active call by the green phone icon within the Status Bar. Active Call Notification Ending a Call from the Status Bar 1 Touch and drag the Status Bar down to open the Notifications Pan...
Page 39 - Contacts; Searching for a contact; To add a contact to your favorites
37 Contacts You can add contacts on your phone and synchronize them with the contacts in your Google Account or other accounts that support syncing contacts. Searching for a contact 1 From the Home screen, tap Apps and then tap Contacts to open your contacts. 2 Tap the Search contacts box and enter ...
Page 40 - Creating a group
38 3 Tap the star to the right of the contact’s name. The star turns gold and the contact is added to your favorites. To remove a contact from your favorites list 1 From the Home screen, tap Apps and then tap Contacts to open your contacts. 2 Tap the Favorites tab to view your favorite contacts. 3 T...
Page 41 - Conversation view
39 Messaging Your phone combines text and multimedia messages into one intuitive, easy- to-use menu. Conversation view Messages exchanged with another party are displayed in chronological order so that you can conveniently see an overview of your conversations. Sending a message 1 From the Home scre...
Page 42 - Using smilies; Changing your message settings
40 Using smilies Liven up your messages using smilies.When writing a new message, tap the Menu Key , then tap Insert smiley . Changing your message settings Your phone’s message settings are predefined, so you can send messages immediately. You can change the settings based on your preferences. • Fr...
Page 43 - Email; Managing an email account; To add another email account:; Working with account folders
41 Email You can use the Email application to read emails from services like Gmail. The Email application supports the following account types: POP3, IMAP and Exchange.Your service provider or system administrator can provide you with the account settings you need. Managing an email account The firs...
Page 44 - Composing and sending email; To compose and send a message
42 Composing and sending email To compose and send a message 1 While in the Email application, tap Compose . 2 Enter an address for the message’s intended recipient. As you enter text, matching addresses will be proposed from your Contacts. Separate multiple addresses using semicolons. 3 Tap the Cc ...
Page 45 - Camera; Getting to know the viewfinder
43 Camera To open the Camera application, tap Camera on the Home screen. Getting to know the viewfinder Swap camera – Switch between the rear–facing camera lens and the front– facing camera lens. Voice shutter – To take a photo, say one of the following words: Cheese, Smile, Whisky, Kimchi or LG. Sh...
Page 46 - Using the advanced settings
44 Using the advanced settings In the viewfinder, tap to open the advanced options. You can change the camera settings by scrolling through the list. After selecting the option, tap the Back Key . Touch if you want to change the viewfinder menu. Zoom in or out. Defines and controls the amount of sun...
Page 47 - Taking a quick photo
45 Selects a shutter sound. Automatically shows you the picture you just took.Set the storage location for your pictures. Choose from Internal memory and SD card.Restore all camera default settings.Touch this whenever you want to know how a function works. This icon will provide you with a quick gui...
Page 48 - Once you've taken a photo
46 Once you've taken a photo Your captured photo will appear on the screen if Auto review is set to On (refer to Using the advanced settings). Touch image preview in the bottom right corner of the screen to view the last photo you took. The following options are available: Tap to view the Gallery of...
Page 49 - Viewing your saved photos
47 Applies artistic effects to your photos.Applies color effects to your photos. Applies additional options to your photos. Slideshow – Automatically shows you the images in the current folder one after the other. Details – Find out more information about the contents. Viewing your saved photos You ...
Page 50 - Video camera
48 Video camera Getting to know the viewfinder Swap camera – Switch between the rear–facing camera lens and the front- facing camera lens. Video size – Touch to set the size (in pixels) of the video you are recording. Live effect – Live effect provides various visual effects when taking a video. Fla...
Page 52 - After recording a video; Watching your saved videos
50 5 A timer showing the length of the video will appear. 6 Touch on the screen to stop recording. NOTE: Touch on the screen to take a picture while you're recording. After recording a video A still image representing your video will appear on the screen if Auto review is set to On. Touch the image ...
Page 53 - LG Unique Functions
51 LG Unique Functions QuickMemo The QuickMemo feature allows you to create memos and capture screen shots. Capture screens, draw on them, and share them with family and friends with QuickMemo. OR 1 Enter the QuickMemo screen by pressing both the Volume Keys for one second on the screen you want to ...
Page 54 - Using the QuickMemo options; Viewing the saved QuickMemo
52 3 Tap in the Edit menu and select to save the memo. To exit QuickMemo at any time, tap the Back Key . NOTE: Please use a fingertip while using the QuickMemo. Do not use your fingernail. Using the QuickMemo options You can easily use the QuickMenu options when using the QuickMemo. Touch to keep th...
Page 57 - Viewing pictures; Multimedia
55 Gallery You can store multimedia files in internal memory for easy access to all your multimedia files. Use this application to view multimedia files like pictures and videos. 1 From the Home screen, tap Apps > Apps tab > Gallery . You can manage and share all your image and video files wit...
Page 58 - Videos; Playing a video
56 Viewing photo and video options When viewing a photo or video, tap the Menu Key and use the advanced editing options. Deleting images and videos Use one of the following methods: • In a folder, tap and select the photos and videos you want to delete, then tap Delete . • When viewing a photo or vi...
Page 59 - Music; Add music files to your phone
57 Touch to resume video playback. Touch to go 10 seconds forward. Touch to go 10 seconds backward. Touch to manage the video volume. Touch to change the ratio of the video screen. Touch access QSlide and display the video in small window. Touch to share your video via the SmartShare function. Touch...
Page 60 - Playing a song
58 Transfer music using Media sync (MTP) 1 Connect the phone to your PC using the USB cable. 2 Select the Media sync (MTP) option. Your phone will appear as another hard drive on your computer. Click on the drive to view it. Copy the files from your PC to the drive folder. 3 When you’re finished tra...
Page 62 - Utilities
60 411 & More This offers alot more than just access to directory assistance and other portals. Available categories include: 411 Directory Assistance, Current Weather, etc. 1 From the Home screen, tap Apps > 411 & More . 2 Tap the on-screen options and follow the on-screen prompts. Choic...
Page 65 - To open the File Manager application
63 T-Mobile Name ID Lets you modify the on-screen Caller ID information. Name ID identifies unknown callers by Name, City, and State. 1 From the Home screen, tap Apps > T-Mobile Name ID . 2 Choose an on-screen option. Slacker Radio Slacker® offers Internet radio for mobile devices. 1 From the Hom...
Page 66 - Application Manager; Application Manager Settings; Scout
64 • Copy: Allows you to copy files and folders and paste them in another location. • Share: Allows you to share files and folders with others. • Zip: Allows you to compress files and folders into a .zip file. • Exit: Allows you to exit the application. Application Manager You can manage your progra...
Page 67 - Recording a sound or voice
65 4 Select to either upgrade to the premium application or select to use basic navigation. 5 Use the available on-screen functions. Visual Voicemail The Visual Voicemail application allows users to view a list of people who left voicemail messages on your phone. You can listen to your message witho...
Page 68 - Sending the voice recording; Task Manager; Task Manager Options; Polaris Office 4; Viewing files
66 NOTE: Touch to access your list of recordings. You can listen to the saved recordings. The available recording time may differ from actual recording time. Sending the voice recording 1 Once you have finished recording, you can send the audio clip by touching . 2 Choose from any of the available m...
Page 69 - About backing up and restoring smartphone data
67 FileShare This feature allows you to share files from your phone. 1 From the Home screen, tap Apps > Apps tab > FileShare . 2 Choose the types of content you would like to share. Choose from Images , Videos , Music and Documents . 3 Tap Send file in the upper right corner of the screen, the...
Page 71 - Restoring smartphone data; Enable encryption
69 Restoring smartphone data To restore data that is in your internal memory, Media sync mode must be turned off. NOTE: All files that are stored on your smart phone are deleted before the backup file is restored. 1 From the Home screen, tap Apps > Apps tab > Backup > Restore > Internal ...
Page 72 - Voice Search; Downloads
70 Google+ Use this application to stay connected with people via Google’s social network service.From the Home screen, tap Apps > Apps tab > Google+ . NOTE: This application may not be available depending on the region or service provider. Voice Search Use this application to search webpages ...
Page 73 - The Web; Browser; Using the Web toolbar; Viewing webpages; Opening a page
71 The Web Browser Use this application to browse the Internet. Browser gives you a fast, full-color world of games, music, news, sports, entertainment and much more, right on your mobile phone wherever you are and whatever you enjoy. NOTE: Additional charges apply when connecting to these services ...
Page 74 - Chrome
72 Searching the web by voice Tap the web address field, tap , speak a keyword, and then select one of the suggested keywords that appear. NOTE: This feature may not be available depending on the region or service provider. Bookmarks • To bookmark the current webpage, tap the Menu Key > Save to b...
Page 75 - Searching the web by voice; Syncing with other devices
73 Viewing webpages Tap the web address field, and then enter a web address or search criteria. Opening a page • To go to a new page, tap > New tab . • To go to another webpage, tap , scroll up or down and tap the page to select it. Searching the web by voice Tap the address field, tap , speak a ...
Page 76 - Settings; Access the Settings menu
74 Settings Access the Settings menu 1 From the Home screen, tap Apps > Apps tab > Settings . OR From the Home screen, tap the Menu Key > System settings . 2 Select a setting category and select an option. WIRELESS & NETWORKS < Airplane mode > Tap the Airplane mode switch to toggl...
Page 79 - DEVICE
77 DEVICE < Sound >Sound profile – Choose the Sound, either Vibrate only or Silent. Volumes – Manage the volume of Phone ringtone, Notification sound, Touch feedback & system, Music, video, games and other media. Quiet time – Set times to turn off all sounds except alarm and media. Rington...
Page 81 - PERSONAL
79 prepares it for use with your phone. < Power saver > Manage the battery and select the features you want to turn off or change when the battery is low. You can also check the battery use. < Apps > Use the Apps menu to view details about the applications installed on your phone, manage...
Page 82 - SYSTEM
80 Clear credentials – Remove all certificates. < Language & input > Use the Language & input settings to select the language for the text on your phone and to configure the on-screen keyboard, including words you've added to its dictionary. < Backup & reset >Backup my data –...
Page 86 - Phone software update
84 Phone software update This feature allows you to update the firmware of your phone to the latest version conveniently from the internet without the need to visit a service center. For more information on how to use this function, please visit: http://www.lg.com As the mobile phone firmware update...
Page 88 - DivX Mobile
86 NOTICE: Open Source Software To obtain the corresponding source code under GPL, LGPL, MPL and other open source licences, please visithttp://opensource.lge.com/ All referred licence terms, disclaimers and notices are available for download with the source code. DivX Mobile ABOUT DIVX VIDEO: DivX®...
Page 89 - Accessories
87 These accessories are available for use with the LG Optimus L9. (Items described below may be optional and sold separately.) Travel adapter Data cable Connect your LG Optimus L9 and PC. User Guide Learn more about your LG Optimus L9. 86 These accessories are available for use with the LG-P990. ( ...
Page 90 - Technical data
88 Technical data Ambient TemperaturesMax: +50°C (discharging), +45°C (charging) Min: -10°C Battery Standby and Talk Time Standby and talk times will vary depending on phone usage patterns and conditions. Battery power consumption depends on factors such as network configuration, signal strength, op...
Page 91 - Troubleshooting
89 Troubleshooting This chapter lists some problems you might encounter when using your phone. Some problems require you to call your service provider, but most are easy to fix yourself. Message Possible causes Possible corrective measures Micro SIM error There is no Micro SIM card in the phone or i...
Page 95 - For Your Safety; Safety Information
93 For Your Safety Safety Information Please read and observe the following information for safe and proper use of your phone and to prevent damage. WARNING! This product contains chemicals known to the State of California to cause cancer and birth defects or reproductive harm. Wash hands after hand...
Page 98 - Care and Maintenance; Extreme heat or cold
96 Care and Maintenance Your mobile device is a product of superior design and craftsmanship and should be treated with care. The suggestions below will help you fulfill any warranty obligations and allow you to enjoy this product for many years: Keep your Mobile Device away from:Liquids of any kind...
Page 101 - FCC RF Exposure Information; Bodily Contact During Operation; Vehicle-Mounted External Antenna
99 FCC RF Exposure Information WARNING! Read this information before operating the phone. In August 1996, the Federal Communications Commission (FCC) of the United States, with its action in Report and Order FCC 96-326, adopted an updated safety standard for human exposure to Radio Frequency (RF) el...
Page 102 - Consumer Information About Radio Frequency Emissions; Are wireless phones safe?; What does “SAR” mean?
100 Consumer Information About Radio Frequency Emissions Your wireless phone, which contains a radio transmitter and receiver, emits radio frequency energy during use. The following consumer information addresses commonly asked questions about the health effects of wireless phones. Are wireless phon...
Page 107 - TIA Safety Information; Exposure to Radio Frequency Signal; Phone Operation
105 TIA Safety Information The following is the complete TIA Safety Information for wireless handheld phones. Exposure to Radio Frequency Signal Your wireless handheld portable phone is a low power radio transmitter and receiver. When ON, it receives and sends out Radio Frequency (RF) signals.In Aug...
Page 110 - For Vehicles Equipped with an Air Bag; FDA Consumer Update; FDA; Do wireless phones pose a; Do wireless phones pose a health hazard?; What is the FDA’s role concerning the safety of wireless
108 contains chemicals or particles (such as grain, dust, or metal powders); and any other area where you would normally be advised to turn off your vehicle engine. For Vehicles Equipped with an Air Bag An air bag inflates with great force. DO NOT place objects, including either installed or portabl...
Page 113 - What research is needed to decide whether RF exposure from; What is the FDA doing to find out more about the possible
111 long-term exposures, since the average period of phone use in these studies was around three years. 5. What research is needed to decide whether RF exposure from wireless phones poses a health risk? A combination of laboratory studies and epidemiological studies of people actually using wireless...
Page 114 - How can I find out how much Radio Frequency energy; What has the FDA done to measure the Radio Frequency
112 oversight, obtaining input from experts in government, industry, and academic organizations. CTIA-funded research is conducted through contracts with independent investigators. The initial research will include both laboratory studies and studies of wireless phone users. The CRADA will also incl...
Page 115 - What steps can I take to reduce my exposure to Radio; What about children using wireless phones?
113 rate at which RF is deposited in the heads of wireless phone users. The test method uses a tissue-simulating model of the human head. Standardized SAR test methodology is expected to greatly improve the consistency of measurements made at different laboratories on the same phone. SAR is the meas...
Page 117 - Driving; HAC statement
115 (http://www.fcc.gov/oet/rfsafety)International Commission on Non-lonizing Radiation Protection(http://www.icnirp.de)World Health Organization (WHO) International EMF Project(http://www.who.int/emf)National Radiological Protection Board (UK)(http://www.hpa.org.uk/radiation/) Driving Check the law...
Page 120 - Limited Warranty Statement
Limited Warranty Statement 1. WHAT THIS WARRANTY COVERS: LG offers you a limited warranty that the enclosed subscriber unit and its enclosed accessories will be free from defects in material and workmanship, according to the following terms and conditions: (1) The limited warranty for the product ex...