Page 3 - LIMITED WARRANTY STATEMENT
LIMITED WARRANTY STATEMENT 1. WHAT THIS WARRANTY COVERS : LG offers you a limited warranty that the enclosed subscriber unit and its enclosed accessories will be free from defects in material and workmanship, according to the following terms and conditions: 1. The limited warranty for the product ex...
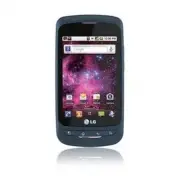
Page 5 - User Manual
Page 6 - Table of Contents
Table of Contents Important notice......................... 7Your Phone ................................ 12Getting Started ......................... 14 Installing the SIM card and battery ......................................... 14 Charging your phone ................... 15 Installing the microSD c...
Page 8 - To set whether you sign into
Table of Contents To set whether you sign into Google Talk automatically ........... 55 To set Google Talk to change your status........................................... 55 Utilities ...................................... 56 Setting the alarm ........................ 56 Using the calculator .........
Page 9 - Optimizing Battery Life; Important notice
7 Please check to see if any problems you have encountered with your phone are described in this section before taking the phone in for service or calling a service representative. 1. Phone Memory You need to check your phone memory and delete some data, such as applications or messages, to make mor...
Page 10 - Installing an Open Source; Warning
8 To view the battery charge level 1 From the Home screen, press the Menu Key and touch Settings > About phone > Status . 2 The battery status (charging or not charging) and level are displayed on the top menu of the screen. To monitor and control what uses the battery From the Home screen, pr...
Page 11 - Caution; Using Safe Mode and Hard
9 account and prompted to create a new unlock pattern. If you haven’t created a Google account on the phone or you forgot your PIN or Password, you need to perform a hard reset. n Caution If you perform a hard reset, all user applications and user data will be deleted. Please remember to back up any...
Page 12 - Using a microSD Card; Connecting your phone to a; TIP
10 6. Using a microSD Card Pictures, Music and Video files, can only be saved to external memory. Before using the camera, you need to insert a microSD card. If you have not inserted a microSD card, you will not be able to save pictures and video taken with the phone. n Warning Do not insert or remo...
Page 14 - Your Phone; Front View
12 Your Phone To turn on the phone, press and hold the Power/Lock Key for 3 seconds.To turn off the phone, press the Power/Lock Key for 3 seconds and touch Power off and OK to confirm. Front View Home Key - Returns to the Home screen from any screen. Menu Key - Displays available options for the cur...
Page 15 - Rear View; Side View
13 Your Phone Rear View Accessory/Charger Port 3.5mm Headset Jack Volume Keys - From the Home screen: Controls ringer volume. - During a call: Controls your earpiece volume. - When playing a track: Controls volume continuously. Power/Lock Key Microphone Side View Battery Cover Battery SIM Card Slot ...
Page 16 - Getting Started
14 Installing the SIM card and battery Before you can start exploring your new phone, you’ll need to set it up. To insert the SIM card and battery: Hold the phone on your hand firmly. With the 1 other hand, firmly press your thumb on the back and lift off the battery cover with your forefinger using...
Page 17 - Charging your phone
15 Insert the battery into place by aligning the 3 gold contacts on the phone and the battery. Replace the back cover of the phone (as 4 demonstrated below). Apply a steady downward pressure until the battery cover clicks into place. Charging your phone Plug the USB cable (as shown below) into the p...
Page 18 - Installing the microSD card
16 Installing the microSD card To store multimedia files, such as images taken using the camera, you must insert a microSD card into your phone. To insert a microSD card: n NOTE This device supports up to a 32GB microSD card. Turn the phone off before inserting or 1 removing the microSD card. Remove...
Page 19 - Formatting the microSD card
17 Flip the slot protection down to close it. 3 Then slide the slot protection downwards to lock it and replace the battery cover. n Warning Do not insert or remove the microSD card when the phone is on. Otherwise, it may damage the microSD card as well as your phone, and the data stored on the micr...
Page 20 - Switching between and; Switching between applications
18 Getting Started Switching between and Exiting Applications Multi-tasking is easy with Android because open applications keep running even when you open another application. There is no need to quit an application before opening another. Use and switch among several open applications. Android mana...
Page 21 - Proximity sensor; Your Home screen
19 Touch-screen tips Here are some tips on how to navigate around your phone. Touch - To choose a menu/option or open an application, touch it. Touch and hold - To open an options menu or grab an object you want to move, touch and hold it. Drag - To scroll through a list or move slowly, drag across ...
Page 22 - Lock screen; Silent Mode; Home
20 lock mode. It is recommended that you exit all programs before entering the lock mode to avoid unnecessary charges. (e.g., phone call, web access and data communications) Setting an unlock pattern: You can draw your own unlock pattern by connecting four or more dots.To unlock the phone, draw the ...
Page 24 - Getting back to a recently; Notifications panel; Viewing the Status Bar
22 n TIP You cannot delete the preloaded applications. (Only their icons can be deleted from the screen). Getting back to a recently used application Press and hold the 1 Home Key. The screen will display the icons of applications that you have used recently.Touch an icon to open its application or ...
Page 26 - Onscreen Keyboard; Selecting the type of keyboard you
24 Onscreen Keyboard You can also enter text using the onscreen keyboard. The onscreen keyboard displays automatically on the screen when you need to enter text. To manually display the keyboard, simply touch a text field where you want to enter text.There are two types of keypad that you can use, t...
Page 27 - Entering text
25 Entering text Shift Key - Touch once to capitalize the next letter you type. Double-tap for all caps.The colored arrow tells you if uppercase is locked on or if it is just on for one character . Setting Key- Allows you to set the keyboard settings. Number and Symbols Key - Touch to change to 123 ...
Page 28 - Google Account Set-up
26 The first time you open a Google application on your phone, you will be required to sign in with your existing Google account. If you do not have a Google account, you will be prompted to create one. Creating your Google account From the Home screen, touch the 1 Applications Launcher Key . Touch ...
Page 30 - Making a call; Calling your contacts; When the screen is locked; When the screen is unlocked; Adjusting the In-call volume; Calls
28 Making a call Touch 1 to open the keypad. Enter the number on the keypad. To delete a 2 digit, touch the Clear icon . Touch the 3 Call icon to make a call. To end a call, touch the 4 End icon . n TIP To enter “+” to make international calls, touch and hold down . Calling your contacts Touch 1 to ...
Page 31 - Making a second call; Viewing your call logs; Call settings
29 Making a second call During your initial call, touch 1 . Then enter the number you want to call.Dial the number or search your contacts. 2 Touch the 3 Call icon to connect the call. Both calls will be displayed on the call 4 screen. Your initial call will be locked and put on hold.Touch 5 to togg...
Page 32 - Contacts
30 You can add contacts on your phone and synchronize them with the contacts in your Google Account or other accounts that support syncing contacts. Searching for a contact Touch 1 to open your contacts. Press the 2 Search Key and enter the contact name using the keypad. Adding a new contact Touch 1...
Page 35 - To open the Email application; Email Accounts screen; The Accounts screen
33 Using smilies Liven up your messages using smilies.When writing a new message, press the Menu Key, then touch Insert Smiley . Changing your message settings Your phone's message settings are predefined, so you can send messages immediately. You can change the settings based on your preferences. E...
Page 36 - To delete a message; Composing and Sending Email; To compose and send a message
34 Messaging/Email Touch 3 Combined Inbox (on the Accounts screen). Messages in the Combined Inbox are color coded along their left sides, by account, using the same colors that are used for your accounts on the Accounts screen. Only your account’s most recent email are downloaded to your phone. To ...
Page 37 - Working with Account Folders; To add an Email account
35 Touch the 6 Send button. Saving and Accessing Draft Messages If you’re not ready to send the message, touch the Save as draft button to save it in the Drafts folder. Touch a draft message in the Drafts folder to resume working on it. Your message will also be saved as a draft if you touch the Bac...
Page 38 - Social Networking; Adding an account to your; Viewing and updating your
36 Messaging/Email Touch 3 Remove account in the menu that opens.Touch the 4 OK button in the dialog box to confirm that you want to delete the account. Social Networking With your phone, you can enjoy social networking and manage your micro-blog in on-line communities. You can update your current s...
Page 40 - Getting to know the viewfinder; Camera
38 Getting to know the viewfinder Zoom – Zoom in or zoom out. Alternatively you can use the Volume Keys. Brightness – This defines and controls of the amount of sunlight entering the image. Slide the brightness indicator along the bar, towards “-” for a lower brightness image, or towards “+” for a h...
Page 42 - Using the advanced settings
40 Using the advanced settings In the viewfinder, touch to open the advanced options.You can change the camera settings by scrolling the list. After selecting the option, touch the Back Key . Image size – Touch to set the size (in pixels) of the picture you take. Select a pixel value from the follow...
Page 43 - Viewing your saved photos; Adjusting the volume when
41 Reset – Restore all camera default settings. Camera help – Touch whenever you want to know how a function operates. This will provide you a quick guide. n TIP When you exit the camera, all settings will return to their defaults, except image size and image quality. Any non-default settings must b...
Page 44 - Video camera
42 Video camera Getting to know the viewfinder Zoom – Zoom in or zoom out. Alternatively you can use the Volume Keys. Before starting record a video, you can use the zoom function. You cannot control the zoom function during recording. Brightness – This defines and controls of the amount of sunlight...
Page 46 - Watching your saved videos
44 Color effect – Choose a color tone to use for your new view. Duration – Set a duration limit for your video. Choose between Normal and MMS to limit the recording time and share the video as an MMS. If you set Video Duration as MMS, the video size will be set as 176x144 automatically and you can o...
Page 47 - View mode; Multimedia
45 You can store multimedia files to a microSD card to have easy access to all your image and video files.Touch the Applications Launcher Key , then touch Gallery . n NOTE Make sure you install a microSD card into the phone to save photos and access all your pictures. Without a microSD card, the pho...
Page 50 - Working with Playlists; To create a playlist; To remove a song from a
48 Touch the song you want to play. 3 Touch 4 to pause the song. Touch 5 to skip to the next song. Touch 6 to go back to the beginning of the song. Touch twice to go back to the previous song. To change the volume while listening to music, press the up and down Volume Keys on the right side of the p...
Page 52 - Searching For Locations and; Google applications
50 About Google applications Google applications, including mobile versions of Gmail, Google Talk, Google Calendar, and Google Maps, are loaded on your phone. First, set up a Google account. Then enter 1 your user name and password and sign in.After signing in, your contacts, email, 2 and calendar i...
Page 53 - Getting Directions; To get directions
51 Getting Directions To get directions While viewing a map, press the 1 Menu Key and touch Directions . Enter a starting point in the first text box and 2 your destination in the second text box. To reverse directions, press the Menu Key and touch Reverse Start & End . Touch the icon for car, p...
Page 54 - Latitude; Places
52 Google applications To view Starred Places While viewing a map, press the Menu Key and touch My Places . Clear Map Clear any information, such as routes and search results, from the map. To clear a map While viewing a map, press the Menu Key and touch Clear Map . Latitude Finding Your Friends wit...
Page 55 - MarketTM
53 Google applications Once you select a category, you will see a list of closest matches, including their distance, compass bearing, description and even user reviews. You can customize your own location search categories, and even add the Places icon to your Home screen. n Tip While viewing a map,...
Page 56 - GmailTM
54 Google applications Gmail™ Gmail™ can be configured when you first set up your phone. Depending on your synchronization settings, Gmail™ on your phone is automatically synchronized with your Gmail™ account on the web.The inbox conversations list is your default Gmail™ view.Press the Menu Key, the...
Page 58 - Utilities
56 Setting the alarm From the Home screen, touch the 1 Applications Launcher Key and touch Clock . To add a new alarm, touch 2 . Touch 3 Add alarm and set the alarm time. After you set the time, the phone will let you know how much time is left before the alarm sounds.Set 4 Repeat , Ringtone or Vibr...
Page 60 - Recording a sound or voice; Sending the voice recording
58 Utilities Recording a sound or voice From the Home screen, touch the 1 Applications Launcher Key and touch Voice Recorder . Touch 2 to begin recording. Touch 3 to end recording. n NOTE Touch Go to list to access your voice recordings. You can listen to the saved recordings. Sending the voice reco...
Page 61 - Browser; Using the Web browser; The Web
59 Browser The Browser gives you a fast, full-color world of games, music, news, sports, entertainment, and much more, right on your mobile phone. n NOTE Additional charges apply when connecting to these services and downloading content. Check data charges with your network provider. Using the Web b...
Page 62 - Accessing bookmarks; The web
60 n TIP To return to the previous web page, press the Back Key . Accessing bookmarks Press the 1 Menu Key and touch Bookmarks . To access the bookmark, simply touch the 2 bookmark. Adding bookmarks Press the 1 Menu Key and touch Bookmarks . • From Thumbnail view , touch Add , enter a name and URL, ...
Page 63 - Settings
61 Wireless & networks This menu allows you to manage Wi-Fi and Bluetooth connections, portable hotspot and data tethering, airplane mode and VPN connections.To access this menu, from the Home Screen, press Menu Key and touch Settings > Wireless & networks . Airplane mode Airplane mode al...
Page 66 - Data Tethering; Mobile Hotspots
64 Settings n NOTE This device supports WEP, WPA/ WPA2-PSK and 802.1x EAP. security. If your Wi-Fi service provider or network administrator sets encryption for network security, enter the key in the pop-up window. If encryption is not set, this pop- up window will not be shown. You can obtain the k...
Page 67 - Sound
65 DataPro plan. Plans are not unlimited and significant charges may be incurred if the included data allowance is exceeded. Performance may vary depending on the number of devices connected and other factors. If you do not use a password, others will be able to use your Mobile Hotspot connection. C...
Page 68 - or Password
66 When you turn on your phone or wake up the screen, you're prompted to draw your unlock pattern to unlock the screen. Screen lock timer - Set the amount of idle time before the screen lock is enabled. Set up Sim card lock – Set up SIM card lock or change SIM PIN. Visible passwords – Select to show...
Page 69 - Applications; Privacy
67 When you can’t recall your Unlock Pattern, PIN, or Password: If you logged into a Google account on the phone and failed to use the correct pattern 5 times, touch Forgot Pattern? You will be required to sign in with your Google account and prompted to create a new unlock pattern. If you haven’t c...
Page 70 - Search; Accessibility; Date and time
68 Search Touch Google search and you can adjust Google search settings. Adjust Searchable items so you can get necessary information effectively . Choose from Web , Apps, Contacts, Messaging Search, Music , Twitter or Voice Search . You can also clear shortcuts to recently chosen search suggestions...
Page 71 - Software update
69 Phone Software update This feature allows you to update the firmware of your phone to the latest version conveniently from the internet without the need to visit a service center. For more information on how to use this function, please visit:http://update.lgmobile.com orhttp://www.lg.com/common/...
Page 73 - Accessories
71 There are a variety of accessories available for your mobile phone, some of which may be sold separately. You can select these options according to your personal communication requirements. Visit your local AT&T store or ww.att.com/wirelessaccessories for specific offerings. n NOTE • Always u...
Page 74 - For Your Safety; Important Information; Safety Instructions; Safety Information
72 For Your Safety Important Information This user guide contains important information on the use and operation of this phone. Please read all the information carefully for optimal performance and to prevent any damage to or misuse of the phone. Any changes or modifications not expressly approved i...
Page 75 - microSD card information and
73 For Your Safety ] The unit should be kept away from heat sources such as radiators or cookers. ] Do not drop. ] Do not subject this unit to mechanical vibration or shock. ] The coating of the phone may be damaged if covered with wrap or vinyl wrapper. ] Use dry cloth to clean the exterior of the ...
Page 76 - CAUTION
74 For Your Safety The design of this phone complies with the FCC guidelines and these international standards. CAUTION Use only the supplied and approved antenna. Use of unauthorized antennas or modifications could impair call quality, damage the phone, void your warranty and/or result in violation...
Page 77 - Cautions for Battery
75 For Your Safety If this equipment does cause harmful interference or television reception, which can be determined by turning the equipment off and on, the user is encouraged to try to correct the interference by one or more of the following measures: ] Reorient or relocate the receiving antenna....
Page 78 - Avoid damage to your hearing
76 For Your Safety ] Avoid dropping the phone or battery. If the phone or battery is dropped, especially on a hard surface, and the user suspects damage, take it to a service center for inspection. ] Improper battery use may result in a fire, explosion or other hazard. ] For those host devices that ...
Page 79 - Safety Guidelines; TIA Safety Information; Exposure to Radio Frequency
77 Safety Guidelines TIA Safety Information Provided herein is the complete TIA Safety Information for Wireless Handheld phones. Inclusion of the text covering Pacemakers, Hearing Aids, and Other Medical Devices is required in the owner’s manual for CTIA Certification. Use of the remaining TIA langu...
Page 80 - Tips on Efficient Operation
78 Safety Guidelines Tips on Efficient Operation For your phone to operate most efficiently: ] Do not touch the antenna unnecessarily when the phone is in use. Contact with the antenna affects call quality and may cause the phone to operate at a higher power level than otherwise needed. Driving Chec...
Page 82 - For Vehicles Equipped with an
80 Safety Guidelines Areas with a potentially explosive atmosphere are often, but not always, marked clearly. Potential areas may include: fueling areas (such as gasoline stations); below deck on boats; fuel or chemical transfer or storage facilities; vehicles using liquefied petroleum gas (such as ...
Page 83 - Hazards
81 Safety Guidelines ] The self-protection function of the battery cuts the power of the phone when its operation is in an abnormal state. In this case, remove the battery from the phone, reinstall it, and turn the phone on. ] Actual battery life will depend on network configuration, product setting...
Page 85 - FDA Consumer Update
83 Safety Guidelines FDA Consumer Update The U.S. Food and Drug Administration Center for Devices and Radiological Health Consumer Update on Mobile Phones. 1. Do wireless phones pose a health hazard? The available scientific evidence does not show that any health problems are associated with using w...
Page 92 - 0 Driver Safety Tips
90 Safety Guidelines Federal Communications Commission (FCC) RF Safety Program (http://www.fcc.gov/oet/rfsafety) International Commission on Non-lonizing Radiation Protection (http://www.icnirp.de) World Health Organization (WHO) International EMF Project (http://www.who.int/emf) National Radiologic...
Page 94 - Consumer Information on SAR
92 Safety Guidelines 9. Use your wireless phone to help others in emergencies. Your wireless phone provides you a perfect opportunity to be a “Good Samaritan” in your community. If you see an auto accident, crime in progress or other serious emergency where lives are in danger, call 911 or other loc...
Page 97 - Guía del Usuario
Parte del contenido de esta guía puede variar en el teléfono, dependiendo del software del teléfono o del proveedor del servicio. Todas las marcas de AT&T contenidas aquí son marcas comerciales de AT&T Intellectual Property y/o compañías afiliadas a AT&T. © 2011 AT&T Intellectual Pro...
Page 99 - DECLARACIÓN DE GARANTÍA LIMITADA
DECLARACIÓN DE GARANTÍA LIMITADA 1. ESTA GARANTÍA CUBRE: LG le ofrece una garantía limitada de que la unidad adjunta para el suscriptor y sus accesorios adjuntos estarán libres de defectos de materiales o mano de obra, según los siguientes términos y condiciones: 1. La garantía limitada del producto...
Page 101 - Guía del usuario
Page 102 - Contenido; Configuración de la cuenta de
Contenido Aviso importante .....................................7 Características del teléfono ...............13 Instalación de la tarjeta SIM y la batería 15 Cargue el teléfono....................................16 Instalación de la tarjeta microSD ............17 Formatear la tarjeta microSD..........
Page 105 - Aviso importante
7 Antes de llevar el teléfono a reparación o llamar a un representante del servicio técnico, compruebe si alguno de los problemas que presenta el teléfono se describen en esta sección. 1. Memoria del teléfono Deberá controlar la memoria del teléfono y borrar algunos datos, como aplicaciones o mensaj...
Page 106 - ADVERTENCIA
8 Para comprobar el nivel de carga de la batería Desde la pantalla principal, 1 presione la Tecla de menú y toque Ajustes > Acerca del teléfono > Estado . El estado de la batería (carga o 2 descarga) y el nivel aparecen en la parte superior de la pantalla. Para supervisar y controlar qué usa l...
Page 107 - Usar el Modo seguro y
9 Tiene 5 oportunidades para introducir su información de bloqueo de pantalla. Tras usar las 5 oportunidades, debe esperar 30 segundos para volver a intentar a desbloquear el teléfono. Si no recuerda el Patrón de desbloqueo, el PIN o la Contraseña: Si inició sesión en una cuenta de Google en el telé...
Page 108 - Usar una tarjeta microSD
10 Toque las fichas en la parte superior 3 de la pantalla, elija la aplicación que desea desinstalar y toque Desinstalar y Aceptar para confirmar. Después de desinstalar la aplicación, 4 apague y reinicie el teléfono. Usar la función de reinicio completo (restablecer valores de fábrica). Si no logra...
Page 111 - Características del teléfono; Vista frontal
13 Características del teléfono Para encender el teléfono, mantenga presionada la Tecla de encender/bloquear por 3 segundos.Para apagar el teléfono, presione la Tecla de encender/bloquear por 3 segundos y toque Apagar y Aceptar para confirmar. Vista frontal Tecla de inicio - Vuelve a la pantalla pri...
Page 112 - El teléfono; Vista posterior
14 El teléfono Vista posterior Vista lateral Toma para auricular de 3.5mm Teclas de volumen - En la pantalla principal: controla el volumen del timbre. - Durante una llamada: controla el volumen del auricular. - Durante la reproducción de una canción: permite controlar el volumen continuamente. Tecl...
Page 113 - Introducción
15 Instalación de la tarjeta SIM y la batería Antes de comenzar a explorar su nuevo teléfono, deberá configurarlo. Para insertar la tarjeta SIM y la batería: Sostenga el teléfono firmemente con una 1 mano. Con la otra mano, presione con el pulgar la tapa posterior y levante la tapa de la batería con...
Page 114 - Cargue el teléfono
16 Inserte la batería en su lugar alineando 3 los contactos dorados del teléfono y de la batería. Vuelva a colocar la tapa posterior del 4 teléfono (como se muestra a continuación). Aplique una presión constante hacia abajo hasta que la tapa de la batería se encaje en su lugar. Cargue el teléfono En...
Page 116 - Formatear la tarjeta microSD; Alternar entre y salir de
18 n ADVERTENCIA: No inserte ni retire la tarjeta microSD con el teléfono encendido. De lo contrario, podría dañar la tarjeta microSD o el teléfono, y los datos almacenados en la tarjeta microSD podrían alterarse. Formatear la tarjeta microSD Es posible que la tarjeta microSD ya esté formateada. De ...
Page 118 - Sensor de proximidad; La pantalla principal
20 Sugerencias sobre la pantalla táctil A continuación, se incluyen algunos consejos sobre cómo navegar por el teléfono. Tocar : para elegir un menú/opción o abrir una aplicación, tóquelo/a. Tocar y mantener presionado: para abrir un menú de opciones o tomar un objeto que desea mover, tóquelo y mant...
Page 119 - Precaución; Pantalla de bloqueo; Modo silencio
21 n NOTA - El límite de tiempo de bloquear la pantalla se puede configurar manualmente en Ajustes. - Si se están ejecutando programas cuando configura el patrón, es posible que se sigan ejecutando en el modo de bloqueo. Se recomienda cerrar todos los programas antes de activar el modo de bloqueo a ...
Page 120 - Inicio; Agregar accesos directos y
22 Inicio Simplemente pase el dedo hacia la izquierda o hacia la derecha para ver los diferentes paneles. También puede personalizar cada panel con aplicaciones, carpetas y fondos de pantalla. También puede personalizar cada panel con widgets, los cuales son accesos directos a sus aplicaciones favor...
Page 121 - Volver a las aplicaciones; Panel de notificaciones
23 Aparecerá un nuevo icono en la pantalla 3 principal. Arrástrelo hacia la ubicación deseada en el panel deseado y levante el dedo de la pantalla desde la pantalla de inicio de aplicaciones. n Sugerencia Para agregar una aplicación precargada o una aplicación que haya descargado de Android Market a...
Page 122 - Vista de la Barra de estado
24 Toque el Panel de notificaciones y deslícelo hacia abajo con el dedo. O desde la pantalla principal, presione la Tecla de menú y toque > Notificaciones . Aquí podrá revisar y administrar el estado de Wi-Fi, Bluetooth, GPS, Modo avión, Timbre y otras notificaciones Vista de la Barra de estado L...
Page 123 - Teclado en pantalla
25 Icono Descripción Se está cargando la batería Entrada de datos Salida de datos Entrada y salida de datos El teléfono está conectado a una computadora vía cable USB Descargando datos Cargando datos GPS está encendido GPS está recibiendo datos de ubicación Anclaje de USB está activo Zona Wi-Fi port...
Page 124 - Introducir texto
26 Ambos teclados muestran una letra por tecla, igual al teclado de computadora. También puede usar los teclados en modo horizontal. Gire el teléfono a una posición horizontal para usarlo en este modo. Introducir texto Tecla de mayúsculas - toque esta tecla una vez para poner en mayúscula la próxima...
Page 126 - IMPORTANTE; Configuración de la cuenta de Google
28 La primera vez que abra la aplicación de Google en el teléfono, se le solicitará que inicie sesión con su cuenta de Google. Si no tiene una cuenta de Google, deberá crear una. Crear una cuenta de Google Desde la pantalla principal, toque la 1 Tecla de inicio de aplicaciones para abrir el menú de ...
Page 128 - Llamadas
30 Hacer una llamada Toque 1 para abrir el teclado. Introduzca el número en el teclado. Para 2 borrar un dígito, toque el icono Borrar . Toque el icono 3 Llamar para hacer una llamada.Para terminar una llamada toque el icono 4 Finalizar . n Sugerencia Para introducir "+" para realizar llamad...
Page 129 - Hacer una segunda llamada; Ver los registros de llamadas; SUGERENCIA; Configuración de llamada
31 Hacer una segunda llamada Durante la llamada inicial, toque 1 . A continuación, seleccione el número al que desea llamar.Marque el número o búsquelo en la lista de 2 contactos.Toque el icono 3 Llamar para conectar la llamada.Ambas llamadas se verán en la pantalla de 4 llamada. La primera llamada ...
Page 130 - Contactos
32 Puede agregar contactos en el teléfono y sincronizarlos con los contactos de su cuenta de Google u otras cuentas que admitan la sincronización de contactos. Buscar un contacto Desde la pantalla principal, toque 1 para abrir sus contactos. Presione la 2 Tecla de búsqueda e introduzca el nombre del...
Page 132 - Mensajes/Correo electrónico; Mensajes
34 Mensajes/Correo electrónico Mensajes El teléfono combina SMS y MMS en un menú intuitivo y fácil de usar. Lista por remitente Los mensajes (SMS y MMS) intercambiados con otra persona pueden mostrarse en orden cronológico para que pueda ver con comodidad toda su conversación. Enviar un mensaje Toqu...
Page 133 - Para abrir la aplicación E-mail
35 Usar emoticones Agréguele vida a sus mensajes con emoticones.Cuando escriba un nuevo mensaje, presione la Tecla de menú y luego elija Insertar emoticono . Cambiar la configuración de su mensaje La configuración de mensajes del teléfono viene predefinida para poder enviar mensajes de inmediato. Pu...
Page 134 - Leer mensajes; Para borrar un mensaje
36 Mensajes/Correo electrónico Su Combinación de recibidos Si configuró la aplicación E-mail para enviar y recibir correos electrónicos de más de una cuenta, puede ver todos los mensajes enviados a todas las cuentas en la Combinación de recibidos. Abra la aplicación 1 E-mail . Desde la carpeta Recib...
Page 135 - Para redactar y enviar un mensaje; Usar las carpetas de las
37 Redactar y enviar correos electrónicos Para redactar y enviar un mensaje Mientras se encuentra en la aplicación 1 Correo electrónico, presione la Tecla de menú y toque Redactar . Ingrese la dirección del destinatario del 2 mensaje. Al escribir el texto, se sugieren direcciones que coinciden de lo...
Page 136 - Agregar y editar cuentas de; Agregar su cuenta en el
38 Mensajes/Correo electrónico Agregar y editar cuentas de correo electrónico Para agregar una cuenta de correo electrónico Desde la pantalla Cuentas, presione la 1 Tecla de menú y toque Añadir cuenta . Toque el tipo de cuenta que desea añadir e 2 introduzca la configuración de la cuenta de correo e...
Page 137 - Ver y actualizar su estado; Sincronizar cuentas a su
39 Introduzca su correo electrónico y 2 contraseña que estableció para su cuenta y toque Acceder o Entrar . n NOTA Si agrega un widget de red social a la pantalla principal, el widget indicará su estado cuando el teléfono se actualice desde la red. También puede acceder a la red social directamente ...
Page 138 - Uso del visor; Cámara
40 Uso del visor Zoom: acerca o aleja la imagen. También puede utilizar las Teclas de volumen. Brillo: esta opción define y controla la cantidad de luz solar que entra en la imagen. Deslice el indicador de brillo a lo largo de la barra, hacia "-" para una imagen con menor brillo o hacia "...
Page 139 - Usar el modo de enfoque; Tomar una foto rápida; Después de que haya tomado
41 n NOTA Puede cerrar todas las opciones de atajos para proporcionar una pantalla del visor más despejada. Simplemente toque el centro del visor una sola vez. Para que vuelvan a aparecer las opciones, toque la pantalla otra vez. Usar el modo de enfoque Puede seleccionar una de las siguientes opcion...
Page 140 - Opciones de configuración
42 n NOTA Es posible que se apliquen cargos adicionales al descargar mensajes MMS mientras se encuentra en roaming. Fijar como Toque esta opción para usar la imagen como Fondo de pantalla o Icono de contacto. Renom. Toque esta opción para editar el nombre de la imagen seleccionada. Toque esta opción...
Page 142 - Ver las fotos guardadas; Ajustar el volumen al ver un
44 Ver las fotos guardadas Puede acceder a sus fotos guardadas desde el modo de cámara. Sólo toque y su Galería se mostrará. n SUGERENCIA Dé un toquecito hacia la izquierda o la derecha para ver otras fotos o videos. Presentación de diapositiva : Toque esta opción para ver la presentación de diaposi...
Page 143 - Videocámara
45 Videocámara Uso del visor Zoom: acerca o aleja la imagen. También puede utilizar las Teclas de volumen. Puede usar la función de zoom antes de comenzar a grabar un video. No podrá controlar la función de zoom durante la grabación. Brillo: esta opción define y controla la cantidad de luz solar que...
Page 144 - Grabar un video rápido; Después de grabar un video
46 Grabar un video rápido Desde la pantalla principal, toque 1 Cámara y deslice el botón de modo de cámara hacia abajo. El icono Capturar cambiará a . Aparecerá en la pantalla el visor de la 2 videocámara.Con el teléfono en posición horizontal, 3 apunte la lente hacia lo que desea filmar.Para empeza...
Page 145 - Ver los videos guardados
47 deberá especificar las condiciones de luz. Elija entre Automática , Incandescente , Soleado, Fluorescente y Nublado . Efectos de color: permite elegir una tonalidad para aplicarla en el nuevo video. Duración: permite establecer un límite de duración para el video. Elija entre General y MMS para l...
Page 146 - Modo de vista
48 Puede almacenar archivos multimedia en una tarjeta microSD para tener fácil acceso a todos los archivos de imagen y video.Toque la Tecla de inicio de aplicaciones y luego toque Galería . n NOTA Asegúrese de instalar una tarjeta microSD en el teléfono para guardar fotos y acceder a todas las imáge...
Page 149 - Cómo reproducir archivos
51 Para obtener más información, consulte 'Transferir archivos mediante aparatos de almacenamiento masivo'. Guarde archivos de música o video desde la computadora al aparato de almacenamiento extraíble del teléfono. - Es posible copiar o mover archivos de la computadora al almacenamiento extraíble d...
Page 150 - Usar las listas de reproducción; Para crear una lista de reproducción; Para eliminar una canción de la
52 cualquier canción en la lista. Aparecerán las siguientes opciones: Reproducir, Agregar a lista de reproducción, Utilizar como tono del teléfono, Borrar, Detalles y Buscar . Usar las listas de reproducción Puede crear listas de reproducción para organizar los archivos de música en grupos de cancio...
Page 152 - Aplicaciones de Google
54 Aplicaciones de Google Las aplicaciones de Google, incluyendo versiones móviles de Gmail, Google Talk, Calendario de Google y Google Maps, están precargadas en su teléfono Primero, configure una cuenta de Google. 1 Luego introduzca su nombre de usuario y contraseña e inicie sesión.Después de inic...
Page 153 - Obtener indicaciones; Para obtener indicaciones
55 En el cuadro de búsqueda, introduzca el 2 lugar que está buscando. Puede introducir una dirección, una ciudad o un tipo de negocio o establecimiento. Por ejemplo, "cines en Nueva York".Toque el icono de búsqueda 3 . Los marcadores con etiquetas de letras indican las coincidencias de la bú...
Page 155 - Lugares
57 Toque 2 Seleccionar entre los contactos o Agregar a través de la dirección de correo electrónico en el menú que se abre.Toque 3 Agregar amigos en la parte inferior de la pantalla. Si sus amigos ya usan Latitude, recibirán una solicitud por correo electrónico y una notificación en Latitude. Su no ...
Page 157 - Google TalkTM
59 Aplicaciones de Google siguientes opciones adicionales: Redactar, Cuentas , Ir a etiquetas , Buscar y Más . Presione la Tecla de menú y toque Cuentas > Añadir cuenta para agregar una cuenta. También puede cambiar la configuración presionando la Tecla de menú y tocando Más > Ajustes desde cu...
Page 159 - Utilidades; Configurar una alarma
61 Utilidades Configurar una alarma Desde la pantalla principal, toque la 1 Tecla de inicio de aplicaciones y toque Reloj . Si desea agregar una nueva alarma, toque 2 . Toque 3 Agregar alarma y establezca la hora. Después de configurar la hora, el teléfono le informará cuánto tiempo falta para que s...
Page 160 - Marcación por voz
62 calendario. Un cuadrado de color marcará en el calendario todos los días en los que guardó eventos. Sonará una alarma a la hora de inicio del evento si la estableció. Cambiar la vista del calendario Desde la pantalla principal, toque la 1 Tecla de inicio de aplicaciones y toque Calendar . Presion...
Page 161 - Enviar una grabación de voz
63 Para llamar por voz Desde la pantalla principal, toque la 1 Tecla de inicio de aplicaciones y toque Marcación por voz . Diga " 2 Call " (Llamar) o " Dial " (Marcar)" luego un nombre o un número de teléfono, O puede decir "Remarcar" para marcar el último número marcado....
Page 162 - Navegador; Usando el navegador web; La Web
64 Navegador El Navegador le ofrece un divertido y colorido mundo de juegos, música, noticias, deportes, entretenimiento y mucho más, al que puede acceder directamente desde el teléfono móvil. n NOTA Incurrirá cargos adicionales cuando se conecte a estos servicios y descargue contenido. Consulte con...
Page 163 - Sugerencia; Agregar favoritos
65 • Compartir página – permite compartir la página web con su familia y amigos. • Descargas – permite mostrar el historial de descargas. • Ajustes – permite establecer la configuración del Navegador. n Sugerencia Para regresar a la página web anterior, presione la Tecla Atrás . Agregar favoritos Pr...
Page 164 - Configuración
66 Controles de red inalámbrica Desde esta opción, puede administrar los servicios de Wi-Fi y Bluetooth. Además, puede configurar redes móviles y el modo de vuelo.Para acceder este menú, desde la pantalla principal, presione la Tecla de menú y toque Ajustes > Controles de red inalámbrica . Modo d...
Page 166 - Para conectarse a una red Wi-Fi
68 Wi-Fi Para utilizar Wi-Fi en su teléfono, necesita el acceso a un punto de acceso inalámbrico o "hotspot". Algunos puntos de acceso están abiertas y sólo tiene que conectarse a ellos. Otros se ocultan o implementan otras características de seguridad, por lo que debe configurar su teléfono...
Page 167 - Anclaje de datos; Zonas Wi-Fi portátiles
69 n NOTA Se requiere el acceso a Internet y un router inalámbrico. Como conveniencia añadida, AT&T ha enviado algunos teléfonos con Wi-Fi establecido como valor predeterminado. Dejando Wi-Fi encendido cuando no está conectado a una red Wi-Fi puede afectar la carga de la batería. Se requiere un ...
Page 168 - Ajustes de llamada
70 Para crear una zona Wi-Fi portátil, presione la Tecla de menú desde la pantalla principal y toque Ajustes > Controles de red inalámbrica > Anclaje a red zona Wi-Fi > Zona Wi-Fi portátil . Establezca una contraseña en su primer uso. n NOTA La función Zona Wi-Fi portátil requiere un plan d...
Page 169 - Contraseña de desbloqueo
71 Activar satélites GPS: al marcar la opción Activar satélites GPS, el teléfono determinará su ubicación con precisión, es decir, en qué calle está. Bloqueo pantalla: permite establecer un patrón de bloqueo para proteger el teléfono. Se abrirá un conjunto de pantallas que le guiarán para que dibuje...
Page 170 - Aplicaciones; Cuentas y sincronización
72 Configuración Tiene 5 oportunidades para introducir su información de bloqueo de pantalla. Tras usar las 5 oportunidades, debe esperar 30 segundos para volver a intentar a desbloquear el teléfono. Si no recuerda el Patrón de desbloqueo, el PIN o la Contraseña: Si inició sesión en una cuenta de Go...
Page 172 - Actualización de software
74 Actualización del software del teléfono Esta función le permite actualizar el software de su teléfono a la versión más reciente con rapidez y comodidad a través de Internet y sin necesidad de acudir a nuestro centro de servicios.Si desea obtener más información sobre la instalación y el uso de es...
Page 173 - Preguntas y respuestas
75 Antes de llevar el teléfono a reparar o llamar al servicio técnico, revise si alguno de los problemas que presenta el teléfono está descrito en esta sección. Preguntas y respuestas P ¿Cómo puedo ver la lista de llamadas marcadas, recibidas y perdidas? R Toque la tecla rápida Teléfono y toque la f...
Page 174 - Accesorios
76 Hay una variedad de accesorios disponibles para su teléfono celular y es posible que algunos se vendan por separado. Puede seleccionar esas opciones según sus requisitos de comunicación en particular. Visite su tienda AT&T local o www.att.com/wirelessaccessories para ofertas específicas. n NO...
Page 175 - Por su seguridad; Información importante; Instrucciones de seguridad; Información de seguridad
77 Por su seguridad Información importante Esta guía del usuario contiene información importante acerca del uso y funcionamiento de este teléfono. Lea toda la información con cuidado para obtener un desempeño óptimo y para evitar cualquier daño o mal uso del teléfono. Cualquier cambio o modificación...
Page 176 - Información y cuidado de las
78 Por su seguridad ] La unidad debe mantenerse alejada de fuentes de calor, como radiadores o cocinas. ] No la deje caer. ] No someta esta unidad a vibración mecánica o golpe. ] La cubierta del teléfono podría dañarse si se lo envuelve o se lo cubre con un envoltorio de vinilo. ] Use un paño seco p...
Page 177 - PRECAUCIÓN
79 Por su seguridad PRECAUCIÓN Utilice solamente la antena incluida y aprobada. El uso de antenas no autorizadas o modificaciones no autorizadas puede afectar la calidad de la llamada telefónica, dañar al teléfono, anular su garantía o dar como resultado una violación de las reglas de la FCC. No uti...
Page 178 - Precauciones con la batería
80 Por su seguridad Si este equipo ocasiona una interferencia dañina en la recepción de televisión (lo cual puede determinarse al encender y apagar el equipo), se recomienda al usuario que intente corregir la interferencia a través de la aplicación de una o varias de las siguientes medidas: ] Reorie...
Page 179 - Precauciones con el adaptador
81 Por su seguridad ] El manual del usuario de los dispositivos host que utilizan un puerto USB como fuente de carga debe incluir una declaración en la que se mencione que el teléfono sólo debe conectarse a productos que tienen el logotipo USB-IF o que completaron el programa de conformidad USB-IF. ...
Page 180 - Exposición a las señales de; Indicaciones de seguridad
82 Información de seguridad de TIA Aquí se incluye la información completa de seguridad de la TIA (Asociación de la industria de las telecomunicaciones) sobre teléfonos inalámbricos de mano. La inclusión en el manual del usuario del texto referente a Marcapasos, audífonos para sordera y otros dispos...
Page 184 - Peligros de explosión,
86 Indicaciones de seguridad ] No desarme ni golpee la batería porque eso podría provocar descarga eléctrica, corto circuito o incendio. Almacene la batería en un sitio alejado del alcance de los niños. ] Mantenga limpios los contactos de metal de la batería. ] Reemplace la batería cuando ya no teng...
Page 185 - Aviso general
87 Indicaciones de seguridad ] No le provoque un corto circuito a la batería. Los artículos metálicos como monedas, clips o plumas en el bolsillo o bolso pueden provocar al moverse un cortocircuito en los terminales + y – de la batería (las tiras de metal de la batería). El cortocircuito de los term...
Page 186 - Actualización de la FDA para
88 Indicaciones de seguridad ] No apague o encienda el teléfono cuando se lo ponga al oído. Actualización de la FDA para los consumidores Actualización para los consumidores sobre teléfonos celulares del centro de dispositivos médicos y salud radiológica de la Administración de alimentos y drogas de...
Page 194 - 0 consejos de seguridad
96 Indicaciones de seguridad voluntario patrocinado por el Instituto de ingenieros eléctricos y electrónicos (IEEE). Este estándar especifica los métodos de prueba y los requisitos de desempeño de los aparatos para la sordera y los teléfonos inalámbricos con el fin de que no ocurra ninguna interfere...
Page 197 - Información al consumidor
99 Indicaciones de seguridad a la asistencia en ruta o a un número especial para asistencia de no emergencia desde el teléfono inalámbrico. Para obtener más información, llame al 888-901-SAFE o visite nuestro sitio web http://www.ctia.org. Información al consumidor sobre la SAR (Tasa de absorción es...