Page 2 - Table of Contents
Table of Contents Welcome to Sprint . . . . . . . . . . . . . . . . . . . . . . . . . . . . . . . . .iIntroduction . . . . . . . . . . . . . . . . . . . . . . . . . . . . . . . . . . . . . .iiYour Phone’s Menu . . . . . . . . . . . . . . . . . . . . . . . . . . . . . . .iiiSection 1: Getting Started...
Page 7 - Welcome to Sprint; Welcome and thank you for choosing Sprint.
Welcome to Sprint Sprint and Nextel have come together offering youmore choice and flexibility to do whatever you want,whenever you want. This powerful combination brings you access to moreproducts, more services, and more of what you need to domore of what you want. Welcome to a future full ofpossi...
Page 8 - ii; Introduction; Phone Guide
ii Introduction This Phone Guide introduces you to Sprint PCS Service and all the features of your new phone. It’s divided into foursections: Section 1: Getting Started Section 2: Your Phone Section 3: Sprint PCS Service Features Section 4: Safety and Warranty Information Throughout this guide, you’...
Page 9 - iii; Your Phone’s Menu
iii Your Phone’s Menu The following list outlines your phone’s menu structure. Formore information about using your phone’s menus, see“Navigating Through Phone Menus” on page 23. 1. Missed Alerts2. Call History 1. Missed Calls2. Incoming Calls3. Outgoing Calls4. Recent Calls5. Delete History 1. Miss...
Page 10 - iv
iv 5. On Demand 1. News / 2. Sports / 3. Weather / 4. Money / 5. Movies / 6. Directory / 7. Maps / 8. TV Guide® / 9. Dictionary 6. Pictures 1. Camera2. Camcorder Video Mail/Long Video 3. Picture Mail Inbox/Sent Mail/Saved Mail/Pending Messages 4. My Albums In Phone/Memory Card/Online Albums 5. PictB...
Page 13 - vii
vii Profile 3. Change Lock Code4. Special Numbers5. Delete Contacts 1. Yes/2. No 6. Limit Calls Unlock/Contacts Only/Special #'s Only/911 Emergency Services Only 7. Selective Call Block8. Reset Favorites 1. Yes/2. No 9. Reset Phone 1. Yes/2. No 0. Setup/Others 1. Auto Keyguard On/Off 2. Shortcuts 1....
Page 14 - viii
viii LX550_Phone Guide_1.2.qxd 1/22/07 10:19 AM Page viii
Page 15 - Getting Started; S e c t i o n 1
Getting Started S e c t i o n 1 LX550_Phone Guide_1.2.qxd 1/22/07 10:19 AM Page 1
Page 16 - Section 1A: Setting Up Service; S e c t i o n 1 A; Setting Up Service; In This Section; Getting Started With Sprint PCS Service
2 Section 1A: Setting Up Service S e c t i o n 1 A Setting Up Service In This Section Getting Started With Sprint PCS Service (page 3) Setting Up Your Voicemail (page 4) Sprint PCS Account Passwords (page 5) Getting Help (page 6) Setting up service on your new phone is quick and easy. This section w...
Page 17 - Determining if Your Phone is Already Activated; To unlock your phone, follow these easy steps:; Unlock; Setting Up Ser
Section 1A: Setting Up Service 3 Getting Started With Sprint PCS Service Determining if Your Phone is Already Activated If you purchased your phone at a Sprint Store, it is probablyactivated, unlocked, and ready to use. If you received yourphone in the mail, it probably has been activated; all you n...
Page 18 - Setting Up Your Voicemail; To set up your voicemail:
4 Section 1A: Setting Up Service Setting Up Your Voicemail All unanswered calls to your phone are automaticallytransferred to your voicemail, even if your phone is in use orturned off. Therefore, you will want to set up your voicemailand personal greeting as soon as your phone is activated. To set u...
Page 19 - Sprint PCS Account Passwords; Account Password; Voicemail Password
Section 1A: Setting Up Service 5 Sprint PCS Account Passwords As a Sprint PCS customer, you enjoy unlimited access to yourpersonal account information, your voicemail account, andyour Sprint PCS Vision® account. To ensure that no one elsehas access to your information, you will need to createpasswor...
Page 20 - Getting Help; Reaching Sprint Customer Service
6 Section 1A: Setting Up Service Getting Help Visit www.sprint.com You can go online to: Access your account information Check your minutes used (depending on your Sprint PCS Service Plan) View and pay your bill Make your life easier by enrolling in Sprint PCS onlinebilling and automatic payment Pur...
Page 21 - Receiving Automated Invoicing Information; To access automated invoicing information:
Section 1A: Setting Up Service 7 Receiving Automated Invoicing Information For your convenience, your phone gives you access toinvoicing information on your Sprint PCS account. Thisinformation includes balance due, payment received,invoicing cycle, and an estimate of the number of minutesused since ...
Page 22 - Sprint PCS Operator Services; To access Sprint PCS Operator Services:
8 Section 1A: Setting Up Service Sprint PCS Operator Services Sprint PCS Operator Services provides assistance whenplacing collect calls or when placing calls billed to a localtelephone calling card or third party. To access Sprint PCS Operator Services: Press . For more information or to see the la...
Page 23 - S e c t i o n 2; Your Phone
S e c t i o n 2 Your Phone LX550_Phone Guide_1.2.qxd 1/22/07 10:19 AM Page 9
Page 24 - Section 2A: Your Phone – The Basics; S e c t i o n 2 A; Your Phone: The Basics
10 Section 2A: Your Phone – The Basics S e c t i o n 2 A Your Phone: The Basics In This Section Front View of Your Phone (page 11) Viewing the Display Screen (page 14) Features of Your Phone (page 16) Turning Your Phone On and Off (page 18) Using Your Phone’s Battery and Charger (page 19) Removing a...
Page 25 - Front View of Your Phone; Phone Basics
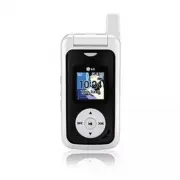
Section 2A: Your Phone – The Basics 11 Front View of Your Phone Phone Basics 2. Softkey Buttons 4. Speaker Key 16. End (Power) 15. Navigation Key 18. Menu/OK 6. Voice Services Key 9. Accessory Jack 14. Microphone 13. Charger Jack 3. microSD Memory Card Slot 8. Back (Clear) 5. Volume Control 20. Disp...
Page 26 - Key Functions
12 Section 2A: Your Phone – The Basics Key Functions 1. Signal Strength Indicator represents the signal strength by displaying bars. The more bars displayed, the better thesignal strength. 2. Softkey Buttons let you select softkey actions or menu items corresponding to the bottom left and right line...
Page 28 - Viewing the Display Screen
14 Section 2A: Your Phone – The Basics 21. Battery Strength Indicator represents the amount of remaining battery charge currently available in your phone.When all bars are displayed in the battery icon, the phone’sbattery is fully charged. When no bars are displayed, thephone’s battery is completely...
Page 30 - Features of Your Phone
16 Section 2A: Your Phone – The Basics operating in digital or analog mode. (For more information, see Section 2D:Controlling Your Roaming Experience on page 69.) Features of Your Phone Congratulations on the purchase of your phone. The Fusic™ byLG® is lightweight, easy-to-use, and reliable, and it ...
Page 32 - Turning Your Phone On and Off; Turning Your Phone On; To turn your phone on:; Turning Your Phone Off; To turn your phone off:
18 Section 2A: Your Phone – The Basics Turning Your Phone On and Off Turning Your Phone On To turn your phone on: Press and hold for approximately two seconds. Once your phone is on, it may display “Searching for Service,”which indicates that your phone is searching for a signal.When your phone find...
Page 33 - Using Your Phone’s Battery and Charger; Wireless; Accessories; Battery Capacity
Section 2A: Your Phone – The Basics 19 Using Your Phone’s Battery and Charger WARNING: Use only Sprint-approved or manufacturer-approved batteries and chargers with your phone. The failure to use a Sprint-approved or manufacturer-approved battery and charger mayincrease the risk that your phone will...
Page 34 - Installing the Battery; To install the Lithium Polymer battery:; Removing the Battery; To remove your battery:
20 Section 2A: Your Phone – The Basics Installing the Battery To install the Lithium Polymer battery: To install, insert the battery into the opening on the backof the phone and gently press down until the latch snapsinto place. Removing the Battery WARNING: Do not handle a damaged or leaking Lithiu...
Page 35 - Charging the Battery; To use the travel charger provided with your phone:
Section 2A: Your Phone – The Basics 21 Charging the Battery Your phone’s Lithium Polymer battery is rechargeable andshould be charged as soon as possible so you can begin usingyour phone. Keeping track of your battery’s charge is important. If yourbattery level becomes too low, your phone automatica...
Page 36 - Removing and Installing the Faceplate; Removing the Faceplate; Installing the Faceplate
22 Section 2A: Your Phone – The Basics Removing and Installing the Faceplate Removing the Faceplate To remove the faceplate, follow the sequence shown below. Note: Faceplates are fragile. Use care when removing them and follow the sequence above. Installing the Faceplate You can personalize your pho...
Page 37 - Navigating Through Phone Menus; Settings; Selecting Menu Items; Call History
Section 2A: Your Phone – The Basics 23 Navigating Through Phone Menus The navigation key on your phone allows you to scroll throughmenus quickly and easily. The scroll bar at the right of themenu keeps track of your position in the menu at all times. To navigate through a menu, simply press the navi...
Page 38 - Backing Up Within a Menu; To go to the previous menu:; Displaying Your Phone Number; To display your phone number:; Making and Answering Calls; Making Calls; To make a call using your keypad:
24 Section 2A: Your Phone – The Basics Backing Up Within a Menu To go to the previous menu: Press . To return to standby mode: Press . Displaying Your Phone Number Just in case you forget your phone number, your phone canremind you. To display your phone number: Select Menu > Settings > Phone ...
Page 39 - Dialing Options
Section 2A: Your Phone – The Basics 25 2. Enter a phone number from standby mode. (If you makea mistake while dialing, press to erase one digit at a time. Press and hold to erase the entire number.) 3. Press . (To make a call when you are roaming and Call Guard is enabled, highlight Roam Call and pr...
Page 40 - Answering Calls; To answer an incoming call:
26 Section 2A: Your Phone – The Basics Contact Match allows you to find a contact match for the displayed number. (When more than 3 numbers areentered, this option is displayed.) Save allows you to enter a seven- or ten-digit number (phone number and area code) and press Save to save the phone numbe...
Page 41 - TALK only; Quiet; Answering a Roam Call With Call Guard Enabled; To answer a call when you are roaming and Call Guard is enabled:; Answer; Ending a Call; To disconnect a call when you are finished:
Section 2A: Your Phone – The Basics 27 If the incoming call is from a number stored in your Contacts,the entry’s name is displayed. The caller’s phone number mayalso be displayed, if available. If Call Answer is set to TALK only , the following options are also displayed. To select an option, press ...
Page 42 - Missed Call Notification; To display the Missed Call entry from the notification screen:; Calling Emergency Numbers
28 Section 2A: Your Phone – The Basics Missed Call Notification When an incoming call is not answered, the Missed Call log isdisplayed on your screen. To display the Missed Call entry from the notification screen: Highlight the entry and press . (To dial the phone number, press .) To display a Misse...
Page 43 - Mute
Section 2A: Your Phone – The Basics 29 To exit Emergency mode: 1. Press to end a 911 call. 2. Highlight Exit and press . Note: When you are in Emergency mode, you can exit only from the options menu. Enhanced 911 (E911) Information This phone features an embedded Global Positioning System(GPS) chip ...
Page 45 - Saving a Phone Number; To save a number from standby mode:; Finding a Phone Number; To find a phone number:
Section 2A: Your Phone – The Basics 31 Saving a Phone Number Your phone can store up to five phone numbers in each of 500Contacts entries. Each entry’s name can contain up to 32characters. Your phone automatically sorts the Contactsentries alphabetically. (For more information, see Section 2F:Using ...
Page 46 - Dialing and Saving Phone Numbers With Pauses; Hard Pause; To dial or save phone numbers with pauses:
32 Section 2A: Your Phone – The Basics 4. To dial the number, scroll to Call and press . Tip: You can also dial the number by highlighting it and pressing TALK during step 3 above. Dialing and Saving Phone Numbers With Pauses You can dial or save phone numbers with pauses for use withautomated syste...
Page 47 - Dialing From the Contacts; To dial directly from a Contacts entry:
Section 2A: Your Phone – The Basics 33 Plus (+) Code Dialing When placing international calls, you can use Plus CodeDialing to automatically enter the international access codefor your location (for example, 011 for international callsmade from the United States). To make a call using Plus Code Dial...
Page 48 - Using Speed Dialing
34 Section 2A: Your Phone – The Basics Using Speed Dialing You can store up to 99 numbers in your phone’s speed dialmemory to make contacting friends and family as easy aspressing a button or two. With this feature, you can dial speeddial entries using one keypress for locations 1-9 or twokeypresses...
Page 49 - Entering Text; Selecting a Character Input Mode; To change the character input mode:
Section 2A: Your Phone – The Basics 35 Entering Text Selecting a Character Input Mode Your phone provides convenient ways to enter words, letters,punctuation, and numbers whenever you are prompted toenter text (for example, when adding a Contacts entry orwhen using Sprint PCS Mail and SMS Text Messa...
Page 50 - Entering Characters Using T9 Text Input; To enter a word using T9 Text Input:
36 Section 2A: Your Phone – The Basics Entering Characters Using T9 Text Input T9 Text Input lets you enter text in your phone by pressingkeys just once per letter. (To select the T9Word mode when entering text, see “Selecting a Character Input Mode” on page 35.) T9 Text Input analyzes the letters y...
Page 51 - Adding a Word to the T9 Database; To add a word to the T9 Text Input database:; Abc
Section 2A: Your Phone – The Basics 37 Adding a Word to the T9 Database If a word you want to enter is not displayed as an option whenyou are using T9 Text Input, you can add it to the database. To add a word to the T9 Text Input database: 1. Select the Abc character input mode. (See “Selecting a Ch...
Page 52 - Entering Characters by Tapping the Keypad; To enter characters by tapping the keypad:
38 Section 2A: Your Phone – The Basics Entering Characters by Tapping the Keypad To enter characters by tapping the keypad: 1. Select the Abc mode. (See “Selecting a Character Input Mode” on page 35.) 2. Press the corresponding keys repeatedly until the desiredletter appears. (For example, to enter ...
Page 55 - External Navigation Controls While Playing Music Files
Section 2A: Your Phone – The Basics 41 To play music: Press and hold . Select Music to play music downloaded from the Sprint Music Store. Select Memory Card to play music from your memory card's media folder. External Navigation Controls While Playing Music Files Pause / Resume Next song (short pres...
Page 56 - Section 2B: Controlling Your Phone’s Settings; S e c t i o n 2 B; Controlling Your Phone’s Settings
42 Section 2B: Controlling Your Phone’s Settings S e c t i o n 2 B Controlling Your Phone’s Settings In This Section Sound Settings (page 43) Display Settings (page 46) Location Settings (page 52) Messaging Settings (page 53) Airplane Mode (page 56) TTY Use With Sprint PCS Service (page 57) Phone Se...
Page 57 - Sound Settings; Ringer Types; Selecting Ringer Types for Voice Calls; To select a ringer type for voice calls:
Section 2B: Controlling Your Phone’s Settings 43 Sound Settings Ringer Types Ringer types help you identify incoming calls and messages.You can assign ringer types to individual Contacts entries,types of calls, and types of messages. You can select RingerTypes among Single Tones, Ring Tones, Melodie...
Page 58 - Selecting Ringer Types for Messages; To select a ringer type for messages:; Selecting a Key Tone; To select a key tone:
44 Section 2B: Controlling Your Phone’s Settings 4. Press to assign the desired ringer. – or –Select Options > My Content and scroll through the list of downloaded ringers. Assign the desired ringer bypressing . Selecting Ringer Types for Messages To select a ringer type for messages: 1. Select M...
Page 59 - Adjusting the Phone’s Volume Settings; To adjust your phone’s volume settings:; Alert Notification; To enable or disable alert sounds:
Section 2B: Controlling Your Phone’s Settings 45 Adjusting the Phone’s Volume Settings You can adjust your phone’s volume settings to suit yourneeds and your environment. To adjust your phone’s volume settings: 1. Select Menu > Settings > Sounds > Volume . 2. Select Ringer , Earpiece , Key ...
Page 60 - Silence All; To activate Silence All:; Display Settings; Changing the Text Greeting; To display or change your greeting:
46 Section 2B: Controlling Your Phone’s Settings Silence All There may be times when you need to silence your phoneentirely. The phone’s Silence All option allows you to mute allsounds without turning your phone off. To activate Silence All: With the phone open, press and hold the volume key downin ...
Page 61 - Changing the Backlight Time Length; To change the backlight setting:; Changing the Display Screen; To change the display images:
Section 2B: Controlling Your Phone’s Settings 47 Changing the Backlight Time Length The backlight setting lets you select how long the displayscreen and keypad are backlit after any keypress is made. To change the backlight setting: 1. Select Menu > Settings > Display > Backlight . 2. Selec...
Page 62 - Changing the Display Screen for Incoming Calls; To set the incoming calls display:
48 Section 2B: Controlling Your Phone’s Settings Changing the Display Screen for Incoming Calls You can set the color or downloaded image (screen saver) to beshown on the Incoming Calls display. To set the incoming calls display: 1. Select Menu > Settings > Display > Incoming Calls . 2. Sel...
Page 63 - Slide Show; To create a slide show:; Changing the Phone’s Menu Style; To select the display’s menu style:
Section 2B: Controlling Your Phone’s Settings 49 Slide Show You can create a slide show screen saver of up to nine imagesthat will change continuously on your standby screen. To create a slide show: 1. Select Menu > Settings > Display > Slide Show . 2. Select a slide from 1 to 9 and press ....
Page 64 - Changing the Theme Color; To change the display’s theme color:; Changing the Theme; To change the display’s theme :; Changing the Clock Display; To change the clock’s appearance on the standby screen:
50 Section 2B: Controlling Your Phone’s Settings Changing the Theme Color You can customize your phone’s display appearance byselecting a color scheme to reflect your personality. To change the display’s theme color: 1. Select Menu > Settings > Display > Themes & Skins > Skins . 2. S...
Page 65 - Changing the Text Input Font; To change the text input font:; Changing the Power Save Mode; To change the power save mode:; Changing the Status Light Mode; To change the status light mode:
Section 2B: Controlling Your Phone’s Settings 51 Changing the Text Input Font This setting allows you to adjust the display appearance whenentering text (for example, when using the notepad or whenadding a Contacts entry). To change the text input font: 1. Select Menu > Settings > Display >...
Page 66 - Location Settings; To enable your phone’s Location feature:
52 Section 2B: Controlling Your Phone’s Settings Location Settings Your phone is equipped with a Location feature for use inconnection with location-based services that may be availablein the future. The Location feature allows the network to detect yourposition. Turning Location off will hide your ...
Page 67 - Messaging Settings; Displaying Pop-up Messages; Icon Only; Setting Message Alerts; To hear an alert when you receive a new message:
Section 2B: Controlling Your Phone’s Settings 53 Messaging Settings Staying connected to your friends and family has never beeneasier. With your phone’s advanced messaging capabilities,you can send and receive many different kinds of textmessages without placing a voice call. (For more information,s...
Page 68 - Callback Number; To automatically delete read messages:; Adding a Customized Signature; To add a customized signature to each sent message:
54 Section 2B: Controlling Your Phone’s Settings Callback Number 1. Select Menu > Settings > Messaging > Callback Number . 2. Select None , My Phone Number , or Other and press . (If you select Other , enter a number and press .) Deleting Old Messages You can delete messages that you’ve alr...
Page 69 - Managing Preset Messages; To edit or delete a preset message:; To add a new preset message:
Section 2B: Controlling Your Phone’s Settings 55 Managing Preset Messages Your phone is loaded with 20 preset messages to help makesending text messages faster and easier. These messages, suchas “Where are you?”, “Let’s get lunch.”, and “Meet me at”, can becustomized or deleted to suit your needs. Y...
Page 70 - SMS Voice Options; Speakerphone; Airplane Mode; To set your phone to Airplane Mode:
56 Section 2B: Controlling Your Phone’s Settings SMS Voice Options Your phone offers several options for organizing andaccessing your SMS Voice messages. 1. Select Menu > Settings > Messaging > VoiceSMS Options . 2. Select Speakerphone or From Name and press . Airplane Mode Airplane Mode al...
Page 71 - TTY Use With Sprint PCS Service; Your Phone’
Section 2B: Controlling Your Phone’s Settings 57 TTY Use With Sprint PCS Service TTY (also known as a TDD or Text Telephone) is atelecommunications device that allows people who are deaf, hard-of-hearing, or who have speech or languagedisabilities, to communicate by telephone. Your phone is compatib...
Page 73 - Phone Setup Options; Shortcuts; To assign your shortcut key:; Call Answer Mode; To set call answer mode:
Section 2B: Controlling Your Phone’s Settings 59 Phone Setup Options Shortcuts Your phone offers you the option of assigning a shortcut keyto a favorite or often-used function. Pressing the navigationkey to the left in standby mode will launch your personallydesignated shortcut. To assign your short...
Page 74 - Auto Answer Mode; To set Auto Answer mode:; Dialing Match; To set your dialing match options:
60 Section 2B: Controlling Your Phone’s Settings Auto Answer Mode You may set your phone to automatically pick up incomingcalls when connected to an optional hands-free car kit. To set Auto Answer mode: 1. Select Menu > Settings > Setup/Others > Auto-Answer . 2. To select an option, highlig...
Page 75 - Text Entry; To assign a language for the phone’s display:
Section 2B: Controlling Your Phone’s Settings 61 Text Entry 1. Select Menu > Settings > Setup/Others > Text Entry . 2. Read the information and press . 2. Select Auto-Capital , Word Choice List , Word Prediction , Word Completion , or Help and press . Display Language You can choose to disp...
Page 76 - Section 2C: Setting Your Phone’s Security; S e c t i o n 2 C; Setting Your Phone’s Security
62 Section 2C: Setting Your Phone’s Security S e c t i o n 2 C Setting Your Phone’s Security In This Section Accessing the Security Menu (page 63) Using Your Phone’s Lock Feature (page 63) Using Special Numbers (page 65) Erasing the Contacts List (page 65) Restricting Your Phone (page 66) Resetting ...
Page 77 - Accessing the Security Menu; To access the Security menu:; Using Your Phone’s Lock Feature; Locking Your Phone; Lock Phone > Lock Now; Unlocking Your Phone; To unlock your phone:
Section 2C: Setting Your Phone’s Security 63 Accessing the Security Menu All of your phone’s security settings are available through theSecurity menu. You must enter your lock code to view theSecurity menu. To access the Security menu: 1. Select Menu > Settings > Security . 2. Enter your lock ...
Page 78 - Locking Pictures; To turn picture lock on or off :; Changing the Lock Code; To change your lock code:; Calling in Lock Mode; To place an outgoing call in lock mode:
64 Section 2C: Setting Your Phone’s Security Locking Pictures To turn picture lock on or off : 1. From the Security menu, scroll to Picture Mail and press . Scroll to Lock Pictures and press . 2. Highlight Lock and press . Changing the Lock Code To change your lock code: 1. Select Menu > Settings...
Page 79 - Using Special Numbers; To add or replace a special number:; Erasing the Contacts List; To erase all the names and phone numbers in your Contacts:
Section 2C: Setting Your Phone’s Security 65 Using Special Numbers Special numbers are important numbers that you havedesignated as being “always available”. You can call andreceive calls from special numbers even if your phone islocked. You can save up to 10 special numbers in addition to yourConta...
Page 80 - Restricting Your Phone; To restrict your phone:
66 Section 2C: Setting Your Phone’s Security Restricting Your Phone There may be occasions when you want to limit the numbersyour phone can call. You can use the Limit Calls setting to dojust that. (The Limit Calls setting does not apply to incomingcalls, calls made to 911, or calls made to Sprint C...
Page 81 - Resetting Your Phone; Reset Phone; Updating Your Picture Mail Profile; To update picture mail profile:
Section 2C: Setting Your Phone’s Security 67 Resetting Your Phone Resetting the phone restores all the factory defaults,including the ringer types and display settings. The Contacts,Call History, Scheduler, and Messaging are not affected. To reset your phone: 1. Select Menu > Settings > Securi...
Page 82 - Enabling Selective Call Block; Selective Call Block
68 Section 2C: Setting Your Phone’s Security Selective Call Block Enabling Selective Call Block Phone numbers on the Selective Call Block list will be routeddirectly to your voicemail. 1. Select Menu > Settings > Security , and then enter your lock code. (The Security menu is displayed.) 2. Se...
Page 83 - Section 2D: Controlling Your Roaming Experience; S e c t i o n 2 D; Controlling Your Roaming Experience; Understanding Roaming; oaming
Section 2D: Controlling Your Roaming Experience 69 S e c t i o n 2 D Controlling Your Roaming Experience In This Section Understanding Roaming (page 70) Setting Your Phone’s Roam Mode (page 73) Using Call Guard (page 74) Using Data Roam Guard (page 75) Roaming is the ability to make or receive calls...
Page 84 - Recognizing the Roaming Icon on the Display Screen; Digital Roam; Roaming on Other Digital Networks
70 Section 2D: Controlling Your Roaming Experience Understanding Roaming Recognizing the Roaming Icon on the Display Screen Your phone’s display screen always lets you know when you’reoff the Nationwide Sprint PCS Network. Any time you areroaming, the phone displays the roaming icon ( ). If you are ...
Page 86 - Checking for Voicemail Messages While Roaming; To check your voicemail while roaming:
72 Section 2D: Controlling Your Roaming Experience Checking for Voicemail Messages While Roaming When you are roaming off the Nationwide Sprint PCSNetwork, you will not receive on-phone notification of newvoicemail messages. Callers can still leave messages, but youwill need to periodically check yo...
Page 87 - Setting Your Phone’s Roam Mode; Roaming; Set Mode; To set your phone’s roam mode:
Section 2D: Controlling Your Roaming Experience 73 Setting Your Phone’s Roam Mode Your phone allows you to control your roaming capabilities. Byusing the Roaming menu option, you can determine which signals your phone accepts. Set Mode Choose from three different settings on your dual-band phoneto c...
Page 88 - Using Call Guard; To turn Call Guard on or off:; To place roaming calls with Call Guard on:
74 Section 2D: Controlling Your Roaming Experience Using Call Guard Your phone has two ways of alerting you when you areroaming off the Nationwide Sprint PCS Network: the onscreenroaming icon and Call Guard. Call Guard makes it easy tomanage your roaming charges by requiring an extra stepbefore you ...
Page 89 - Using Data Roam Guard; To turn Data Roam Guard on or off:; Always Ask; Never Ask Again
Section 2D: Controlling Your Roaming Experience 75 Using Data Roam Guard You will be asked if you want to continue using your browseror other online applications when you are in a data roamingarea. When Data Roam Guard is turned off, your phone willestablish or maintain a data connection in a data r...
Page 90 - Section 2E: Managing Call History; S e c t i o n 2 E; Managing Call History
76 Section 2E: Managing Call History S e c t i o n 2 E Managing Call History In This Section Viewing History (page 77) Call History Options (page 78) Making a Call From Call History (page 79) Saving a Phone Number From Call History (page 79) Prepending a Phone Number From Call History (page 80) Eras...
Page 91 - Viewing History; To view a Call History entry:; all History
Section 2E: Managing Call History 77 Viewing History You’ll find the Call History feature very helpful. It is a list of thelast 50 phone numbers (or Contacts entries) for calls youplaced, accepted, or missed. Call History makes redialing anumber fast and easy. It is continually updated as newnumbers...
Page 92 - Call History Options
78 Section 2E: Managing Call History Call History Options For additional information and options on a particular call,highlight a Call History entry and press . This feature displays the date and time of the call, the phone number (ifavailable), and the caller’s name (if the number is already inyour...
Page 93 - Making a Call From Call History; To place a call from Call History:; Saving a Phone Number From Call History; To save a phone number from Call History:
Section 2E: Managing Call History 79 Making a Call From Call History To place a call from Call History: 1. Select Menu > Call History , and then select Missed Calls , Incoming Calls , Outgoing Calls , or Recent Calls . 2. Use your navigation key to select a Call History entry andpress . Note: You...
Page 94 - To prepend a phone number from Call History:
80 Section 2E: Managing Call History 5. Use the keypad to type in the new entry name and press . – or – Use your navigation key to scroll through your existingContacts entries, highlight a name, and press . 6. Use your navigation key to select a phone number type(Mobile, Home, Office, etc.) and pres...
Page 95 - Erasing Call History; To erase Call History:
Section 2E: Managing Call History 81 Erasing Call History To erase individual Call History entries, see “Call HistoryOptions” on page 78. To erase Call History: 1. Select Menu > Call History > Delete History . 2. Select Missed Calls , Incoming Calls , Outgoing Calls , Recent Calls , or All Cal...
Page 96 - Section 2F: Using Contacts; S e c t i o n 2 F; Using Contacts
82 Section 2F: Using Contacts S e c t i o n 2 F Using Contacts In This Section Adding a New Contacts Entry (page 83) Finding Contacts Entries (page 84) Contacts Entry Options (page 86) Adding a Phone Number to a Contacts Entry (page 86) Editing a Contacts Entry’s Phone Number (page 87) Assigning Spe...
Page 97 - Adding a New Contacts Entry; Done
Section 2F: Using Contacts 83 Adding a New Contacts Entry Your phone can store up to 500 Contacts entries. Contactsentries can store up to a total of five phone numbers, and eachentry’s name can contain 32 characters. To add a new entry: 1. Select Menu > Contacts > Find/Add Entry . 2. Scroll t...
Page 98 - Finding Contacts Entries; Finding Names; To find Contacts entries by name:
84 Section 2F: Using Contacts Finding Contacts Entries There are several ways to display your Contacts entries: byname, by speed dial number, and by group. Follow the stepsoutlined in the sections below to display entries from theContacts menu. Finding Names To find Contacts entries by name: 1. Sele...
Page 99 - Finding Group Entries; To find entries designated as part of a group:; Finding Speed Dial Numbers; To find phone numbers you have stored in speed dial locations:
Section 2F: Using Contacts 85 Finding Group Entries To find entries designated as part of a group: 1. Select Menu > Contacts > Groups . 2. Scroll through the group titles using your navigation key.To display entries belonging to a group, highlight thegroup and press . 3. To display an entry wi...
Page 100 - Contacts Entry Options; No Group; Adding a Phone Number to a Contacts Entry; To add a phone number to an entry:
86 Section 2F: Using Contacts Contacts Entry Options To access a Contacts entry’s options, display the entry,highlight <Edit Entry> , and press . To select an option, highlight it and press . [Add Number] to add a phone number to the entry. (See “Adding a Phone Number to a Contacts Entry” onpa...
Page 101 - Editing a Contacts Entry’s Phone Number; To edit an entry’s phone number:
Section 2F: Using Contacts 87 5. Use the keypad to enter the new number and press . 6. Press Done (left softkey) to save the new number. – or – Press Options (right softkey), assign a speed dial number for the number, and then press Done (left softkey) to save your new settings. Editing a Contacts E...
Page 102 - Assigning Speed Dial Numbers; To assign a speed dial number to a new phone number:
88 Section 2F: Using Contacts Assigning Speed Dial Numbers Your phone can store up to 99 phone numbers in speed diallocations. For details on how to make calls using speed dialnumbers, see “Using One-Touch/Two-Touch Speed Dialing” onpage 34. Speed dial numbers can be assigned when you add a newConta...
Page 103 - Editing a Contacts Entry; To make changes to an entry:
Section 2F: Using Contacts 89 4. Highlight Set Speed Dial and press . 5. Select an available speed dial location and press . 6. Scroll to Set Speed Dial and press . (A confirmation will be displayed.) 7. Press Done (left softkey) to save the new speed dial number. Note: If you attempt to assign an a...
Page 104 - Selecting a Ringer Type for an Entry; To select a ringer type for an entry:
90 Section 2F: Using Contacts Selecting a Ringer Type for an Entry You can assign a ringer type to a Contacts entry so you canidentify the caller by the ringer type. (See “Ringer Types” onpage 43.) To select a ringer type for an entry: 1. Display a Contacts entry. 2. Scroll to <Edit Entry> and...
Page 105 - Wireless Backup; To subscribe to Wireless Backup from your Contacts:; Dialing Sprint PCS Services; To dial a service from your Contacts:
Section 2F: Using Contacts 91 Wireless Backup Wireless Backup allows you to back up all of your Contacts tothe Sprint Web site and restore them if your phone is lost,stolen, damaged, or replaced. To subscribe to Wireless Backup from your Contacts: 1. Select Menu > Contacts > Wireless Backup ( ...
Page 106 - Section 2G: Using the Phone’s Calendar and Tools; S e c t i o n 2 G; Using Your Phone’s Calendar
92 Section 2G: Using the Phone’s Calendar and Tools S e c t i o n 2 G Using the Phone’s Calendar and Tools In This Section Using Your Phone’s Calendar (page 93) Using Your Phone’s Alarm Clock (page 96) Using Your Phone’s Notepad (page97) Using Your Phone’s Tools (page 98) Your phone is equipped with...
Page 107 - Adding an Event to the Calendar; Tools
Section 2G: Using the Phone’s Calendar and Tools 93 Using Your Phone’s Calendar Adding an Event to the Calendar Your Calendar helps organize your time and reminds you ofimportant events. To add an event: 1. Select Menu > Tools > Scheduler . 2. Using your navigation key, highlight the day to wh...
Page 108 - Event Alerts; Detail; Viewing Events; To view your scheduled events:
94 Section 2G: Using the Phone’s Calendar and Tools 7. Select a ringer type for the alarm by highlighting theringer field and pressing . To select a ringer menu, select Options > Single Tones, Ring Tone, or Melodies for preprogrammed ringers or Options > My Content for downloaded ringers. 8. P...
Page 109 - Going to Today’s Calendar Menu; To go to the Calendar menu for today’s date:; Erasing a Day’s Events; To erase a day’s scheduled events:
Section 2G: Using the Phone’s Calendar and Tools 95 Tip: In the calendar view, days with events scheduled are underlined. 3. To display the details of an event listed in the schedule,highlight it and press . Going to Today’s Calendar Menu To go to the Calendar menu for today’s date: Select Menu >...
Page 110 - Purging Events; To delete events scheduled before a specific time and date:; Purging All Events; To delete all scheduled events:; Using Your Phone’s Alarm Clock; To use the alarm clock:
96 Section 2G: Using the Phone’s Calendar and Tools Purging Events To delete events scheduled before a specific time and date: 1. Select Menu > Tools > Scheduler > Options > Delete Old . 2. Select the option to erase events older than One week , One month , One year , or One day . (A dia...
Page 111 - Using Your Phone’s Notepad; To read a saved note:
Section 2G: Using the Phone’s Calendar and Tools 97 5. Select a repeating status for the alarm by highlightingthe repeat field and pressing . Highlight Once , Daily , Mon - Fri , or Weekends and press . 6. Select a ringer type for the alarm by highlighting theringer field and pressing . To select a ...
Page 112 - Using Your Phone’s Tools; Using EZ Tips; To quickly and easily calculate tip amounts:; Using the Calculator; To use the calculator:
98 Section 2G: Using the Phone’s Calendar and Tools Using Your Phone’s Tools In addition to helping your be more efficient and organized,your phone offers useful and entertaining tools. Using EZ Tips To quickly and easily calculate tip amounts: 1. Select Menu > Tools > Calculator > Ez Tip C...
Page 113 - World Clock; To view the time in over 52 different locations:; Cities
Section 2G: Using the Phone’s Calendar and Tools 99 World Clock To view the time in over 52 different locations: 1. Select Menu > Tools > World Clock . 2. Press Cities (right softkey) to select a city. – or – Press the navigation key left or right to scroll throughdifferent time zones. C alend...
Page 114 - Section 2H: Using Your Phone’s Voice Services; S e c t i o n 2 H; Using Your Phone’s Voice Services; Managing Voice Memos
100 Section 2H: Using Your Phone’s Voice Services S e c t i o n 2 H Using Your Phone’s Voice Services In This Section Managing Voice Memos (page 101) Using Voice Service (page 103) Your phone’s Voice Services let you place calls using your voice,store voice reminders, and record memos right on your ...
Page 115 - Recording Voice Memos; To record a voice memo:; ice Ser
Section 2H: Using Your Phone’s Voice Services 101 Managing Voice Memos You can use your phone’s Voice Services to record brief memosto remind you of important events, phone numbers, or grocerylist items. Recording Voice Memos To record a voice memo: 1. Select Menu > Tools > Voice Memo . 2. Scr...
Page 116 - Voice Memo Options; To play the voice memos you have recorded:; Erasing Voice Memos; To erase all voice memos:
102 Section 2H: Using Your Phone’s Voice Services Voice Memo Options To play the voice memos you have recorded: 1. Press Menu > Tools > Voice Memo . 2. Scroll to the voice memo you wish to hear and press . Play to play the selected voice memo. Set As to assign the recording as a default ringer...
Page 117 - Using Voice Services; To access Voice Control through Menu:
Section 2H: Using Your Phone’s Voice Services 103 Using Voice Services To access Voice Control through Menu: 1. Select Menu > Tools > Voice Control . To access Voice Control by pressing the button on the side of thehandset. 1. With the phone open, press the Voice Services key ( ). 2. After hea...
Page 118 - Section 2I: Using the microSD Card; S e c t i o n 2 I; Using the microSD Card; Using Your Phone’s microSD Card and Adapter
104 Section 2I: Using the microSD Card S e c t i o n 2 I Using the microSD Card In This Section Using Your Phone’s microSD Card and Adapter (page 105) microSD Settings (page 107) microSD Folders (page 109) Your phone allows you to use the microSD card and its adapterto expand the available memory sp...
Page 119 - Section 2I: Using the micro SD Card; Inserting the microSD Card; To insert the microSD card into your phone:; Removing the microSD Card; To remove the microSD card from your phone:; micr
Section 2I: Using the micro SD Card 105 Using Your Phone’s microSD Card andAdapter Using the microSD Card Your phone is equipped with a 64 MB microSD (Secure Digital)memory card and its adapter to expand the phone’s availablememory space. It allows you to easily store images, videos,music, and voice...
Page 120 - microSD Icon Indicators; Using the microSD Adapter; To insert the microSD card into the microSD adapter:
106 Section 2I: Using the micro SD Card microSD Icon Indicators The following icons will appear on your phone’s display screenwhen a microSD card is properly inserted into the microSDcard slot: Indicates that a microSD memory card has beeninserted into your phone. Note: DO NOT remove a microSD card ...
Page 121 - Using the phone as a USB Flash Drive; To view the microSD card contents from your computer:; microSD Settings; Creating Folders in the microSD Card; To create folders in the microSD card:
Section 2I: Using the micro SD Card 107 Using the phone as a USB Flash Drive You can use the supplied USB cable to load files from yourcomputer onto the microSD inserted into your phone. Voicecalls will be disabled during the USB connection. To view the microSD card contents from your computer: 1. S...
Page 122 - Viewing Memory in the microSD Card; Formatting the microSD Card; To format your microSD card:
108 Section 2I: Using the micro SD Card Viewing Memory in the microSD Card To view the used and available memory in the inserted microSD card: 1. With the microSD inserted, select Menu > Tools > Memory Card . 2. Press Options (right softkey) and select Memory Info . (The used and available mem...
Page 123 - microSD Folders; Displaying Your microSD Folders; To access the microSD card folders:; Memory Card; dcim; File Format Compatibility; Folders for compatible media formats:
Section 2I: Using the micro SD Card 109 microSD Folders Displaying Your microSD Folders All the files stored in your microSD are accessible through yourmicroSD card folders. To access the microSD card folders: 1. With the microSD card inserted, select Menu > Tools > Memory Card . 2. Select you...
Page 124 - Section 2J: Using the Music Composer and FM Transmitter; S e c t i o n 2 J; Composing a Melody
110 Section 2J: Using the Music Composer and FM Transmitter S e c t i o n 2 J Using the Music Composer and FM Transmitter In This Section Composing a Melody (page 111) Music Transmitter (page 113) The Music Composer lets you use your phone to compose amelody and then use the tune on your phone. You ...
Page 127 - Music Transmitter; To set the music transmitter:; To activate the music transmitter during media playback:
Section 2J: Using the Music Composer and FM Transmitter 113 Music Transmitter The FM transmitter lets you broadcast your Sprint Music Storeor audio media player files to a car stereo or other FM receiver.A distance of five feet or less is recommended to minimizeinterfence and provide the strongest s...
Page 128 - Section 2K: Using Your Phone’s Built-in Camera; S e c t i o n 2 K; Using Your Phone’s Built-in Camera; Taking Pictures
114 Section 2K: Using Your Phone’s Built-in Camera S e c t i o n 2 K Using Your Phone’s Built-in Camera In This Section Taking Pictures (page 116) Storing Pictures (page 122) Recording Videos (page 127) Storing Videos (page 130) Settings and Info (page 130) Your phone’s built-in camera gives you the...
Page 129 - To take a picture with the phone open:; er
Section 2K: Using Your Phone’s Built-in Camera 115 Taking Pictures Taking pictures with your phone’s built-in camera is as simpleas choosing a subject, pointing the lens, and pressing abutton. You can activate the phone’s camera mode whetherthe phone is open or closed. To take a picture with the pho...
Page 131 - Camera Mode Options
Section 2K: Using Your Phone’s Built-in Camera 117 Camera Mode Options When the phone is open and in camera mode, press Options (right softkey) to display additional camera options: Flash to activate the flash. (See “Setting the Flash” on page 118 for details.) Self Timer to activate the camera’s ti...
Page 132 - Setting the Flash; To activate the flash:; Setting the Self-Timer; To cancel the self-timer after it has started:
118 Section 2K: Using Your Phone’s Built-in Camera Setting the Flash To activate the flash: 1. From camera mode, select Options > Flash . 2. Select one of the following options and press : Off to deactivate the flash. On This Shot to activate the flash for one shot. Always On to activate the flas...
Page 133 - Using the Zoom; Selecting Camera Settings; To select your camera settings:
Section 2K: Using Your Phone’s Built-in Camera 119 Using the Zoom This feature allows you to zoom in on an object when you takea picture. Depending on your resolution settings, you canadjust the zoom from 1x to 15x steps. To use the zoom: 1. From camera mode, press the navigation key or the sidevolu...
Page 134 - Viewing Your Camera’s Status Area Display
120 Section 2K: Using Your Phone’s Built-in Camera Viewing Your Camera’s Status Area Display OptionSelected CameraOptions LX550_Phone Guide_1.2.qxd 1/22/07 10:19 AM Page 120
Page 135 - Storing Pictures; In Phone Folder; To review your stored pictures in the In Phone folder:; In Phone Folder Options
Section 2K: Using Your Phone’s Built-in Camera 121 Storing Pictures Your phone’s picture storage area is called My Albums . There are three types of folders that can be used separatelyaccording to your needs: In Phone Memory Card Online Albums In Phone Folder Once a picture is taken, it is automatic...
Page 138 - To review your stored pictures in the Memory Card:; Memory Card Options; Options; Online Albums; To save your pictures to online albums:
124 Section 2K: Using Your Phone’s Built-in Camera Memory Card When no memory card is present the pictures will beautomatically saved in the In Phone folder. To review your stored pictures in the Memory Card: 1. Select Menu > Pictures > Settings & Info > Memory Card . 2. Use your naviga...
Page 139 - Online Album Options
Section 2K: Using Your Phone’s Built-in Camera 125 To review your online albums: 1. Select Menu > Pictures > My Albums > Online Albums . (The Uploads folder and your albums appear.) 2. Select Uploads or an album title and press to display your saved images. Online Album Options When you are...
Page 140 - Recording Videos
126 Section 2K: Using Your Phone’s Built-in Camera Recording Videos In addition to taking pictures, you can also record, view, andsend videos to your friends and family with your phone’sbuilt-in video camera. To record a video: 1. Select Menu > Pictures > Camcorder > Video Mail or Long Vide...
Page 142 - Video Mode Options; To select your video settings:
128 Section 2K: Using Your Phone’s Built-in Camera Video Mode Options When the phone is open and in camcorder mode, press Options (right softkey) to display additional camera options: Video Light to activate the video light. Color Tone : Press the navigation key right or left to select Normal , Blac...
Page 143 - Storing Videos; To access the settings and info menu:
Section 2K: Using Your Phone’s Built-in Camera 129 Storing Videos Your phone’s video storage area is called My Albums. There arethree types of folders in the My Albums menu that can beused separately according to your needs: In Phone (See “In Phone Folder” on page 121.) Memory Card (See “Memory Card...
Page 144 - Section 2L: Using Bluetooth; S e c t i o n 2 L; Using Bluetooth; Turning Bluetooth On and Off
130 Section 2L: Using Bluetooth S e c t i o n 2 L Using Bluetooth In This Section Turning Bluetooth On and Off (page 131) Using the Bluetooth Settings Menu (page 132) Bluetooth Profiles (page 134) Pairing Bluetooth Devices (page 136) Your phone features built-in Bluetooth technology, allowingyou to ...
Page 145 - To turn Bluetooth on:; Bluetooth Status Indicators
Section 2L: Using Bluetooth 131 Turning Bluetooth On and Off By default, your device’s Bluetooth functionality is turned off. Turning Bluetooth on makes your phone“available” by other in-range Bluetooth devices. To turn Bluetooth on: 1. Select Menu > Settings > Bluetooth > On/Off . 2. Press...
Page 146 - Using the Bluetooth Settings Menu; Bluetooth Settings; Bluetooth Settings: My Bluetooth Name; My Bluetooth Name
132 Section 2L: Using Bluetooth Using the Bluetooth Settings Menu The Bluetooth Settings menu allows you to set up many of the characteristics of your phone’s Bluetooth service, including: Entering or changing the name your phone uses forBluetooth communication. Setting your phone’s visibility (or “...
Page 147 - Bluetooth Settings: Visibility; Visibility; Bluetooth Settings: My Bluetooth Address; To display your phone’s Bluetooth address:
Section 2L: Using Bluetooth 133 Bluetooth Settings: Visibility The Visibility section of the Bluetooth Settings menu allows you to manage your phone's availability to other Bluetoothdevices. To configure your phone’s visibility (discoverability) to otherBluetooth devices: 1. Select Menu > Setting...
Page 148 - Bluetooth Profiles
134 Section 2L: Using Bluetooth Bluetooth Profiles Different profiles can be used for specific Bluetooth functions. Headset Profile (HSP) – This profile functions as a wireless ear jack. When an incoming call is received, the ringer canbe heard through the headset and a built-in alert tone canbe hea...
Page 150 - Pairing Bluetooth Devices; Add Device; To pair your phone with another Bluetooth device:; Trusted Devices; To create a trusted pair:
136 Section 2L: Using Bluetooth Pairing Bluetooth Devices Add Device The Bluetooth pairing process allows you to establish trustedconnections between your phone and another Bluetoothdevice. When devices are paired, a passcode is sharedbetween devices.(Passcodes are typically four digits. Pleaserefer...
Page 151 - Exchange Folder; To access the Exchange Folder:; Using the Bluetooth transfer audio function during a call
Section 2L: Using Bluetooth 137 To cancel pairing: Scroll to the device whose pairing youwant to cancel and press . If you are currently connected to a device, and delete thepairing with that device, the pairing is removed and thedevice connection is terminated, but the Bluetoothfunction remains act...
Page 153 - S e c t i o n 3; Sprint PCS Service Features
S e c t i o n 3 Sprint PCS Service Features LX550_Phone Guide_1.2.qxd 1/22/07 10:19 AM Page 139
Page 154 - Section 3A: Sprint PCS Service Features – The Basics; S e c t i o n 3 A
140 Section 3A: Sprint PCS Service Features – The Basics S e c t i o n 3 A Sprint PCS Service Features: The Basics In This Section Using Voicemail (page 143) Using SMS Text Messaging (page 149) Using SMS Voice Messaging (page 152) Using Caller ID (page 154) Responding to Call Waiting (page 155) Maki...
Page 155 - Using Voicemail; Sprin
Section 3A: Sprint PCS Service Features – The Basics 141 Using Voicemail Setting Up Your Voicemail All unanswered calls to your phone are automaticallytransferred to your voicemail, even if your phone is in use orturned off. Therefore, you will want to set up your Sprint PCSVoicemail and personal gr...
Page 156 - Voicemail Notification; To call your voicemail:
142 Section 3A: Sprint PCS Service Features – The Basics Voicemail Notification There are several ways your phone alerts you to a newmessage: By displaying a message on the screen. By sounding the assigned ringer type. By the LED blinking red. By displaying at the top of your screen. New Voicemail M...
Page 157 - Retrieving Your Voicemail Messages; Using One-Touch Message Access; Using a Phone Other Than Your Phone to Access Messages
Section 3A: Sprint PCS Service Features – The Basics 143 Retrieving Your Voicemail Messages You can review your messages directly from your phone orfrom any other touch-tone phone. To dial from your phone, youcan either speed dial your voicemail or use the menu keys. Using One-Touch Message Access P...
Page 158 - Voicemail Button Guide; Voicemail Options; Using Expert Mode; To turn Expert Mode on or off:
144 Section 3A: Sprint PCS Service Features – The Basics Voicemail Button Guide Here’s a quick guide to your keypad functions while listeningto voicemail messages. For further details and menu options,see “Voicemail Menu Key” on page 148. Date/Time Send Reply Advance Replay Rewind Forward Erase Call...
Page 159 - Setting Up Group Distribution Lists
Section 3A: Sprint PCS Service Features – The Basics 145 3. Press for Expert Mode. 4. Press to turn Expert Mode on or off. Setting Up Group Distribution Lists Create up to 20 separate group lists, each with up to 20customers. 1. Press and hold to access your voicemail. (If your voicemail box contain...
Page 160 - Voicemail-to-Voicemail Message Forwarding
146 Section 3A: Sprint PCS Service Features – The Basics 3. Follow the voice prompts to record and send your voicemessage. Voicemail-to-Voicemail Message Reply Reply to a voice message received from any other Sprint PCSVoicemail user. 1. After listening to a voice message, press . 2. Follow the voic...
Page 161 - Continue Recording; Clearing the Message Icon; To clear the icon from the display screen:
Section 3A: Sprint PCS Service Features – The Basics 147 Continue Recording When leaving a voice message, you can choose to continuerecording even after you’ve stopped. Before pressing to indicate that you are satisfied with the message you recorded, press to continue recording. Extended Absence Gre...
Page 162 - Voicemail Menu Key
148 Section 3A: Sprint PCS Service Features – The Basics Voicemail Menu Key Following the prompts on the voicemail system, you can useyour keypad to navigate through the voicemail menu. Thefollowing list outlines your phone’s voicemail menu structure. Listen Envelope Information Reply Advance 8 Seco...
Page 163 - Using SMS Text Messaging; Composing SMS Text Messages; To compose an SMS Text message:; Mobile; Email
Section 3A: Sprint PCS Service Features – The Basics 149 Personal Greetings Name Announcement Extended Absence Greeting Return to Personal Options Menu Expert Mode (On/Off) Place a Call Disconnect Using SMS Text Messaging With SMS Text Messaging, you can use other people's wirelessphone numbers to s...
Page 165 - Accessing SMS Text Messages; To read an SMS Text message:
Section 3A: Sprint PCS Service Features – The Basics 151 Accessing SMS Text Messages To read an SMS Text message: When you receive a text message, it will automaticallyappear on your phone’s main display screen. Use yournavigation key to scroll down and view the entiremessage. To reply to an SMS Tex...
Page 166 - Using Preset Messages; To add or edit preset messages:; Edit; Delete; Using SMS Voice Messaging; Activating SMS Voice Messaging
152 Section 3A: Sprint PCS Service Features – The Basics Using Preset Messages Preset messages make sending text messages to your friends,family, and coworkers easier than ever. To add or edit preset messages: 1. Select Menu > Settings > Messaging > Preset Messages > <Add New> . – ...
Page 167 - Playing an SMS Voice Message; To play an SMS Voice message from the main menu:; Composing SMS Voice Messages; To compose an SMS Voice message:
Section 3A: Sprint PCS Service Features – The Basics 153 To activate SMS Voice Messaging: 1. When you turn on your phone, you will be prompted toregister your phone to receive SMS Voice messages. 2. Select Yes . (When activation is complete, an activation confirmation screen appears). Note: If you s...
Page 168 - Accessing SMS Voice Messages; To play an SMS Voice message:; Using Caller ID
154 Section 3A: Sprint PCS Service Features – The Basics 6. Start recording after the beep. (You can record up to two minutes.) 7. To finish recording, press Done (left softkey). 8. Press Send (left softkey) to send the voice message. Accessing SMS Voice Messages To play an SMS Voice message: When y...
Page 169 - Responding to Call Waiting; To respond to an incoming call while you’re on a call:; To switch back to the first caller:
Section 3A: Sprint PCS Service Features – The Basics 155 Responding to Call Waiting When you’re on a call, Call Waiting alerts you to incoming callsby sounding two beeps. Your phone’s screen informs you thatanother call is coming in and displays the caller’s phonenumber (if it is available and you a...
Page 170 - Making a Three-Way Call
156 Section 3A: Sprint PCS Service Features – The Basics Making a Three-Way Call With Three-Way Calling, you can talk to two people at thesame time. When using this feature, the normal airtime rateswill be charged for each of the two calls. To make a Three-Way Call: 1. Enter a number you wish to cal...
Page 171 - Using Call Forwarding; To activate Call Forwarding:
Section 3A: Sprint PCS Service Features – The Basics 157 Using Call Forwarding Call Forwarding lets you forward all your incoming calls toanother phone number – even when your phone is turned off.You can continue to make calls from your phone when CallForwarding is activated. To activate Call Forwar...
Page 172 - Section 3B: Sprint PCS Voice Command; S e c t i o n 3 B; Sprint PCS® Voice Command; Getting Started With Sprint PCS Voice Command
158 Section 3B: Sprint PCS Voice Command S e c t i o n 3 B Sprint PCS® Voice Command In This Section Getting Started With Sprint PCS Voice Command (page 159) Creating Your Own Address Book (page 160) Making a Call With Sprint PCS Voice Command (page 161) Accessing Information Using Sprint PCS Voice ...
Page 173 - It’s Easy to Get Started; ice C
Section 3B: Sprint PCS Voice Command 159 Getting Started With Sprint PCS Voice Command With Sprint PCS Voice Command: You can store all your contacts’ phone numbers, so you cansimply say the name of the person you want to call. There’s no need to punch in a lot of numbers, memorizevoicemail password...
Page 174 - Creating Your Own Address Book; Use an Existing Address Book.; Use Voice Recordings.
160 Section 3B: Sprint PCS Voice Command Creating Your Own Address Book You can program up to 500 names into your personal addressbook, with each name having up to five phone numbers.That’s 2500 phone numbers, and with the advancedtechnology of Sprint PCS Voice Command, you can haveinstant access to...
Page 177 - S e c t i o n 4
Safety and WarrantyInformation S e c t i o n 4 LX550_Phone Guide_1.2.qxd 1/22/07 10:19 AM Page 163
Page 178 - Section 4A: Important Safety Information; S e c t i o n 4 A; Important Safety Information
164 Section 4A: Important Safety Information S e c t i o n 4 A Important Safety Information In This Section General Precautions (page 165) Maintaining Safe Use of and Access to Your Phone (page 165) Using Your Phone With a Hearing Aid Device (page 168) Caring for the Battery (page 169) Radio Frequen...
Page 179 - General Precautions; Do Not Rely on Your Phone for Emergency Calls
Section 4A: Important Safety Information 165 General Precautions There are several simple guidelines to operating your phone properly andmaintaining safe, satisfactory service. Hold the phone with the antenna raised, fully extended, and over yourshoulder. Try not to hold, bend, or twist the phone’s ...
Page 180 - Following Safety Guidelines; Turning Off Your Phone Before Flying
166 Section 4A: Important Safety Information Using Your Phone While Driving Talking on your phone while driving (or operating the phone without ahands-free device) is prohibited in some jurisdictions. Laws vary as tospecific restrictions. Remember that safety always comes first. Tip: Purchase an opt...
Page 181 - Restricting Children’s Access to Your Phone
Section 4A: Important Safety Information 167 Turning Off Your Phone in Dangerous Areas To avoid interfering with blasting operations, turn your phone off when in ablasting area or in other areas with signs indicating two-way radios shouldbe turned off. Construction crews often use remote-control RF ...
Page 183 - Caring for the Battery; Protecting Your Battery; Impor
Section 4A: Important Safety Information 169 Sprint Nextel further suggests you experiment with multiple phones (eventhose not labeled M3/T3 or M4/T4) while in the store to find the one thatworks best with your hearing aid device. Should you experienceinterference or find the quality of service unsa...
Page 184 - Disposal of Lithium Polymer Batteries; Understanding How Your Phone Operates
170 Section 4A: Important Safety Information Buying the right batteries and accessories is the best way to ensure they’regenuine and safe. In order to avoid damage, charge the battery only in temperatures that range from 32° F to 113° F (0° C to 45° C). Don’t use the battery charger in direct sunlig...
Page 185 - Specific Absorption Rate (SAR) for Wireless Phones
Section 4A: Important Safety Information 171 Knowing Radio Frequency Safety The design of your phone complies with updated NCRP standards describedbelow. In 1991-92, the Institute of Electrical and Electronics Engineers (IEEE) andthe American National Standards Institute (ANSI) joined in updating AN...
Page 186 - FCC Radiofrequency Emission; Owner’s Record; Phone Guide Proprietary Notice
172 Section 4A: Important Safety Information The highest reported SAR values of the Fusic™ are: CDMA mode (Part 22): Head: 0.606 W/kg; Body-worn: 0.249 W/kg PCS mode (Part 24): Head: 1.340 W/kg; Body-worn: 0.317 W/kg FCC Radiofrequency Emission This phone meets the FCC Radiofrequency Emission Guidel...
Page 187 - S e c t i o n 4 B; Manufacturer’s Warranty
Section 4B: Warranty 173 S e c t i o n 4 B Manufacturer’s Warranty In This Section Manufacturer’s Warranty (page 174) Your phone has been designed to provide you with reliable,worry-free service. If for any reason you have a problem with your equipment, please refer to the manufacturer’swarranty in ...
Page 191 - Index; Inde
Index 177 Index A Airplane Mode 56Alarm Clock 96Answering Calls 26 B Battery 19-21 Capacity 19Charging 21Installing 20 Bluetooth 130-137 Bluetooth Profiles 134Bluetooth Settings Menu 132 Pairing Bluetooth Devices 136 Turning Bluetooth On and Off 131 C Calculator 98Calendar 93-96Call Forwarding 157Ca...
Page 194 - Notes
Notes ________________________________________________________ ________________________________________________________ ________________________________________________________ ________________________________________________________ ________________________________________________________ _________...