Page 3 - Important Customer Information; ELECTRICAL SAFETY; SAFETY PRECAUTIONS FOR POWER SUPPLY UNIT
3 Important Customer Information When using this product, the safety precautions below must be taken to avoid possible legal liabilities and damages. Retain and follow all product safety and operating instructions. Observe all warnings in the product operating instructions. To reduce the risk of bod...
Page 4 - may cause a short circuit.
4 Important Customer Information Handle battery packs carefully This product contains a Li-ion battery. There is a risk of fire and burns if the battery pack is handled improperly. Do not attempt to open or service the battery pack. Do not disassemble, crush, puncture, short external contacts or circ...
Page 5 - If the battery leaks:; SAFETY PRECAUTIONS FOR DIRECT SUNLIGHT
5 Important Customer Information O Avoid dropping the phone or battery. If the phone or battery is dropped, especially on a hard surface, and the user suspects damage, take it to a service center for inspection. O If the battery leaks: Do not allow the leaking fluid to come in contact with skin or cl...
Page 7 - do not contain any metal.; INTERFERENCE WITH MEDICAL EQUIPMENT FUNCTIONS
7 Important Customer Information SAFETY PRECAUTIONS FOR RF EXPOSURE O Avoid using your phone near metal structures (for example, the steel frame of a building). O Avoid using your phone near strong electromagnetic sources, such as microwave ovens, sound speakers, TV and radio. O Use only original ma...
Page 9 - Table of Contents
9 Important Customer Information.......................................................... 3 Table of Contents ................................................................................... 9 Technical Details ................................................................................... 1...
Page 10 - Cautions; Locations are inaccurate when GPS and Wi-Fi are not set to On.; Technical Details; CDMA Dual-Mode Air Interface; Intersystem Operations
10 Technical Details Cautions The user interface of Google applications (Google Search, Google Maps, Navigation, etc.) can vary depending on its software version. Locations are inaccurate when GPS and Wi-Fi are not set to On. With the Android operating system, some available Play Store applications ...
Page 11 - Speech CODEC
11 Technical Details Service TIA/EIA/IS-96-B TIA/EIA/IS-637 TIA/EIA/IS-657 IS-801 TIA/EIA/IS-707-A Speech CODEC Short Message Service Packet Data Position Determination Service (gpsOne) High Speed Packet Data 1x EV-DO Related Interface TIA/EIA/IS-856 TIA/EIA/IS-878 TIA/EIA/IS-866 TIA/EIA/IS-890 CDMA...
Page 12 - Radio transmission and reception; FCC RF Exposure Information
12 Technical Details Conformance Test TS 36.521-1 TS 36.521-2 TS 36.521-3 Evolved Universal Terrestrial Radio Access (E-UTRA); User Equipment (UE) conformance specification; Radio transmission and reception; Part 1: Conformance testing Evolved Universal Terrestrial Radio Access (E-UTRA); User Equipme...
Page 13 - - Reorient or relocate the receiving antenna.
13 Technical Details Vehicle-Mounted External Antenna (Optional, if available.) To satisfy FCC RF exposure requirements, keep 8 inches (20 cm) between the user / bystander and vehicle-mounted external antenna. For more information about RF exposure, visit the FCC website at www.fcc.gov. Part 15.19 s...
Page 14 - The
14 Technical Details The LG F7 operates on 4G network, based on Long Term Evolution (LTE) technology and Mobile Broadband 4G networks in the United States*. Now you can connect easily at high speeds to the Internet, your corporate Intranet, and your email while you’re away from the office. * Service ...
Page 15 - The Basics; Phone Overview; Front View; Proximity Sensor; Quick Keys
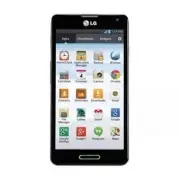
15 The Basics Phone Overview Front View Proximity Sensor Quick Keys Back Key Home Key Menu Key Earpiece Touchscreen Front Camera Lens NOTES All screen shots in this guide are simulated. Actual displays may vary. Instructions To perform tasks in this guide are based on the default phone settings and ...
Page 17 - Microphone; Side View; QuickMemo Key
17 The Basics 13. Microphone Transmits your voice to the other caller and allows use for Voice-activated functions. Side View Volume Keys QuickMemo Key Power/Lock Key Accessory/Charger Port 14. Power/Lock Key Locks the screen with a single press. Press and hold to open the Phone options menu for the...
Page 18 - Installing the Battery and microSD Card; Installing & removing the battery; place until it is fully inserted and locked in place.; To remove the microSD card; You must first unmount the microSD card prior to removing it (see
18 The Basics Installing the Battery and microSD Card NOTE It is important to fully charge the battery before initial use of the phone. Installing & removing the battery The phone comes with a rechargeable battery. Keep the battery charged while not in use in order to maximize talk, use, and sta...
Page 19 - Apps Key; Charging the Phone
19 The Basics To unmount the microSD card It is important to unmount the microSD card to avoid damage to it or data saved on the card. 1. From the Home screen, touch the Apps Key . 2. Touch Settings > Storage . 3. Touch Unmount SD card > OK . Installing & removing the micro-SIM card 1. Tur...
Page 20 - Optimizing Battery Life; To stop applications from running in the background; From the Home screen, touch the; Tips to extend the life of your battery; Turn off radio communications that you aren’t using. If you aren’t
20 The Basics Charging with USB You can use your computer to charge your phone. To be able to charge with the USB cable, you need to have the necessary USB drivers installed on your PC first. Connect one end of the USB cable to the Accessory/Charger Port on your phone and connect the other end to a U...
Page 22 - Turning the Phone On and Off; Turning the phone on; Power off; To unlock the phone; To turn the phone sounds off; OR
22 The Basics 2. Follow the Setup Wizard to configure your phone set up including creating or logging in to your Google Account. NOTE If you have an existing Google Account, your contacts from that account are synced to your phone. Turning the Phone On and Off Turning the phone on 㻌 Press and hold th...
Page 23 - Setting Up Your Device; To set up your device, follow the steps below:
23 The Basics Press the Volume Down Key until all sounds are turned off or vibration is set. OR Open the Notifications panel and touch the Sound icon until is displayed. Setting Up Your Device When you turn on your wireless device for the first time, you have the option to quickly set up various accou...
Page 25 - Phone’s Status Icons; Call icons
25 The Basics Phone’s Status Icons The Status Bar appears at the top of every screen. It displays icons indicating that you’ve received notifications (on the left) and icons indicating the phone’s status (on the right), along with the current time. Notification icons Status icons If you have more noti...
Page 27 - Getting to Know the Home Screen; Phone; To return to the Home screen; Home Key
27 The Basics Getting to Know the Home Screen The Home screen is your starting point to access all the features on your phone. It displays application shortcuts, icons, widgets, and other features. Status Bar Shows device status information, including the time, signal strength, battery status, and n...
Page 28 - Slide your finger left or right across the Home screen. The Home; Touchscreen; Touch; A single finger touch selects items. For example, touch an icon
28 The Basics To view other Home screen canvases 㻌 Slide your finger left or right across the Home screen. The Home screen spans seven screen widths, allowing more space for icons, widgets, shortcuts, and other items. Home Screen Pane Indicator The bars near the bottom of the screen indicate which Ho...
Page 29 - Touch and hold
29 The Basics Touch and hold Touch and hold an item on the screen by touching it and not lifting your finger until an action occurs. For example, to open a Context menu for editing a contact, touch and hold a contact entry until the menu pops up. Drag Touch and hold an item for a moment and then, wit...
Page 30 - Capturing the screen; Volume Down Key; Text Input Methods; Typing tips
30 The Basics Capturing the screen If you press the Volume Down Key and Power/Lock Key at the same time, the current image on the screen is captured. You can find the captured image in the Gallery (Note that you cannot capture an image from some videos and applications). Text Input Methods On-screen ...
Page 31 - Cut
31 The Basics Cut or copy selected text Highlight the desired text, then touch Cut or Copy . Paste cut or copied text Touch the location to place the cursor where you want to paste the text. Then touch and hold the location and select Paste . Delete a character Touch the Delete Key . Language toggle...
Page 32 - Applications: How to View, Open and Switch; Downloads; Your Home screen; Customizing an application icon from the Home screen
32 The Basics Applications: How to View, Open and Switch All of the applications on your phone, including any applications that you downloaded and installed from Play Store or other sources, are grouped together on the Applications screen, which you access from your Home screen. Swipe to the left or...
Page 33 - Opening and Closing the Applications screen; Customizing the Applications screen
33 The Basics 1. Touch and hold an icon until the canvas grid is displayed, then release the icon. An editing icon appears at the upper right side of the application icon. 2. Touch the icon and select the desired icon design. OR Touch Create photo icon and select Take photo to open the Camera applic...
Page 34 - Sorting applications
34 The Basics 3. Touch and hold the application icon you want to move, drag it to its new position, then lift your finger. The remaining icons shift to the right. NOTE If you drag the application icon onto another application icon, a folder is created with both of the applications in it. Sorting appl...
Page 35 - Opening an application; Opening multiple applications
35 The Basics Checking application information To check on an application’s information from the Applications screen: 1. From the Home screen, touch the Apps Key . 2. Touch the Apps tab, then touch the Setting icon at the top right of the screen. The Settings icon changes to a checkmark . 3. Touch a...
Page 36 - Touch and hold the application icon you want to add to your Home; Moving applications to other Home screen canvases; You can place application icons on any of the Home screen canvases.
36 The Basics Adding application icons to the Home screen Customize your Home screen with the applications you use most often. 1. Open the Applications screen. 2. Touch and hold the application icon you want to add to your Home screen. The Applications screen will close so that you can place the ico...
Page 37 - Working with Menus; Options menus; Menu Key; Context menus
37 The Basics Working with Menus There are two kinds of Android menus: Options menus and Context menus. Options menus Options menus contain tools that apply to the activities of the current screen or application, not to any specific item on the screen. To open the available options menu, touch the Me...
Page 38 - Managing Notifications; To open the Notifications panel; Touch and drag the Status Bar to the bottom of the screen.; To respond to a notification
38 The Basics Managing Notifications Notification icons report the arrival of new messages, calendar events, alarms, as well as ongoing events, such as when you are in a call. When you receive a notification, the notification icon will be displayed in the Status Bar. You can open the Notifications panel ...
Page 39 - Clear; To close the Notifications panel; Back Key; Quick settings on the Notifications panel; Edit
39 The Basics To clear all notifications 1. Open the Notifications panel. 2. Touch the Clear icon . All event-based notifications will be cleared; ongoing notifications will remain in the list. TIP You can also swipe the notifications to the left or right to remove them. To close the Notifications panel T...
Page 40 - Searching Your Phone and the Web; Phone and Web search using text entry; Search Widget
40 The Basics Searching Your Phone and the Web You can search for information on your phone and on the web by using the Google search application. Some applications, such as Gmail and Contacts, have the ability to search contents within those specific applications. You can conduct the search by typin...
Page 41 - Locking the Screen; Setting a lock screen
41 The Basics Locking the Screen You can lock your screen so that only you can unlock it to make calls, access your data, buy applications, and prevent unauthorized use. Setting a lock screen 1. From the Home screen, touch the Apps Key > Settings > Lock screen . 2. Touch Select screen lock . 3...
Page 42 - Changing Your PIN or Password
42 The Basics NOTES O You have 5 opportunities to enter your unlock pattern, PIN or password. If you used all the 5 opportunities, you can try again after 30 seconds. O When you can’t recall your unlock pattern: - If you’ve created a Google Account on the phone, touch Forgot pattern? . Then you are ...
Page 43 - Customizing the Home Screen; To add an item to the Home screen; To remove an item from the Home screen
43 The Basics Customizing the Home Screen You can personalize your Home screen by adding application icons, shortcuts, widgets, and other items to any Home screen canvas. You can also change the wallpaper. To add an item to the Home screen 1. Go to the Home screen canvas where you want to add the it...
Page 44 - QuickMemo
44 The Basics QuickMemo The QuickMemo feature allows you to create memos and capture screen shots. You can use QuickMemo to easily and efficiently create memos during a call, with a saved picture or on the current phone screen. 1. While viewing the screen you want to capture and create a memo on, pre...
Page 45 - Viewing the saved QuickMemo; Gallery
45 The Basics - Touch to erase the memo that you created. - Touch to share the memo with others via any of the available applications. - Touch to save the memo you’ve created. Touch the Menu Key > Signature off if you want not to display “LG QuickMemo” label at the bottom right corner of the scre...
Page 46 - Connecting Quickly With Your Contacts; Open your Contacts list and touch the contact’s picture.
46 The Basics Connecting Quickly With Your Contacts As you build up your list of contacts on your phone, you can use the Quick Contact for Android feature to quickly chat, email, text message, place a call, or locate your contacts. Quick Contact for Android is a special set of icons that you can use...
Page 47 - Connecting to Networks and Devices; Connecting to Mobile Networks; To disable data when roaming
47 Connecting to Networks and Devices Connecting to Mobile Networks When you buy your phone and sign up for service, your phone is configured to use your provider’s mobile networks for voice calls and for transmitting data. Different locations may have different mobile networks available. Initially, ...
Page 48 - Connecting to Wi-Fi Networks; To turn Wi-Fi on and connect to a Wi-Fi network
48 Connecting to Networks and Devices Connecting to Wi-Fi Networks Wi-Fi is a wireless networking technology that can provide Internet access at distances of up to 100 meters, depending on the Wi-Fi router and your surroundings. To use Wi-Fi on your phone, you must connect to a wireless access point...
Page 49 - To add a Wi-Fi network; Network SSID
49 Connecting to Networks and Devices O When you’re connected to a network, you can touch the network name in the Wi-Fi settings screen for details about the speed, security, address, and related settings. To receive notifications when open networks are in range By default, when Wi-Fi is on, you rece...
Page 50 - USB connection; To select a USB mode for a connection
50 Connecting to Networks and Devices To forget a Wi-Fi network You can make the phone forget about the details of a Wi-Fi network that you added. For example, if you don’t want the phone to connect to it automatically or if it’s a network that you no longer use. 1. Turn on Wi-Fi, if it’s not alread...
Page 51 - microSD Card; Unmounting and removing the microSD Card; Viewing Memory in the microSD Card
51 microSD Card microSD Card Unmounting and removing the microSD Card To safely remove the microSD card from your device, first you need to unmount the microSD card before removing it from the phone. 1. From the Home screen, touch the Apps Key > Settings > Storage > Unmount SD card > OK ....
Page 52 - USB port on your computer.
52 microSD Card Connecting Your Device to Your Computer Before using your device’s mass storage capabilities, you need to prepare your device’s data services to synchronize with your desktop or laptop computer. Once you have connected the device to the computer, you can transfer your data to or from...
Page 53 - Sending data from your phone using Bluetooth; Sending data using Bluetooth
53 microSD Card Sending data from your phone using Bluetooth Sending data using Bluetooth You can use Bluetooth to send data by opening a corresponding application, not from the Bluetooth menu as on most other mobile phones. * Sending pictures : Open the Gallery application, then open the picture an...
Page 54 - Calls; Placing and Ending Calls; To open the Phone application
54 Calls Placing and Ending Calls You can place calls using the Phone application. Calls can be manually dialed using the Dial tab. You can also dial from your phone’s memory using the Call logs , Contacts , Favorites , or Groups tabs. To open the Phone application From the Home screen, touch the Ph...
Page 55 - Use the on-screen buttons to enter additional numbers, place the; Airplane mode; Press and hold the
55 Calls O Use the on-screen buttons to enter additional numbers, place the call on hold and take an incoming call, add another call, use the speakerphone, end the call, and other options. NOTE If you opened other applications while on a call, you'll need to return to the Call screen to end the call...
Page 56 - Answering or Rejecting Calls; To answer a call; Answer Key; Unlocked Screen
56 Calls Answering or Rejecting Calls When you receive a phone call, the Incoming call screen opens with the caller ID and any additional information about the caller that you have saved in the Contacts list. All incoming calls are recorded in the Call log. To answer a call O If the screen is unlock...
Page 57 - To decline a call and send a text message
57 Calls To decline a call and divert it to voicemail O If the screen is unlocked, simply touch the Decline Key . O If the screen is locked, swipe the Decline icon in any direction to ignore the call. The caller is sent directly to your voicemail box to leave a message. Unlocked Screen Locked Screen...
Page 58 - Working with the Call Log; To open the Call log; Phone Key; To dial a number in the Call log; Call Key; To add an entry’s number to your Contacts; Add to Contacts
58 Calls Working with the Call Log The Call log is a list of all of the calls you’ve dialed, received, or missed. It offers a convenient way to redial a number, return a call, or add a number to your Contacts. To open the Call log From the Home screen, touch the Phone Key (in the Quick Keys bar) and...
Page 59 - Calling Your Contacts; You can also quickly call a contact by using Quick Contact.; To call a contact; To call a favorite contact; Contacts Key
59 Calls Calling Your Contacts Instead of manually dialing phone numbers using the dial pad, you can use your Contacts list to dial quickly and easily. You can also quickly call a contact by using Quick Contact. If you have contacts on the web, they’re synchronized with your phone when you first sync...
Page 60 - Options During a Call; To set up a conference call; Place a call to the first participant.
60 Calls Options During a Call Touch to switch between a Bluetooth headset and the phone. Touch to mute the microphone during a call. The Mute Key lights up to indicate that the microphone is muted. Touch to turn the speakerphone on or off. The Speaker Key lights up to indicate that the speakerphone...
Page 61 - Listening to Your Voicemail; Voicemail notification; To listen to your Voicemail; New voicemail; To set up your Voicemail
61 Calls Touch here to merge the calls. Listening to Your Voicemail When you have a new voicemail message, the Voicemail notification icon appears in the Status Bar. If you have not set up your voicemail number, or if you need to change it, you can do that in the Call settings. To listen to your Voic...
Page 63 - Web; Browser; Using the web toolbar
63 Web Browser Browser gives you a fast, full-color world of games, music, news, sport, entertainment and much more, right on your mobile phone. Wherever you are and whatever you enjoy. NOTE Additional charges apply when connecting to these services and downloading content. Check data charges with y...
Page 64 - Chrome; Browse web pages
64 Web Chrome The Chrome app allows you to access the internet from your device. Access and selections within this feature are dependent upon your service provider. For specific information on Chrome access through your phone, open Chrome and touch the Menu Key > Help . NOTES s You may incur addit...
Page 65 - Maps
65 Web To open a new window, touch the Menu Key > New tab . If you want to view pages and not have the browser history or search history save information, you can open an incognito tab. Touch the Menu Key > New Incognito tab . To view the list of bookmarks, touch touch the Menu Key > Bookma...
Page 67 - Checking the Weather; To get details about the weather
67 Web Switching between common features The Maps application has icons for easy access to many common features used when searching for the places you want to go. Touch the side menu icon to access Traffic, Public transit, Bicycling, Satellite, Google Earth, Settings and more. Touch the Directions ic...
Page 68 - Changing Weather Settings; You can configure a number of settings for the
68 Web Type in the city, state or ZIP code to search the name. Changing Weather Settings You can configure a number of settings for the Weather application. The location and related settings also affect the display of the Weather widget application. To open the Weather settings screen, touch the Menu...
Page 69 - Communication; Contacts; Using Your Contacts; To open your Contacts application; To open a list of your favorite contacts
69 Communication Contacts The Contacts application allows you to store names, phone numbers and other information in your phone’s memory. Using Your Contacts Use the Contacts application to add, view, and communicate with your friends and acquaintances. To open your Contacts application From the Hom...
Page 70 - Adding Contacts; To add a new contact
70 Communication 3. The Contact’s information will be displayed. The following options are available. The Dial icon places a call to the number. The Message icon starts a message. Touch the Menu Key for the following menu options: Delete, Share, Join, Add to default group, Export, and Add to Home sc...
Page 71 - icon; Importing, Exporting, and Sharing Contacts; To import contacts from your microSD card; which you want to import the contacts.; To export contacts to your microSD card
71 Communication 7. Touch the Picture icon to select a picture to display next to the name in your list of contacts and in other applications. 8. When you’re finished, touch the Save button. Importing, Exporting, and Sharing Contacts If you have contacts stored in vCard format on a microSD card you c...
Page 72 - Adding a Contact to Your Favorites; To add a contact to your favorites list
72 Communication 4. Touch the contacts you wish to export to the SD card. To export all contacts, touch Select all in the top left corner of the screen. 5. Touch Export , enter a file name, then touch OK . To share a contact You can share a contact with someone by sending it to them as a vCard file. 1...
Page 73 - To connect by using Quick Contact for Android
73 Communication Communicating with Your Contacts From the Contacts , Groups , or Favorites tab, you can quickly call or send a text (SMS) or multimedia message (MMS) to a contact’s default phone number. You can also open a list of all the ways you can communicate with that contact. This section des...
Page 74 - To call a contact’s default number; Selecting Which Contacts are Displayed; To change which groups are displayed
74 Communication To communicate with a contact 1. Open the Contacts application. 2. Touch the contact with whom you want to communicate. 3. In the contact’s details screen, touch the way to start communicating with the contact. The Dial icon places a call to the number. The Message icon starts a mes...
Page 75 - Joining Contacts; application attempts to avoid duplication by; To join contacts; Touch the contact entry to which you want to add information. The; Separating Contact Information; To separate contact information; Touch the contact entry whose information you want to separate.
75 Communication Joining Contacts When you add an account or add contacts in other ways, such as by exchanging emails, the Contacts application attempts to avoid duplication by joining contact information automatically. You can also join contacts manually. To join contacts 1. Open the Contacts appli...
Page 76 - Email; To open the Email application; Working with Account Folders
76 Communication Email You can use the Email application to read email from providers other than Gmail. The Email application supports the following account types: POP3, IMAP and Microsoft Exchange. To open the Email application From the Home screen, tap the Apps Key > Email . The first time you o...
Page 77 - Adding and Editing Email Accounts; To add an email account
77 Communication Adding and Editing Email Accounts To add an email account 1. From the Home screen, touch the Apps Key > Email . 2. Select the desired email provider. If an email account is already set up, the wizard is not activated automatically. In this case, tap the Menu Key > Accounts >...
Page 79 - Gmail; To open the Gmail application; Gmail Inbox icons; Message search
79 Communication Gmail When you open the Gmail application, the most recent conversations are displayed at the top of your Inbox list. All of your conversations are displayed in your Inbox unless you delete, archive, or filter them. To open the Gmail application From the Home screen, tap the Apps Key...
Page 80 - To switch accounts; From your Gmail Inbox, tap the Accounts on the Inbox header, then
80 Communication Adding another Google Account 1. From your Gmail Inbox, tap the Menu Key > Settings . 2. Tap ADD ACCOUNT at the top right corner of the screen. 3. Tap Existing or New , then enter the necessary information. Tap here to add an account. To switch accounts Gmail displays conversatio...
Page 81 - Reading Your Messages
81 Communication Navigating in the Gmail application While viewing your Inbox, swipe the screen up and down to scroll through the list of messages. The following icons are available at the top right of the Gmail Inbox: Compose : Tap to start a new Gmail message. Search : Tap to search within the Gma...
Page 82 - Reply all; To reread a message; Unread
82 Communication Tap the Contact's picture to open Quick Contact. Tap to set labels for the message to help organize your messages. While viewing a message, tap the message action icons on the message header to access options which include to mark it as a favorite, to reply to the sender, and to acc...
Page 83 - Composing and Sending a Message; To compose and send a message; Replying to or Forwarding a Message; To reply to or forward a message
83 Communication Composing and Sending a Message You can compose and send a message to people or groups with Gmail addresses or other email addresses. To compose and send a message 1. From the Home screen, tap the Apps Key > Gmail > Compose icon at the top right corner of the screen. NOTE If y...
Page 84 - Google Account settings
84 Communication 2. On the message header, tap the Reply icon or tap the Menu icon , then tap Reply all or Forward . Add others to an ongoing conversation by replying to all and then adding the new person’s address(es) to the reply. 3. Tap the Send icon at the top right corner of the screen to send ...
Page 85 - Confirm before sending:
85 Communication Confirm before sending: Mark the checkbox to ask to confirm before sending a message. OR Tap an account to change the following settings for that specific account. Inbox type: Select the default inbox. Notifications: Mark the checkbox to display notifications for new messages. Inbox soun...
Page 86 - Messaging; To open Messaging; To delete a message thread from the Messaging window
86 Communication Messaging To open Messaging From the Home screen, touch the Messaging Key in the Quick Keys bar. Touch here to create a new message. Touch New message to start a new text or multimedia message. Touch an existing message thread to open it. To delete a message thread from the Messagin...
Page 88 - Changing Messaging Settings; How to select the type of keyboard you want
88 Communication want to send as vCard file(s). If you touch Slide , you can assemble photos, audios, videos, texts into a slideshow (up to 10 slides) to attach to the message. 6. Touch the Send MMS button to send the message. To respond to messages you receive If you’re working in a message window, ...
Page 90 - Hangouts; To Open the Hangouts application; Hangouts chatting list
90 Communication Hangouts The Hangouts application lets you have real-time text conversations with your friends. To Open the Hangouts application From the Home screen, tap the Apps Key > the Hangouts . To sign out of Hangouts From your chatting list, tap the Menu Key > Settings > Sign out ....
Page 92 - Entertainment; Camera; To open the Camera application, from the Home screen touch the; Getting to know the viewfinder; Photo options; : Touch if you want to change the viewfinder menu.
92 Entertainment Camera To open the Camera application, from the Home screen touch the Apps Key > Camera . Getting to know the viewfinder Time catch shot – Allows you to capture the missing moment by taking five sequential pictures at once before the shutter key is touched. Mode Switch – Allows you...
Page 94 - Once you’ve taken the photo
94 Entertainment 5. Touch the Capture button to take the picture. NOTE You can also press the Volume Keys to take a picture. Once you’ve taken the photo Touch the image preview at the bottom of the screen to view the last photo you captured. Touch to share via SmartShare. Touch to return to Camera m...
Page 95 - Video Camera
95 Entertainment Video Camera To open the Video Camera, from the Home screen touch the Apps Key > Camera . Then touch . Getting to know the viewfinder Live effect – Allows you to add various visual effects when recording a video. Video size – Allows you to choose the video size. Settings – Opens t...
Page 96 - After recording a video
96 Entertainment Audio recording : Record a video with or without sound. Auto review : Auto review automatically shows you the video you just recorded. Storage : Select the storage location where you want to save videos. Reset : Restore all video camera default settings. Video help guide : Touch thi...
Page 97 - Rename; Adjusting the volume when viewing a video; To adjust the volume of a video while it is playing, use the
97 Entertainment Rename – Touch to edit the name of the selected video. Details – Touch to see a detailed information, such as the name, date, time, size and type. Adjusting the volume when viewing a video To adjust the volume of a video while it is playing, use the Volume Keys on the left side of t...
Page 98 - Opening Gallery and Viewing Your Albums; To open Gallery and view your albums; To share an album
98 Entertainment Gallery Opening Gallery and Viewing Your Albums Open the Gallery application to view albums of your pictures and videos. To open Gallery and view your albums From the Home screen, touch the Apps Key > Gallery . OR Open Gallery from the Camera application by touching the thumbnail...
Page 99 - Working with photos; To view and browse photos; To edit pictures
99 Entertainment Working with photos Use the Gallery application to view pictures that you’ve taken with the Camera application, downloaded, copied onto your microSD card or that are stored in Picasa web albums. To view and browse photos 1. From the Home screen, touch the Apps Key > Gallery . 2. ...
Page 100 - Working with Videos; To play videos; To share a video
100 Entertainment Working with Videos Use the Gallery application to play videos that you’ve taken with the Camera application and to share them with friends. To play videos Open a Gallery album, then touch a video. The video plays in the orientation you recorded it in. Touch here to lock the screen...
Page 101 - Live Zooming
101 Entertainment To delete a video 1. From the Home screen, touch the Apps Key > Gallery , then touch an album. 2. While viewing an album, touch the Delete icon at the top right corner of the screen. 3. Touch to checkmark the video(s) you want to delete. 4. Touch Delete at the bottom of the scre...
Page 102 - Video Editor; Project list screen; Project edit screen
102 Entertainment Video Editor You can edit the photos or videos stored on the phone. From the Home screen, tap the Apps Key > Video Editor . NOTE The Video Editor app supports only photos or videos which were recorded using this device. Project list screen Help Project list area Project options ...
Page 103 - Video Wiz
103 Entertainment Sound effect : Adds a sound effect. Add : Adds additional video, images, or audio clips. Undo : Undo the last action. Redo : Redo the previously removed action. Add text : Adds text to a video or image clip. Video Wiz You can make your own movie using your images, video and music. ...
Page 104 - Play Store; To open the Play Store application; To get help with Play Store
104 Entertainment 7. Tap the Edit icon to edit the video clip using Text , Sticker , or Magic spot . After editing the video, tap the Done icon . 8. Tap the Save icon to save the video. 9. Tap the Revert icon to remove all of the edits previously applied to the images. NOTE Tap the Help icon if you ...
Page 105 - Downloading and Installing Applications; To download and install an application; Install
105 Entertainment To open a screen with details about an application At any time while browsing Play Store, touch an application to open its details screen. The Application details screens include a description, ratings, comments, and related information about the application. From this screen, you ...
Page 107 - Music; Transferring Music Files to Your Phone; To copy music files onto the phone’s microSD card
107 Entertainment Music Transferring Music Files to Your Phone The Music application plays audio files that are stored on your phone’s microSD card. Copy audio files from your computer onto the microSD card before you open the Music application. NOTE The LG USB driver needs to be installed on your PC ...
Page 108 - Opening Music and Working with Your Library; To open the Music Player and view your music library; To search for music in your library
108 Entertainment Opening Music and Working with Your Library After you’ve copied some music onto your microSD card you can open the Music application and view your library of music files, sorted in one of five ways. To open the Music Player and view your music library From the Home screen, touch the ...
Page 109 - Playing Music; To play music
109 Entertainment To delete a song from the microSD card You can delete music from the microSD card. Touch and hold a song in a Library list. In the Context menu that opens, touch Delete > Yes. OR On the Playback screen, touch the Menu Key > Delete > Yes . You can also delete music files fro...
Page 110 - You can return to the Playback screen from any other application; To control playback; Videos
110 Entertainment You can return to the Playback screen from any other application by opening the Notifications panel and touching the ongoing music notification. To control playback The Playback screen contains several icons that you can touch to control the playback of songs, albums, and playlists: ...
Page 111 - Videos options
111 Entertainment To open the Videos application 1. From the Home screen, touch the Apps Key > Videos . 2. Touch the video you want to play. Playback controls Touch the screen to display the playback controls. The following options allow you to control the video playback: Pause playback. Play a v...
Page 112 - YouTubeTM; Opening YouTube and Watching Videos; To open the YouTube application
112 Entertainment Delete Touch the Menu Key > Delete to delete the desired videos. DivX ® VOD Touch the Menu Key > DivX ® VOD to view the DivX registration code needed to register the device in order to play protected content. YouTube™ Opening YouTube and Watching Videos You can browse, search...
Page 113 - Using SmartShare; To turn SmartShare on and allow sharing contents
113 Entertainment Touch the screen to view the Playback controls. You can pause and play the video or drag the slider to the point in the video you want to watch. Touch the Back Key to stop playback and return to the videos list. Touch the Menu Key for the following options: Add to, Share, Like, Dis...
Page 114 - To control your renderer devices
114 Entertainment NOTE Make sure that the microSD card is correctly mounted and the Receive files option in the Settings menu is checked. 4. Touch Shared contents to checkmark the types of content you would like to share. Choose from Photos , Videos , and Music . 5. SmartShare is now activated and re...
Page 115 - To upload contents to the remote content library; Voice Recorder; Record a Voice Memo
115 Entertainment To download contents from the remote content library 1. From the Home screen, touch the Apps Key > SmartShare . 2. Touch the Library icon and select the device of the remote content library. 3. You can browse the content library. 4. Touch and hold a content thumbnail and then to...
Page 116 - Managing your Voice Memos
116 Entertainment 4. When you’re finished, touch . The recording is automatically saved to your recordings list. Touch to listen to your recording. Touch to record a new voice memo. Touch to view your list of recordings. Play a Voice Memo 1. From the Home screen, touch the Apps Key > Voice Recorde...
Page 117 - QSlide
117 Entertainment QSlide The QSlide function enables an overlay on your phone’s display for easy multi-tasking. OR 1. Open the Notifications Panel and touch the desired app from the QSlide apps section. OR While using an application that supports QSlide, touch . The function will be continuously disp...
Page 118 - VuTalk; Registering VuTalk; Using VuTalk
118 Entertainment VuTalk Use VuTalk to collaboratively communicate using real-time interactive handwriting. NOTE VuTalk is compatible with other VuTalk-capable LG devices. During a voice call, you can use VuTalk only when connected to the 3G data network or Wi-Fi. The screen may lock if no inp...
Page 120 - Tools; Calendar; Viewing Your Calendar and Events; To open the Calendar application
120 Tools Calendar Viewing Your Calendar and Events Open the Calendar application to view events you’ve created or that others have invited you to. When you first set up your phone, you configured it to use an existing Google Account or you created a new account. The first time you open the Calendar ap...
Page 121 - Calculator; To open and use the Calculator
121 Tools Calculator Allows you to perform simple mathematical calculations. To open and use the Calculator From the Home screen, touch the Apps Key > Calculator . Enter numbers and arithmetic operators on the Basic panel. Drag the Basic panel to the left to open the Advanced panel. Touch and hol...
Page 123 - Setting the Timer
123 Tools 6. Touch Alarm sound to select a ringtone from the alarm sounds or a music file. The ringtone plays briefly when you select it. 7. Slide the Alarm volume bar to adjust the volume. 8. Touch Auto app starter if you want to set an application to run when the alarm is stopped. 9. Touch Puzzle lo...
Page 124 - Setting the World Clock
124 Tools Setting the World Clock This feature allows you to set up a list of cities to easily check current times in other time zones with a quick glance. 1. Open the Alarm/Clock application and touch the World clock tab . 2. Touch the New City icon at the bottom of the screen then search through t...
Page 125 - Polaris Viewer 4; Viewing files; Tasks; To open the Tasks application
125 Tools Polaris Viewer 4 Polaris Viewer 4 is a professional mobile office solution that lets users conveniently view various types of office documents, including Word, Excel and PowerPoint files, anywhere, anytime, using their mobile devices. On the Home screen, touch the Apps Key > Polaris Viewer...
Page 126 - File Manager; To open the File Manager application
126 Tools File Manager The File Manager application allows you to manage files in your internal/ external storage. To open the File Manager application From the Home screen, tap the Apps Key > File Manager . File Manager Options : Allows you to create a new folder. : Allows you to move files and fo...
Page 127 - Settings; To open the Settings application
127 Settings Settings The Settings application contains most of the tools for customizing and configuring your phone. All of the settings in the Settings application are described in this section. To open the Settings application From the Home screen, tap the Menu Key > System settings . OR From t...
Page 128 - Bluetooth
128 Settings Wi-Fi Direct : Allows direct connection with Wi-Fi devices without any access point. Advanced: Accesses the following advanced Wi-Fi settings. Network notification : Allows you to be notified when an open network is available. Keep Wi-Fi on during sleep : Allows you to set Wi-Fi during sl...
Page 129 - Mobile data
129 Settings setting is All devices. NOTE Tap Search for devices at the bottom of the screen to search for in-range Bluetooth devices. Mobile data This menu allows you to manage your mobile data usage. Tap the Mobile data switch to toggle between On and Off. Limit mobile data usage: Checkmark to lim...
Page 131 - Miracast; File networking; TETHERING
131 Settings NOTE NFC (Near Field Communication) is a wireless technology that enables data transmission between two objects when they are brought within a few inches of each others. When you enable NFC on your phone, it can exchange data with other NFC-enabled devices or read information from smart...
Page 132 - DEVICE; Sound
132 Settings NETWORK SETTINGS VPN: Sets up and manages Virtual Private Networks (VPNs). Mobile networks: Sets up options for data enabled, data roaming, network mode, and system select. DEVICE The Device section allows you to configure and manage the general device functions such as sound and display...
Page 133 - Display
133 Settings Vibrate strength: Sets the vibration strength for Incoming calls, Notifications, and Vibrate on touch. Incoming call vibration: Sets the the type of vibration for incoming calls. Choose from Long lasting, Rapid, Short repeated, Standard, or Ticktock. Dial pad touch tones: Checkmark to se...
Page 136 - Lock; Storage; INTERNAL STORAGE
136 Settings One-handed operation Dial keypad: Checkmark to enable you move the dial keypad to the right or left side of the device. Simply tap the arrow to move it to one side or the other. LG keyboard: Checkmark to enable you move the keyboard to the right or left side of the device. Simply tap th...
Page 137 - PERSONAL
137 Settings Battery BATTERY INFORMATION The Battery charge information is displayed on a battery graphic along with the percentage of the remaining charge and its status. Touch the Battery charge icon to display the Battery use screen to see battery usage level and battery use details. It displays ...
Page 138 - Location access
138 Settings Gmail™, Calendar, and other applications may also have their own settings to control how they synchronize data; see the sections on those applications for details. Tap Accounts & sync to access the settings below. Auto-sync data: Checkmark to turn on the sync function. ACCOUNTS Disp...
Page 142 - SYSTEM
142 Settings GENERAL Speech rate : Sets the speed at which the text is spoken. Listen to an example : Plays a short demonstration of speech synthesis. MOUSE/TRACKPAD Pointer speed: Sets the pointer speed. Backup & reset This menu allows you to back up and erase your data. BACKUP & RESTORE Ba...
Page 146 - About phone
146 Settings screen. Profile GPU rendering : Checkmark to measure rendering time in adb shell dumpsys gfxinfo. Enable traces : Allows you to select enabled traces. APPS Don’t keep activities: Checkmark to force stop every activity as soon as the user leaves it. Background process limit: Allows you to...
Page 147 - Safety; TIA Safety Information; Exposure to Radio Frequency Signal; ICNIRP; Antenna Care
147 Safety TIA Safety Information The following is the complete TIA Safety Information for wireless handheld phones. Exposure to Radio Frequency Signal Your wireless handheld portable phone is a low power radio transmitter and receiver. When ON, it receives and sends out Radio Frequency (RF) signals...
Page 148 - Phone Operation; For your phone to operate most efficiently:; Driving; conditions or the law require it.; Electronic Devices
148 Safety Phone Operation NORMAL POSITION: Hold the phone as you would any other telephone with the antenna pointed up and over your shoulder. Tips on Efficient Operation For your phone to operate most efficiently: Don’t touch the antenna unnecessarily when the phone is in use. Contact with the anten...
Page 149 - Should ALWAYS keep the phone more than six (6) inches from their
149 Safety Persons with pacemakers: O Should ALWAYS keep the phone more than six (6) inches from their pacemaker when the phone is turned ON; O Should not carry the phone in a breast pocket; O Should use the ear opposite the pacemaker to minimize the potential for interference; O Should turn the pho...
Page 150 - Aircraft
150 Safety Aircraft FCC regulations prohibit using your phone while in the air. Switch OFF your phone before boarding an aircraft. Blasting Areas To avoid interfering with blasting operations, turn your phone OFF when in a “blasting area” or in areas posted: “Turn off two-way radio”. Obey all signs ...
Page 151 - Safety Information; Charger and Adapter Safety
151 Safety Safety Information Please read and observe the following information for safe and proper use of your phone and to prevent damage. Also, keep the user guide in an accessible place at all times after reading it. Violation of the instructions may cause minor or serious damage to the product....
Page 152 - General Notice
152 Safety O Battery life will vary due to usage patterns and environmental conditions. O Use of extended backlighting, Browser, and data connectivity kits affect battery life and talk/ standby times. O The self-protection function of the battery cuts the power of the phone when its operation is in ...
Page 154 - (including headsets, earbuds and Bluetooth; American Academy of Audiology
154 Safety (including headsets, earbuds and Bluetooth ® or other wireless devices). Exposure to very loud sound has also been associated in some studies with tinnitus (a ringing in the ear), hypersensitivity to sound and distorted hearing. Individual susceptibility to noise-induced hearing loss and ...
Page 155 - National Institutes of Health; National Institute for Occupational Safety and Health; FDA Consumer Update; Do wireless phones pose a health hazard?
155 Safety Voice: (800) 222-2336 Email: [email protected] Internet: www.audiology.org National Institute on Deafness and Other Communication Disorders National Institutes of Health 31 Center Drive, MSC 2320 Bethesda, MD USA 20892-2320 Voice: (301) 496-7243 Email: [email protected] Internet: http://w...
Page 156 - What is the FDA’s role concerning the safety of wireless phones?; type emitted by wireless phones
156 Safety emit very low levels of RF when in standby mode. Whereas high levels of RF can produce health effects (by heating tissue), exposure to low level RF that does not produce heating effects causes no known adverse health effects. Many studies of low level RF exposures have not found any biolo...
Page 157 - Occupational Safety and Health Administration; What kinds of phones are the subject of this update?
157 Safety O Occupational Safety and Health Administration O National Telecommunications and Information Administration The National Institutes of Health participates in some interagency working group activities, as well. The FDA shares regulatory responsibilities for wireless phones with the Federa...
Page 161 - What about children using wireless phones?
161 Safety reduce RF exposure. If you must conduct extended conversations by wireless phone every day, you could place more distance between your body and the source of the RF, since the exposure level drops off dramatically with distance. For example, you could use a headset and carry the wireless ...
Page 162 - Where can I find additional information?; 0 Driver Safety Tips
162 Safety was completed in late 2000. This standard will allow manufacturers to ensure that cardiac pacemakers and defibrillators are safe from wireless phone EMI. The FDA has tested hearing aids for interference from handheld wireless phones and helped develop a voluntary standard sponsored by the ...
Page 163 - Don’t take notes or look up phone numbers while driving. If you are
163 Safety When operating a car, driving is your first responsibility. When using your wireless phone behind the wheel of a car, practice good common sense and remember the following tips: 1. Get to know your wireless phone and its features such as speed dial and redial. Carefully read your instructi...
Page 164 - Consumer Information on SAR
164 Safety they are distracting and even dangerous when you are behind the wheel of a car. Make people you are talking with aware you are driving and if necessary, suspend conversations which have the potential to divert your attention from the road. 8. Use your wireless phone to call for help. Your...
Page 168 - Wireless Phones and Hearing Aid Accessibility
168 Safety The hearing aid and wireless phone rating values are then added together. A sum of 5 is considered acceptable for normal use. A sum of 6 is considered for best use. In the example to the left, if a hearing aid meets the M2 level rating and the wireless phone meets the M3 level rating, the...
Page 169 - Specifications; DivX Mobile
169 Specifications DivX Mobile ABOUT DIVX VIDEO: DivX ® is a digital video format created by DivX, LLC, a subsidiary of Rovi Corporation. This is an official DivX Certified ® device that has passed rigorous testing to verify that it plays DivX video. Visit divx.com for more information and software too...
Page 170 - LIMITED WARRANTY STATEMENT
170 LIMITED WARRANTY STATEMENT 1. WHAT THIS WARRANTY COVERS: LG offers you a limited warranty that the enclosed subscriber unit and its enclosed accessories will be free from defects in material and workmanship, according to the following terms and conditions: (1) The limited warranty for the produc...
Page 171 - applicable limited warranty period.
171 LIMITED WARRANTY STATEMENT applicable limited warranty period. (5) Products which have had the serial number removed or made illegible. (6) This limited warranty is in lieu of all other warranties, express or implied either in fact or by operations of law, statutory or otherwise, including, but ...
Page 172 - DO NOT RETURN YOUR PRODUCT TO THE ABOVE ADDRESS.
172 LIMITED WARRANTY STATEMENT Some states do not allow the exclusive limitation of incidental or consequential damages or limitations on how long an implied warranty lasts; so these limitations or exclusions may not apply to you. This warranty gives you specific legal rights and you may also have ot...
Page 173 - Index; Numbers; Adding Contacts 70
173 Index Numbers 10 Driver Safety Tips 162 A Adding a Contact to Your Favorites 72 Adding and Editing Email Accounts 77 Adding Contacts 70 Alarm/Clock 122 Answering or Rejecting Calls 56 Applications: How to View 32 B Browser 63 C Calculator 121 Calendar 120 Calling Your Contacts 59 Calls 54 Camera...
Page 174 - Joining Contacts 75
174 Index Getting to Know the Home Screen 27 Gmail 79 H Hangouts 90 I Important Customer Information 3 Installing the Battery and microSD Card 18 J Joining Contacts 75 L Listening to Your Voicemail 61 Live Zooming 101 Locking the Screen 41 M Managing Multiple Calls 60 Managing Notifications 38 Managi...