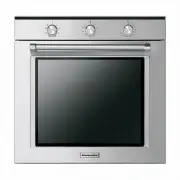
Page 4 - Important safety instructions; YOUR SAFETY AND THAT OF OTHERS IS VERY IMPORTANT; installation operations.; WARNING
4 Important safety instructions YOUR SAFETY AND THAT OF OTHERS IS VERY IMPORTANT This manual and the appliance itself provide important safety warnings, to beread and observed at all times. This is the danger symbol, pertaining to safety, which alerts users topotential risks to themselves and others...
Page 7 - SCRAPPING OF HOUSEHOLD APPLIANCES
7 (e.g. rum, cognac, wine), remember that alcoholevaporates at high temperatures. As a result, there is arisk that vapours released by the alcohol may catchfire upon coming into contact with the electricalheating element. • Never use steam cleaning equipment.• Do not touch the oven during the pyroly...
Page 8 - Installation
8 After unpacking the oven, make sure that it has notbeen damaged during transit and that the ovendoor closes properly.In the event of problems, contact the dealer oryour nearest After-Sales Service. To avoid anydamage, only remove the oven from itspolystyrene foam base at the time of installation. ...
Page 9 - Safeguarding the environment; Disposal of packing materials; EC Declaration of conformity; The oven does not work:; Troubleshooting Guide
9 Safeguarding the environment Disposal of packing materials • The packaging materials are 100% recyclable and are marked with the recycling symbol . • The various parts of the packing must therefore be disposed of responsibly and in fullcompliance with local authority regulationsgoverning waste dis...
Page 10 - Cleaning
10 Before contacting the After-Sales Service: 1. See if you can solve the problem yourself with the help of the suggestions given in the"Troubleshooting guide". 2. Switch the appliance off and then on again it to see if the problem has been eliminated. If the fault persists after the above c...
Page 11 - Maintenance
11 - Use safety gloves.- Ensure the oven is cold before carrying out the following operations. - Disconnect the appliance from the mains power supply. REMOVING THE DOOR To remove the door: 1. Open the door fully.2. Lift the catches and push them forwards as far as they will go (fig. 1 ). 3. Close th...
Page 12 - FOR ELECTRICAL CONNECTION, SEE THE PARAGRAPH ON INSTALLATION; Instructions for oven use
12 FOR ELECTRICAL CONNECTION, SEE THE PARAGRAPH ON INSTALLATION 1. Control panel 2. Upper heating element/grill 3. Cooling fan (not visible) 4. Dataplate (not to be removed) 5. Lamps 6. Circular heating element (not visible) 7. Fan 8. Rotisserie (if supplied) 9. Bottom heating element (not visible) ...
Page 13 - ACCESSORIES SUPPLIED; ACCESSORIES NOT SUPPLIED; INSERTING WIRE SHELVES AND OTHER ACCESSORIES IN THE OVEN
13 ACCESSORIES SUPPLIED A. WIRE SHELF : the wire shelf can be used to grill food or as a support for pans, cake tins and other ovenproof cooking receptacles. B. BAKING TRAY: for cooking all bread and pastry products, but also roasts, fish en papillotte, etc. C. DRIP TRAY : the drip tray is designed ...
Page 14 - Functions description table; CONTROL PANEL DESCRIPTION
14 Functions description table CONTROL PANEL DESCRIPTION 15 30 45 60 70 90 105 120 50 75 100 125 150 175 200 225 250 °C 1. FUNCTIONS SELECTOR KNOB: to select functions. 2. COOKING TIME SELECTOR KNOB: to switch on/off and to set cooking cycle duration. 3. THERMOSTAT SELECTOR KNOB: to set cooking cycl...
Page 16 - Cooking table
16 Recipe Function Preheating Shelf (from bottom) Temperature (°C) Time (min) Accessories Leavened cakes YES 2 / 3 160 - 180 30 - 90 Cake tin on wire shelf YES 1 - 4 160 - 180 30 - 90 Shelf 4: cake tin on wire shelf Shelf 1: cake tin on wire shelf Filled pies (cheesecake,strudel, apple pie) YES 3 16...
Page 18 - Tested recipes
18 Tested recipes (in compliance with IEC 60350-1:2011-12 and DIN 3360-12:07:07) Recipe Function Preheating Shelf (from bottom) Temperature (°C) Time (min) Accessories and notes* IEC 60350-1:2011-12 § 7.5.2 Shortbread YES 3 170 15 - 25 Drip tray / baking tray YES 1 - 4 150 25 - 35 Shelf 4: baking tr...
Page 19 - Recommended use and tips
19 How to read the cooking table The table indicates the best function to use for any given food, to be cooked on one or more shelves atthe same time. Cooking times start from the moment food is placed in the oven, excluding pre-heating(where required). Cooking temperatures and times are purely for ...
Page 20 - Pizza
20 Recommended use and tips Pizza Lightly grease the trays to ensure the pizza has a crispy base. Scatter the mozzarella over the pizza twothirds of the way through cooking. Rising function (only in some models) It is always best to cover the dough with a damp cloth before placing it in the oven. Do...