Honeywell CT54- User Manual
Honeywell CT54– User Manual, read for free online in PDF format. We hope this helps you resolve any issues you may have. If you have further questions, please contact us through the contact form.


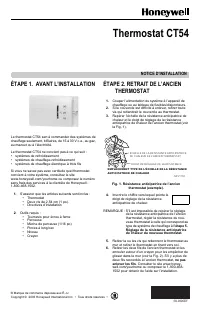
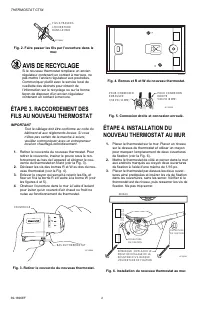
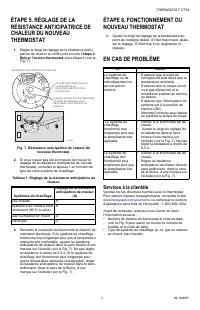
Table of Contents:
- Page 2 – MERCURY NOTICE; STEP 3. CONNECT WIRES TO NEW; THERMOSTAT TO WALL
- Page 3 – STEP 5. SET HEAT ANTICIPATOR; Step 2. Remove Old Thermostat; STEP 6. OPERATING NEW; Customer Assistance; Heating System
- Page 5 – NOTICE D'INSTALLATION; Thermostat CT54; ÉTAPE 1. AVANT L’INSTALLATION; ÉTAPE 2. RETRAIT DE L’ANCIEN; Fig. 1. Résistance anticipatrice de l’ancien; ne pas
- Page 6 – Fig. 2. Faire passer les fils par l’ouverture dans le; AVIS DE RECYCLAGE; ÉTAPE 3. RACCORDEMENT DES; ÉTAPE 4. INSTALLATION DU
- Page 7 – Services à la clientèle
® U.S. Registered Trademark
Copyright © 2003 Honeywell International Inc. •
• All Rights Reserved
INSTALLATION INSTRUCTIONS
69-1696EF
CT54 Thermostat
STEP 1. PREPARE FOR
INSTALLATION
The CT54 Thermostat controls 2-wire, 15 Vac to 30 Vac,
gas, oil or electric heating-only systems.
The CT54 Thermostat is not suitable for:
• cooling systems
• heating-cooling systems
• 3-wire electric heating systems
If you are unsure which thermostat model is right for your
system, visit www.honeywell.com/yourhome or call
Honeywell Customer Care at 1-800-468-1502.
1.
Check that the following components are included:
• Thermostat
• Two one-inch screws
• Installation Instructions
2.
Required tools:
• Slotted screwdriver
• Drill
• Drill bit (1/16 in.)
• Needle nose pliers
• Level
• Pencil
STEP 2. REMOVE OLD
THERMOSTAT
1.
Turn power off to the system at the furnace or at
the fuse/circuit breaker panel.
2.
If the cover does not easily pull off, remove any
screws that may fasten the cover to the thermostat.
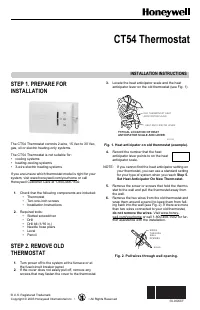
3.
Locate the heat anticipator scale and the heat
anticipator lever on the old thermostat (see Fig. 1).
Fig. 1. Heat anticipator on old thermostat (example).
4.
Record the number that the heat
anticipator lever points to on the heat
anticipator scale.
NOTE: If you cannot find the heat anticipator setting on
your thermostat, you can use a standard setting
for your type of system when you reach
Step 5.
Set Heat Anticipator On New Thermostat.
5.
Remove the screw or screws that hold the thermo-
stat to the wall and pull the thermostat away from
the wall.
6.
Remove the two wires from the old thermostat and
wrap them around a pencil to keep them from fall-
ing back into the wall (see Fig. 2). If there are more
than two wires connected to your old thermostat,
do not remove the wires
. Visit www.honey-
well.com/yourhome or call 1-800-468-1502 for fur-
ther assistance with the installation.
Fig. 2. Pull wires through wall opening.
M21192
OLD THERMOSTAT HEAT
ANTICIPATOR SCALE
HEAT ANTICIPATOR LEVER
TYPICAL LOCATION OF HEAT
ANTICIPATOR SCALE AND LEVER
WIRES
THROUGH
WALL
OPENING
M19645
"Loading the manual" means you need to wait until the file loads and becomes available for online reading. Some manuals are very large, and the time they take to appear depends on your internet speed.
Other Manuals for Honeywell CT54
Summary
CT54 THERMOSTAT 69-1696EF 2 MERCURY NOTICE If this thermostat is replacing a control that contains mercury in a sealed tube, do not place the old thermostat in the trash. Contact your local waste management authority for instructions regarding recycling and proper disposal of this control or of an o...
CT54 THERMOSTAT 3 69-1696EF STEP 5. SET HEAT ANTICIPATOR ON NEW THERMOSTAT 1. Set the heat anticipator lever to the number that you recorded in Step 2. Remove Old Thermostat , sub-step 4 (see Fig. 7). Fig. 7. Heat anticipator on new thermostat. 2. If you could not find a heat anticipator setting on ...
® Marque de commerce déposée aux É.-U.Copyright © 2003 Honeywell International Inc. • Tous droits réservés • NOTICE D'INSTALLATION 69-1696EF Thermostat CT54 ÉTAPE 1. AVANT L’INSTALLATION Le thermostat CT54 sert à commander des systèmes de chauffage seulement, bifilaires, de 15 à 30 V c.a., au gaz, a...