Page 2 - as they can interfere with connectivity.; SEARCH “HONEYWELL AIR COMFORT”; SMART PORTABLE DEHUMIDIFIER
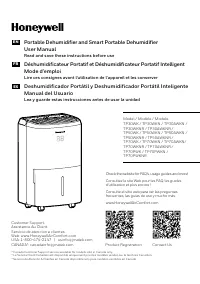
1 EN For Models: TPFIT25AWK / TPFIT32AWK Smart Portable Dehumidifer with WiFi Connectivity The Smart Portable Dehumidifier has added features to allow you to operate the dehumidifier remotely using a smart device, and to use voice commands through an Amazon Echo device, to control the unit. Set up t...
Page 4 - state speed control device.
3 EN DO NOT let children play with this appliance, packaging or included plastic bag.If the unit is damaged or it malfunctions, do not continue to operate it. Unplug the product from the electrical outlet. Refer to the troubleshooting section and contact the customer support center.Always place the ...
Page 5 - WARNING
4 EN SYMBOL NOTE EXPLANATION WARNING This symbol shows that this appliance uses a flammable refrigerant. If the refrigerant is leaked and exposed to an external ignition source, there is a risk of fire. CAUTION This symbol shows that the operation manual should be read carefully. CAUTION This symbol...
Page 6 - Additional warnings for appliances with R32 refrigerant gas.
5 EN R32 SAFETY Read the instructions carefully before using the appliance.R32 refrigerant gas complies with UL60335-2-40 / UL60335-1.This appliance contains a certain number of grams (see rating label at the back of the unit) of R32 refrigerant gas. The maximum refrigerant charge amount is not grea...
Page 9 - The dehumidifier must be positioned on a level floor.
8 EN Place the dehumidifier in an area where the temperature will not drop below 41°F (5°C) Place the dehumidifier at least 17.7 inches (45 cm) away from other objects (e.g. curtains or furniture) that may restrict airflow from the back or through the air vents of the unit. The dehumidifier must be ...
Page 10 - UNPACKAGING THE DEHUMIDIFIER; DO NOT REMOVE THIS FOAM FLOAT.; Gently pull the water tank from out of the dehumidifier
9 EN UNPACKAGING THE DEHUMIDIFIER There is a Foam Float inside the water tank that senses the water level to automatically stop dehumidification when the water tank is full. Make sure the Foam Float is positioned correctly inside the water tank by ensuring it lies level with the top edge of the wate...
Page 11 - PARTS DESCRIPTION
10 EN PARTS DESCRIPTION 9 8 5 3 6 1 2 7 4 13 12 10 11 14 1) Control Panel 9) Washable Dust Filter 2) Handle 10) Direct Drain Outlet 3) Splash Guard 11) Direct Drain Cap 4) Foam Float 12) Cord Cable Tie 5) Water Tank 13) Power Cord & Plug 6) Water Level Indicator 14) Continuous Water Drain Tube I...
Page 12 - INSTALL THE CORD WINDER; Step 1: Line up the cord winder pieces to the mounting holes.
11 EN Once you have removed the cord winder accessories from the water tank - follow the steps below. INSTALL THE CORD WINDER Step 2: Rotate 45-degrees clock-wise. Step 1: Line up the cord winder pieces to the mounting holes. Step 3: Once you hear “click”, then you know the cord winder is ready for ...
Page 13 - CONTROL PANEL
12 EN USE & OPERATION 1) Filter Indicator light 8) Power Control 2) Timer Indicator Light 9) Mode Controls 3) Water Full Indicator Light - Laundry Mode 4) Humidity / Timer Set Controls - Dehumidifying Mode 5) Filter Alert - Comfort Mode 6) Timer Control - Continuous Mode 7) Display Screen CONTRO...
Page 14 - Press
13 EN DISPLAY SCREEN When the unit is switched ON, the Display Screen shows the current humidity percentage and previous mode setting. MODE SETTING Settings: Laundry Mode, Dehumidifying Mode, Comfort Mode & Continuous Mode.The corresponding indicator light will illuminate to indicate the current...
Page 15 - may cause the tank to spillover.
14 EN Comfort Mode Dehumidifier automatically adjusts dehumidification Relative Humidity (RH) percentage settings based on ambient room temperature, for hassle-free operation. When ambient room temperature is 18°C / 64°F or lower, the dehumidifier adjusts to 55% RH. When ambient room temperature is ...
Page 16 - : To cancel the filter alert, simply press; TIMER CONTROL
15 EN USE & OPERATION (CONTINUED) FILTER ALERT When the Filter Alert Light is ON, it is time to clean the filter. Switch the unit OFF and carefully remove the filter from the unit and clean. Replace the filter and switch ON the unit. The Filter Alert Light should not be illuminated until the fil...
Page 19 - Continuous Water Drainage – Using a Continuous Water Drain Tube
18 EN DRAINING THE WATER (CONTINUED) USE & OPERATION (CONTINUED) Locate the drain outlet at the back of the unit. Unscrew and remove the Direct Drain Cap.Insert and screw the Continuous Water Drain Tube into the Direct Drain Outlet. 2.1 A continuous water drainage tube is included with this unit...
Page 20 - angled down and free of bends or kinks.
19 EN If there are leaks, the Continuous Water Drain Tube and Cap may have loosened and may not be connected properly. Disconnect, replace and tighten again. Position the other end of the Continuous Water Drain Tube in the sink or drain. Make sure the tube is not bent or kinked which might stop the ...
Page 22 - TROUBLESHOOTING GUIDE; PROBLEM
21 EN TROUBLESHOOTING GUIDE The following troubleshooting guide addresses the most common problems. If problems persist, call customer service. PROBLEM POSSIBLE CAUSE SOLUTION Dehumidifier does not start No electricity. Check for power. The power cord is not properly plugged in. Remove and reconnect...
Page 24 - Check the tube of cap for tighten.
23 EN TROUBLESHOOTING GUIDE (CONTINUED) PROBLEM POSSIBLE CAUSE SOLUTION Water onthe floor The garden hose/ drainhose may be loose. Check the connections between the hose and the drain outlet on the unit. See Continuous Water Drainage section. Check the tube of cap for tighten. You intended to use th...
Page 25 - ERROR CODE GUIDE; CODE; EH
24 EN ERROR CODE GUIDE CODE POSSIBLE CAUSE POSSIBLE SOLUTIONS EH Humidity Sensor misalignment, malfunction or connection issue. If the display shows “EH” flashing 3 times, it indicates the humidity Sensor may not be working . When this happens, the dehumidifier can still continue to function without...