Honeywell TP70PWKNR - User Manual
Honeywell TP70PWKNR – User Manual, read for free online in PDF format. We hope this helps you resolve any issues you may have. If you have further questions, please contact us through the contact form.


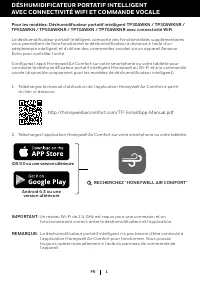
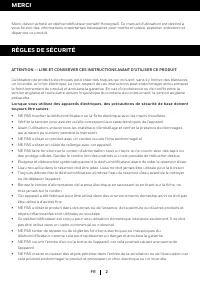
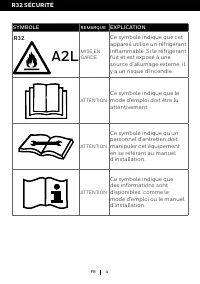

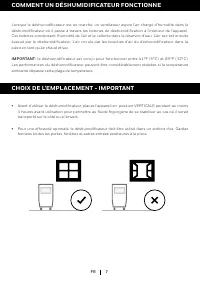
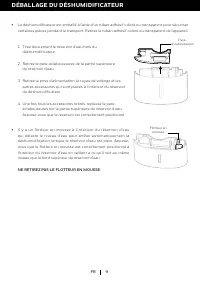
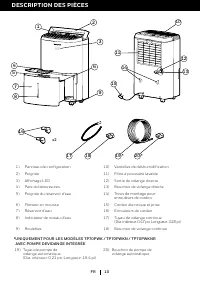
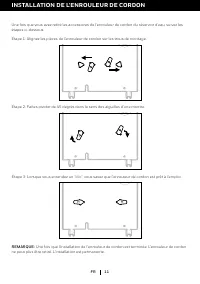
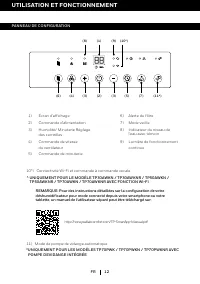
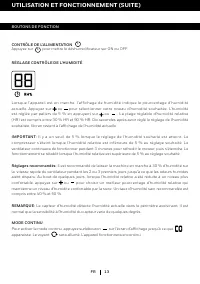
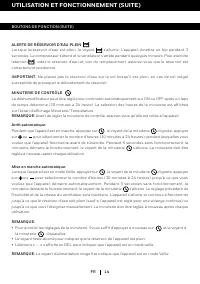
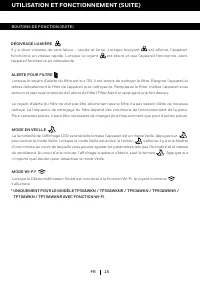
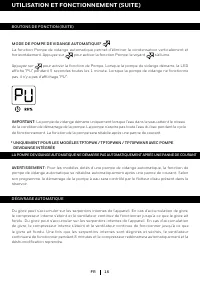
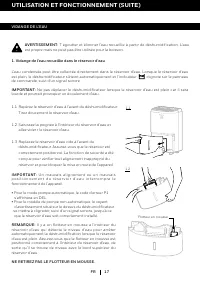
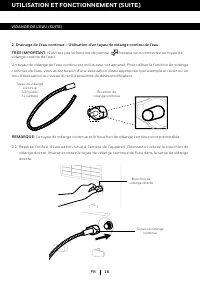
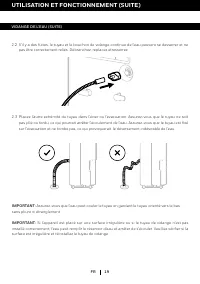
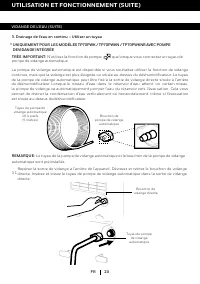
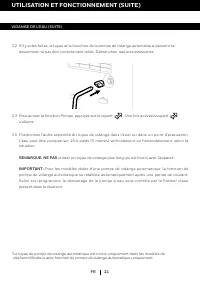
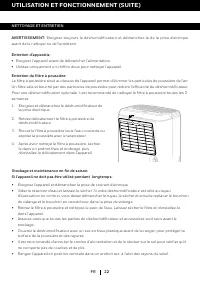
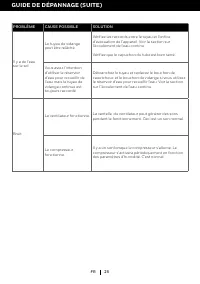
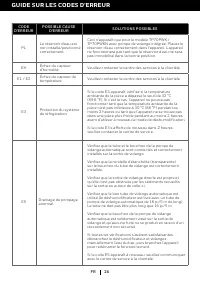
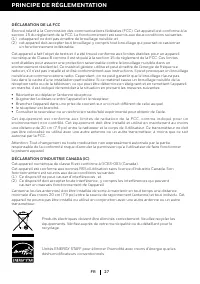


Table of Contents:
- Page 2 – TP70AWKNR Smart Portable Dehumidifer with WiFi Connectivity; as they can interfere with connectivity.; SEARCH “HONEYWELL AIR COMFORT”; SMART PORTABLE DEHUMIDIFIER
- Page 5 – WARNING
- Page 6 – Additional warnings for appliances with R32 refrigerant gas.
- Page 7 – Transportation, marking and storage for units.
- Page 10 – UNPACKAGING THE DEHUMIDIFIER; DO NOT REMOVE THIS FOAM FLOAT.
- Page 11 – PARTS DESCRIPTION; WITH BUILT-IN DRAIN PUMP
- Page 12 – INSTALL THE CORD WINDER
- Page 14 – FUNCTION BUTTONS; CO
- Page 16 – AUTO DRAIN PUMP MODE*; TP70AWKNR WITH WI-FI SMART FEATURES
- Page 18 – Continuous Water Drainage – Using a Continuous Water Drain Tube
- Page 20 – Continuous Water Drainage – Using the Auto Drain Pump option
- Page 23 – TROUBLESHOOTING GUIDE; PROBLEM
- Page 26 – ERROR CODE GUIDE; CODE
- Page 27 – REGULATION STATEMENT; FCC INTERFERENCE STATEMENT
- Page 28 – Echo pour contrôler l’unité.; DÉSHUMIDIFICATEUR PORTATIF INTELLIGENT
- Page 29 – toujours être suivies :
- Page 31 – SYMBOLE; REMARQUE; EXPLICATION; ATTENTION
- Page 32 – La quantité maximale de charge de réfrigérant n'est pas; Avertissements supplémentaires pour les appareils avec gaz
- Page 33 – Conformité aux règles de transport.
- Page 34 – COMMENT UN DÉSHUMIDIFICATEUR FONCTIONNE
- Page 36 – DÉBALLAGE DU DÉSHUMIDIFICATEUR; NE RETIREZ PAS LE FLOTTEUR EN MOUSSE.
- Page 37 – DESCRIPTION DES PIÈCES; Trous de montage pour
- Page 38 – INSTALLATION DE L'ENROULEUR DE CORDON
- Page 39 – UTILISATION ET FONCTIONNEMENT; PANNEAU DE CONFIGURATION
- Page 41 – Mise en marche automatique:
- Page 50 – GUIDE DE DÉPANNAGE; PROBLÈME
- Page 53 – GUIDE SUR LES CODES D'ERREUR
- Page 54 – PRINCIPE DE RÉGLEMENTATION; DÉCLARATION DE LA FCC
- Page 55 – solo para modelos con Deshumidificador Inteligente); DESHUMIDIFICADOR PORTÁTIL INTELIGENTE
- Page 58 – ATENCIÓN
- Page 59 – Advertencias adicionales para unidades con refrigerante de
- Page 60 – debe cumplir con las normativas de transporte.; • Las reparaciones deben realizarse siguiendo las
- Page 62 – SELECCIONANDO UNA UBICACIÓN - IMPORTANTE
- Page 63 – DESEMPACANDO EL DESHUMIDIFICADOR; NO QUITE ESTE FLOTADOR DE ESPUMA DE POLIURETANO.
- Page 64 – DESCRIPCIÓN DE PARTES; *ESTO ES SOLO PARA LOS MODELOS TP70PWK / TP70PWKN / TP70PWKNR
- Page 65 – INSTALACIÍON DEL ENROLLADOR DE CABLE
- Page 66 – USO Y OPERACIÓN; PANEL DE CONTROL
- Page 67 – MODO CONTÍNUO; BOTONES DE FUNCIÓN
- Page 70 – MODO BOMBA DE DRENADO AUTOMÁTICO*; *ES SOLO PARA LOS MODELO TP70PWK / TP70PWKN / TP70PWKNR CON BOMBA DE
- Page 77 – GUÍA DE SOLUCIÓN DE PROBLEMAS; PROBLEMA
- Page 78 – GUÍA DE SOLUCIÓN DE PROBLEMAS (CONTINUACIÓN)
- Page 80 – GUÍA DE CÓDIGO DE ERROR; CÓDIGO
- Page 81 – DECLARACIÓN DE REGULACIÓN; DECLARACIÓN DE LA FCC
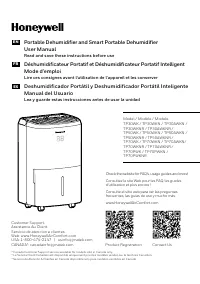
Portable Dehumidifier and Smart Portable Dehumidifier
User Manual
Read and save these instructions before use
EN
Déshumidificateur Portatif et Déshumidificateur Portatif Intelligent
Mode d’emploi
Lire ces consignes avant l’utilisation de l’appareil et les conserver
FR
Deshumidificador Portátil y Deshumidificador Portátil Inteligente
Manual del Usuario
Lea y guarde estas instrucciones antes de usar la unidad
ES
Model / Modèle / Modelo:
TP30WK / TP30WKN / TP30AWKN /
TP30WKNR / TP30AWKNR /
TP50WK / TP50WKN / TP50AWKN /
TP50WKNR / TP50AWKNR /
TP70WK / TP70WKN / TP70AWKN/
TP70WKNR / TP70AWKNR /
TP70PWK / TP70PWKN /
TP70PWKNR
Customer Support:
Assistance Au Client:
Servicio de atencion a clientes:
Web: www.HoneywellAirComfort.com
USA: 1-800-474-2147 | [email protected]
CANADA^: [email protected]
^ Canada Customer Support service available for models sold in Canada only.
^ Le Service Client Canadien est disponible uniquement pour les modèles vendus sur le territoire Canadien.
^ Servicio de Atención A Clientes en Canadá disponible solo para modelos vendidos en Canadá.
Check the website for FAQ's, usage guides and more!
Consultez le site Web pour les FAQ, les guides
d'utilisation et plus encore !
Consulte el sitio web para ver las preguntas
frecuentes, las guías de uso y mucho más.
www.HoneywellAirComfort.com
Contact Us
Product Registration
"Loading the manual" means you need to wait until the file loads and becomes available for online reading. Some manuals are very large, and the time they take to appear depends on your internet speed.
Was this manual helpful?
About this manual
- Brand
- Honeywell
- Model
- TP70PWKNR
- Document type
- User Manual
- Language(s)
- English, Spanish, French
- Pages
- 82
- File size
- 11.4 MB
- Format
Summary
1 For Models: TP30AWKN / TP30AWKNR / TP50AWKN / TP50AWKNR / TP70AWKN / TP70AWKNR Smart Portable Dehumidifer with WiFi Connectivity The Smart Portable Dehumidifier has added features to allow you to operate the dehumidifier remotely using a smart device, and to use voice commands through an Amazon Ec...
4 SYMBOL NOTE EXPLANATION WARNING This symbol shows that this appliance uses a flammable refrigerant. If the refrigerant is leaked and exposed to an external ignition source, there is a risk of fire. CAUTION This symbol shows that the operation manual should be read carefully. CAUTION This symbol sh...
5 EN R32 SAFETY Read the instructions carefully before using the appliance.R32 refrigerant gas complies with UL60335-2-40 / UL60335-1.This appliance contains a certain number of grams (see rating label at the back of the unit) of R32 refrigerant gas. The maximum refrigerant charge amount is not grea...
Ask a question
Related manuals
Popular Honeywell Other
More Honeywell Other models
 Honeywell TL8100 Manual
 Honeywell TL8230A Manual
 Honeywell TL8230A1003 User Manual
 Honeywell TM005X Manual
- Honeywell TP70AWKNR User Manual
- Honeywell TP70PWK User Manual
 Honeywell TPFIT25WK User Manual
- Honeywell TPFIT32WK User Manual
 Honeywell TPFIT50APWK User Manual
- Honeywell TPFIT50AWK User Manual
 Honeywell TPFIT50PWK User Manual
- Honeywell TPFIT50WK User Manual