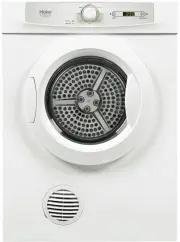
Haier HDY-E60 - User Manual
Haier HDY-E60 Dryer – User Manual, read for free online in PDF format. We hope this helps you resolve any issues you may have. If you have further questions, please contact us through the contact form.


Table of Contents:
- Page 4 – Read all instructions before using this dryer.; SAVE THESE INSTRUCTIONS.; have just purchased due to technical improvements.
- Page 5 – towel; Turning on power; accordance with the value indicated on the name plate.; Preparation of laundry load; is still dripping wet or has excess water.; Load to dry
- Page 6 – You may choose to start the dryer after a preset time.
- Page 7 – A - Program control knob; Heat Dry
- Page 8 – WARNING! Unplug the power cord prior to any cleaning
- Page 9 – Unpacking your dryer
- Page 10 – INSTALLATION INSTRUCTIONS; Tools required; Free standing
- Page 11 – INSTALLATION INSTRUCTIONS; brackets onto the slat. The distance between each is 553 mm as per
- Page 12 – Caution; Stacking installation; Screws; other program, until the inversion is displayed.
- Page 13 – sure the included screws are used. Fix the stacking kit on the top; Dryer
- Page 14 – Rear venting
- Page 15 – Control board; NTC
- Page 16 – ITEM
Extra Dry
100min
30min
60min
30min
INNOVATIVE DESIGN
HDY-E60
number of the tumble dryer.
"Loading the manual" means you need to wait until the file loads and becomes available for online reading. Some manuals are very large, and the time they take to appear depends on your internet speed.
Summary
Extra Dry 100min 30min 60min 30min Read all instructions before using this dryer. This dryer has been designed for domestic use only. SAVE THESE INSTRUCTIONS. This diagram may be slightly different from the layout of the dryer you have just purchased due to technical improvements. Power supply cord ...
Attention: 1.Before operation, clean off any dust and dirt inside the drum of the dryer with a damp towel . 2.Clean off any debris on the lint filter and in the duct to increase the drying efficiency. Turning on power Before turning on the power of the dryer check whether the supply voltage is in ac...
1. Power up Insert the power plug into an appropriate power outlet that is properly installed and grounded. Operating power supply: 220-240V~50Hz. 2. Laundry loading Open the door and load the laundry into the drum of the dryer. For a more energy efficient and better drying result, make sure the loa...