Page 2 - old appliance for disposals at least free of charge.
Do not dispose of electrical appliances as unsorted municipal waste, use separate collection facilities. Contact your local government for information regarding the collection systems available. If electrical appliances are disposed of in landfills or dumps, hazardous substances can leak into the gr...
Page 3 - CONTENTS
CONTENTS Introduction 2 Safety instruction 3 Installation instructions 5 Getting started quickly 11 Program modes 13 Preparing the dryer 14 Preparing the laundry 14 Loading the dryer 14 Care chart 15 Caring for your dryer 16 Error codes 19 Troubleshooting 20 Customer service 21 1
Page 4 - being
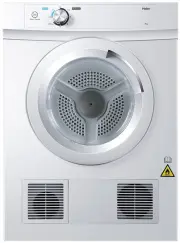
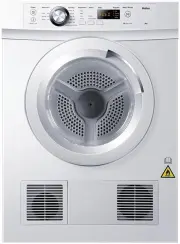
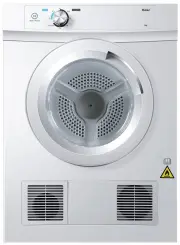
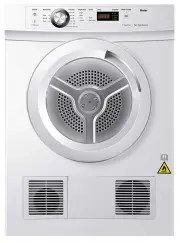
2 DEAR CUSTOMER SCOPE OF DELIVERY 1 2 INTENDED USE INTRODUCT ION being Warning; Risk of fire/ Flammable materials This marking on product is a safety symbol. Failure to follow the warning outlined in these user instructions can cause a fire hazard.
Page 5 - SAFETY INSTRUCTIONS; s service agent or
SAFETY INSTRUCTIONS Children under 3 years of age must be kept away from the tumble dryer unless they are constantly supervised. The tumble dryer is not a toy! To prevent the risk of injury, do not allow children to play with it or near it, or to play with the controls. Before setting up the tumble ...
Page 7 - INSTALLATION INSTRUCTIONS; carefully before using your dryer!
Please read and follow the ‘Safety instructions’ and ‘Installation instructions’ sections Moving your appliance If the dryer needs to be placed at an angle for moving, only tip towards the right hand side leave it standing upright for at least one hour before turning on. Accessories Please check you...
Page 8 - Installation options
INSTALLATION INSTRUCTIONS Installation options Your dryer can be installed one of two ways, either freestanding, or stacked on top of a Haier front loading washer. 1 Free standing The dryer stands on the floor and can easily be moved into position. 2 Stacking Your dryer has been designed to be able ...
Page 9 - Draining
INSTALLATION INSTRUCTIONS Draining The dryer is equipped with a condenser unit which accumulates water during the drying cycle. This water is collected in the removable water tank located at the top left of the dryer. The accumulated water must be emptied after each drying cycle. However you can als...
Page 10 - Electrical connection
INSTALLATION INSTRUCTIONS Electrical connection 1 This appliance must be connected to a 220V - 240V, 50Hz, sinusoidal, 10A electrical supply 2 Uncoil the power cord, remove and discard the plastic pin cover and plug into a power socket. 3 Connect the appliance to an earthed outlet protected by a fus...
Page 12 - Machine specifications; Depth
INSTALLATION INSTRUCTIONS Machine specifications HDHP80A1 Capacity (kg)* 8 DIMENSIONS ( mm )Width 595 Depth 650 Height** 845 Length of drain hose 1300 ELECTRICALVolts 220 – 240 HZ 50 Amps (maximum) 10 Heating Power (W) 560 * Capacity refers to the maximum dry weight of items the machine can dry at a...
Page 13 - GETTING STARTED QUICKLY; Condenser; The display shows the remaining time, the delay time and other; Program knob; Delay function for delay start, touch the button to set time (in
GETTING STARTED QUICKLY 1 2 Condenser Display 4 5 6 3 Display & Delay The display shows the remaining time, the delay time and other related information. Note: The remaining time is a default value, this time will be re-calculated depending on additional program settings and the moisture content...
Page 14 - oci; Note:When the cycle ends or the power supply; 0 Iron Ready
7 8 9 Child-lock indicator Anti-Crease Dry level 12 GETTING STARTED QUICKLY If you wish to minimise wrinking, touch the Anti-Crease. At the end of the cycle, the drum will rotate periodically and cool air will be circulated through the load to minimise wrinkling and creaseing. This is particularly u...
Page 15 - PROGRAM MODES; PROGRAM; Time; DEFAULT
PROGRAM MODES PROGRAM RECOMMENDED LAUNDRY MAX . LOAD Time Dry Auto Dry Cotton*** Towels Duvet Air Dry** Time Dry Warm 30 Warm 60 Mix Shirts Shirts Delicate For lingerie and nightclothes ect. Synthetic items Sportswear Synthetic Sports Baby Care Underwear Underwear Baby Care/Clothing Bedding Sheets, ...
Page 17 - CARE CHART
CARE CHART Resistant material Bleachable in cold water Do not dry clean Delicate fabric Do not bleach Washable at 95 °C Iron at 200 °C Hang to dry Washable at 60 °C Iron at 150 °C Dry on clothes hanger Washable at 40 °C Iron at 100 °C Tumble dry (normal heat) Washable at 30 °C Do not iron Tumble dry...
Page 18 - CARING FOR YOUR DRYER
CARING FOR YOUR DRYER When you have finished using your dryer ● ● Unplug the machine from the power socket. ● ● Wipe around the door to remove any remaining condensation and foreign matter. ● ● Clear the lint filter and empty the water tank (if not set up to automatically drain). Cleaning your dryer...
Page 19 - Emptying the water collection tank; been installed
CARING FOR YOUR DRYER Emptying the water collection tank During the drying cycle steam condenses into water and is collected in the water tank, located at the top left of the dryer. It is important to empty the water tank after every load. A user warning will also be displayed on the screen If the w...
Page 21 - ERROR CODES; CODE
ERROR CODES CODE CAUSE SOLUTION Drain pump error. Contact the customer service. F32, F33 The condenser thermal sensor is open-circuited or short-circuited. Contact the customer service. F4 1,Temperature of the laundry in the drum does not change. 2,Refrigerant leaks. Contact the customer service. Fi...
Page 22 - TROUBLESHOOTING; PROBLEM
TROUBLESHOOTING Before contacting the customer service, please check the following circumstances: PROBLEM CAUSES SOLUTION Tumble dryer fails to operate. – Poor connection to the power supply. – Power failure.– No drying program is set.– Device has not been switched on. – The water tank is full. – Th...
Page 23 - CUSTOMER SERVICE; If you have a problem with your appliance; MODEL; can be found on the rating plate.; Warranty Card; supplied with the product in case of warranty.
CUSTOMER SERVICE If you have a problem with your appliance first see the Troubleshooting section of the manual. If you MODEL SERIAL NUMBER 21 cannot find a solution, please contact your local dealer or try one of the following numbers. Before contacting the customer service, emsure that you have the...