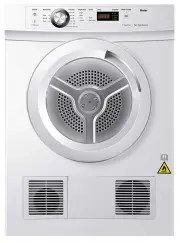
Page 3 - CONTENTS; SAVE THESE INSTRUCTIONS
CONTENTS 1 SAFETY AND WARNINGS INSTALLATION INSTRUCTIONS CONTROL PANEL DRYING CYCLES USING YOUR DRYER CLEANING YOUR DRYER BEFORE YOU CALL FOR SERVICE TROUBLESHOOTING IMPORTANT! SAVE THESE INSTRUCTIONS Please read these instructions carefully before using your tumble dryer. The instructions contain i...
Page 4 - SAFETY AND WARNINGS; Fire Hazard; IMPORTANT SAFETY INSTRUCTIONS; Dryer use
SAFETY AND WARNINGS 2 ! WARNING! Fire Hazard ■ Only dry fabrics that have been washed with water. ■ Do not use heat t o dry articles c ontaining f oam rubber or similarly textured rubber–li ke m at erials, dry on ‘Air ing ’. ■ Do not st op a tumble clothes dr y er bef o re the end of the drying unle...
Page 5 - Lint
SAFETY AND WARNINGS 3 ■ Do not operate this product without the lint filter in place or allow lint to accumulate in or around the dryer. ■ This dryer is not intended for use by persons (including children) with reduced physical, sensory or mental capabilities, or lack of experience and knowledge, un...
Page 6 - Spontaneous combustion
SAFETY AND WARNINGS 4 Spontaneous combustion IMPORTANT! To reduce the risk of fire in a tumble dryer the following should be observed: ■ Items that have been spotted or soaked with vegetable oil or cooking oil are a fire hazard and should not be placed in a tumble dryer. ■ Oil-affected items can ign...
Page 7 - INSTALLATION INSTRUCTIONS; Please read and follow the ‘Safety and warnings’ and ‘Installation
INSTALLATION INSTRUCTIONS Please read and follow the ‘Safety and warnings’ and ‘Installation instructions’ sections carefully before using your dryer. Unpacking 1 Remove all the packaging. 2 Tilt the dryer backwards and ‘walk’ it off the base one foot at a time. 3 Remove all packaging and accessorie...
Page 8 - Venting; from appliances burning gas or other fuels.; External venting; Eliminates condensation on walls and ceilings.; The external venting system should be:
INSTALLATION INSTRUCTIONS Venting Correct installation is very important for all dryers to ensure maximum efficiency and safety. IMPORTANT! Never run the dryer unless the airflow system is free from obstruction. There must be adequate ventilation to avoid the back flow of gases into the room from ap...
Page 9 - Free standing
INSTALLATION INSTRUCTIONS Free standing The dryer stands on the floor and can easily be moved into position. 1 Move the dryer into the desired position. Do not lift the dryer by the top panel. 2 Have a minimum clearance on all sides of at least 20mm. 3 Have a minimum clearance at the rear of 75mm. T...
Page 10 - Mounting dryer on wall; the lid of the washer.
INSTALLATION INSTRUCTIONS Mounting dryer on wall 1 Determine the position of the dryer on the wall and mark the bracket position. A minimum of 50mm is needed between the top of the dryer and the ceiling for ease of installation. If mounting above a washing machine, allow sufficient room to open the ...
Page 11 - Stacking installation; ■ The models of Haier front load washing machine that
INSTALLATION INSTRUCTIONS Stacking installation Your dryer has been designed to be able to be stacked on the top of a Haier front load washing machine, ensure the washing machine is the same width as your dryer. Tools and parts required: ■ Drill and 2.9mm bit ■ Phillips head screwdriver 1 Remove 4 s...
Page 12 - Internal venting; Hose connector
INSTALLATION INSTRUCTIONS Before a rear venting option is installed the dryer must be changed from the front venting factory setup. Remove the outlet grille from the front left-hand side and replace with the outlet cover from the rear left-hand side. These covers should be gently pried at the sides ...
Page 13 - Electrical connection; electrical supply.; Product specifications
INSTALLATION INSTRUCTIONS Electrical connection 1 This appliance must be connected to a 220V-240V, 50Hz, sinusoidal, 10A electrical supply. 2 Uncoil the power cord, remove and discard the plastic pin cover and plug into a power socket. 3 Connect the appliance to an earthed outlet protected by a fuse...
Page 14 - CONTROL PANEL; button presses.
CONTROL PANEL 12 A Press ‘Power’ button to activate your dryer. Press it again to switch the dryer off. B ‘Key Lock’ can be used to lock the buttons on your dryer.This will avoid accidental button presses. C There are two drying settings with your dryer, Sensor Dry and Time Dry. The default cycle is...
Page 15 - DRYING CYCLES; Sensor dry
DRYING CYCLES DESCRIPTION MAX. LOAD SIZE (KG) CYCLE TEMPERATURE 7 High 4 Med Low Sensor dry Your dryer has three dryness levels from ‘Damp’ through to ‘Extra’. Choose the dryness level to suit your load depending on how dry you wish for your load to be. The default temperature for sensor dry cycle i...
Page 16 - USING YOUR DRYER
USING YOUR DRYER IMPORTANT! ■ Check the lint filter is clean before every load. Ensure it is replaced correctly before using your dryer. ■ The lint filter indicator light will flash at the beginning of every cycle when the machine is switched on, as a reminder to check the lint filter. ■ Sort and lo...
Page 18 - CLEANING YOUR DRYER; ■ Failure to follow the ad
CLEANING YOUR DRYER IMPORTANT! ■ If you wish to stop the dryer before the cycle has finished you MUST remove the clothes IMMEDIATELY and spread them out to cool. DO NOT leave the clothes in the dryer or bunched up in a clothes basket. Take extreme care as the drum and the load items may be extremely...
Page 19 - BEFORE YOU CALL FOR SERVICE; To clean the filter:; Open the dryer door.; damage to your dryer.; correct yourself.; User warnings
BEFORE YOU CALL FOR SERVICE To clean the filter: 1 Open the dryer door. 2 Remove the lint filter by pulling it up and out of the filter slot. 3 Open it out and wipe the surface clean with your hand. 4 Close the lint filter and place it back in the opening. Ensure the filter is fitted correctly back ...
Page 20 - TROUBLESHOOTING; please contact your Haier Repairer.
TROUBLESHOOTING The following is a list of problems you may encounter when using this appliance and some suggestions that may help to correct the problem. If you still have problems, please contact your Haier Repairer. PROBLEM POSSIBLE CAUSES WHAT TO DO Pressing ‘Power’ does not turn on the dryer. F...