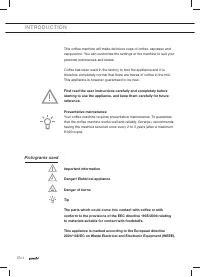
Page 2 - I N T R O D U C T I O N; Pictograms used
EN 4 I N T R O D U C T I O N This coffee machine will make delicious cups of coffee, espresso and cappuccino. You can customise the settings of the machine to suit your personal preferences and tastes. Coffee has been used in the factory to test the appliance and it is therefore completely normal th...
Page 3 - D E S C R I P T I O N
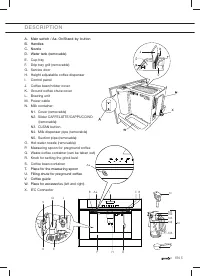
EN 5 D E S C R I P T I O N A. Main switch / Aa. On/Stand-by button B. Handles C. Nozzle D. Water tank (removable ) E. Cup tray F. Drip tray grill (removable) G. Service door H. Height adjustable coffee dispenser I. Control panel J. Coffee bean holder cover K. Ground coffee chute cover L. Brewing uni...
Page 4 - C O N T R O L PA N E L
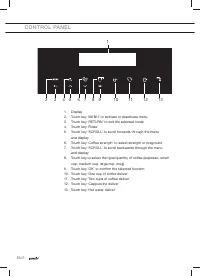
EN 6 C O N T R O L PA N E L 1. Display 2. Touch key ‘MENU’ to activate or deactivate menu 3. Touch key ‘RETURN’ to exit the selected mode 4. Touch key ‘Rinse’ 5. Touch key ‘SCROLL’ to scroll forwards through the menu and display 6. Touch key ‘Coffee strength’ to select strength or preground 7. Touch...
Page 5 - S A F E T Y I N S T R U C T I O N S; What you should pay attention to; The appliance and its accessible
EN 7 S A F E T Y I N S T R U C T I O N S What you should pay attention to • WARNING: The appliance and its accessible parts become hot during use. Care should be taken to avoid touching heating elements. • The appliance is not intended for use by persons (including children) with reduced physical, s...
Page 6 - • The manufacturer is not liable for
EN 8 • The manufacturer is not liable for damage caused by improper, incorrect or unreasonable use of the appliance. • When using the appliance, do not touch the hot surfaces. Use the knobs or handles. • In case of failures, make sure the appliance is not connected to the mains power supply. Turn th...
Page 7 - For european markets only:
EN 9 For european markets only: • The appliance is not intended for use by persons (including children) with reduced physical, sensory or mental capabilities, or lack of experience and knowledge, unless they have been given supervision or instruction concerning use of the appliance by a person respo...
Page 8 - U S E; Preparation; Only fi ll the water tank with cold water. Never use other liquids
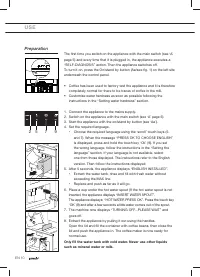
EN 10 U S E Preparation The fi rst time you switch on the appliance with the main switch (see ‘A’ page 5) and every time that it is plugged in, the appliance executes a “SELF-DIAGNOSIS” action. Then the appliance switches off. To turn it on, press the On/stand by button (Aa/see fi g. 1) on the left ...
Page 9 - Operation
EN 11 To prevent malfunctions, never fi ll with ground coffee, frozen or caramelised coffee beans or anything else that could damage the appliance. • When using the appliance for the fi rst time, you need to make 4-5 cups of coffee and 4-5 cappuccinos before the appliance gives satisfactory results....
Page 10 - Tips to make hotter coffee
EN 12 U S E • After a few seconds, the appliance is ready for use again. • To turn the appliance off, press the ‘On-off’ button (Aa / see page 5). Before going off, the appliance performs an automatic rinse cycle. Take care to avoid scalds. • If the coffee only comes out in drips or not at all, the ...
Page 12 - Setting the grind level
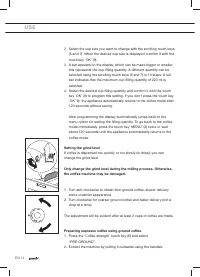
EN 14 U S E 2. Select the cup size you want to change with the scrolling touch keys (5 and 7). When the desired cup size is displayed, confi rm it with the touch key ‘OK’ (9). 3. A bar appears on the display, which can be made bigger or smaller; this represents the cup fi lling quantity. A different...
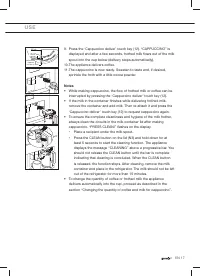
Page 13 - Notes
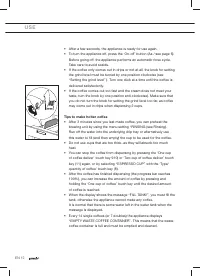
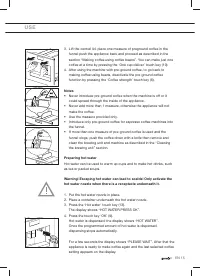
EN 15 U S E 3. Lift the central lid, place one measure of preground coffee in the funnel push the appliance back and proceed as described in the section “Making coffee using coffee beans”. You can make just one coffee at a time by pressing the ‘One cup deliver’ touch key (10). 4. After using the mac...
Page 14 - Changing the quantity of hot water
EN 16 U S E Changing the quantity of hot water The machine is set by default to automatically delivery 150 ml of hot water. To change these quantities, proceed as follows: 1. Place a container underneath the water spout. 2. Press the touch key ‘MENU’(2) to enter the menu 3. Press the Scroll touch ke...
Page 16 - Changing the quantity of milk and coffee for cappuccino; Changing the quantity of coffee
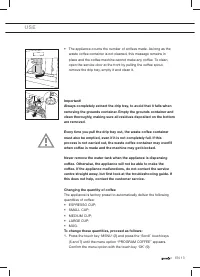
EN 18 U S E Changing the quantity of milk and coffee for cappuccino The appliance is set by default to automatically deliver a standard cappuccino. To change these quantities, proceed as follows: Changing the quantity of milk 1. Fill the container with milk up to the maximum level indicated on the c...
Page 18 - S E T T I N G S; Using menu options; Setting the language
EN 20 S E T T I N G S Using menu options The menu options are used to change and save the appliance’s factory settings, start programs and look up information. They are: • Language (see “Setting the language” on page 19) • Auto shut off time (see “Setting the switch-off time” on page 21) • Set clock...
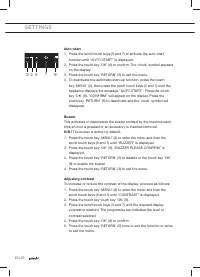
Page 20 - Setting the switch-off time
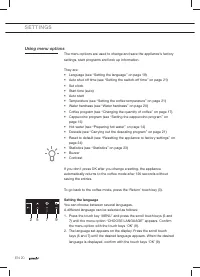
EN 22 S E T T I N G S You can choose between three temperature levels. The coffee temperature levels are defi ned as follows: • TEMPERATURE LOW • TEMPERATURE MEDIUM • TEMPERATURE HIGH The factory setting is TEMPERATURE HIGH. You can change this as follows: 1. Press the touch key ‘MENU’ (2) and press...
Page 21 - Make sure that any splashes from the descaling product do
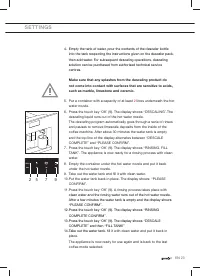
EN 23 S E T T I N G S 4. Empty the tank of water, pour the contents of the descaler bottle into the tank respecting the instructions given on the descaler pack, then add water. For subsequent descaling operations, descaling solu tion can be purchased from authorised technical service centres. Make s...
Page 22 - Failure to descale the appliance invalidates the guarantee.
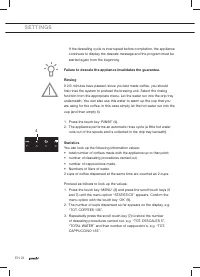
EN 24 S E T T I N G S If the descaling cycle is interrupted before completion, the appliance continues to display the descale message and the program must be started again from the beginning. Failure to descale the appliance invalidates the guarantee. Rinsing If 2/3 minutes have passed, since you la...
Page 23 - Resetting the appliance to factory settings
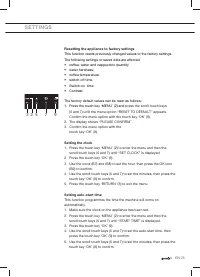
EN 25 S E T T I N G S Resetting the appliance to factory settings This function resets previously changed values to the factory settings. The following settings or saved data are affected: • coffee, water and cappuccino quantity • water hardness; • coffee temperature; • switch-off time. • Switch-on ...
Page 25 - M A I N T E N A N C E; Cleaning; Cleaning the coffee machine
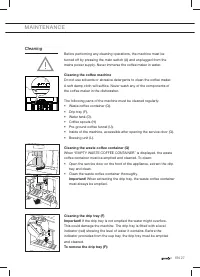
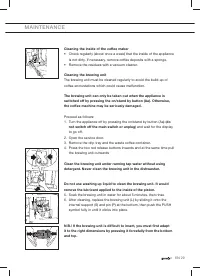
EN 27 M A I N T E N A N C E Cleaning Before performing any cleaning operations, the machine must be turned off by pressing the main switch (A) and unplugged from the mains power supply. Never immerse the coffee maker in water. Cleaning the coffee machine Do not use solvents or abrasive detergents to...
Page 26 - Cleaning the spouts
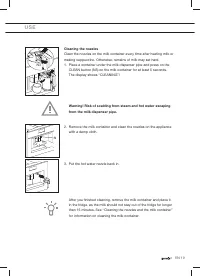
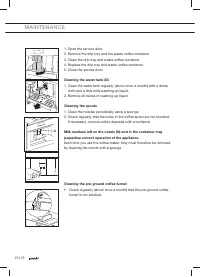
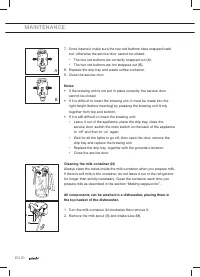
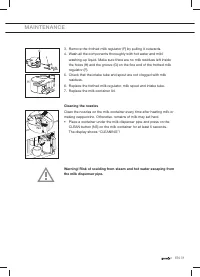
EN 28 M A I N T E N A N C E 1. Open the service door. 2. Remove the drip tray and the waste coffee container. 3. Clean the drip tray and waste coffee container. 4. Replace the drip tray and waste coffee container. 5. Close the service door. Cleaning the water tank (D) 1. Clean the water tank regular...
Page 30 - M E S S A G E S; MESSAGE
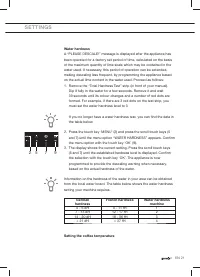
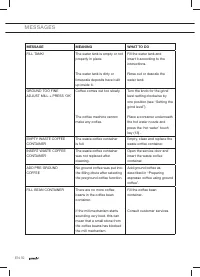
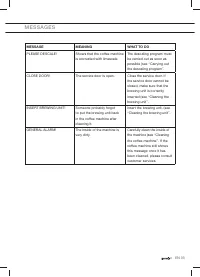
EN 32 M E S S A G E S MESSAGE MEANING WHAT TO DO FILL TANK! The water tank is empty or not properly in place. The water tank is dirty or limescale deposits have built up inside it. Fill the water tank and insert it according to the instructions. Rinse out or descale the water tank. GROUND TOO FINE A...
Page 32 - T R O U B L E S H O O T I N G; Faults table; FAULT
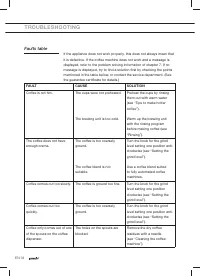
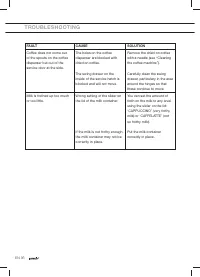
EN 34 T R O U B L E S H O O T I N G Faults table If the appliance does not work properly, this does not always mean that it is defective. If the coffee machine does not work and a message is displayed, refer to the problem solving information of chapter 7. If no message is displayed, try to fi nd a ...
Page 35 - I N S TA L L AT I O N I N S T R U C T I O N S
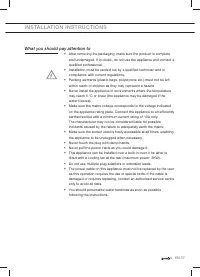
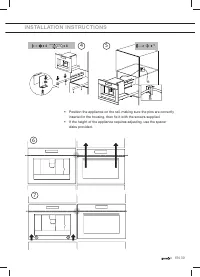
EN 37 I N S TA L L AT I O N I N S T R U C T I O N S What you should pay attention to • After removing the packaging, make sure the product is complete and undamaged. If in doubt, do not use the appliance and contact a qualifi ed professional. • Installation must be carried out by a qualifi ed technc...
Page 36 - Building in
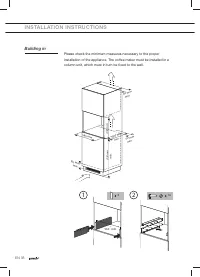
EN 38 I N S TA L L AT I O N I N S T R U C T I O N S Building in Please check the minimum measures necessary to the proper installation of the appliance. The coffee maker must be installed in a column unit, which must in turn be fi xed to the wall. 850 mm min. 560 mm 80 mm min. 550 mm min. 50 mm min....
Page 38 - A P P E N D I C E S; Disposal of appliance and packaging; Declaration of conformity; Technical data
EN 40 A P P E N D I C E S Disposal of appliance and packaging The packaging of this appliance is recyclable and may have been made of: • cardboard • paper • polythene foil (PE) • CFC-free polystyrene (PS hard foam) • polypropylene tape (PP). Dispose of these materials in a responsible manner and in ...