Electrolux ESL 63010 - User Manual
Electrolux ESL 63010 Dishwasher – User Manual, read for free online in PDF format. We hope this helps you resolve any issues you may have. If you have further questions, please contact us through the contact form.
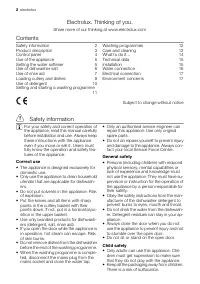
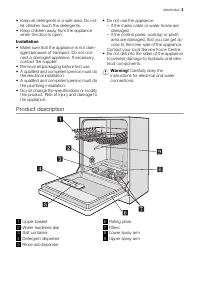
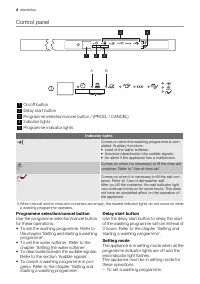
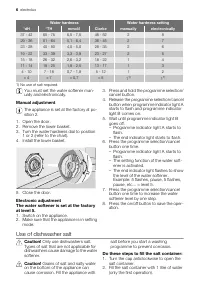
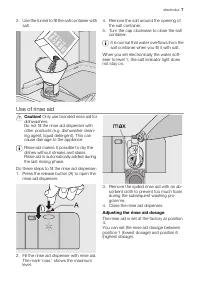
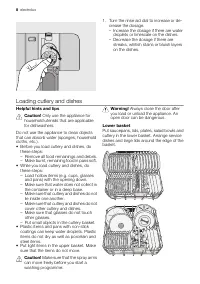
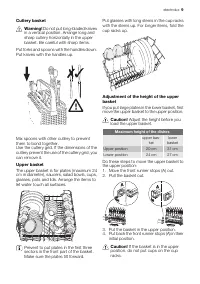
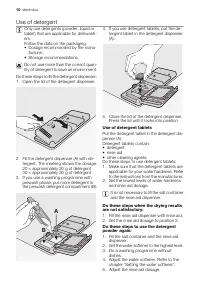
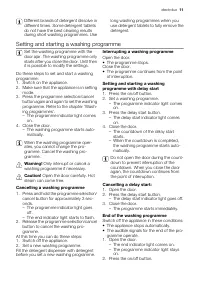
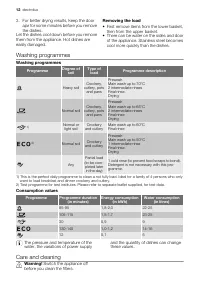
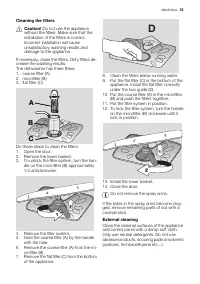
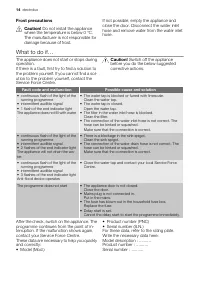
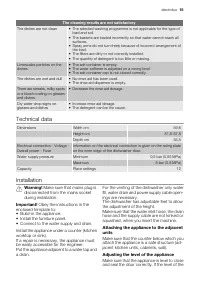
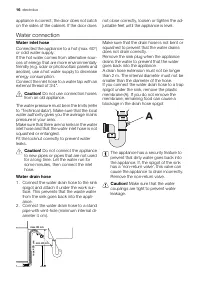
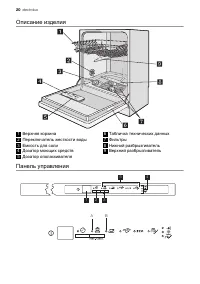
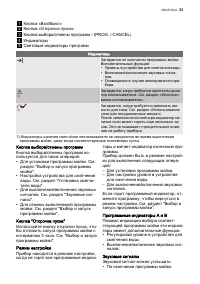
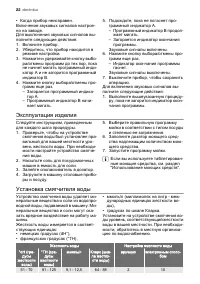
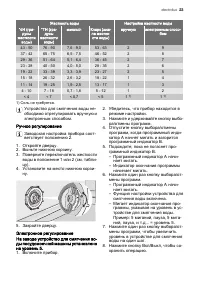
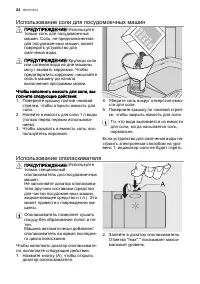
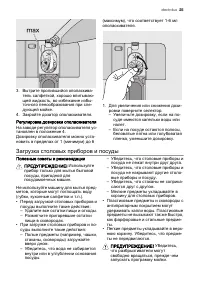
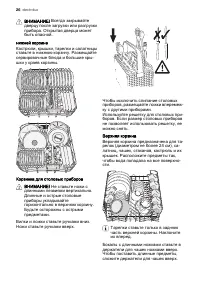
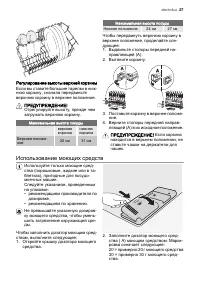
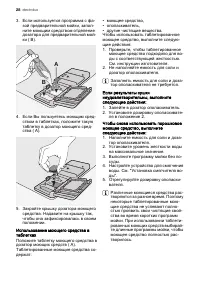
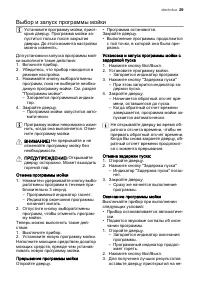
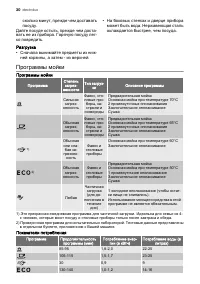

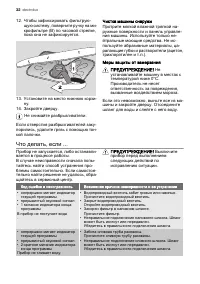

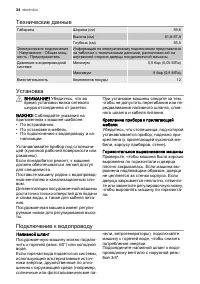
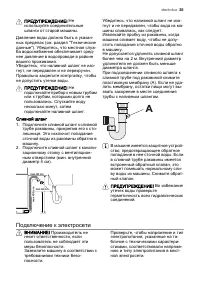


Table of Contents:
- Page 2 – Correct use
- Page 3 – Installation; Product description
- Page 4 – Control panel; Programme selection/cancel button
- Page 5 – Use of the appliance
- Page 6 – Manual adjustment; Use of dishwasher salt; Do these steps to fill the salt container:
- Page 7 – Use of rinse aid; Adjusting the rinse aid dosage
- Page 8 – Loading cutlery and dishes; Helpful hints and tips
- Page 9 – Cutlery basket; Do not put long-bladed knives; Upper basket; Adjust the height before you; If the basket is in the upper
- Page 10 – Use of detergent; Use of detergent tablets
- Page 11 – Setting and starting a washing programme; Cancelling a washing programme
- Page 12 – Removing the load; Washing programmes; Care and cleaning
- Page 13 – Cleaning the filters; Do not use the appliance; External cleaning
- Page 14 – Frost precautions; Do not install the appliance; What to do if...; Switch off the appliance
- Page 15 – Technical data; Make sure that mains plug is; Adjusting the level of the appliance
- Page 16 – Water connection; Water inlet hose
- Page 21 – A B
user manual
Dishwasher
ESL63010
"Loading the manual" means you need to wait until the file loads and becomes available for online reading. Some manuals are very large, and the time they take to appear depends on your internet speed.
Other Manuals for Electrolux ESL 63010
Summary
Electrolux. Thinking of you. Share more of our thinking at www.electrolux.com Contents Safety information 2 Product description 3 Control panel 4 Use of the appliance 5 Setting the water softener 5 Use of dishwasher salt 6 Use of rinse aid 7 Loading cutlery and dishes 8 Use of detergent 10 Setting a...
• Keep all detergents in a safe area. Do not let children touch the detergents. • Keep children away from the appliance when the door is open. Installation • Make sure that the appliance is not dam- aged because of transport. Do not con-nect a damaged appliance. If necessary,contact the supplier. • ...
Control panel 5 4 3 2 1 A B 1 On/off button 2 Delay start button 3 Programme selection/cancel button / (PROG. / CANCEL) 4 Indicator lights 5 Programme indicator lights Indicator lights Comes on when the washing programme is com-pleted. Auxiliary functions:• Level of the water softener.• Activation/d...